How to Use Adafruit Pro Trinket 3.3V 12MHz: Examples, Pinouts, and Specs
Introduction
The Adafruit Pro Trinket 3.3V 12MHz is a compact, Arduino-compatible microcontroller board designed for small-scale projects and wearable technology. It is built around the ATmega328P microcontroller and operates at a frequency of 12MHz. With 3.3V logic levels, it is ideal for interfacing with a wide range of sensors and modules that require lower voltage levels. The Pro Trinket can be powered through USB or an external power supply, making it versatile for various applications.
Common applications include:
- Wearable electronics
- Portable instruments
- Prototyping IoT devices
- Educational projects
Explore Projects Built with Adafruit Pro Trinket 3.3V 12MHz
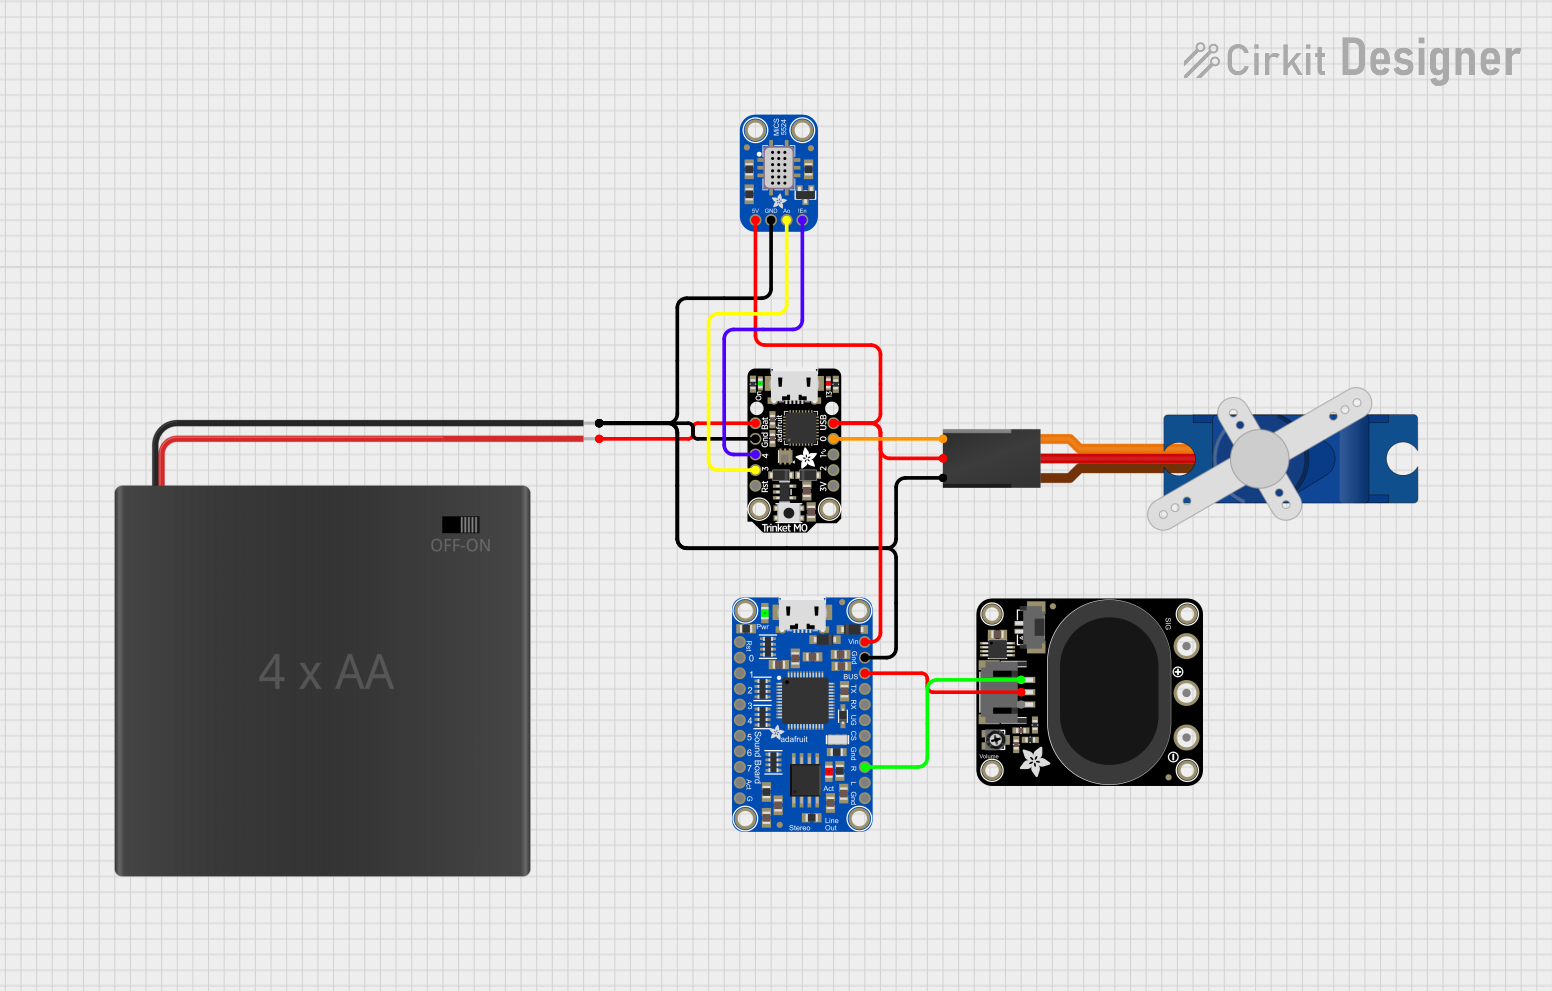

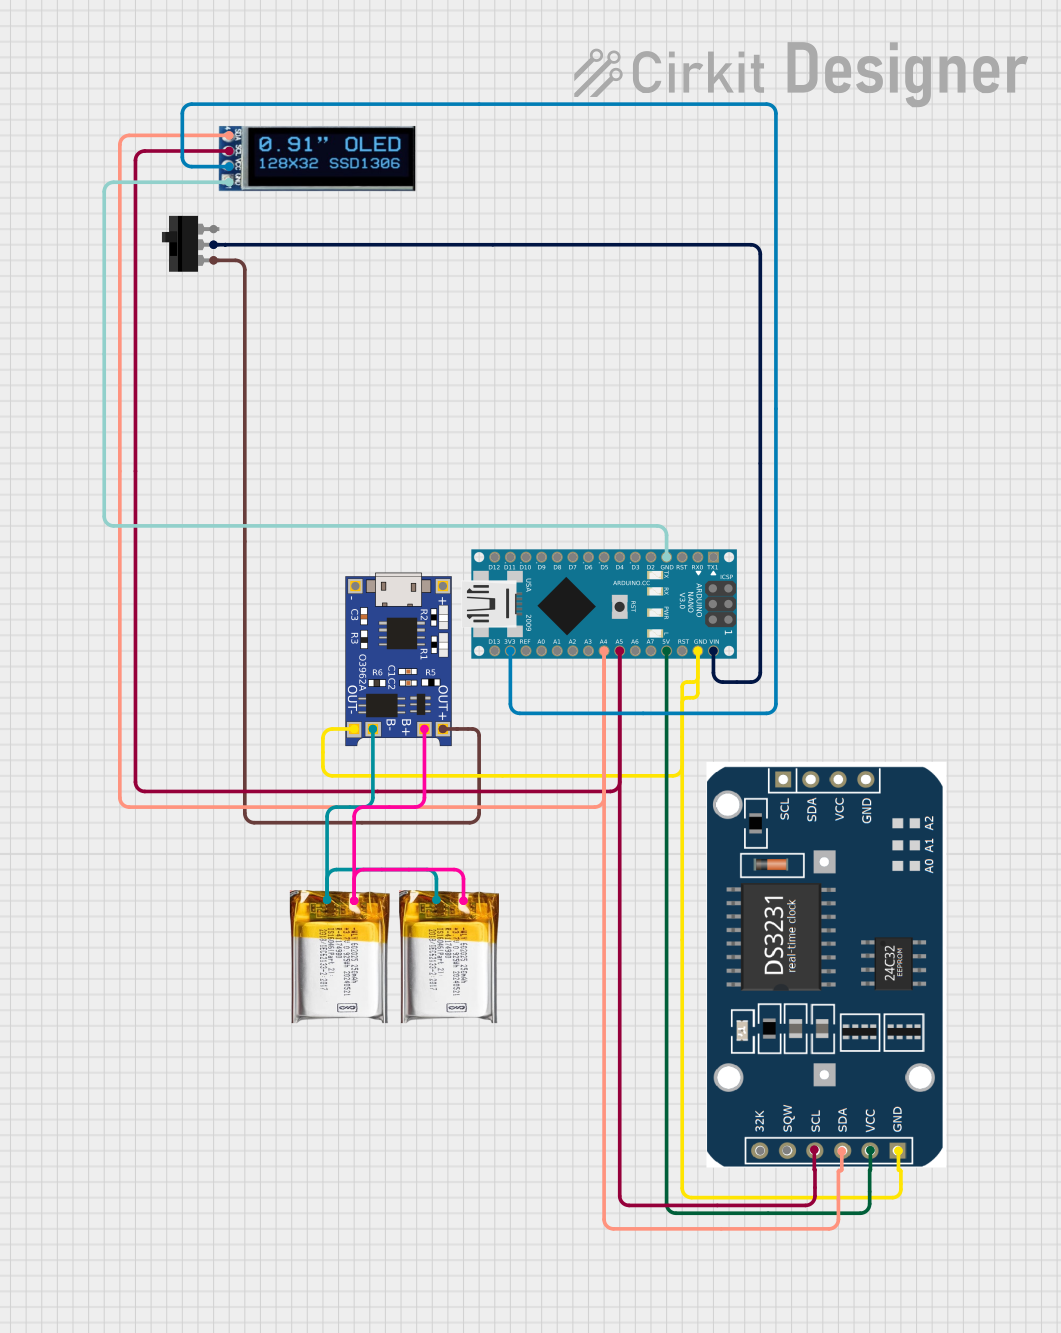

Explore Projects Built with Adafruit Pro Trinket 3.3V 12MHz
Technical Specifications
Key Technical Details
- Microcontroller: ATmega328P
- Operating Voltage: 3.3V
- Clock Speed: 12MHz
- Digital I/O Pins: 18 (of which 5 provide PWM output)
- Analog Input Pins: 2
- Flash Memory: 32 KB (ATmega328P) of which 2 KB used by bootloader
- SRAM: 2 KB (ATmega328P)
- EEPROM: 1 KB (ATmega328P)
- Communication: SPI, I2C, UART
- USB Connection: Micro-USB for programming
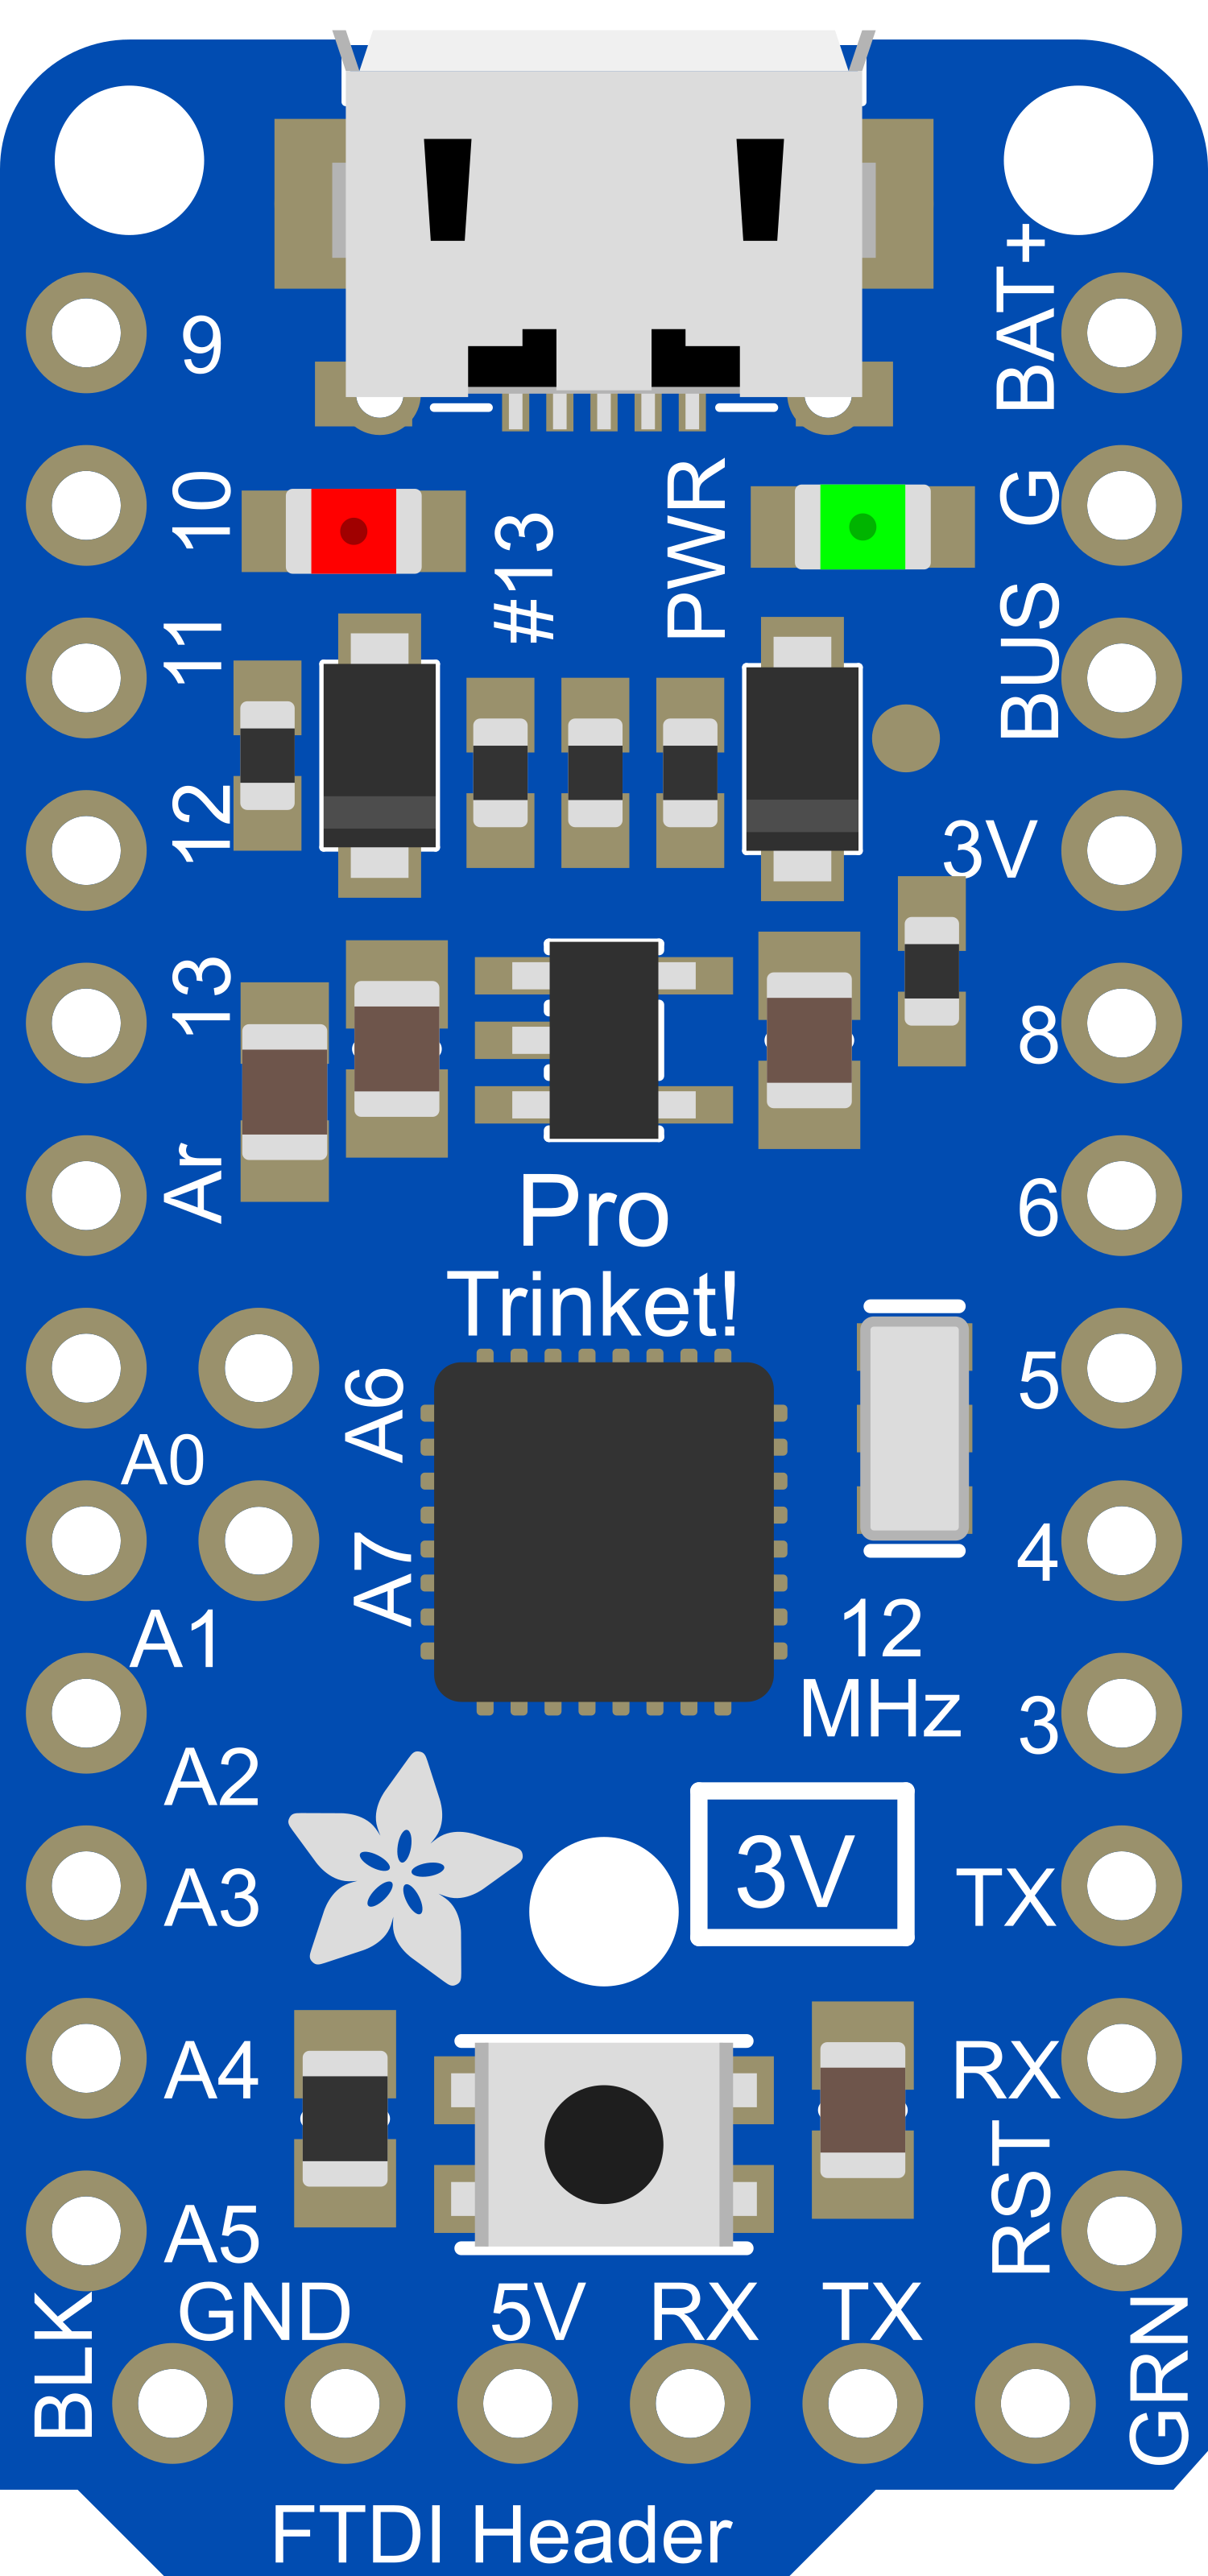
Pin Configuration
| Pin Number | Function | Description |
|---|---|---|
| 1 | GND | Ground |
| 2 | VBAT | Battery +, up to 16V DC |
| 3 | BUS | USB +5V to 3.3V regulator input |
| 4 | 3V | 3.3V output (150mA limit) |
| 5-12 | Digital I/O | Digital pins 0-7 |
| 13-16 | Analog Input | Analog pins A0-A3 |
| 17-20 | Digital I/O | Digital pins 8-11 (SPI and I2C interface) |
Usage Instructions
Integrating with a Circuit
Powering the Pro Trinket:
- Connect the USB cable to the micro-USB port for programming and power.
- Alternatively, supply power through the VBAT pin for battery operation.
Programming:
- Install the Adafruit Pro Trinket board files in the Arduino IDE.
- Select the correct board and port before uploading the sketch.
Connecting Peripherals:
- Use the digital and analog pins to connect sensors, actuators, and other modules.
- Ensure that connected devices are compatible with 3.3V logic levels.
Best Practices
- Avoid supplying voltage higher than 3.3V to the I/O pins to prevent damage.
- When using external power, ensure it does not exceed the recommended voltage.
- Disconnect the battery or external power when programming via USB.
Example Code for Arduino UNO
// Blink example for Adafruit Pro Trinket 3.3V
// Connect an LED to pin 13 and GND

void setup() {
  pinMode(13, OUTPUT); // Initialize digital pin 13 as an output
}

void loop() {
  digitalWrite(13, HIGH);   // Turn the LED on
  delay(1000);              // Wait for a second
  digitalWrite(13, LOW);    // Turn the LED off
  delay(1000);              // Wait for a second
}
Troubleshooting and FAQs
Common Issues
Pro Trinket not recognized by computer:
- Ensure the USB cable is properly connected and the computer's USB port is functioning.
- Try using a different USB cable or port.
Sketch upload fails:
- Check that the correct board and port are selected in the Arduino IDE.
- Press the reset button on the Pro Trinket right before uploading the sketch.
Incorrect voltages at I/O pins:
- Verify that the power supply is within the specified range and the board is not being overpowered.
FAQs
Q: Can I use the Adafruit Pro Trinket 3.3V with 5V sensors? A: It is not recommended as the logic levels are different. Use a level shifter to safely interface with 5V sensors.
Q: How do I recharge the battery connected to the Pro Trinket? A: The Pro Trinket does not have onboard battery charging. You will need to use an external charger.
Q: Is the Pro Trinket 3.3V compatible with all Arduino libraries? A: Most libraries that work with the ATmega328P should be compatible, but some may need modifications for 3.3V logic levels.
For further assistance, consult the Adafruit support forums or the extensive online community resources.