How to Use Muscle BioAmp Candy: Examples, Pinouts, and Specs
Introduction
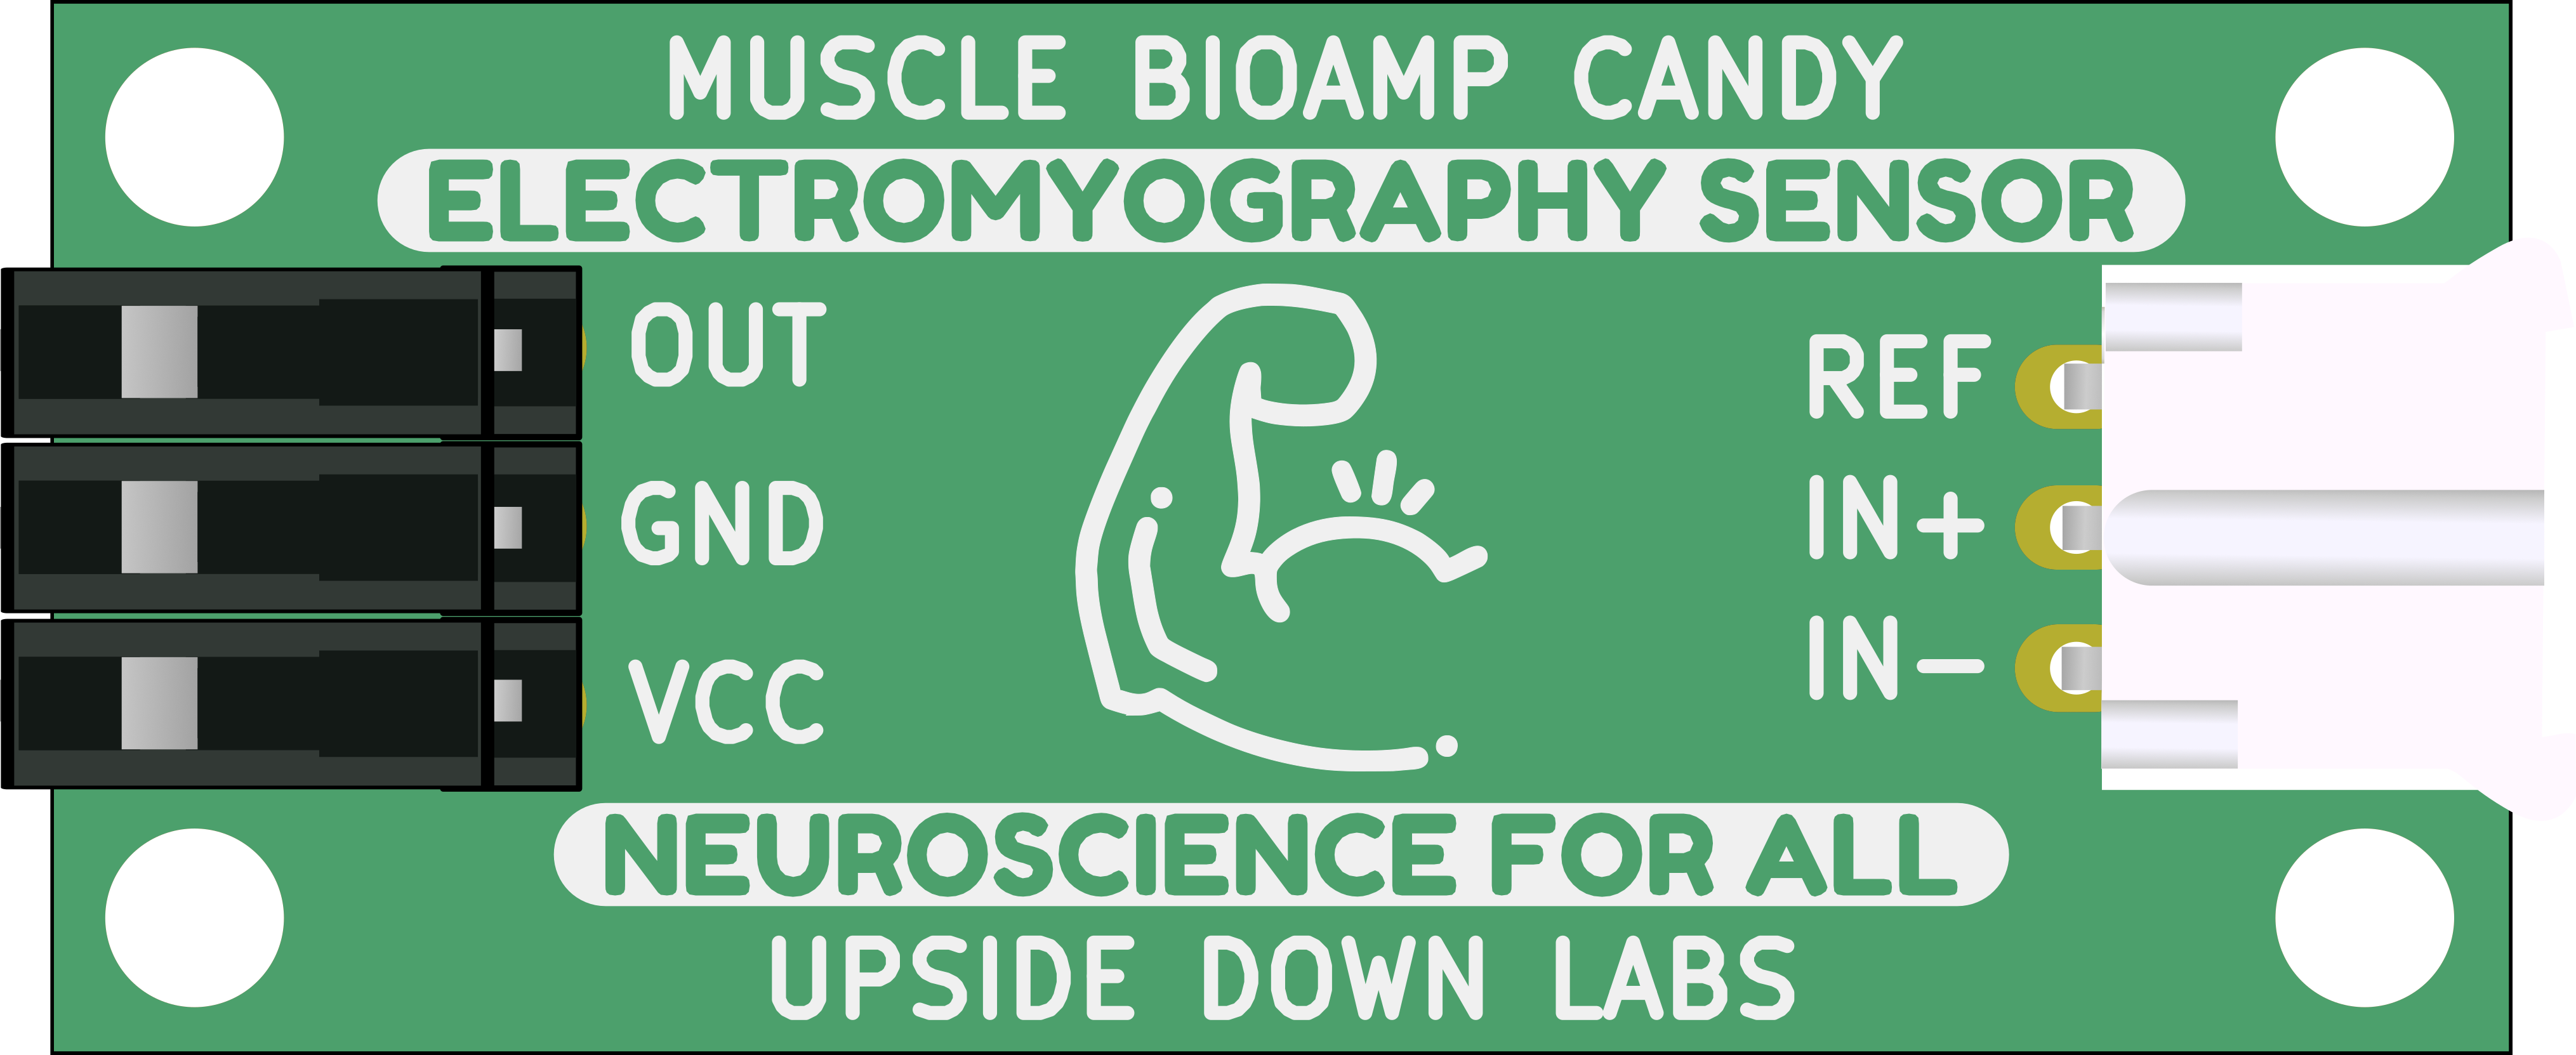
The Muscle BioAmp Candy, manufactured by UpsideDown Labs (Part ID: Candy), is a sophisticated device designed to amplify bioelectric signals from muscles. This component is essential for applications in medical diagnostics, biofeedback, and research. By providing clear and amplified muscle signals, it enables accurate monitoring and analysis of muscle activity.
Explore Projects Built with Muscle BioAmp Candy
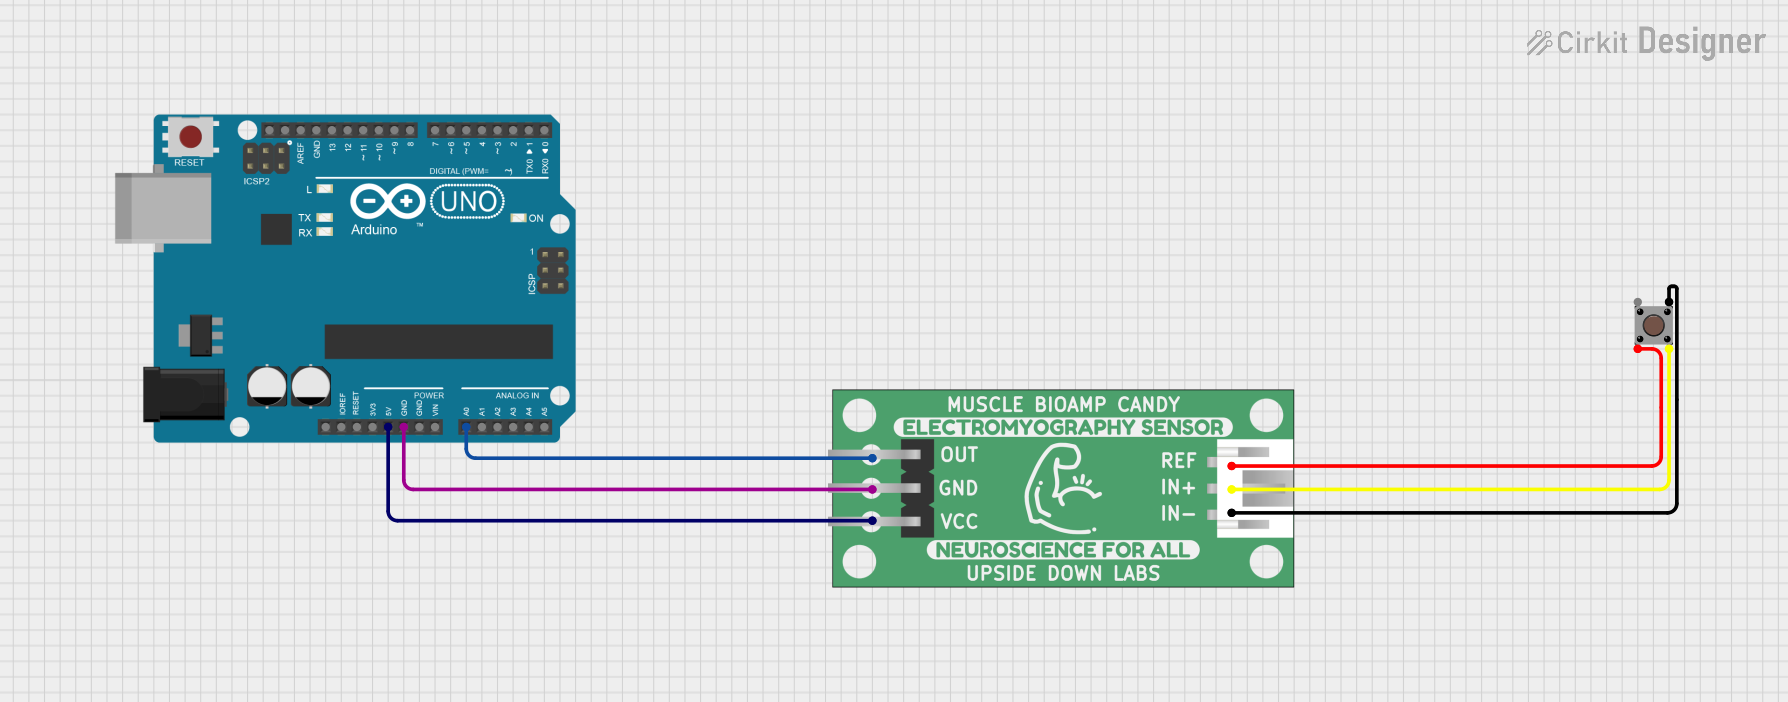

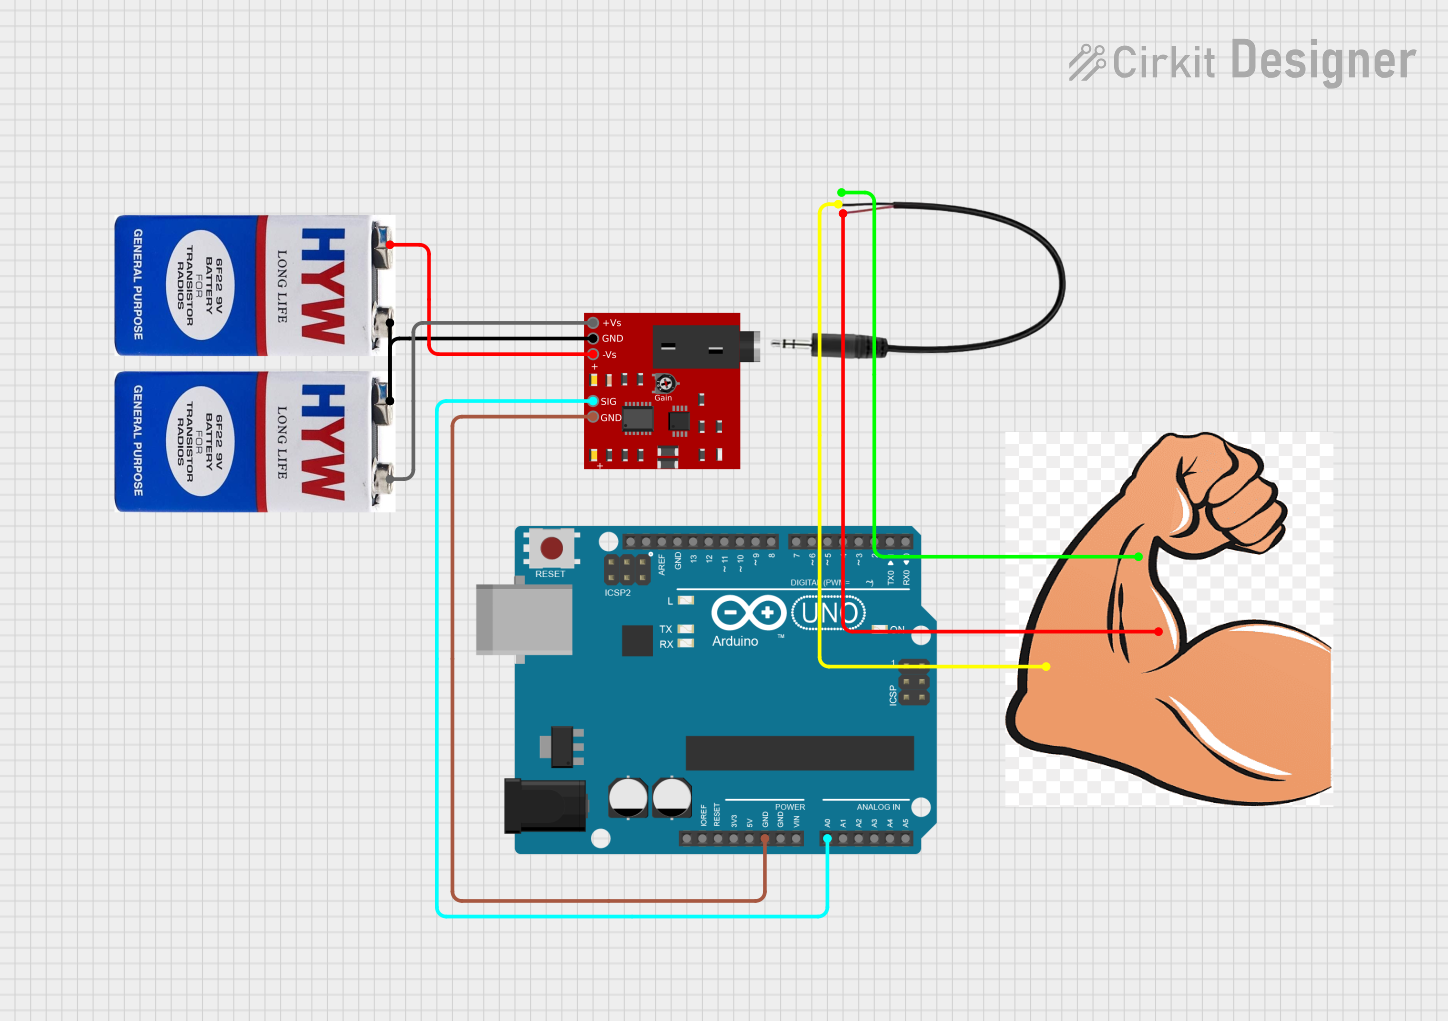
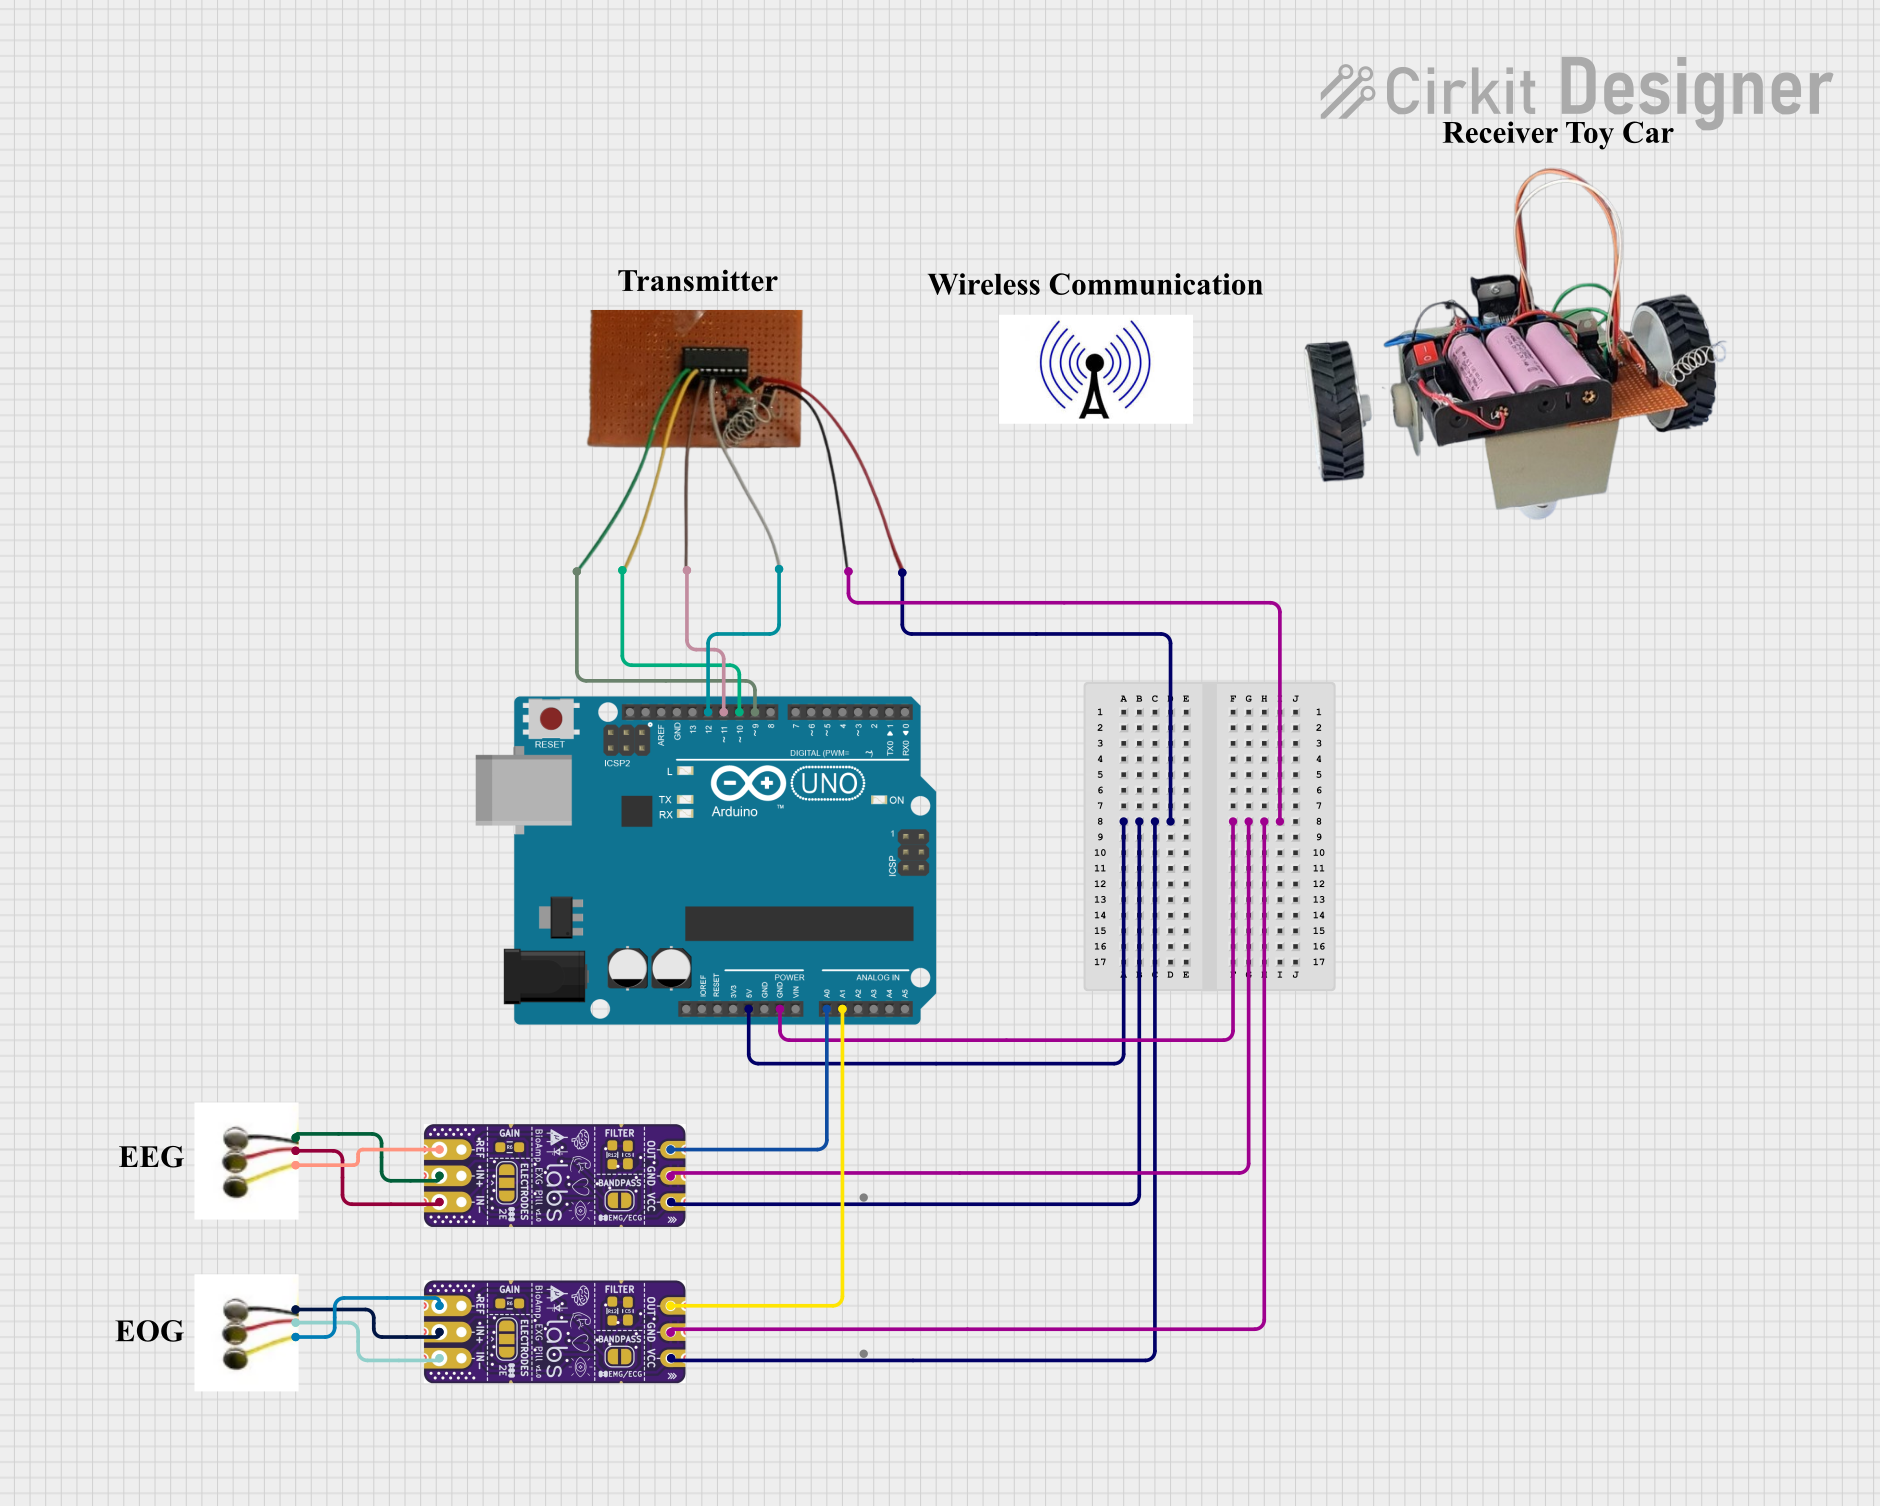
Explore Projects Built with Muscle BioAmp Candy
Technical Specifications
Key Technical Details
| Parameter | Value |
|---|---|
| Supply Voltage | 3.3V - 5V |
| Operating Current | 5mA |
| Gain | 1000x |
| Bandwidth | 10Hz - 500Hz |
| Output Voltage | 0V - 3.3V |
| Input Impedance | >10MΩ |
| Output Impedance | <1kΩ |
| Dimensions | 25mm x 20mm x 5mm |
Pin Configuration and Descriptions
| Pin Number | Pin Name | Description |
|---|---|---|
| 1 | VCC | Power supply (3.3V - 5V) |
| 2 | GND | Ground |
| 3 | IN+ | Non-inverting input (connect to muscle electrode) |
| 4 | IN- | Inverting input (connect to reference electrode) |
| 5 | OUT | Amplified signal output |
Usage Instructions
How to Use the Component in a Circuit
- Power Supply: Connect the VCC pin to a 3.3V or 5V power supply and the GND pin to the ground of your circuit.
- Electrode Connections:
- Connect the IN+ pin to the muscle electrode.
- Connect the IN- pin to the reference electrode (usually placed on a bony area or a neutral site).
- Signal Output: The amplified muscle signal can be accessed from the OUT pin. This output can be connected to an analog input of a microcontroller (e.g., Arduino UNO) for further processing.
Important Considerations and Best Practices
- Electrode Placement: Proper placement of electrodes is crucial for accurate signal acquisition. Ensure that the electrodes are securely attached to the skin and positioned correctly.
- Power Supply: Use a stable power supply to avoid noise and interference in the signal.
- Signal Conditioning: Additional filtering may be required depending on the application to remove unwanted noise and artifacts.
- Safety: Ensure that the device is used in a safe and controlled environment, especially in medical applications.
Example Code for Arduino UNO
Below is an example code to read the amplified muscle signal using an Arduino UNO:
// Muscle BioAmp Candy Example Code
// This code reads the amplified muscle signal from the Muscle BioAmp Candy
// and prints the values to the Serial Monitor.

const int bioAmpPin = A0; // Analog pin connected to the OUT pin of Muscle BioAmp Candy

void setup() {
  Serial.begin(9600); // Initialize serial communication at 9600 baud rate
}

void loop() {
  int muscleSignal = analogRead(bioAmpPin); // Read the analog value from the bioAmpPin
  Serial.println(muscleSignal); // Print the muscle signal value to the Serial Monitor
  delay(10); // Small delay to stabilize the readings
}
Troubleshooting and FAQs
Common Issues Users Might Face
No Signal Output:
- Solution: Check the power supply connections and ensure that the electrodes are properly attached to the skin.
Noisy Signal:
- Solution: Verify the electrode placement and ensure that the skin is clean and dry. Use shielded cables to reduce electromagnetic interference.
Weak Signal:
- Solution: Ensure that the electrodes are placed correctly over the muscle of interest. Adjust the gain if possible.
FAQs
Q1: Can I use the Muscle BioAmp Candy with a 3.3V microcontroller?
- A1: Yes, the Muscle BioAmp Candy can operate with a supply voltage of 3.3V to 5V, making it compatible with both 3.3V and 5V microcontrollers.
Q2: How do I clean the electrodes?
- A2: Use a mild soap and water solution to clean the electrodes. Ensure they are completely dry before use.
Q3: Can I use the Muscle BioAmp Candy for ECG or EEG applications?
- A3: The Muscle BioAmp Candy is specifically designed for muscle signal amplification. For ECG or EEG applications, specialized amplifiers are recommended.
Q4: What is the maximum distance between the electrodes and the Muscle BioAmp Candy?
- A4: To minimize noise and signal degradation, keep the distance between the electrodes and the Muscle BioAmp Candy as short as possible.
By following this documentation, users can effectively utilize the Muscle BioAmp Candy for their bioelectric signal amplification needs. For further assistance, please refer to the manufacturer's support resources.