How to Use RF YK04 433MHz receiver: Examples, Pinouts, and Specs
Introduction
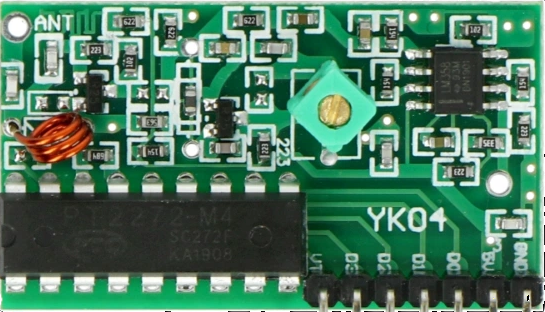
The RF YK04 433MHz receiver module is a wireless receiver that operates at a frequency of 433MHz. It is commonly used in remote control systems, wireless data transmission, and various IoT applications. This module is known for its reliability, ease of use, and compatibility with microcontrollers like the Arduino UNO.
Explore Projects Built with RF YK04 433MHz receiver


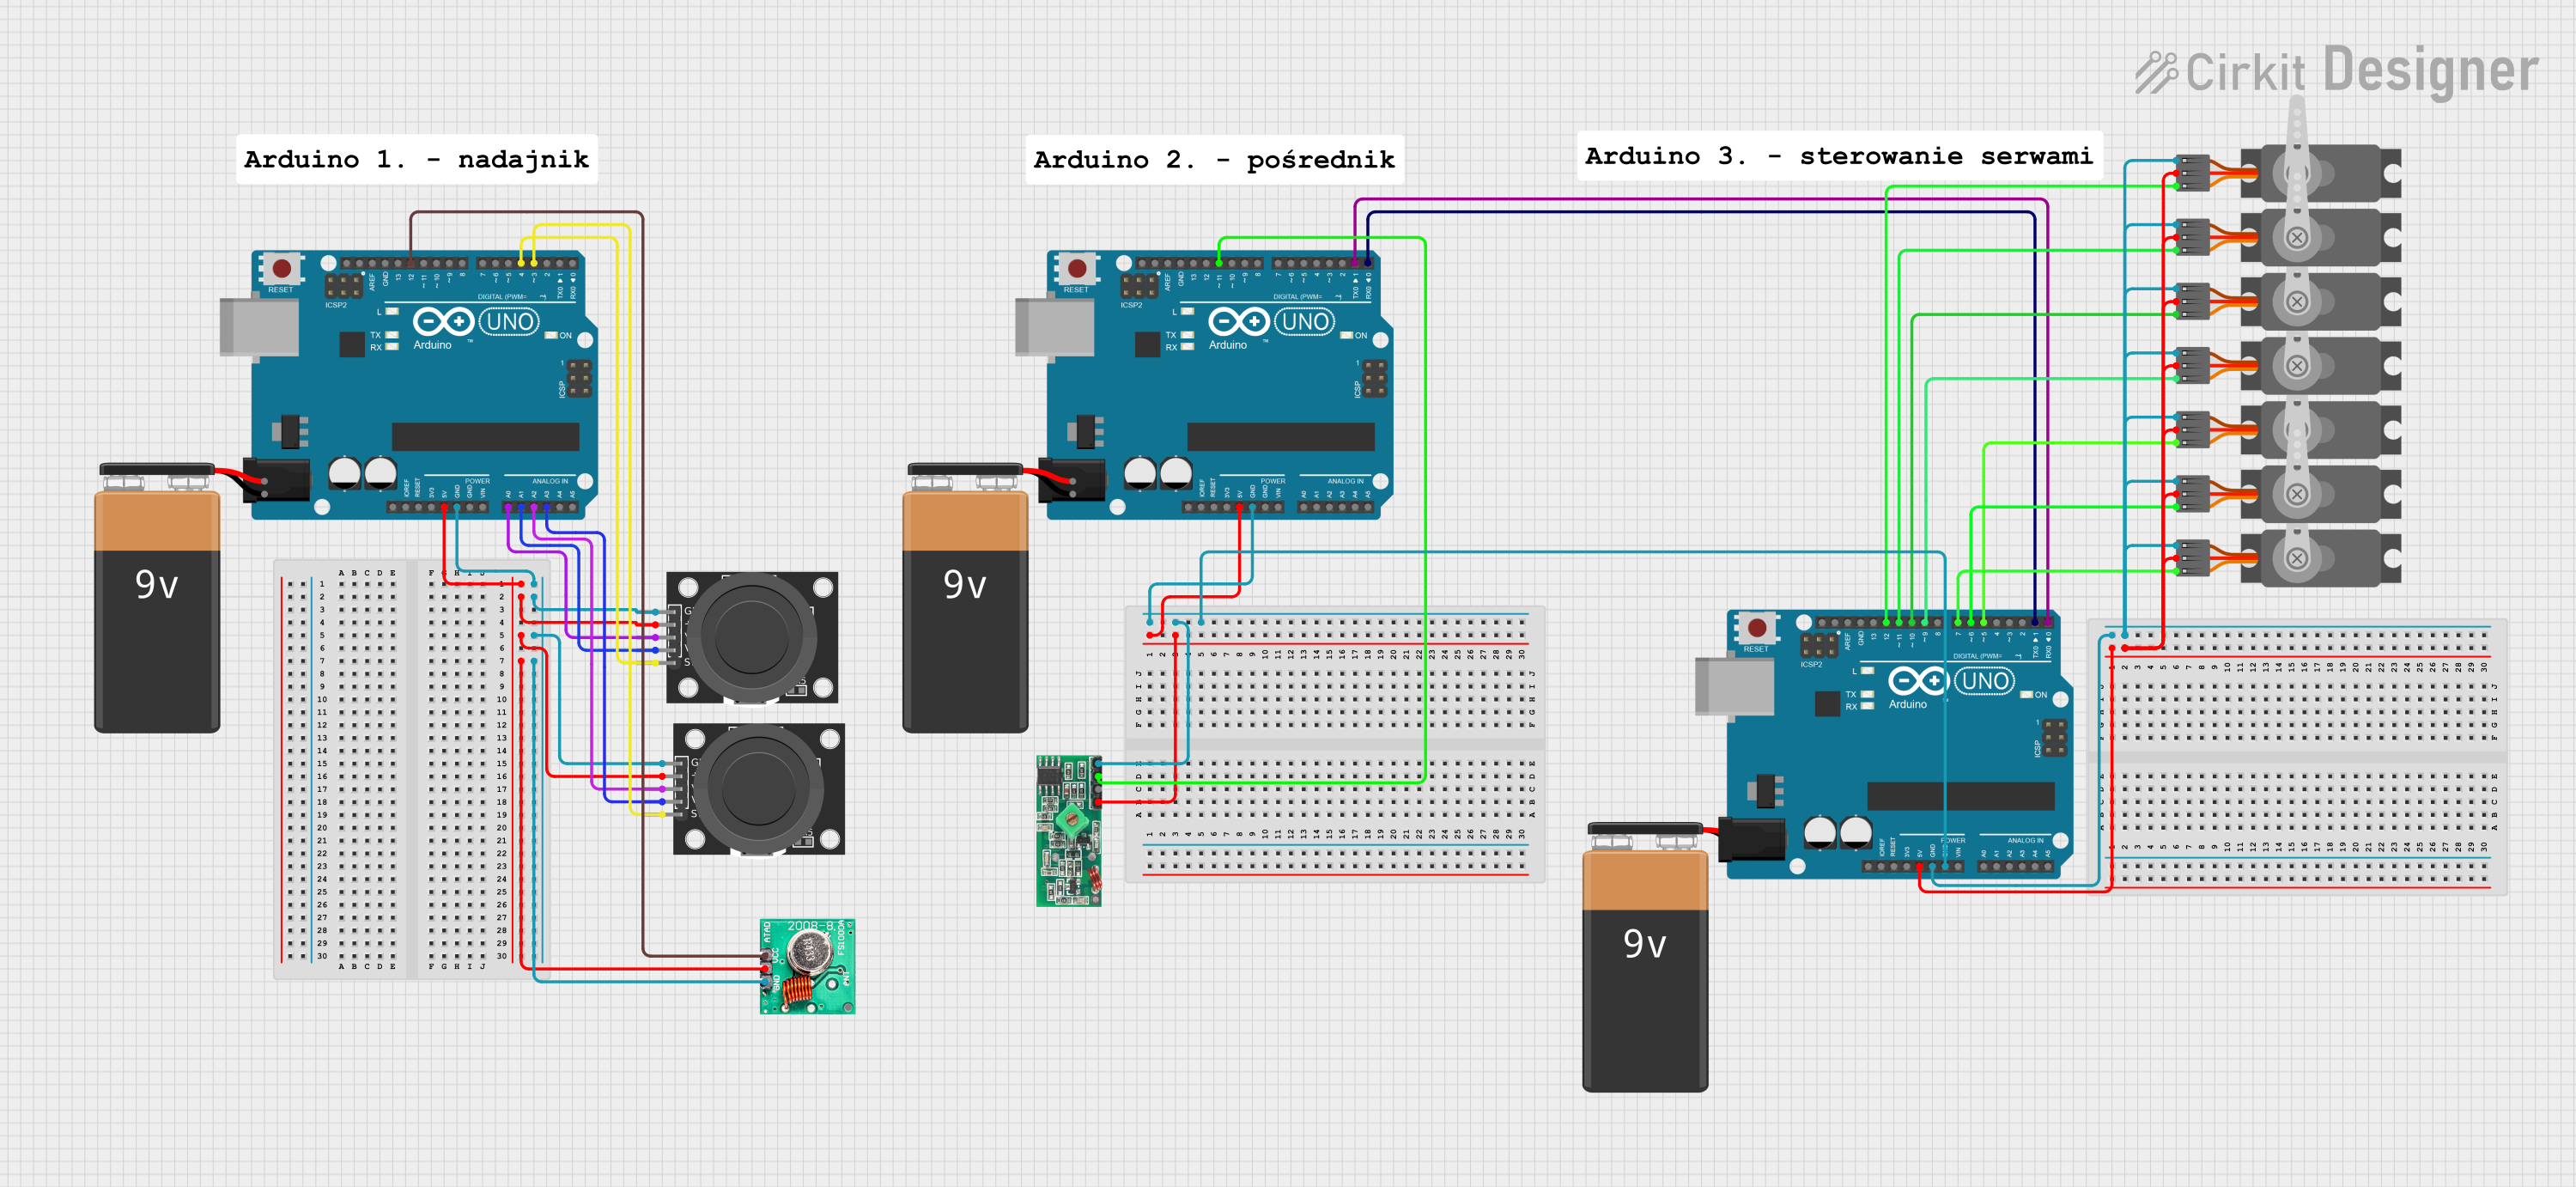

Explore Projects Built with RF YK04 433MHz receiver
Technical Specifications
Key Technical Details
| Parameter | Value |
|---|---|
| Operating Voltage | 5V DC |
| Operating Current | 4.5mA |
| Frequency | 433MHz |
| Sensitivity | -105dBm |
| Data Rate | 2.4kbps (max) |
| Modulation Type | ASK (Amplitude Shift Keying) |
| Operating Temperature | -20°C to +70°C |
Pin Configuration and Descriptions
| Pin Number | Pin Name | Description |
|---|---|---|
| 1 | VCC | Power supply (5V DC) |
| 2 | GND | Ground |
| 3 | DATA | Data output pin |
| 4 | ANT | Antenna connection |
Usage Instructions
How to Use the Component in a Circuit
- Power Supply: Connect the VCC pin to a 5V power supply and the GND pin to the ground.
- Data Output: Connect the DATA pin to a digital input pin on your microcontroller (e.g., Arduino UNO).
- Antenna: Connect a suitable antenna to the ANT pin to improve the reception range.
Example Circuit Diagram
Arduino UNO          RF YK04 433MHz Receiver
+-----------+        +----------------------+
|           |        |                      |
|        5V +--------+ VCC                  |
|       GND +--------+ GND                  |
|   Digital Pin 2 +--+ DATA                 |
|           |        | ANT                  |
+-----------+        +----------------------+
Important Considerations and Best Practices
- Antenna: Use a proper antenna to ensure good signal reception. A simple wire of approximately 17.3 cm (quarter wavelength of 433MHz) can be used.
- Noise Reduction: Place the receiver module away from sources of electromagnetic interference to reduce noise.
- Power Supply: Ensure a stable 5V power supply to avoid fluctuations that can affect performance.
Arduino UNO Example Code
/*
  Example code to receive data from RF YK04 433MHz receiver
  connected to an Arduino UNO. The received data is printed
  to the Serial Monitor.
*/

const int dataPin = 2; // Pin connected to DATA pin of RF receiver

void setup() {
  Serial.begin(9600); // Initialize serial communication at 9600 baud
  pinMode(dataPin, INPUT); // Set data pin as input
}

void loop() {
  int receivedData = digitalRead(dataPin); // Read data from receiver
  Serial.println(receivedData); // Print received data to Serial Monitor
  delay(100); // Small delay to avoid flooding the Serial Monitor
}
Troubleshooting and FAQs
Common Issues and Solutions
No Data Received:
- Check Connections: Ensure all connections are secure and correct.
- Antenna: Verify that the antenna is properly connected and of the correct length.
- Power Supply: Ensure a stable 5V power supply.
Interference and Noise:
- Placement: Place the receiver module away from other electronic devices that may cause interference.
- Shielding: Use shielding techniques to reduce electromagnetic interference.
Inconsistent Data:
- Power Supply: Ensure a stable and clean power supply.
- Antenna: Check the antenna connection and length.
FAQs
Q1: Can I use the RF YK04 433MHz receiver with other microcontrollers? A1: Yes, the RF YK04 433MHz receiver can be used with various microcontrollers, including Arduino, Raspberry Pi, and others, as long as the voltage and pin configurations are compatible.
Q2: What is the maximum range of the RF YK04 433MHz receiver? A2: The range depends on various factors, including the antenna used and environmental conditions. Typically, it can range from 50 meters to 200 meters in open space.
Q3: How can I improve the reception range? A3: Use a proper antenna, ensure a stable power supply, and place the receiver module away from sources of interference to improve the reception range.
This documentation provides a comprehensive guide to using the RF YK04 433MHz receiver module, covering its technical specifications, usage instructions, and troubleshooting tips. Whether you are a beginner or an experienced user, this guide will help you effectively integrate the receiver module into your projects.