
How to Use HLK-PM01: Examples, Pinouts, and Specs
 Design with HLK-PM01 in Cirkit Designer
Introduction
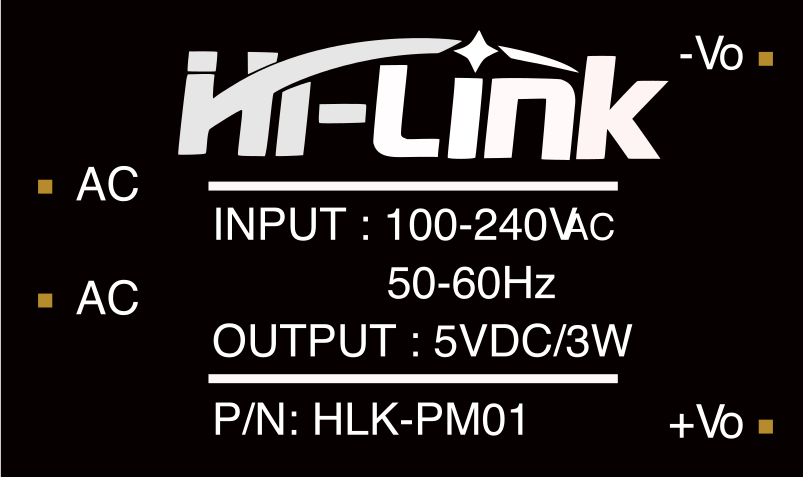
The HLK-PM01 is a compact and efficient AC-DC power module manufactured by Hi-Link. It is designed to convert a wide range of AC input voltages (85-265V AC) into a stable 5V DC output. This module is ideal for powering low-power electronic devices and is widely used in IoT applications, home automation systems, and embedded systems due to its small size and high reliability.
Explore Projects Built with HLK-PM01
 Open Project in Cirkit Designer
 Open Project in Cirkit Designer
 Open Project in Cirkit Designer
 Open Project in Cirkit Designer
Explore Projects Built with HLK-PM01
Open Project in Cirkit DesignerOpen Project in Cirkit DesignerOpen Project in Cirkit DesignerOpen Project in Cirkit DesignerCommon Applications and Use Cases
- Powering microcontrollers (e.g., Arduino, ESP8266, ESP32)
- IoT devices and smart home systems
- Low-power sensors and modules
- Replacing bulky linear power supplies in compact designs
- Industrial control systems
Technical Specifications
The HLK-PM01 is a highly efficient power module with the following key specifications:
| Parameter | Value |
|---|---|
| Input Voltage Range | 85-265V AC |
| Output Voltage | 5V DC |
| Output Current | 600mA (maximum) |
| Output Power | 3W |
| Efficiency | ≥70% |
| Operating Temperature | -20°C to +60°C |
| Storage Temperature | -40°C to +80°C |
| Dimensions | 35mm x 18mm x 15mm |
| Isolation Voltage | 3000V AC |
| Safety Standards | CE, RoHS |
Pin Configuration and Descriptions
The HLK-PM01 has six pins, as described in the table below:
| Pin Number | Pin Name | Description |
|---|---|---|
| 1 | AC IN (L) | Live input for AC voltage (85-265V AC) |
| 2 | AC IN (N) | Neutral input for AC voltage |
| 3 | NC | Not connected (leave unconnected) |
| 4 | GND | Ground for the DC output |
| 5 | +5V | 5V DC output |
| 6 | NC | Not connected (leave unconnected) |
Usage Instructions
How to Use the HLK-PM01 in a Circuit
Connect the AC Input:
- Connect the
AC IN (L)pin to the live wire of the AC mains. - Connect the
AC IN (N)pin to the neutral wire of the AC mains. - Ensure proper insulation and safety precautions when working with high-voltage AC.
- Connect the
Connect the DC Output:
- Use the
+5Vpin to power your device or circuit. - Connect the
GNDpin to the ground of your circuit.
- Use the
Mounting and Placement:
- Place the module on a PCB or securely mount it in your project enclosure.
- Ensure adequate spacing and insulation to prevent accidental contact with high-voltage pins.
Filtering and Protection:
- Add a fuse (e.g., 1A) on the AC input side for overcurrent protection.
- Use capacitors (e.g., 0.1µF and 10µF) on the DC output side to reduce noise and improve stability.
Important Considerations and Best Practices
- Safety First: Always handle the module with care when connected to AC mains. Ensure proper insulation and avoid touching the module while powered.
- Heat Dissipation: Although the module is efficient, ensure adequate ventilation to prevent overheating in high-temperature environments.
- Load Requirements: Do not exceed the maximum output current of 600mA to avoid damaging the module.
- Isolation: The module provides 3000V AC isolation, making it safe for use in most applications. However, ensure proper grounding for additional safety.
Example: Using HLK-PM01 with Arduino UNO
The HLK-PM01 can be used to power an Arduino UNO directly. Below is an example circuit and code:
Circuit Connections
- Connect the
+5Vpin of the HLK-PM01 to the5Vpin of the Arduino UNO. - Connect the
GNDpin of the HLK-PM01 to theGNDpin of the Arduino UNO. - Connect the
AC IN (L)andAC IN (N)pins to the AC mains (with proper insulation and safety precautions).
Example Code
// Example code to blink an LED using Arduino UNO powered by HLK-PM01

const int ledPin = 13; // Pin connected to the onboard LED

void setup() {
  pinMode(ledPin, OUTPUT); // Set the LED pin as an output
}

void loop() {
  digitalWrite(ledPin, HIGH); // Turn the LED on
  delay(1000);               // Wait for 1 second
  digitalWrite(ledPin, LOW);  // Turn the LED off
  delay(1000);               // Wait for 1 second
}
Troubleshooting and FAQs
Common Issues and Solutions
No Output Voltage:
- Cause: Incorrect AC input connections or insufficient input voltage.
- Solution: Verify the AC input connections and ensure the input voltage is within the 85-265V AC range.
Output Voltage Fluctuations:
- Cause: Insufficient filtering or unstable load.
- Solution: Add capacitors (e.g., 0.1µF and 10µF) on the output side to stabilize the voltage.
Module Overheating:
- Cause: Exceeding the maximum output current or poor ventilation.
- Solution: Reduce the load current and ensure proper ventilation around the module.
Buzzing Noise:
- Cause: High-frequency noise from the module.
- Solution: Ensure proper grounding and add filtering capacitors to reduce noise.
FAQs
Can the HLK-PM01 power a Raspberry Pi?
- No, the HLK-PM01 provides a maximum current of 600mA, which is insufficient for most Raspberry Pi models.
Is the HLK-PM01 safe for use in home automation projects?
- Yes, the module is CE and RoHS certified and provides 3000V AC isolation, making it safe for such applications when used with proper insulation.
Can I use the HLK-PM01 with a 12V DC input?
- No, the HLK-PM01 is designed for AC input only (85-265V AC). For DC input, consider using a DC-DC converter.
What happens if I exceed the maximum output current?
- Exceeding 600mA may cause the module to overheat or fail. Always ensure the load current is within the specified limit.
By following this documentation, you can safely and effectively use the HLK-PM01 in your electronic projects.