How to Use Controller NEW: Examples, Pinouts, and Specs
Introduction
The Controller NEW (Manufacturer Part ID: UNO) is a versatile programmable device designed to manage and direct the operation of circuits or systems. Manufactured by Controller, this component is widely used in automation, control systems, and embedded applications. Its ability to process inputs, execute programmed instructions, and control outputs makes it an essential component in modern electronics.
Explore Projects Built with Controller NEW
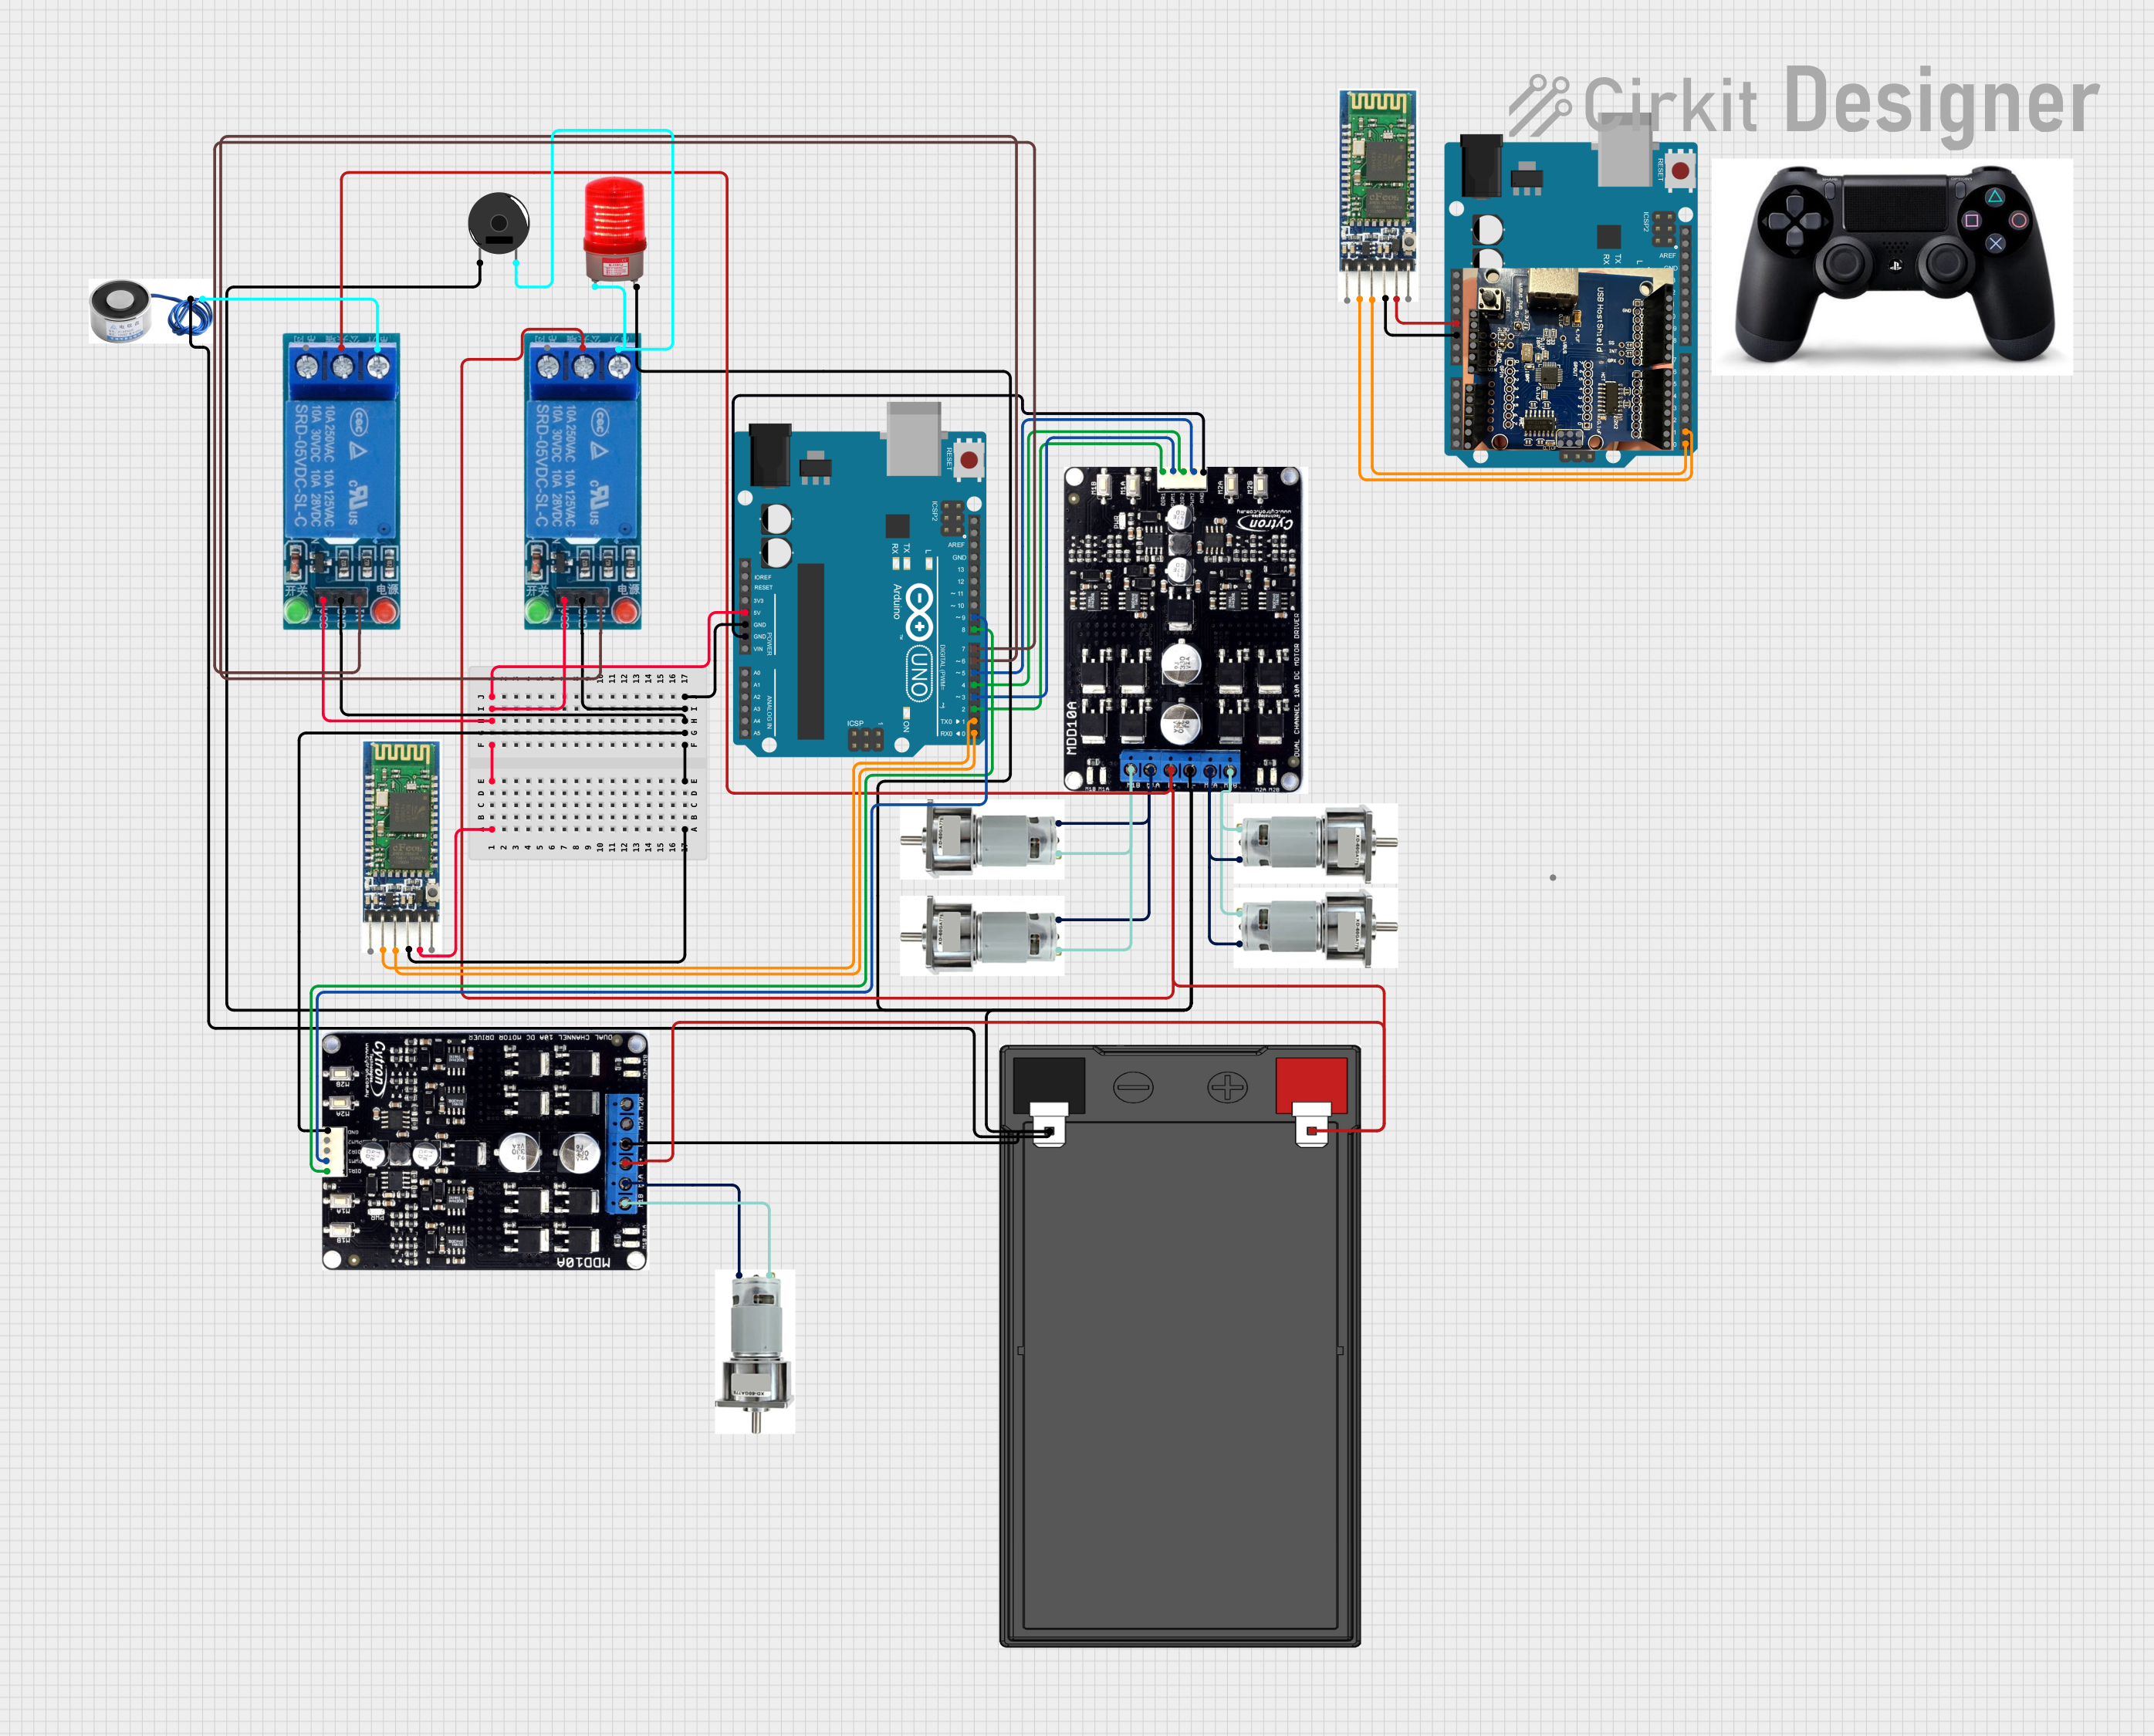
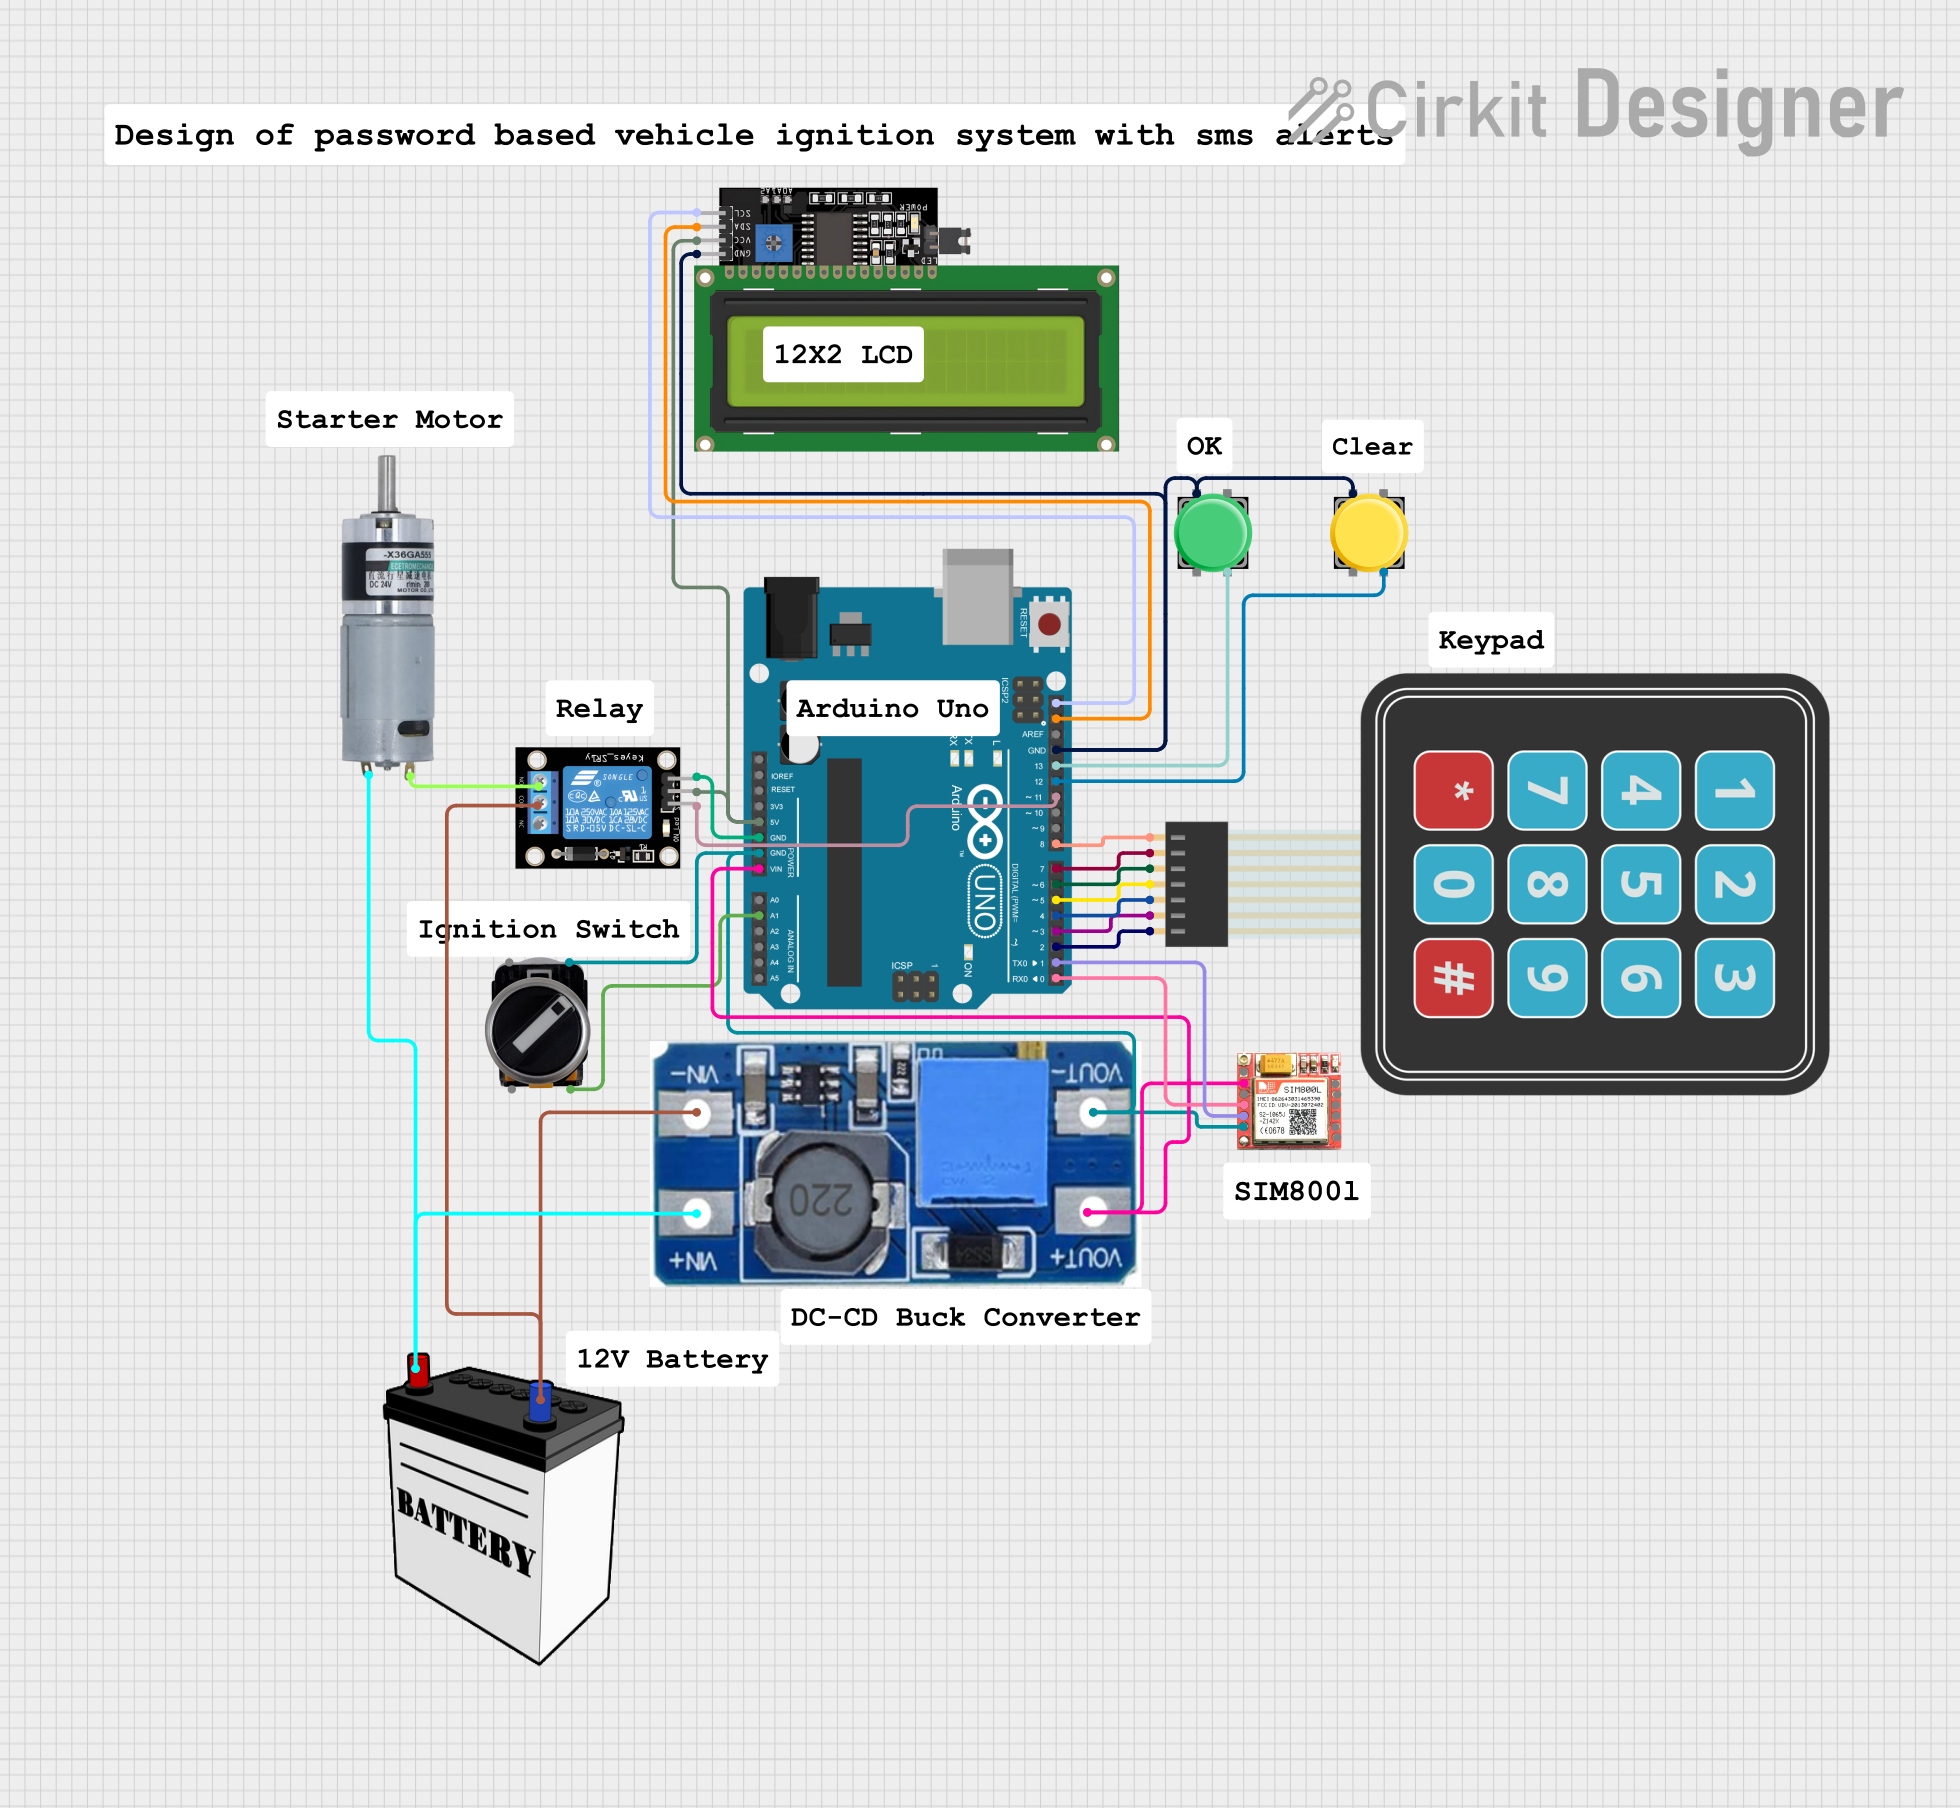
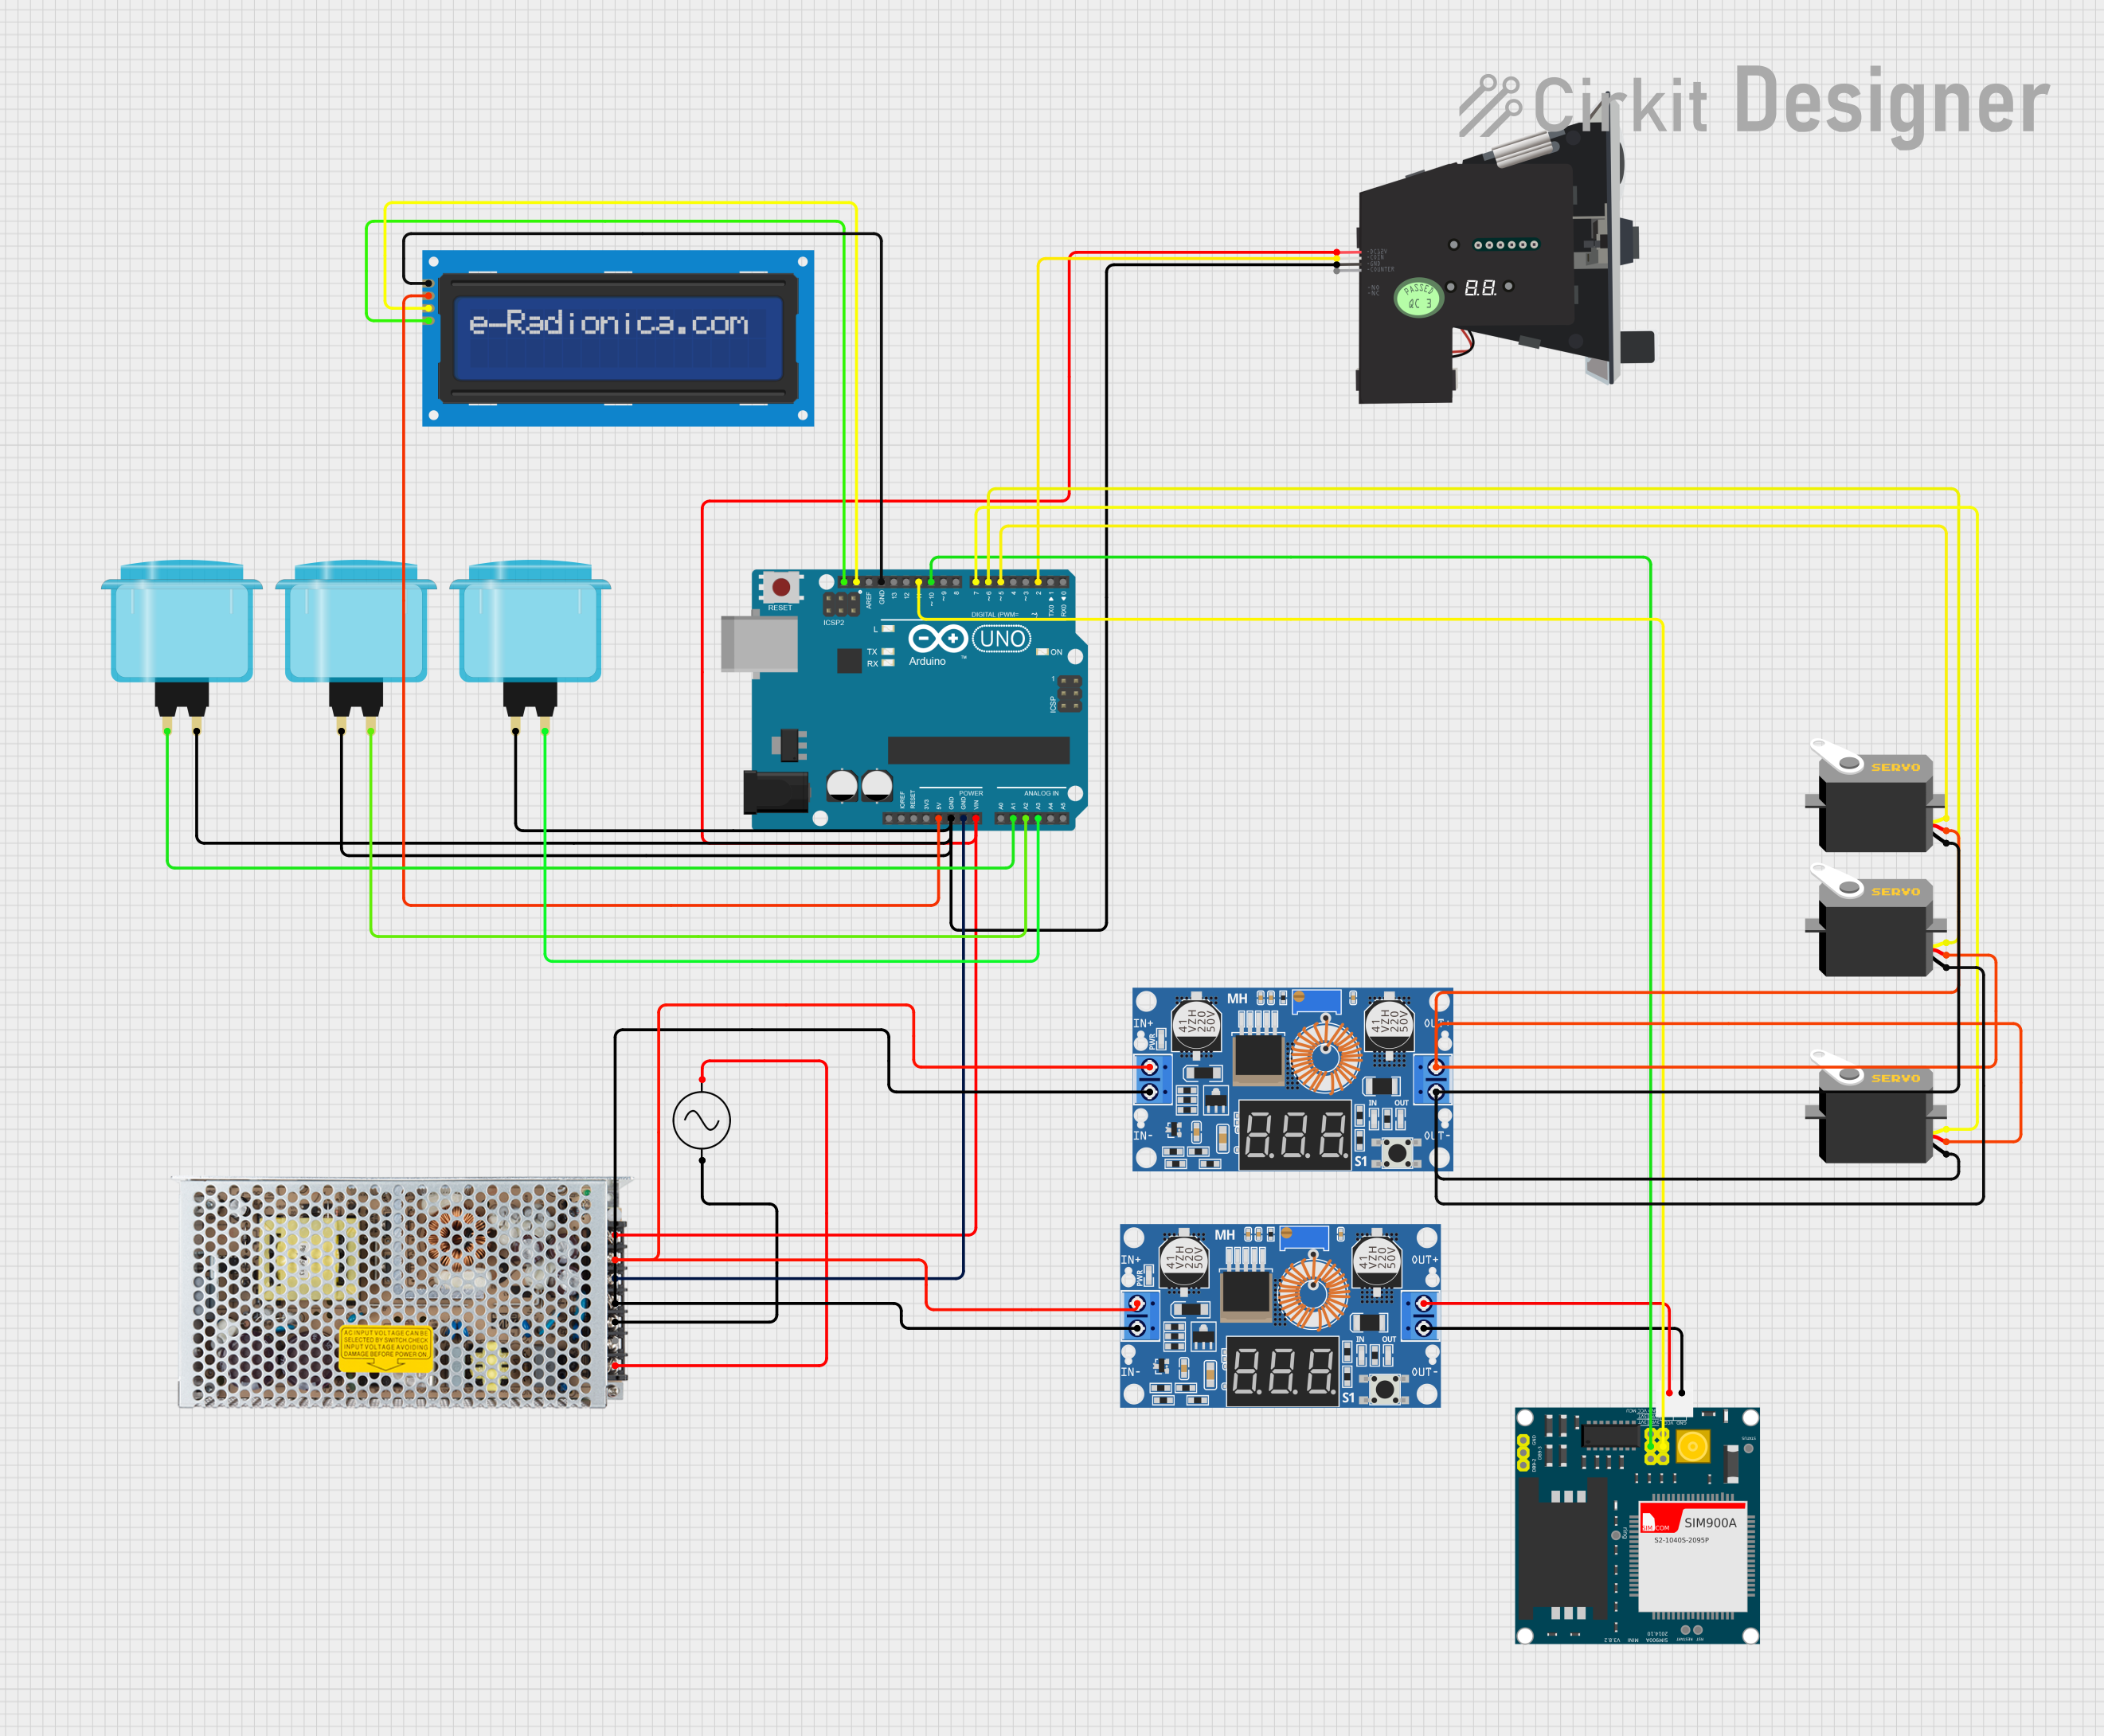
Explore Projects Built with Controller NEW
Common Applications and Use Cases
- Industrial automation and process control
- Robotics and motor control systems
- Home automation and IoT devices
- Data acquisition and signal processing
- Educational projects and prototyping
Technical Specifications
The following table outlines the key technical details of the Controller NEW:
| Parameter | Value |
|---|---|
| Operating Voltage | 5V |
| Input Voltage Range | 6V - 12V |
| Digital I/O Pins | 14 (6 PWM capable) |
| Analog Input Pins | 6 |
| Flash Memory | 32 KB (0.5 KB used by bootloader) |
| SRAM | 2 KB |
| EEPROM | 1 KB |
| Clock Speed | 16 MHz |
| Communication Protocols | UART, SPI, I2C |
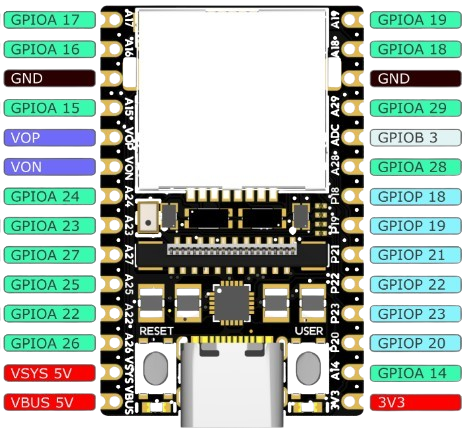
Pin Configuration and Descriptions
The Controller NEW features a total of 28 pins, including power, digital I/O, and analog input pins. Below is the pin configuration:
| Pin | Type | Description |
|---|---|---|
| VIN | Power Input | Input voltage to the controller (6V - 12V). |
| GND | Ground | Ground connection. |
| 5V | Power Output | Regulated 5V output for external components. |
| 3.3V | Power Output | Regulated 3.3V output for low-power components. |
| A0-A5 | Analog Input | Analog input pins (10-bit resolution). |
| D0-D13 | Digital I/O | Digital input/output pins (D3, D5, D6, D9, D10, D11 |
| support PWM). | ||
| RX (D0) | UART Receive | Serial data receive pin. |
| TX (D1) | UART Transmit | Serial data transmit pin. |
| SCL | I2C Clock | Clock line for I2C communication. |
| SDA | I2C Data | Data line for I2C communication. |
| RESET | Reset | Resets the controller. |
Usage Instructions
How to Use the Controller NEW in a Circuit
- Powering the Controller: Connect the VIN pin to a power source (6V - 12V) or use the USB interface for 5V power.
- Programming: Use a USB cable to connect the Controller NEW to a computer. Upload code using the Arduino IDE or compatible software.
- Connecting Inputs and Outputs:
- Use digital pins (D0-D13) for digital sensors, switches, or LEDs.
- Use analog pins (A0-A5) for analog sensors or variable inputs.
- For PWM control, use pins D3, D5, D6, D9, D10, or D11.
Important Considerations and Best Practices
- Avoid exceeding the maximum current rating of 40mA per I/O pin.
- Use external pull-up or pull-down resistors for stable digital input signals.
- Ensure proper grounding to avoid noise or erratic behavior.
- Use decoupling capacitors near power pins to stabilize voltage.
Example: Connecting to an Arduino UNO
The Controller NEW is compatible with the Arduino UNO platform. Below is an example of controlling an LED using the Controller NEW:
// Example: Blink an LED connected to pin D13

void setup() {
  pinMode(13, OUTPUT); // Set pin 13 as an output pin
}

void loop() {
  digitalWrite(13, HIGH); // Turn the LED on
  delay(1000);            // Wait for 1 second
  digitalWrite(13, LOW);  // Turn the LED off
  delay(1000);            // Wait for 1 second
}
Troubleshooting and FAQs
Common Issues and Solutions
The Controller does not power on:
- Ensure the VIN pin is receiving a voltage between 6V and 12V.
- Check the USB connection if powering via USB.
Code upload fails:
- Verify the correct COM port is selected in the Arduino IDE.
- Ensure the correct board and processor are selected in the IDE settings.
- Press the RESET button before uploading the code.
Erratic behavior or resets:
- Check for loose connections or poor grounding.
- Ensure the power supply is stable and within the specified range.
Analog readings are unstable:
- Use a capacitor (e.g., 0.1µF) between the analog input pin and ground to filter noise.
FAQs
Q: Can the Controller NEW handle 3.3V logic levels?
A: Yes, the Controller NEW has a 3.3V output pin and can interface with 3.3V logic devices.
Q: What is the maximum current output of the 5V and 3.3V pins?
A: The 5V pin can supply up to 500mA, and the 3.3V pin can supply up to 50mA.
Q: Can I use the Controller NEW for motor control?
A: Yes, you can use PWM pins (D3, D5, D6, D9, D10, D11) to control motor drivers or speed controllers.
Q: Is the Controller NEW compatible with shields designed for Arduino UNO?
A: Yes, the Controller NEW has the same pin layout as the Arduino UNO and supports most shields.
By following this documentation, users can effectively integrate the Controller NEW into their projects and troubleshoot common issues with ease.