How to Use BATERIA 18650 X2: Examples, Pinouts, and Specs
Introduction
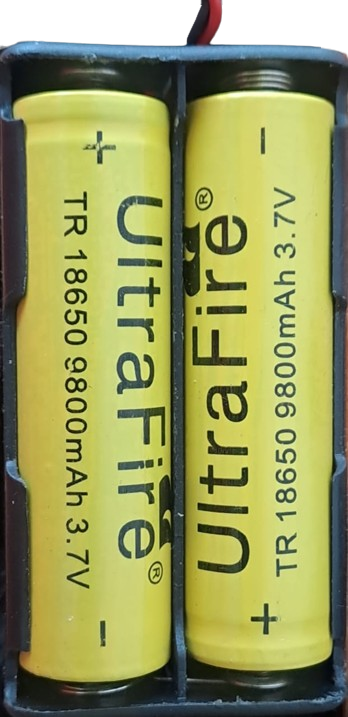
The BATERIA 18650 X2 is a rechargeable lithium-ion battery pack consisting of two 18650 cells. Each 18650 cell provides a nominal voltage of 3.7V and a capacity typically ranging from 1800mAh to 3500mAh. When configured in series, the pack delivers a higher voltage (7.4V nominal), while a parallel configuration increases the capacity. This battery pack is widely used in portable electronics, power banks, flashlights, and DIY electronics projects due to its high energy density, rechargeability, and compact size.
Explore Projects Built with BATERIA 18650 X2


Explore Projects Built with BATERIA 18650 X2
Common Applications
- Powering portable electronic devices (e.g., flashlights, radios, and cameras)
- DIY electronics projects and robotics
- Power banks and backup power supplies
- Electric vehicles and e-bikes (as part of larger battery packs)
- Arduino and Raspberry Pi projects requiring a reliable power source
Technical Specifications
The following table outlines the key technical details of the BATERIA 18650 X2:
| Parameter | Value |
|---|---|
| Nominal Voltage | 7.4V (series configuration) or 3.7V (parallel) |
| Capacity Range | 3600mAh to 7000mAh (depending on cell rating) |
| Maximum Discharge Current | Typically 5A to 20A (varies by cell type) |
| Charging Voltage | 4.2V per cell (8.4V for series configuration) |
| Charging Current | Recommended: 0.5C to 1C (e.g., 1.8A for 1800mAh cells) |
| Dimensions | ~18mm diameter x 65mm length per cell |
| Weight | ~45g per cell |
| Chemistry | Lithium-ion (Li-ion) |
| Cycle Life | 300-500 charge cycles (varies by usage) |
Pin Configuration and Descriptions
The BATERIA 18650 X2 typically has two terminals for connection:
| Pin | Label | Description |
|---|---|---|
| + | Positive | Connects to the positive terminal of the circuit |
| - | Negative | Connects to the negative terminal of the circuit |
Note: Some battery packs may include a built-in protection circuit module (PCM) to prevent overcharging, over-discharging, and short circuits. In such cases, additional terminals (e.g., B+, B-, P+, P-) may be present. Refer to the specific battery pack's datasheet for details.
Usage Instructions
How to Use the BATERIA 18650 X2 in a Circuit
- Determine the Configuration: Decide whether to use the battery pack in series (for higher voltage) or parallel (for higher capacity). Most pre-assembled packs are configured in series.
- Connect the Terminals:
- Connect the positive terminal (+) to the positive input of your circuit.
- Connect the negative terminal (-) to the ground or negative input of your circuit.
- Charging the Battery: Use a compatible lithium-ion battery charger designed for 7.4V (series) or 3.7V (parallel) configurations. Ensure the charger has overcharge protection.
- Monitor Voltage Levels: Avoid discharging the battery below 3.0V per cell (6.0V for series configuration) to prevent damage. Use a voltage monitoring circuit or battery management system (BMS) for safety.
Important Considerations and Best Practices
- Safety First: Lithium-ion batteries can be hazardous if mishandled. Avoid short circuits, overcharging, or puncturing the cells.
- Use a Protection Circuit: If the battery pack lacks a built-in PCM, add an external BMS to protect against overcharging, over-discharging, and overheating.
- Charging Current: Do not exceed the recommended charging current (typically 0.5C to 1C) to prolong battery life.
- Storage: Store the battery in a cool, dry place at ~50% charge to prevent capacity degradation.
- Avoid Deep Discharge: Recharging the battery before it drops below 3.0V per cell will extend its lifespan.
Example: Using BATERIA 18650 X2 with Arduino UNO
To power an Arduino UNO with the BATERIA 18650 X2, follow these steps:
- Use a DC-DC step-down converter (e.g., LM2596) to regulate the battery's output voltage to 5V.
- Connect the battery pack's positive terminal to the input of the step-down converter.
- Connect the converter's output to the Arduino's 5V and GND pins.
Here is an example Arduino code to monitor the battery voltage using an analog pin:
// Define the analog pin connected to the voltage divider
const int voltagePin = A0;

// Voltage divider resistors (adjust based on your circuit)
const float R1 = 10000.0; // 10k ohms
const float R2 = 10000.0; // 10k ohms

// Reference voltage of the Arduino (5V for most boards)
const float referenceVoltage = 5.0;

void setup() {
  Serial.begin(9600); // Initialize serial communication
}

void loop() {
  int sensorValue = analogRead(voltagePin); // Read the analog pin
  float voltage = (sensorValue / 1023.0) * referenceVoltage; // Convert to voltage
  voltage = voltage * ((R1 + R2) / R2); // Adjust for voltage divider

  Serial.print("Battery Voltage: ");
  Serial.print(voltage);
  Serial.println(" V");

  delay(1000); // Wait 1 second before the next reading
}
Note: Use a voltage divider to scale down the battery voltage to a safe range for the Arduino's analog input (0-5V). Adjust the resistor values (R1 and R2) as needed.
Troubleshooting and FAQs
Common Issues and Solutions
Battery Not Charging:
- Ensure the charger is compatible with the battery's voltage and current ratings.
- Check for loose or damaged connections.
- If the battery has a PCM, verify that it is functioning correctly.
Battery Drains Quickly:
- Verify the load current of your circuit. High current draw can deplete the battery faster.
- Check the battery's capacity and age. Older batteries may have reduced capacity.
Overheating During Use:
- Ensure the battery is not overloaded. Use a BMS to limit current draw.
- Avoid using the battery in high-temperature environments.
No Output Voltage:
- Check for a tripped PCM. Disconnect the load and recharge the battery to reset it.
- Inspect the terminals for corrosion or damage.
FAQs
Q: Can I use the BATERIA 18650 X2 without a protection circuit?
A: While it is possible, it is not recommended. A protection circuit ensures safe operation by preventing overcharging, over-discharging, and short circuits.
Q: How do I know when the battery is fully charged?
A: A fully charged 18650 cell will have a voltage of 4.2V. For a series configuration, the total voltage will be 8.4V.
Q: Can I connect multiple BATERIA 18650 X2 packs together?
A: Yes, you can connect multiple packs in series or parallel, but ensure all packs are balanced and have the same capacity and charge level.
Q: How long does the battery last?
A: The lifespan depends on usage and charging habits. Typically, the battery can last 300-500 charge cycles with proper care.