How to Use Water Pump: Examples, Pinouts, and Specs
Introduction
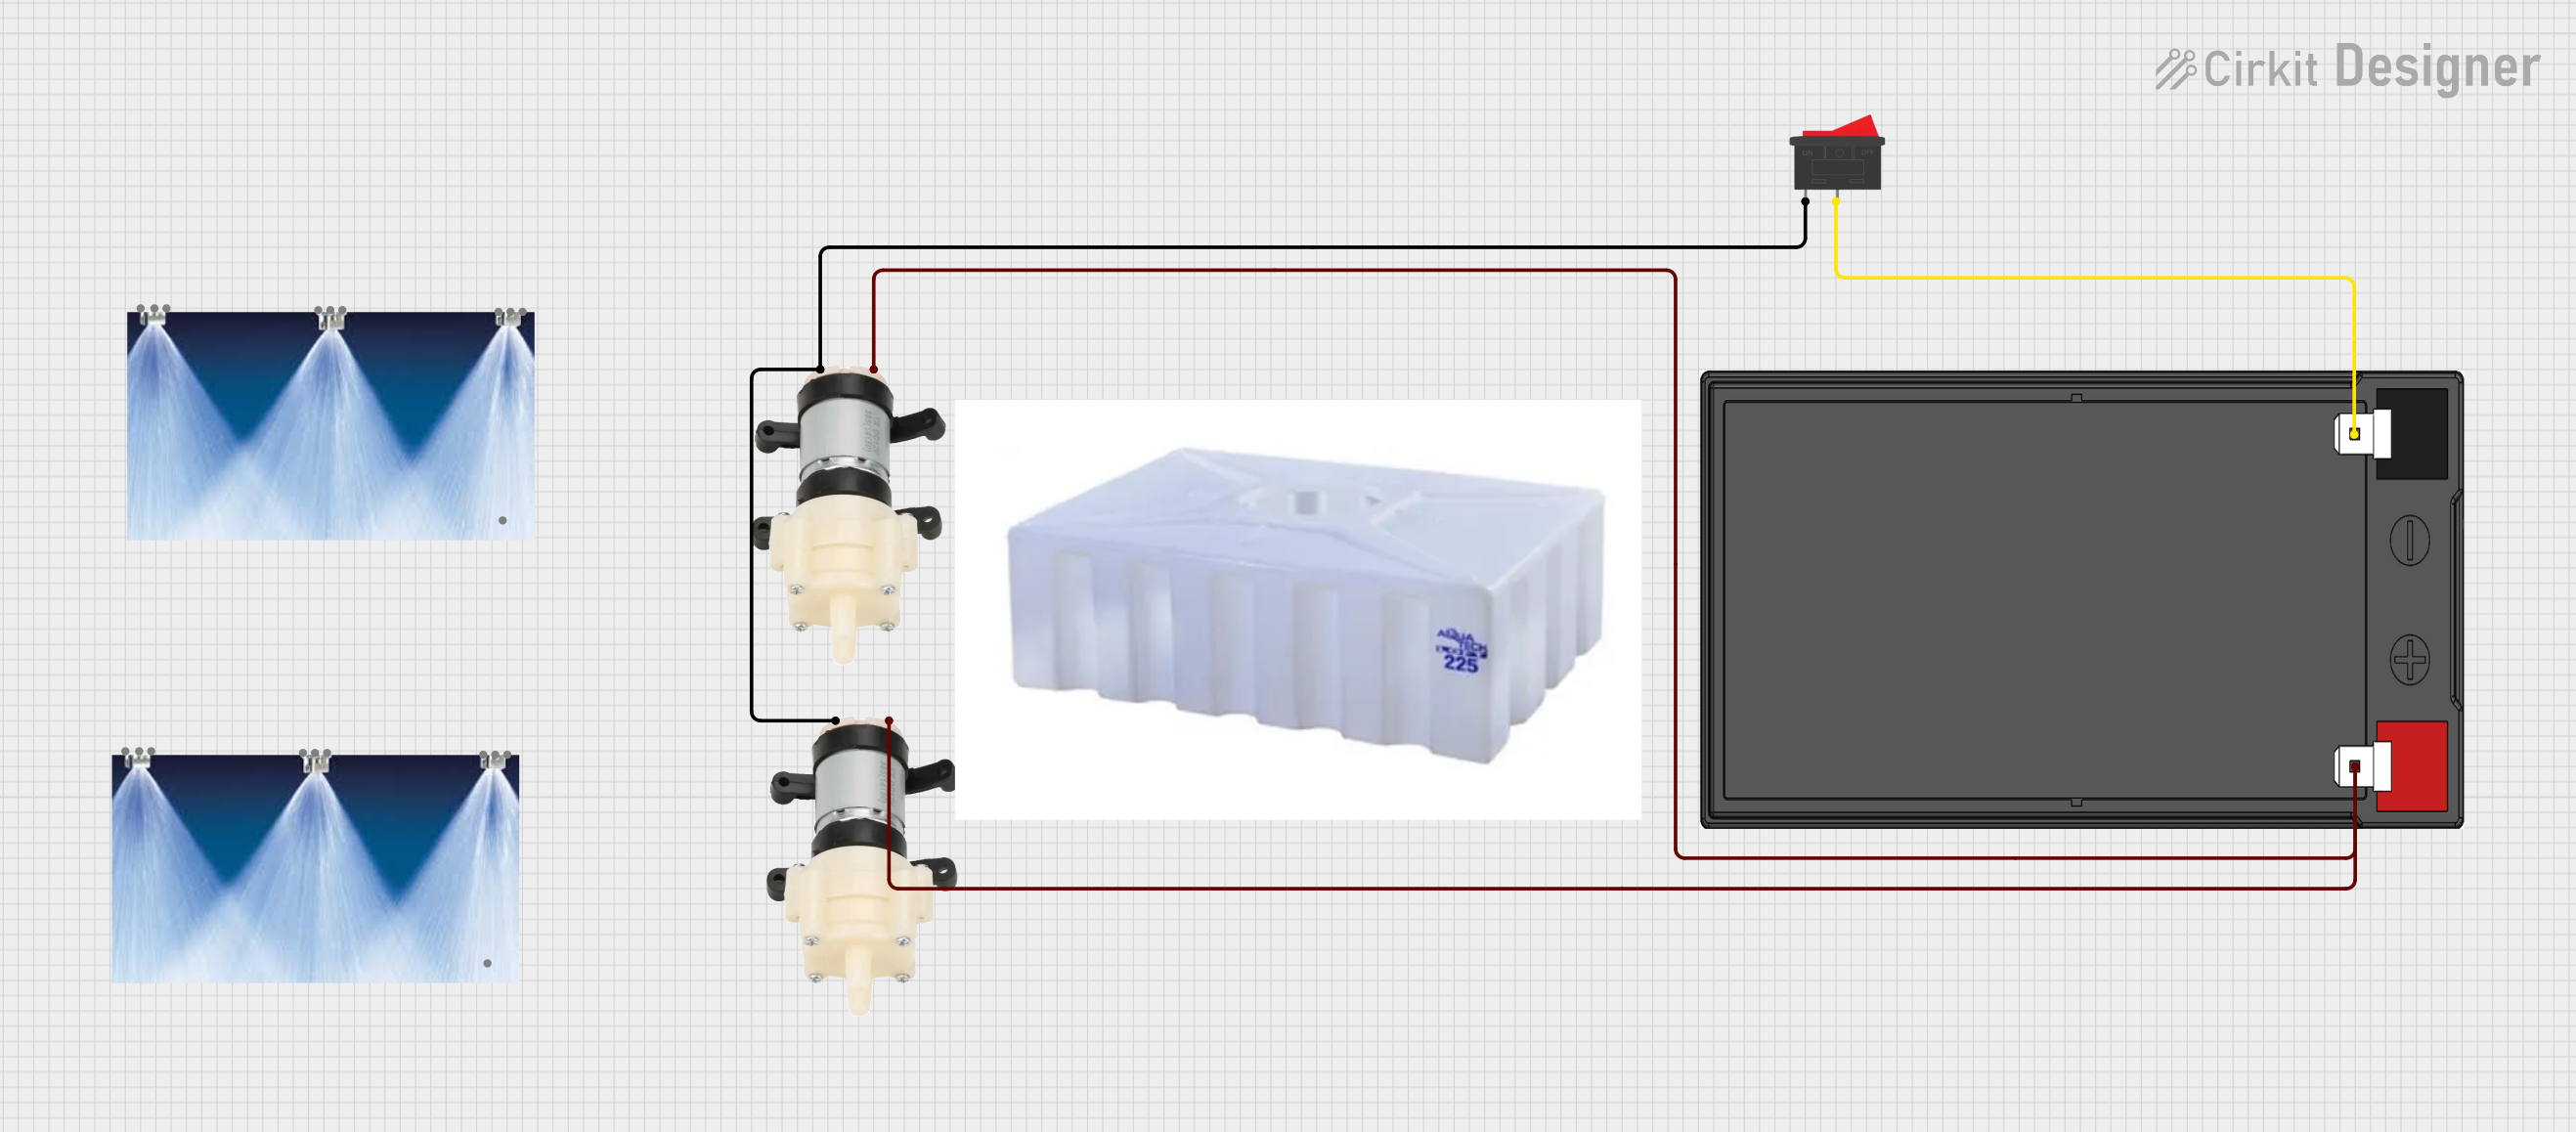
The RoboCraze Water Pump is a versatile device designed to move water efficiently from one location to another. By converting mechanical energy into hydraulic energy, this pump is ideal for a wide range of applications, including irrigation, drainage, water supply systems, and small-scale DIY projects. Its compact design and reliable performance make it a popular choice for hobbyists and professionals alike.
Explore Projects Built with Water Pump
Explore Projects Built with Water Pump
Common Applications and Use Cases
- Irrigation Systems: Used in gardens, farms, and greenhouses to supply water to plants.
- Water Supply: Transfers water from tanks, reservoirs, or wells to desired locations.
- Drainage Systems: Removes excess water from flooded areas or containers.
- DIY Projects: Frequently used in Arduino-based automation projects, such as automated plant watering systems.
- Aquariums and Fountains: Circulates water in decorative or functional setups.
Technical Specifications
The RoboCraze Water Pump is designed for low-power, small-scale applications. Below are its key technical details:
General Specifications
| Parameter | Value |
|---|---|
| Operating Voltage | 3V to 6V DC |
| Operating Current | 130mA to 220mA |
| Maximum Flow Rate | 120 liters per hour (L/h) |
| Maximum Lift Height | 1.1 meters |
| Power Consumption | ~1.5W |
| Material | Plastic (ABS) |
| Dimensions | 45mm x 24mm x 30mm |
| Weight | ~30 grams |
Pin Configuration and Descriptions
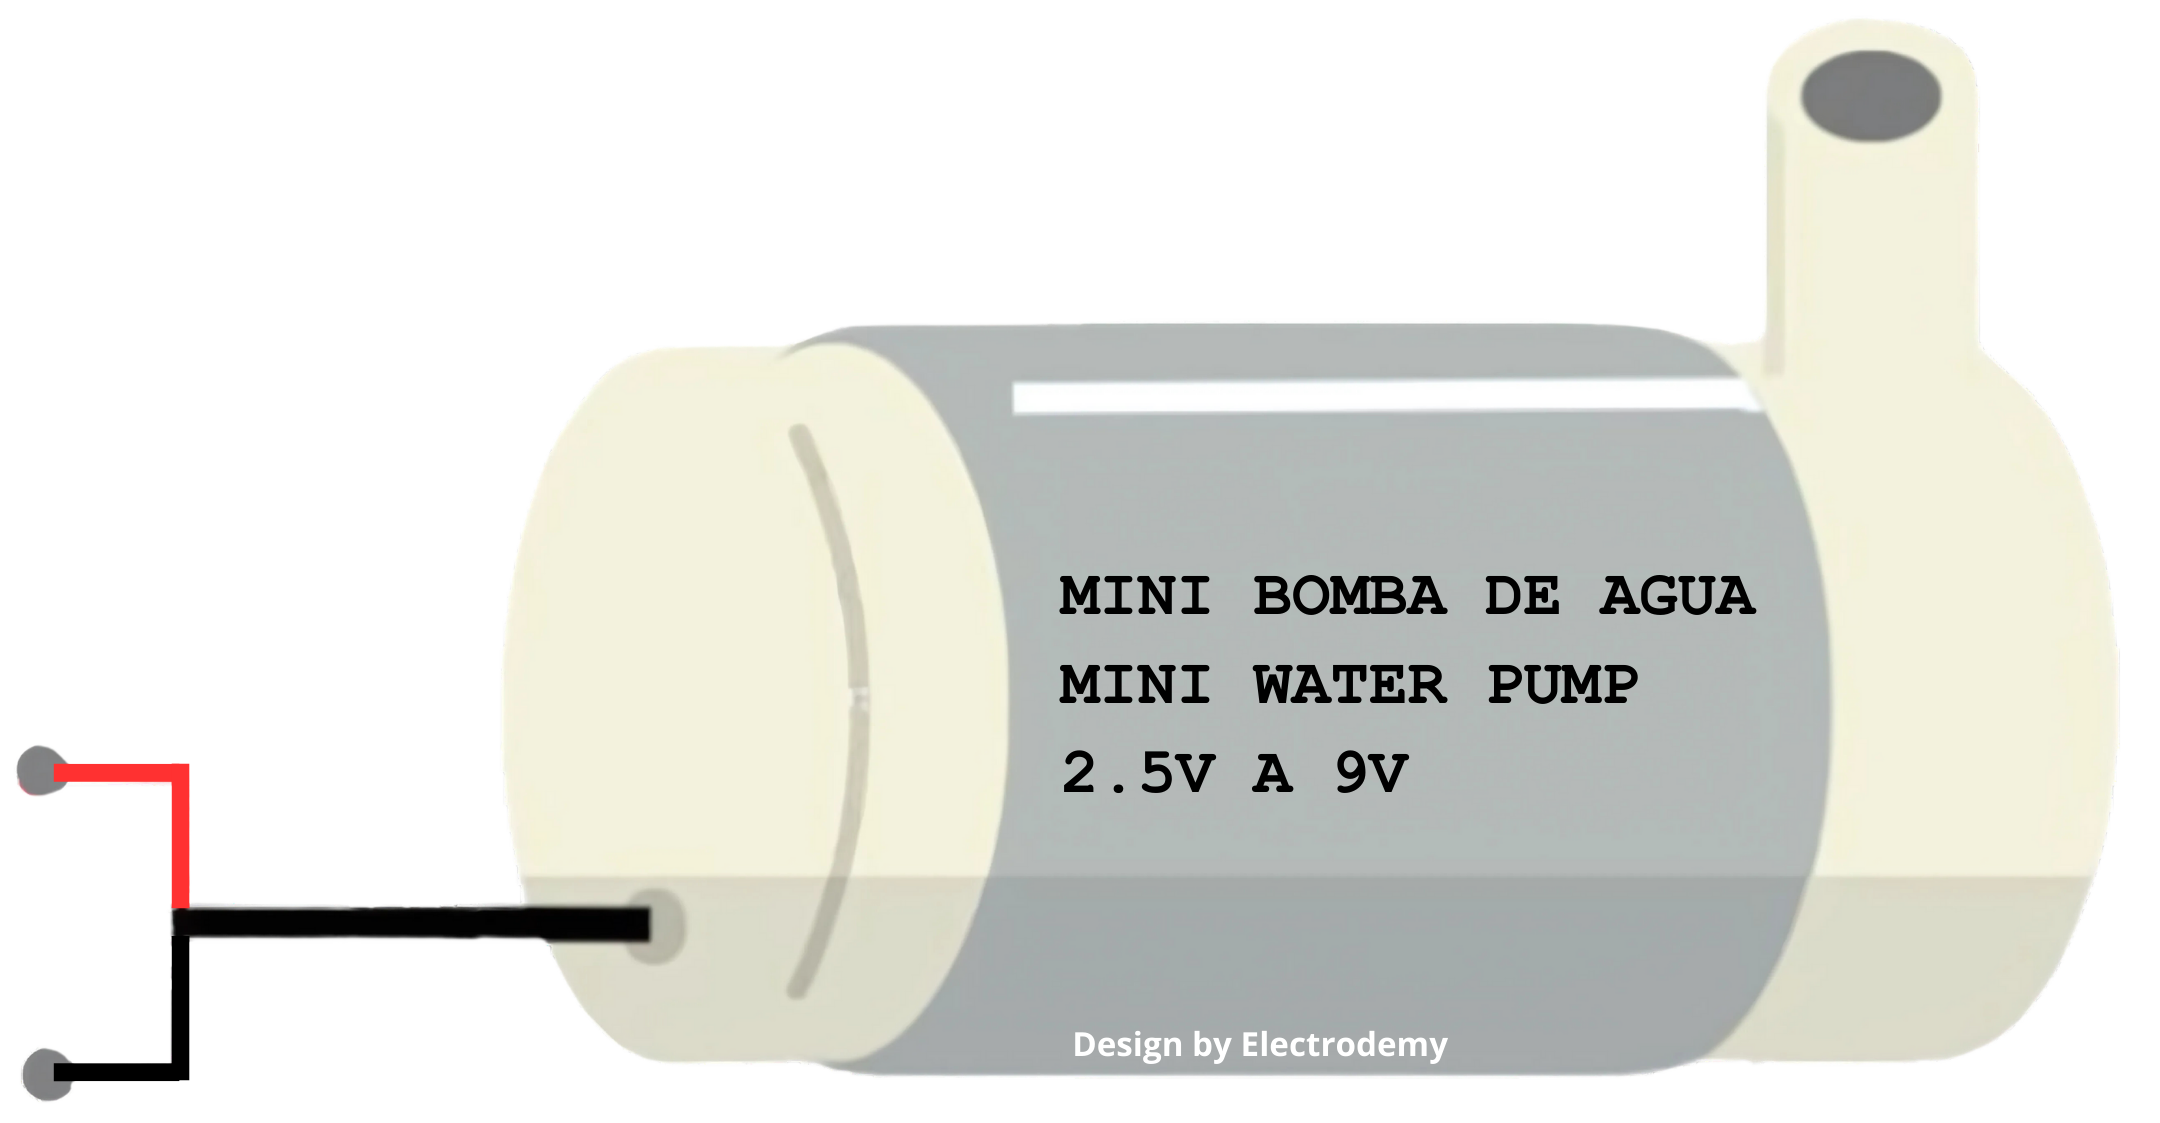
The RoboCraze Water Pump has two wires for electrical connections:
| Wire Color | Function |
|---|---|
| Red | Positive terminal (+) for power |
| Black | Negative terminal (-) for ground |
Usage Instructions
How to Use the Water Pump in a Circuit
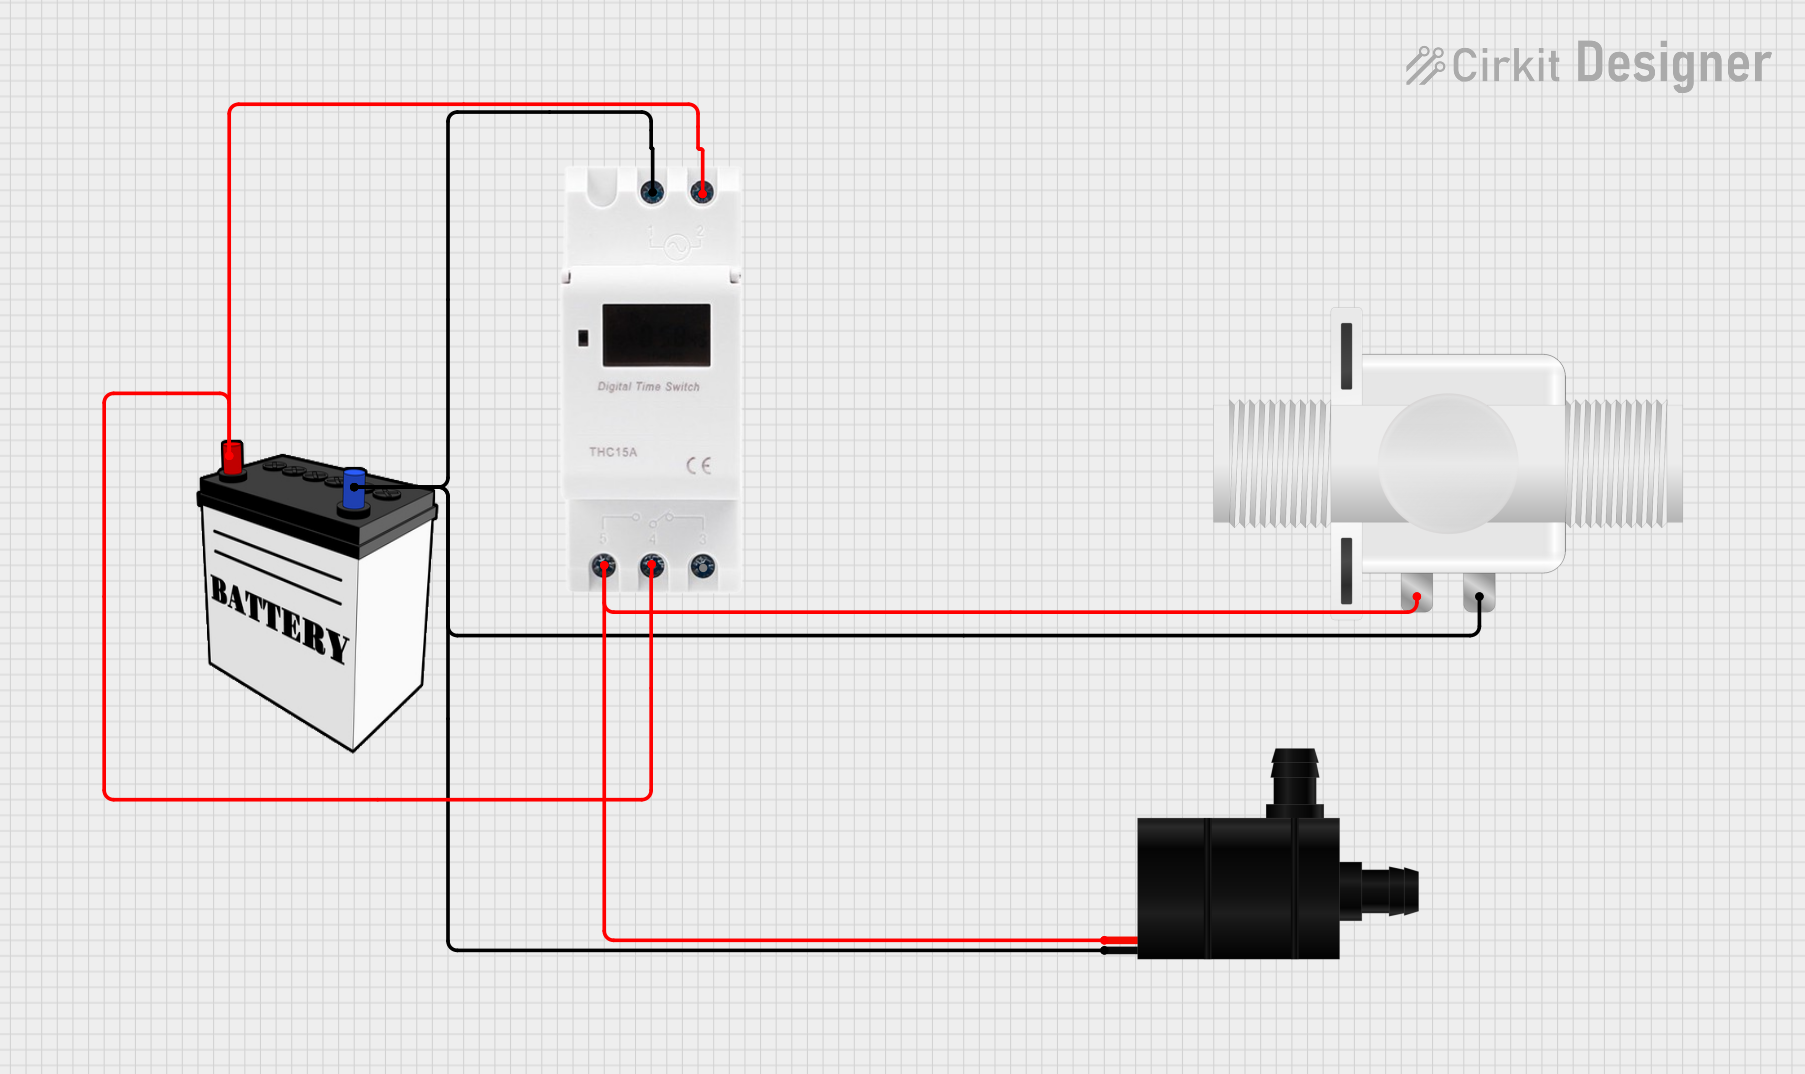
- Power Supply: Connect the red wire to the positive terminal of a DC power source (3V to 6V) and the black wire to the ground terminal.
- Water Source: Submerge the pump's inlet in a water source. Ensure the pump is fully submerged to prevent dry running, which can damage the motor.
- Output Connection: Attach a suitable hose to the pump's outlet to direct the water to the desired location.
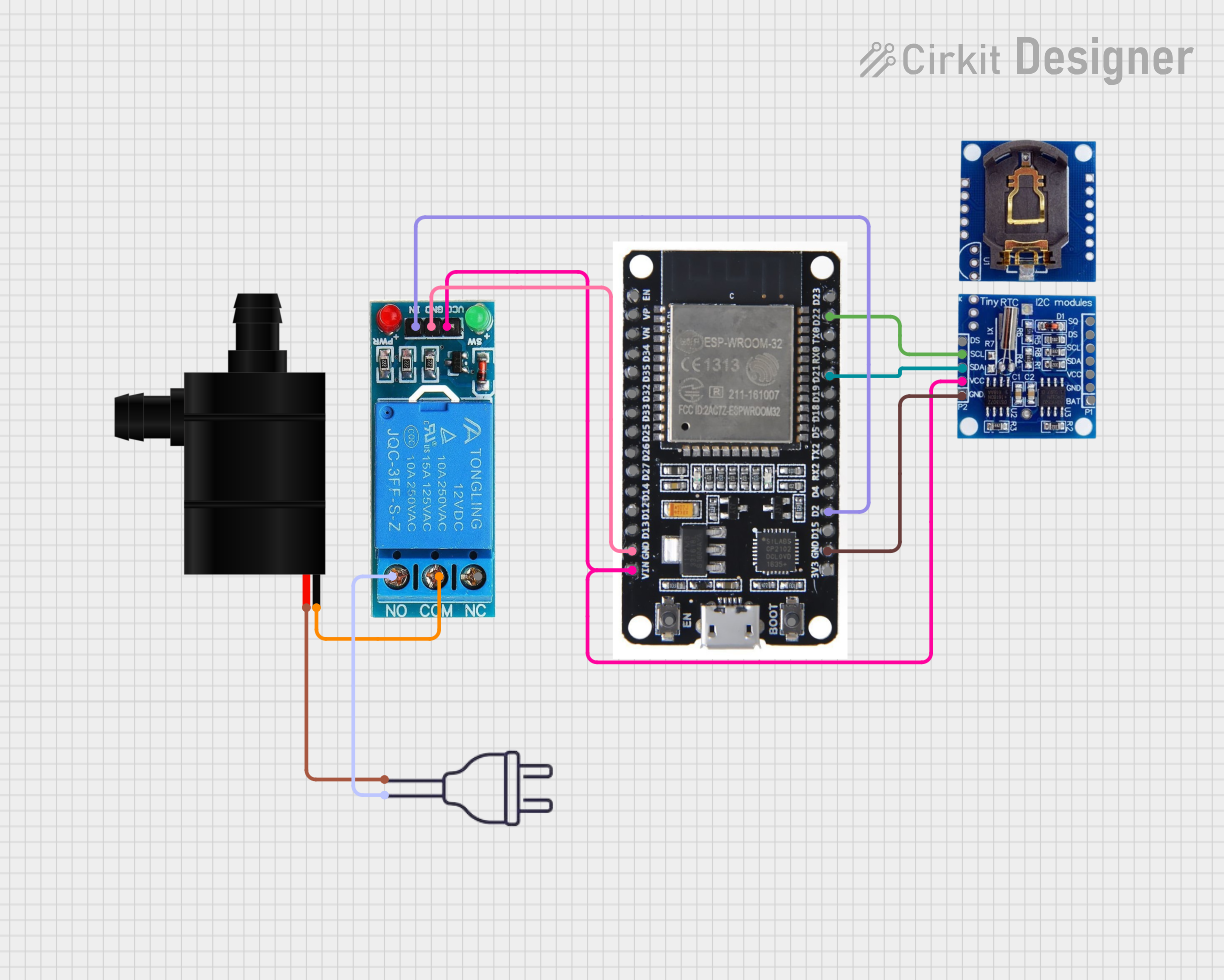
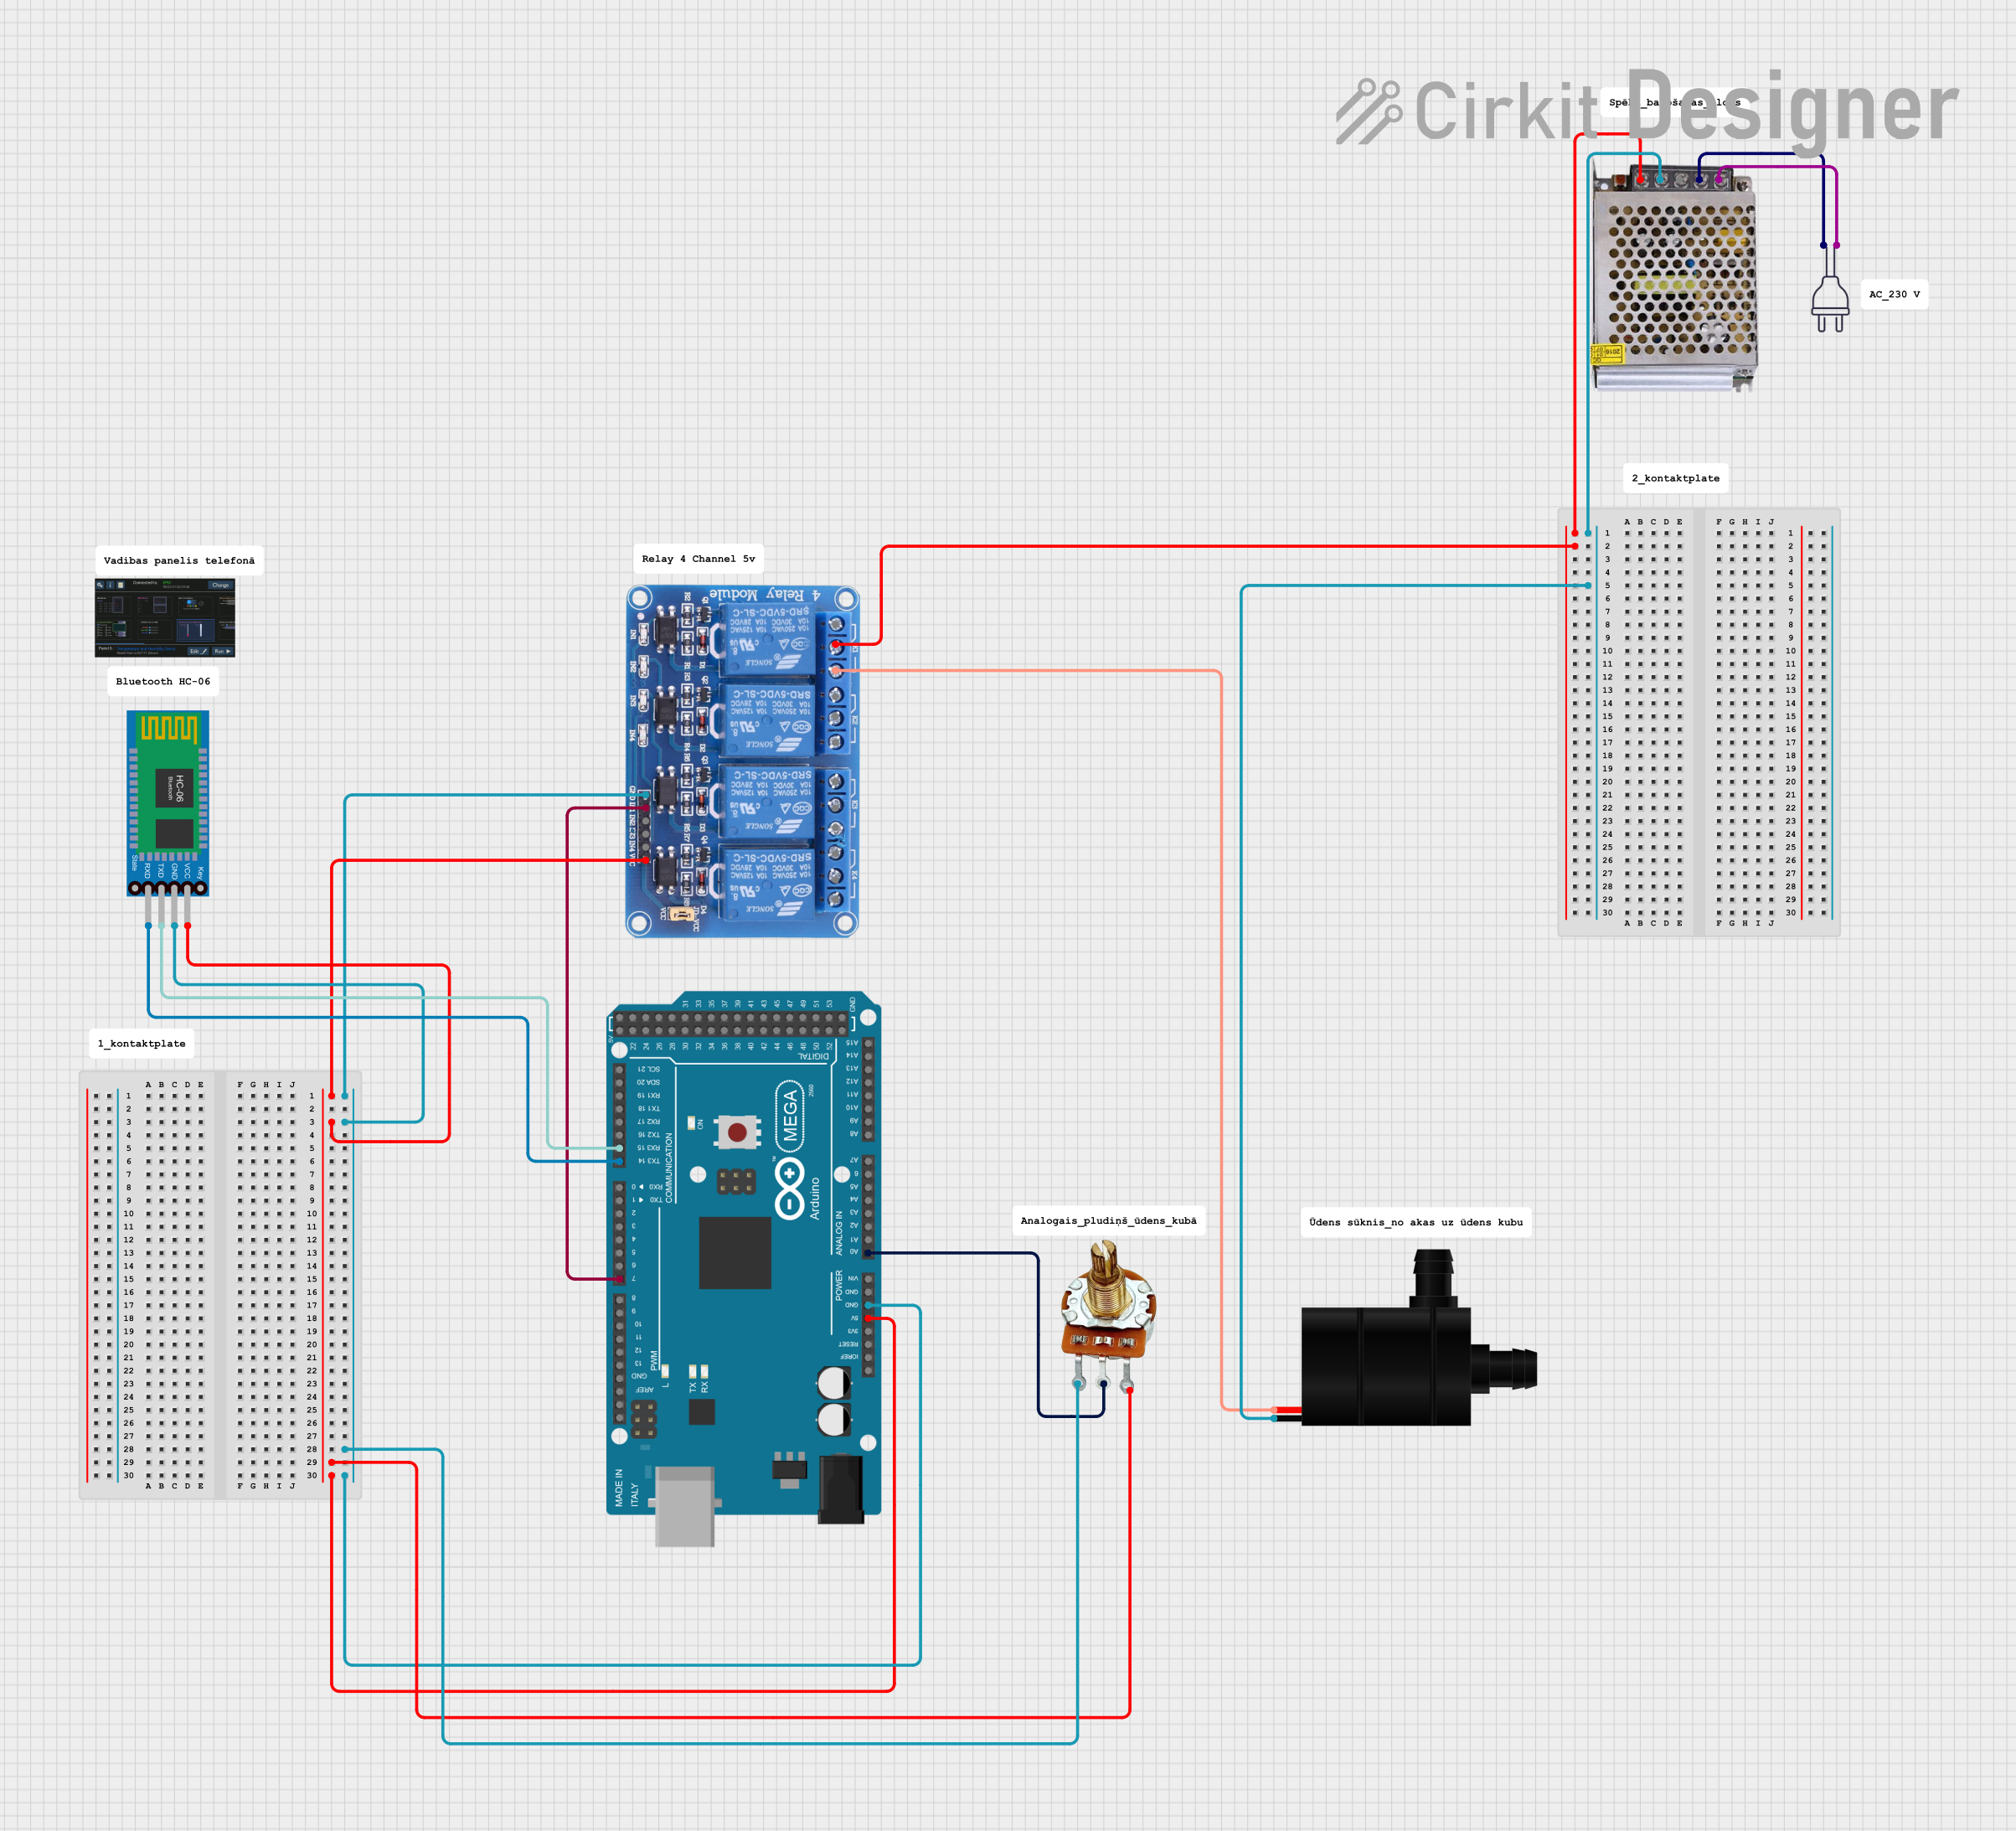
- Control: Optionally, use a relay module or transistor circuit to control the pump via a microcontroller like an Arduino.
Important Considerations and Best Practices
- Avoid Dry Running: Always ensure the pump is submerged in water before powering it on. Running the pump dry can cause overheating and permanent damage.
- Voltage Range: Operate the pump within the specified voltage range (3V to 6V). Exceeding this range may damage the motor.
- Polarity: Ensure correct polarity when connecting the wires. Reversing the polarity may damage the pump.
- Filtration: Use clean water or a filter to prevent debris from clogging the pump.
- Heat Dissipation: Avoid prolonged operation to prevent overheating. Allow the pump to cool down after extended use.
Example: Using the Water Pump with an Arduino UNO
Below is an example of how to control the RoboCraze Water Pump using an Arduino UNO and a relay module:
// Example: Controlling a Water Pump with Arduino UNO
// Components: Arduino UNO, Relay Module, RoboCraze Water Pump

const int relayPin = 7; // Pin connected to the relay module

void setup() {
  pinMode(relayPin, OUTPUT); // Set relay pin as output
  digitalWrite(relayPin, LOW); // Ensure the pump is off initially
}

void loop() {
  // Turn the pump ON
  digitalWrite(relayPin, HIGH);
  delay(5000); // Keep the pump on for 5 seconds

  // Turn the pump OFF
  digitalWrite(relayPin, LOW);
  delay(5000); // Wait for 5 seconds before turning it on again
}
Notes:
- Connect the relay module's input pin to the Arduino's
relayPin(pin 7 in this example). - The relay module should be connected to the water pump's power supply to control its operation.
- Ensure the pump's power supply matches its voltage and current requirements.
Troubleshooting and FAQs
Common Issues and Solutions
| Issue | Possible Cause | Solution |
|---|---|---|
| Pump does not start | Incorrect wiring or insufficient voltage | Check connections and ensure 3V-6V supply |
| Pump runs but no water is pumped | Airlock or clogged inlet | Submerge pump fully and clean the inlet |
| Pump overheats | Prolonged operation or dry running | Allow cooling time and ensure water flow |
| Low water flow | Blocked outlet or low voltage | Clear the outlet and check power supply |
FAQs
Can the pump be used with liquids other than water?
The pump is designed for water. Using other liquids may damage the internal components.What is the maximum operating time for the pump?
The pump can operate continuously for short periods (e.g., 10-15 minutes). For prolonged use, allow cooling intervals to prevent overheating.Can the pump be controlled with a PWM signal?
No, the pump is not designed for direct PWM control. Use a relay or transistor circuit for on/off control.Is the pump waterproof?
The pump is water-resistant and designed to be submerged, but the electrical connections should remain dry.
By following this documentation, you can effectively integrate the RoboCraze Water Pump into your projects and ensure its optimal performance.