How to Use DF Robot UV sensor v2: Examples, Pinouts, and Specs
Introduction
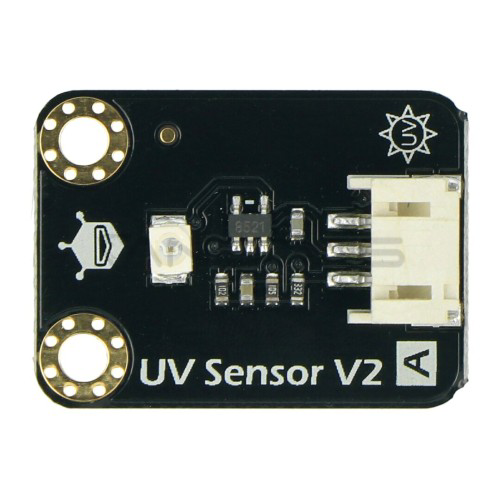
The DF Robot UV Sensor v2 is an advanced sensor module specifically designed to measure the intensity of ultraviolet (UV) light. This sensor is capable of detecting UV radiation in sunlight and provides an analog output voltage that is proportional to the UV light intensity. It is commonly used in applications such as environmental monitoring, weather stations, and wearable devices to measure the UV index, which indicates the strength of sunburn-producing ultraviolet radiation at a particular place and time.
Explore Projects Built with DF Robot UV sensor v2
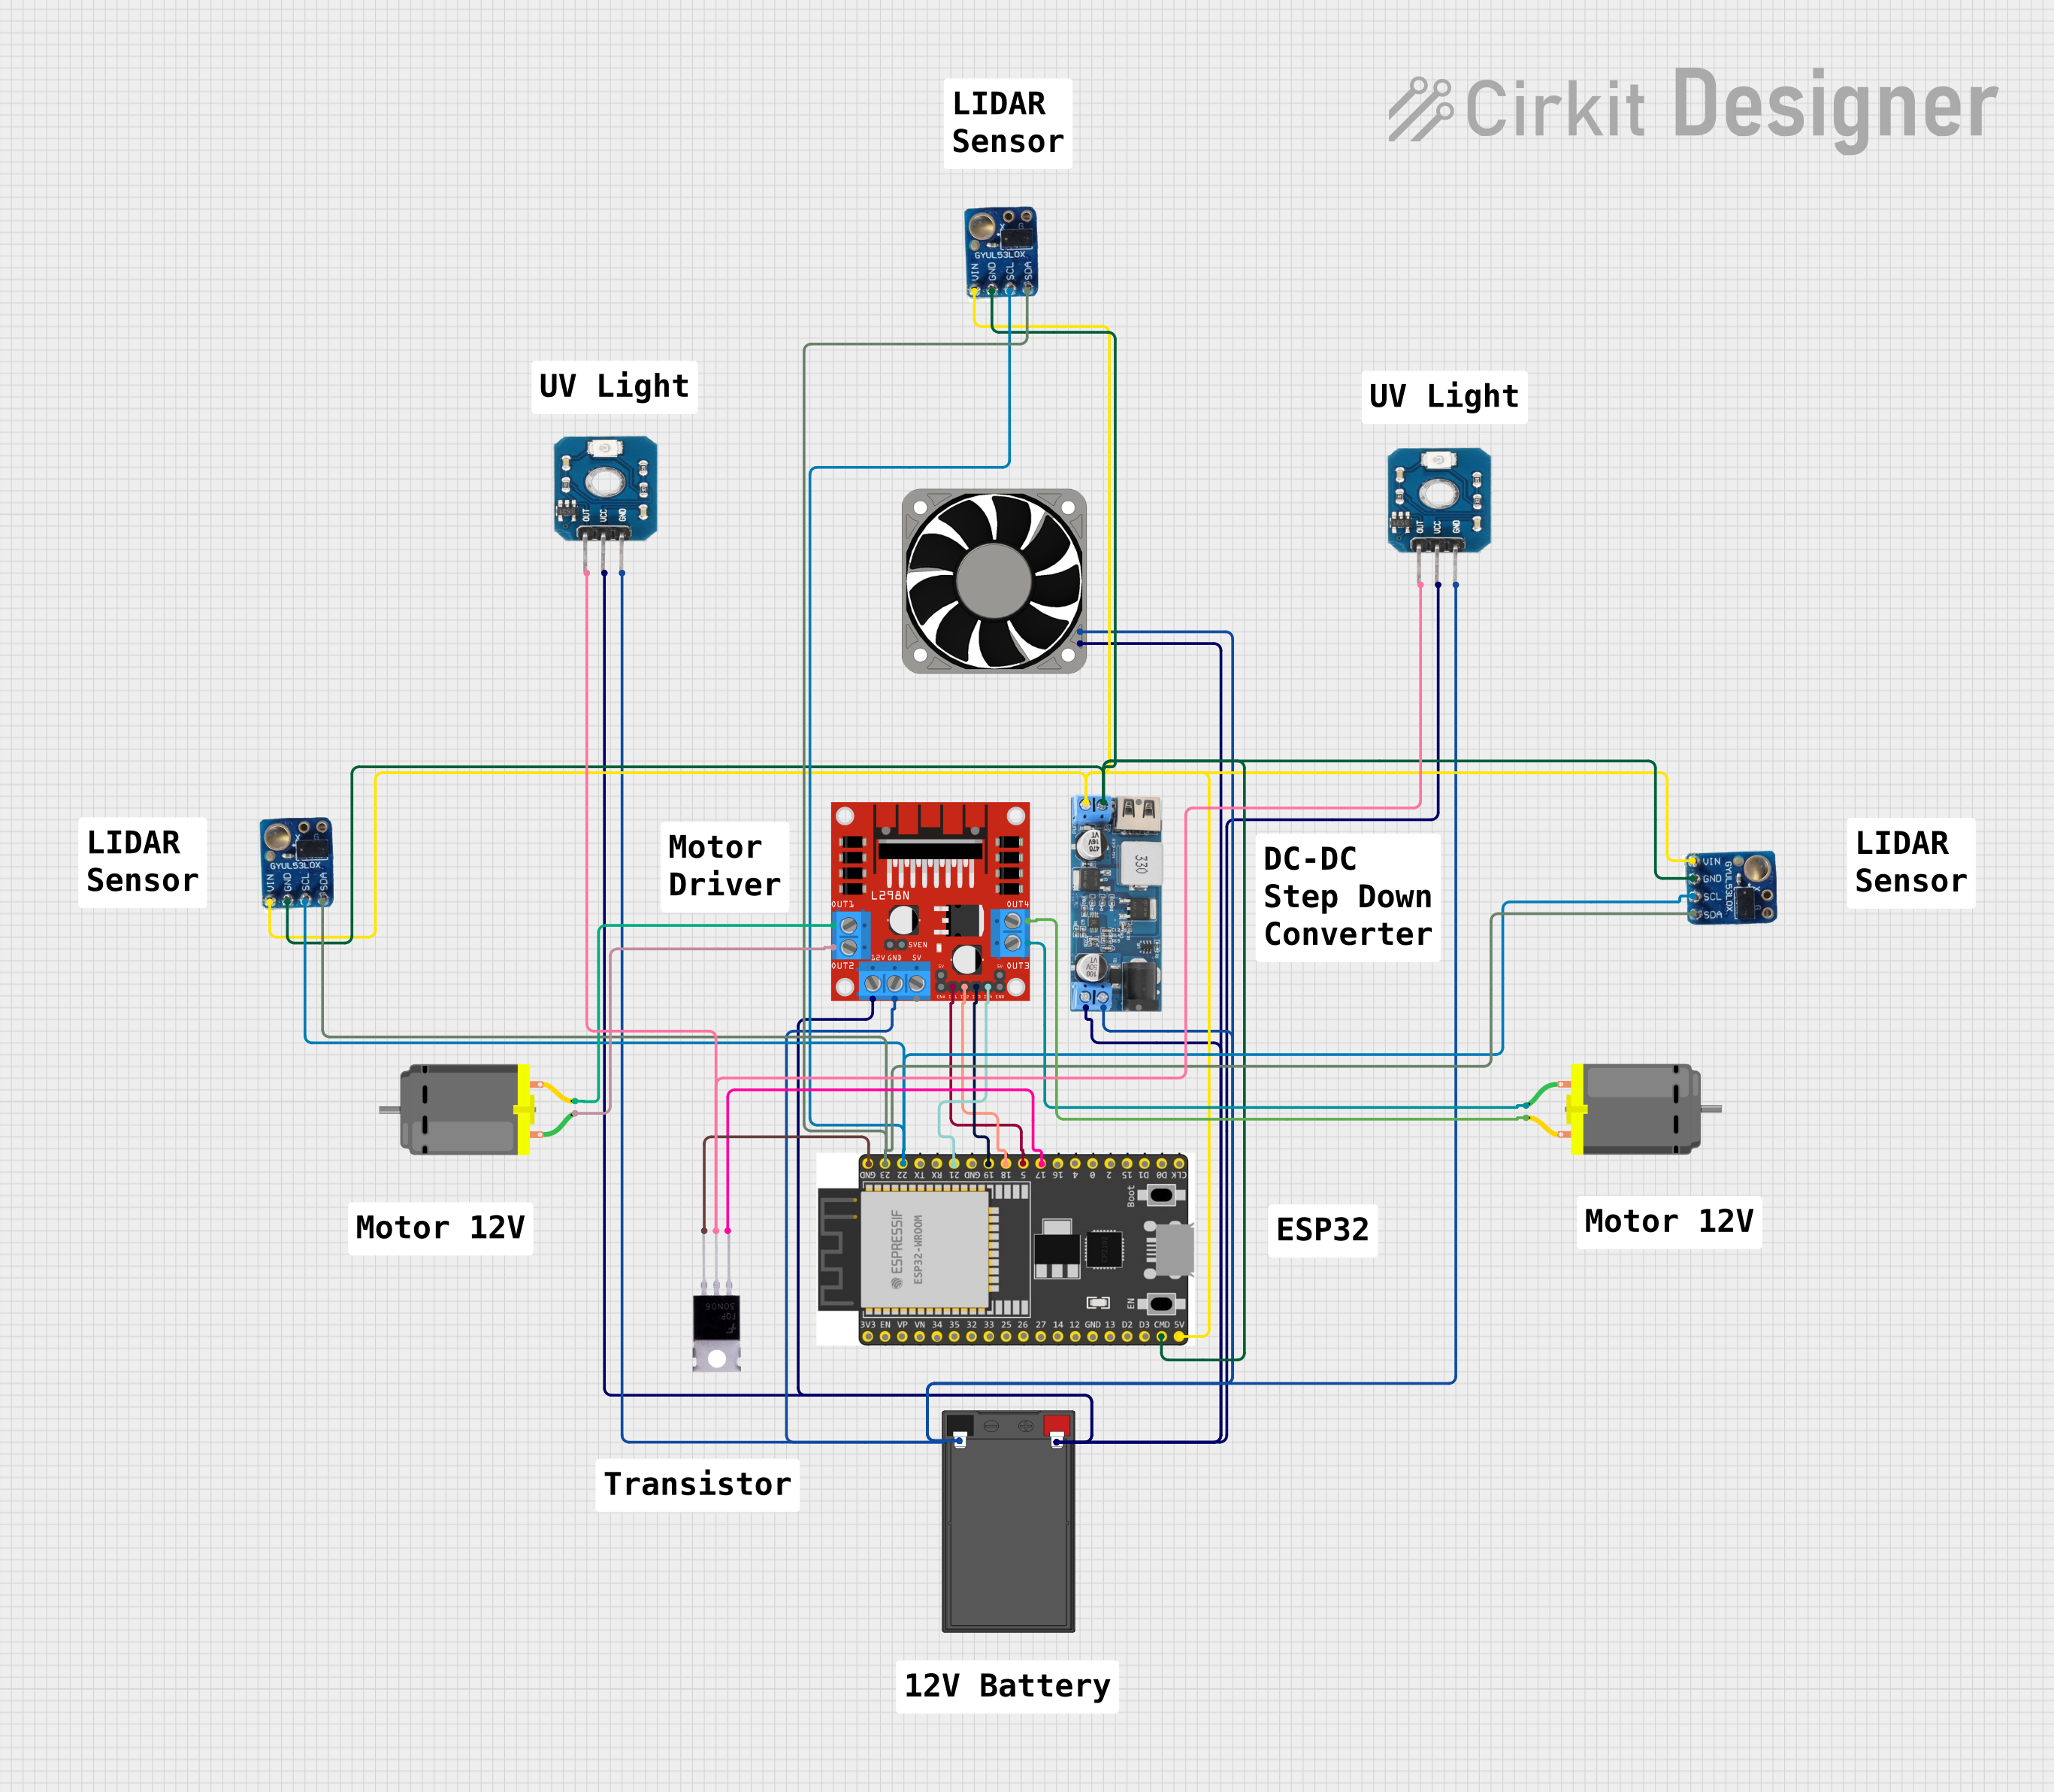

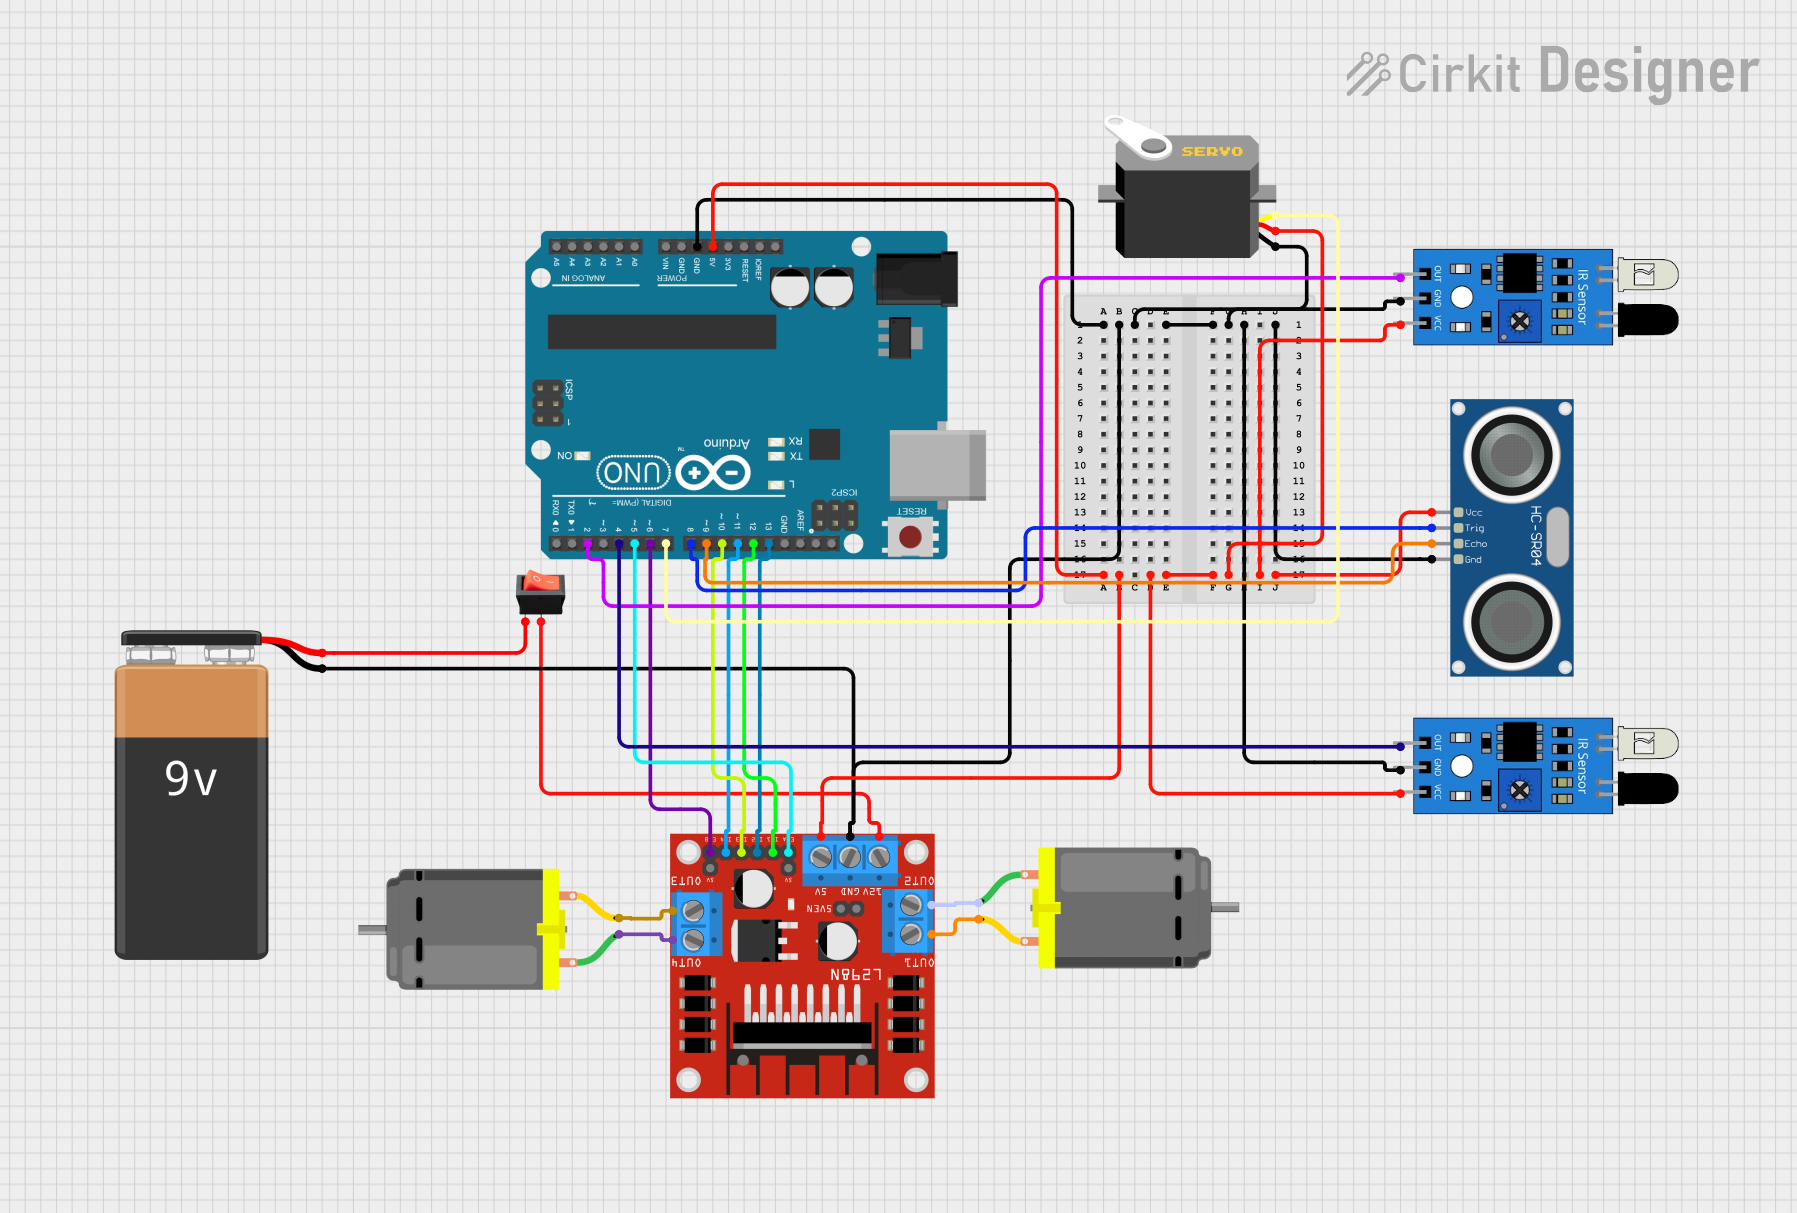
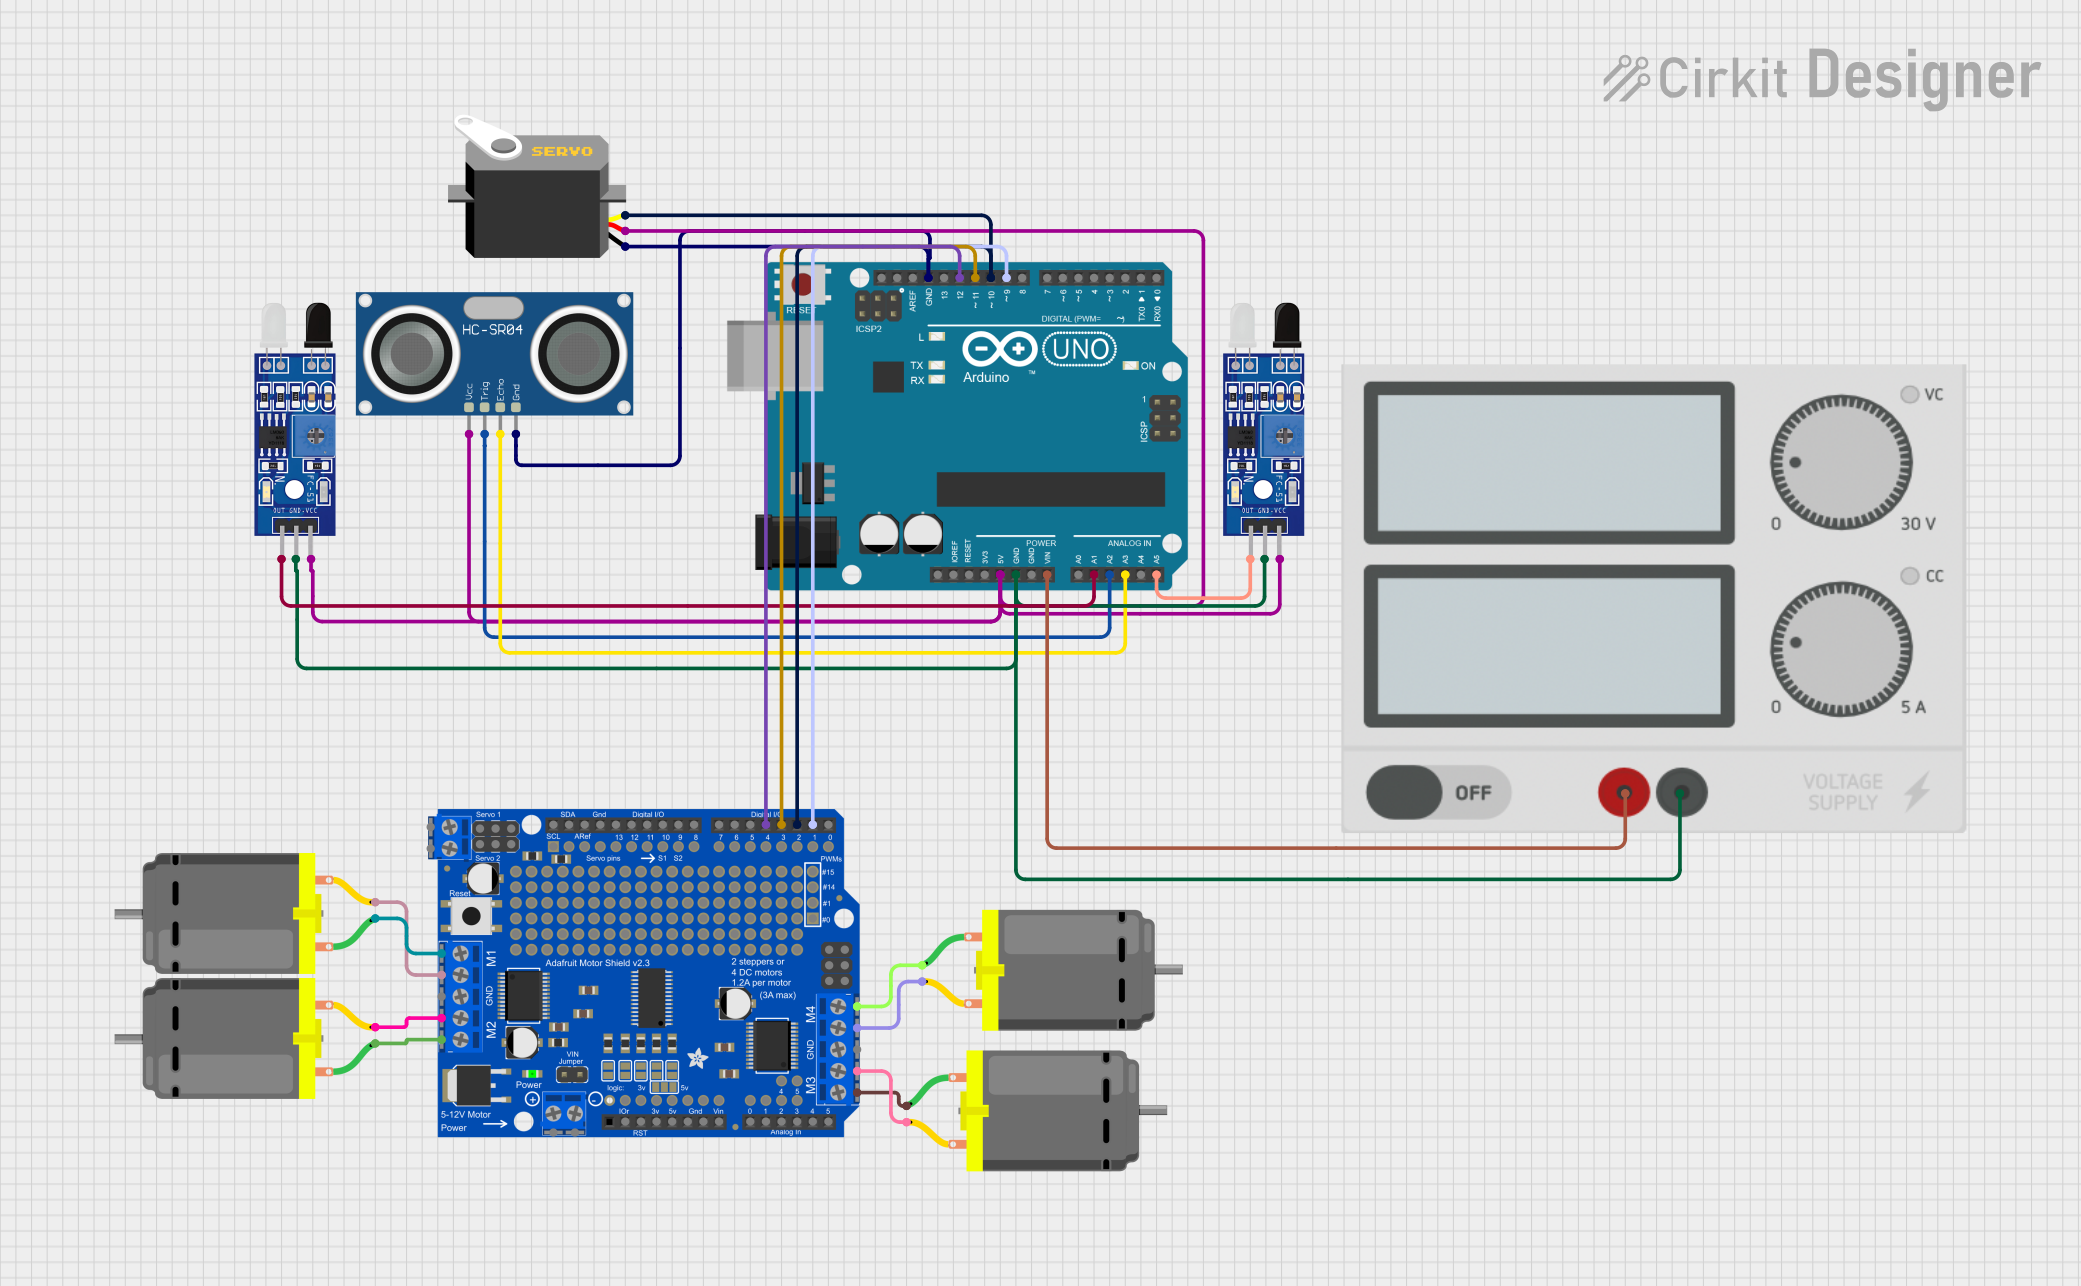
Explore Projects Built with DF Robot UV sensor v2
Common Applications and Use Cases
- UV index monitoring for weather stations
- Personal UV exposure measurement devices
- Environmental UV radiation data collection
- Scientific experiments involving UV light
- Outdoor sports equipment to warn about high UV levels
Technical Specifications
Key Technical Details
- Operating Voltage: 3.3V to 5V
- UV Detection Wavelength: 200nm to 370nm
- Analog Output Voltage: 0 to 1V (corresponding to 0 to 15 UV index)
- Response Time: < 0.5 seconds
- Operating Temperature: -20°C to +85°C
Pin Configuration and Descriptions
| Pin Number | Name | Description |
|---|---|---|
| 1 | VCC | Power supply (3.3V to 5V) |
| 2 | GND | Ground |
| 3 | OUT | Analog UV light intensity output voltage |
Usage Instructions
How to Use the Component in a Circuit
- Connect the VCC pin to a 3.3V or 5V power supply.
- Connect the GND pin to the ground of the power supply.
- Connect the OUT pin to an analog input pin on your microcontroller, such as an Arduino UNO.
Important Considerations and Best Practices
- Avoid exposing the sensor to direct sunlight for extended periods to prevent damage.
- Calibrate the sensor using a known UV light source for accurate measurements.
- Use a voltage divider or level shifter if interfacing with a microcontroller that operates at a different voltage level than the sensor.
- Keep the sensor away from high-temperature sources to avoid affecting its performance.
Example Code for Arduino UNO
// DF Robot UV Sensor v2 Example Code for Arduino UNO

const int uvSensorPin = A0; // Analog input pin connected to the sensor OUT pin

void setup() {
  Serial.begin(9600); // Initialize serial communication at 9600 baud rate
}

void loop() {
  int sensorValue = analogRead(uvSensorPin); // Read the analog value from sensor
  float voltage = sensorValue * (5.0 / 1023.0); // Convert to voltage
  float uvIndex = voltage * 15.0; // Convert voltage to UV index

  Serial.print("UV Index: ");
  Serial.println(uvIndex); // Print the UV index to the serial monitor

  delay(1000); // Wait for a second before reading the value again
}
Troubleshooting and FAQs
Common Issues Users Might Face
- Inaccurate Readings: Ensure the sensor is properly calibrated and not exposed to artificial UV sources that could skew the readings.
- No Output Voltage: Check the connections and ensure the VCC and GND pins are correctly connected to the power supply.
- Sensor Not Responding: Verify that the sensor is within the operating temperature range and not damaged by excessive exposure to UV light.
Solutions and Tips for Troubleshooting
- If the readings are unstable, add a capacitor between the VCC and GND near the sensor to stabilize the power supply.
- Use shielded cables for the OUT pin connection to minimize noise and interference in the analog signal.
- Regularly check and clean the sensor surface to ensure accurate measurements.
FAQs
Q: Can the sensor be used with a 3.3V system? A: Yes, the sensor can operate at 3.3V, but the output voltage range will be lower, affecting the UV index calculation.
Q: How do I calibrate the sensor? A: Use a reference UV light source with a known UV index to calibrate the sensor's output voltage to the corresponding UV index value.
Q: Is the sensor waterproof? A: No, the DF Robot UV Sensor v2 is not waterproof. Protect it from water and moisture to prevent damage.
Q: What is the sensor's lifespan? A: The lifespan of the sensor depends on the usage conditions, but it is generally designed for long-term use if operated within the specified temperature range and protected from excessive UV exposure.