How to Use Sensor Shield: Examples, Pinouts, and Specs
Introduction
A Sensor Shield is a circuit board designed to simplify the process of connecting various sensors to a microcontroller, such as an Arduino. It provides a convenient interface with multiple input/output (I/O) pins, power supply connections, and often includes features like built-in libraries or pin headers for seamless sensor integration. This component is widely used in prototyping, robotics, IoT projects, and educational applications due to its versatility and ease of use.
Explore Projects Built with Sensor Shield
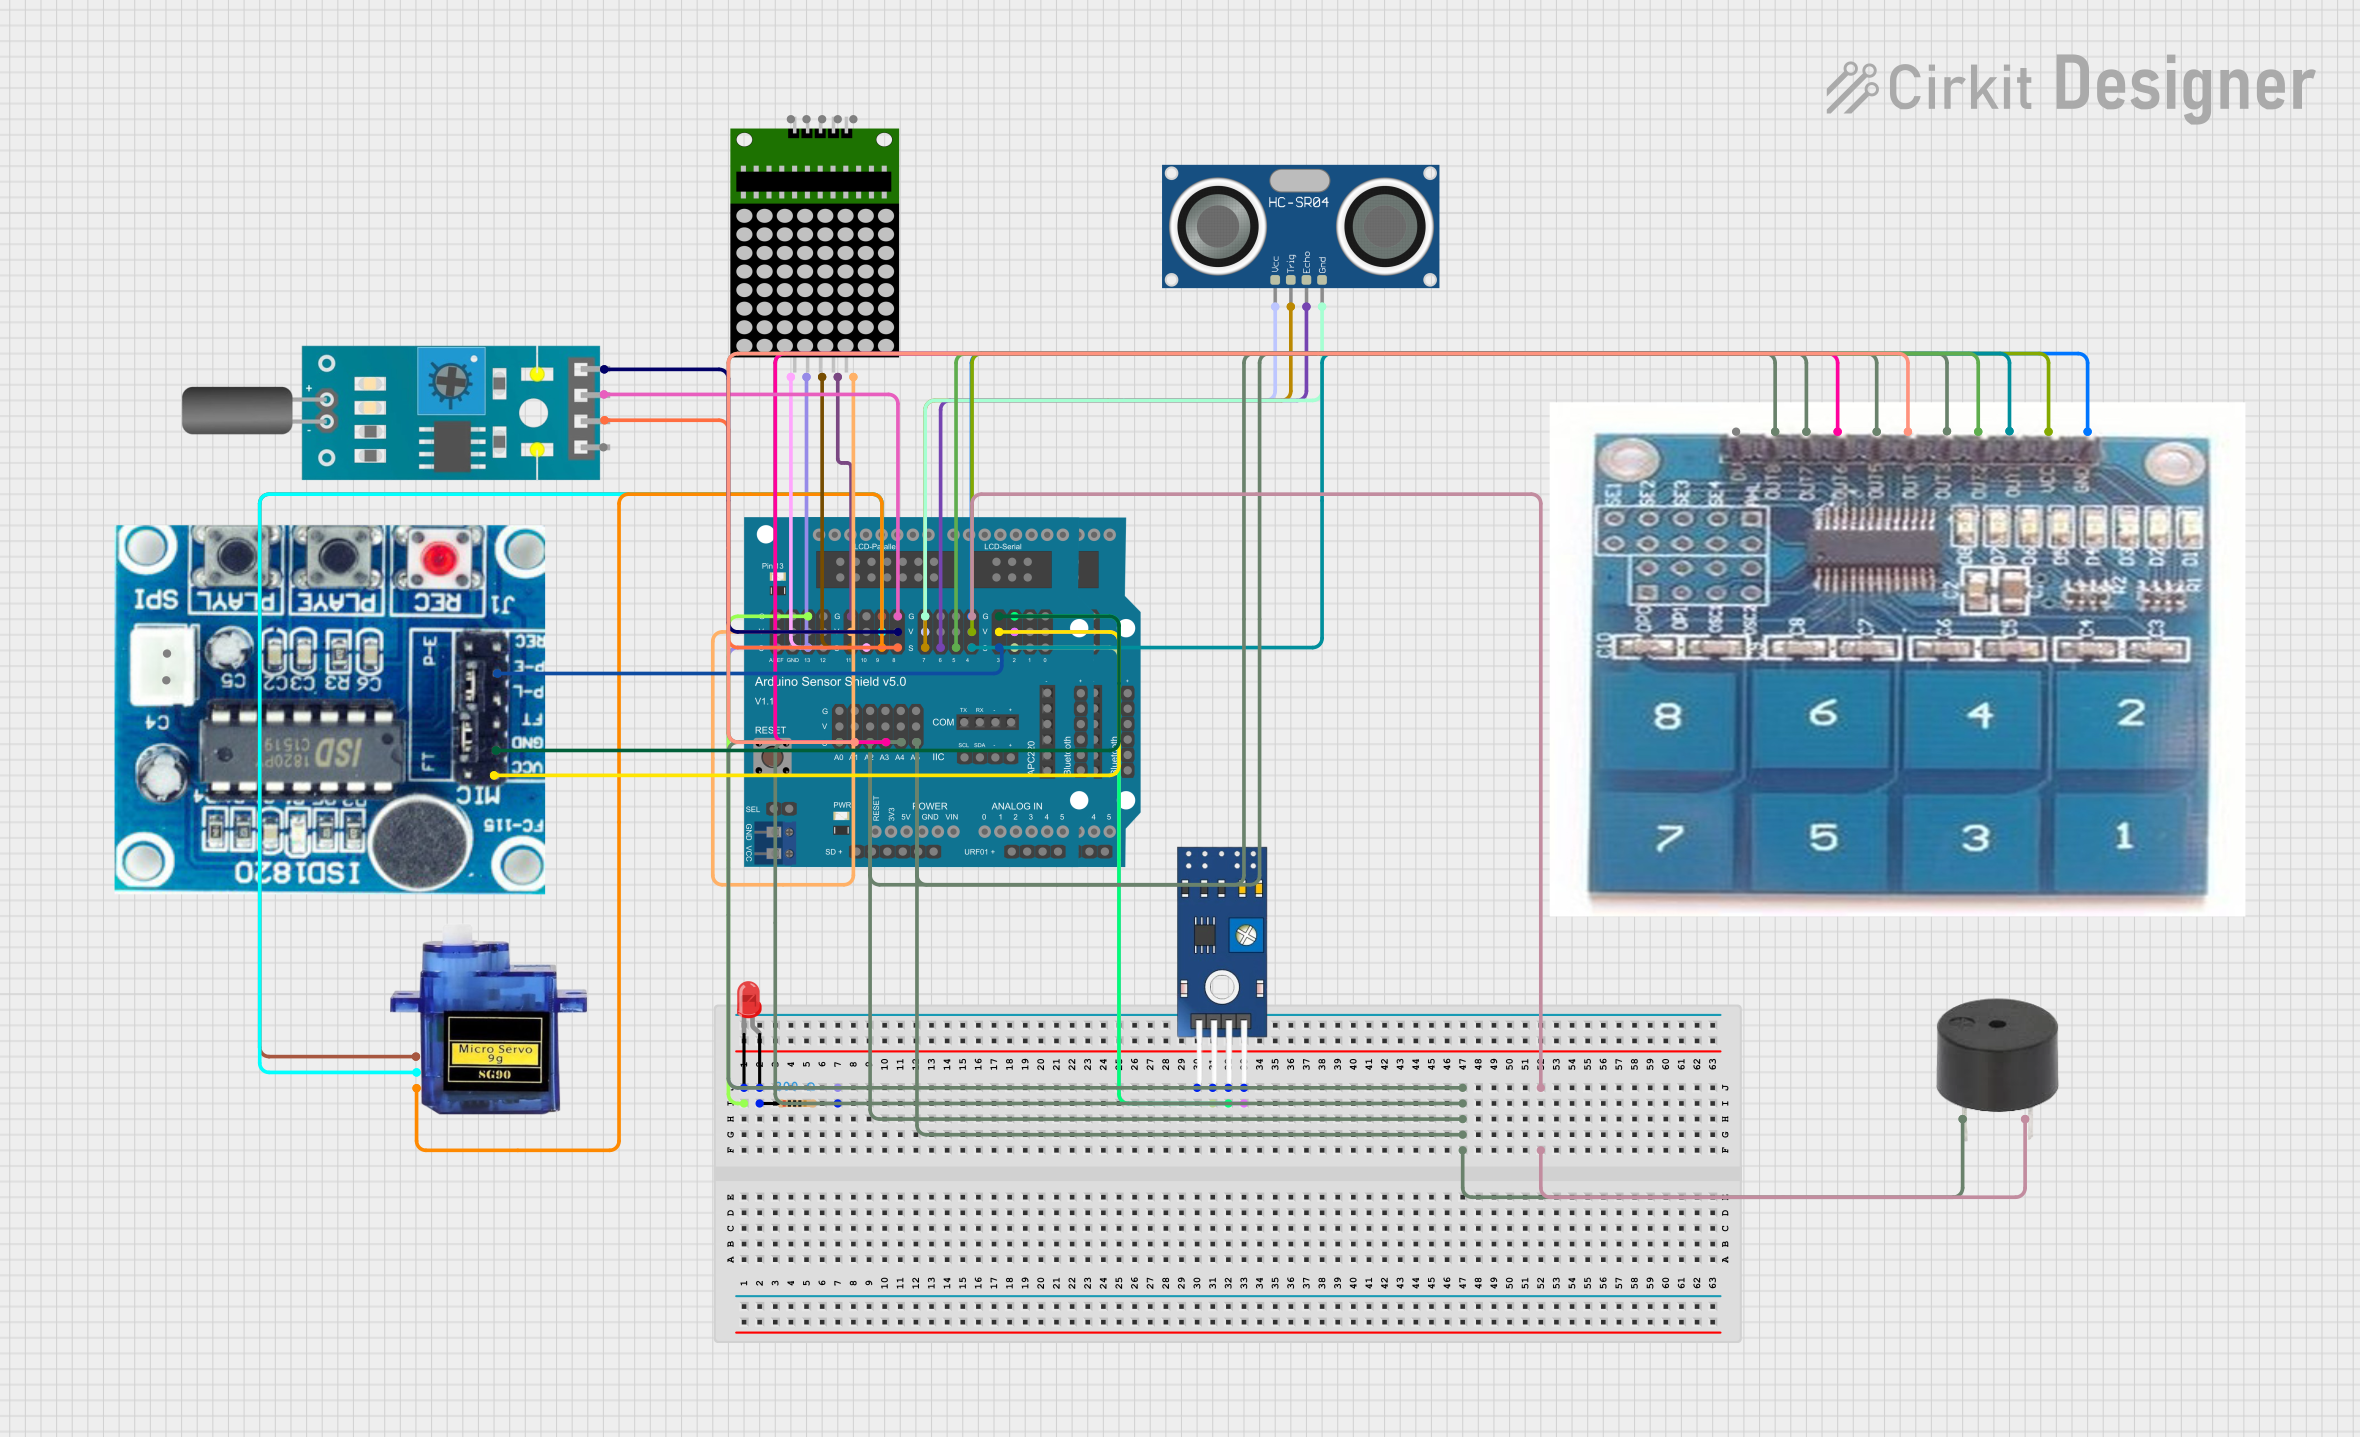


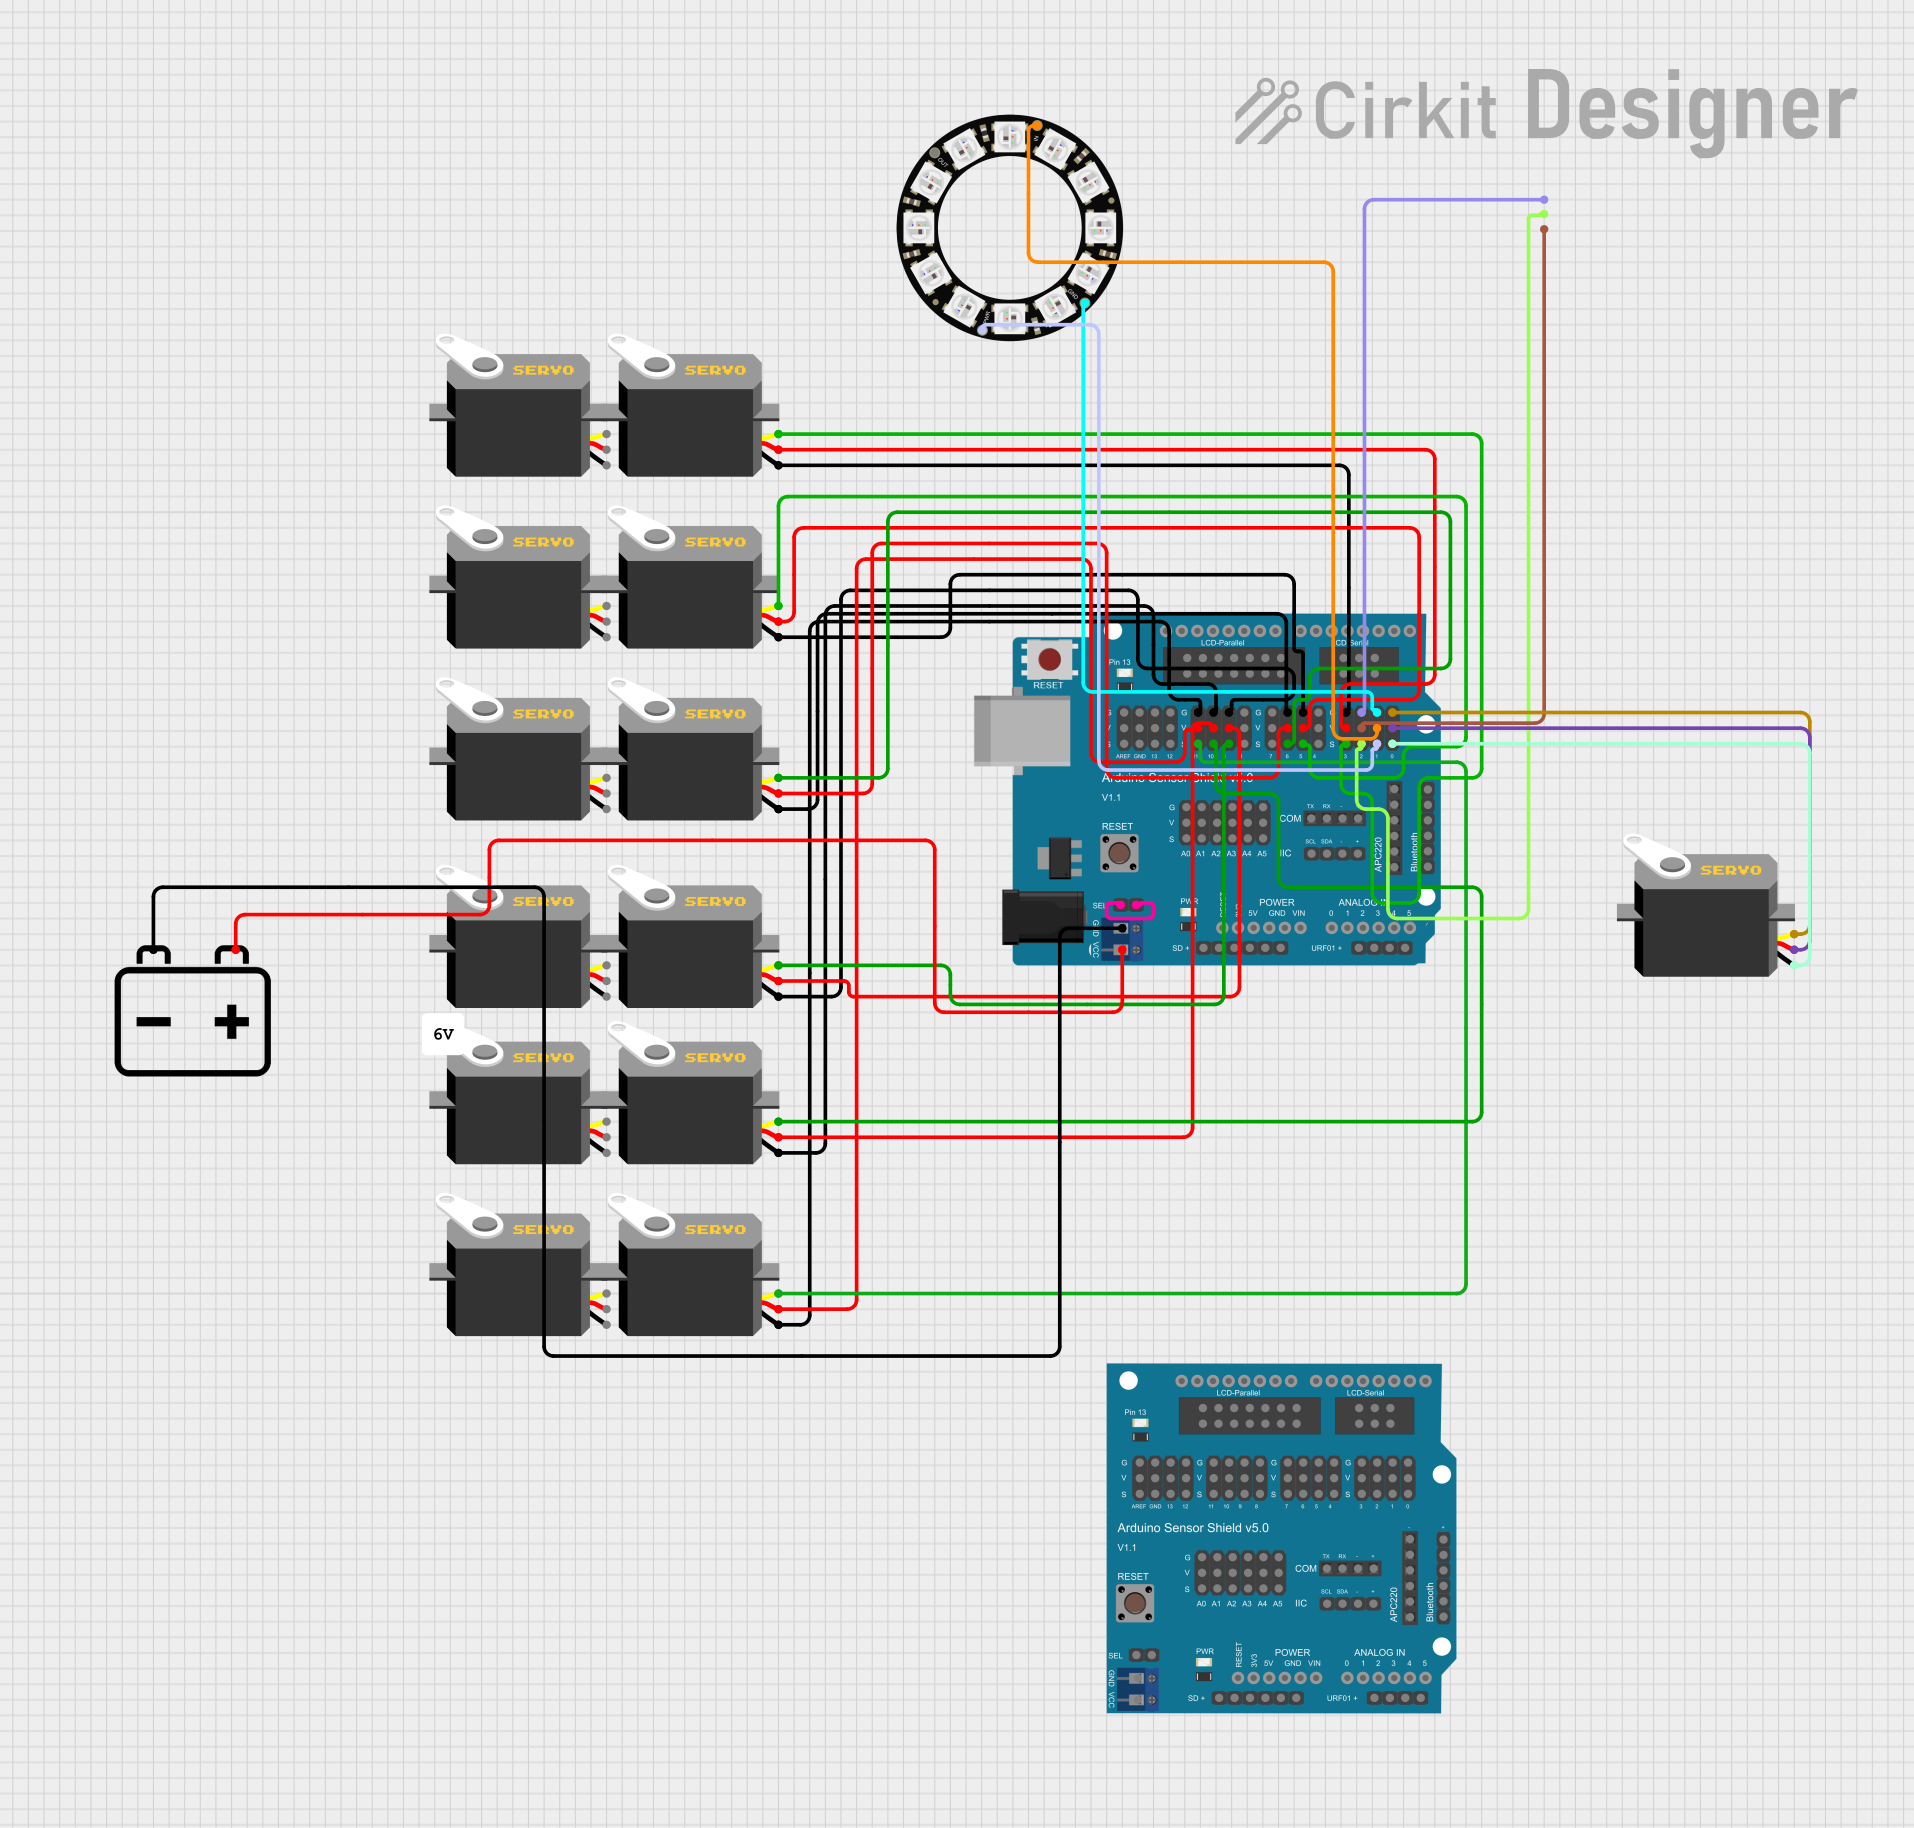
Explore Projects Built with Sensor Shield
Common Applications and Use Cases
- Robotics: Connecting multiple sensors for obstacle detection, line following, or environmental monitoring.
- IoT Projects: Integrating temperature, humidity, or motion sensors for smart home systems.
- Prototyping: Rapidly testing sensor functionality without complex wiring.
- Education: Teaching electronics and programming concepts with simplified hardware connections.
Technical Specifications
The Sensor Shield is compatible with microcontrollers like the Arduino UNO and provides a variety of I/O options for connecting sensors and actuators.
Key Technical Details
- Operating Voltage: 5V (from the Arduino or external power supply)
- I/O Pins: Digital and analog pins, matching the Arduino UNO layout
- Communication Protocols Supported: I2C, SPI, UART
- Power Supply Options: 5V and 3.3V outputs for sensors
- Additional Features: Servo motor headers, external power input, and reset button
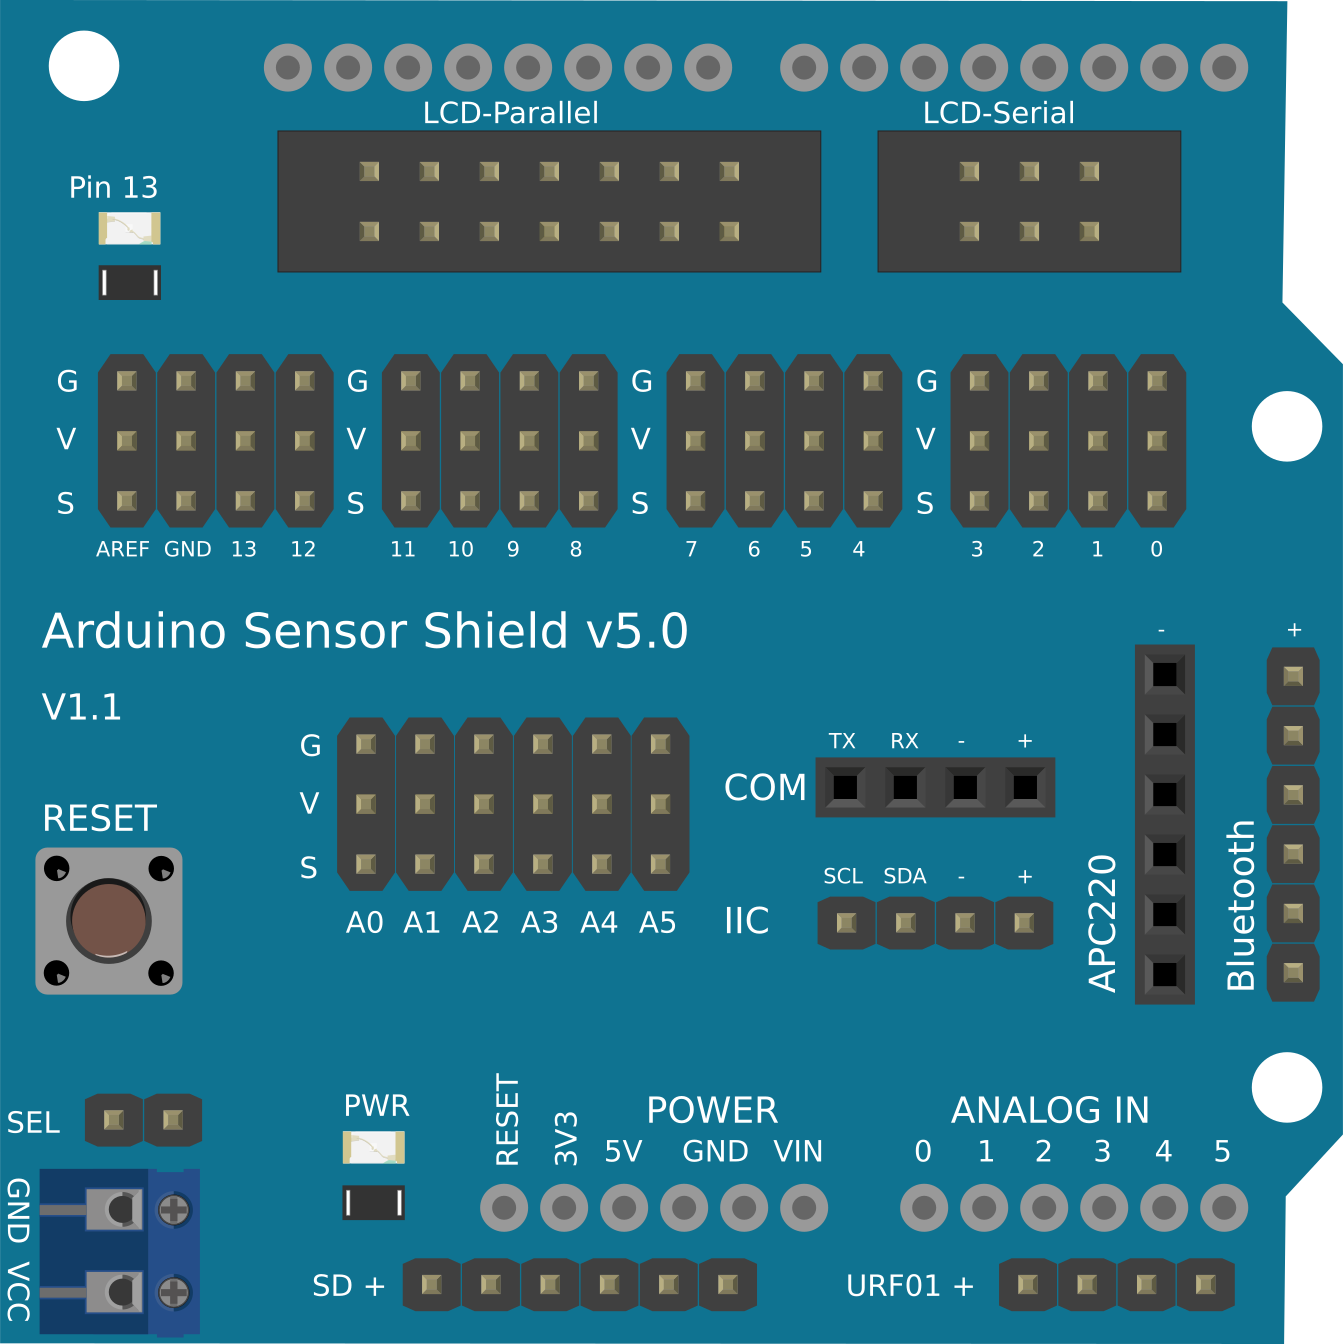
Pin Configuration and Descriptions
The Sensor Shield replicates the Arduino UNO pin layout while adding extra headers for easy sensor connections. Below is a table of the key pin configurations:
| Pin | Description |
|---|---|
| Digital Pins | D0-D13: Standard digital I/O pins for sensors, actuators, or communication. |
| Analog Pins | A0-A5: Analog input pins for sensors like potentiometers or temperature sensors. |
| I2C Pins | SDA (A4), SCL (A5): For I2C communication with compatible sensors. |
| SPI Pins | MOSI (D11), MISO (D12), SCK (D13): For SPI communication. |
| UART Pins | TX (D1), RX (D0): For serial communication. |
| Power Pins | 5V, 3.3V, GND: Power supply for sensors and external modules. |
| Servo Headers | 3-pin headers for directly connecting servo motors (Signal, VCC, GND). |
Usage Instructions
How to Use the Sensor Shield in a Circuit
Attach the Shield to the Microcontroller:
- Align the Sensor Shield with the Arduino UNO and gently press it into place.
- Ensure all pins are properly connected.
Connect Sensors:
- Use the labeled headers to connect sensors to the appropriate pins (e.g., analog sensors to A0-A5, digital sensors to D2-D13).
- For I2C or SPI sensors, connect to the corresponding communication pins.
Power the Shield:
- The Sensor Shield can draw power from the Arduino UNO or an external power source.
- If using high-power devices like servo motors, connect an external power supply to the shield's power input.
Upload Code to the Microcontroller:
- Write or upload a program to the Arduino that reads data from the connected sensors.
- Use the Arduino IDE to compile and upload the code.
Important Considerations and Best Practices
- Power Management: Ensure the total current draw of connected sensors and actuators does not exceed the Arduino's or external power supply's limits.
- Pin Conflicts: Avoid using the same pins for multiple sensors or devices unless explicitly supported.
- Secure Connections: Use jumper wires or connectors to ensure stable and reliable connections.
- Library Support: Many sensors require specific libraries. Install the necessary libraries in the Arduino IDE before use.
Example Code for Arduino UNO
Below is an example of how to use the Sensor Shield to read data from an analog temperature sensor connected to pin A0:
// Example: Reading data from an analog temperature sensor on A0

const int tempSensorPin = A0; // Define the analog pin connected to the sensor

void setup() {
  Serial.begin(9600); // Initialize serial communication at 9600 baud
  pinMode(tempSensorPin, INPUT); // Set the sensor pin as input
}

void loop() {
  int sensorValue = analogRead(tempSensorPin); // Read the analog value
  float voltage = sensorValue * (5.0 / 1023.0); // Convert to voltage (5V reference)
  float temperature = (voltage - 0.5) * 100.0; // Convert voltage to temperature (Celsius)

  // Print the temperature to the Serial Monitor
  Serial.print("Temperature: ");
  Serial.print(temperature);
  Serial.println(" °C");

  delay(1000); // Wait 1 second before the next reading
}
Troubleshooting and FAQs
Common Issues and Solutions
Sensors Not Responding:
- Cause: Incorrect wiring or loose connections.
- Solution: Double-check the wiring and ensure all connections are secure.
Power Issues:
- Cause: Insufficient power supply for connected devices.
- Solution: Use an external power source if the Arduino's power output is insufficient.
Pin Conflicts:
- Cause: Multiple devices using the same pin.
- Solution: Reassign pins in the code or use a multiplexer if necessary.
Communication Errors (I2C/SPI):
- Cause: Incorrect wiring or missing pull-up resistors for I2C.
- Solution: Verify the wiring and add pull-up resistors (typically 4.7kΩ) if needed.
FAQs
Q: Can I use the Sensor Shield with microcontrollers other than the Arduino UNO?
A: The Sensor Shield is primarily designed for the Arduino UNO, but it may be compatible with other Arduino boards that share the same pin layout.
Q: How many sensors can I connect to the Sensor Shield?
A: The number of sensors depends on the available I/O pins and the power requirements of the sensors.
Q: Do I need additional libraries for the Sensor Shield?
A: The Sensor Shield itself does not require a library, but many sensors connected to it may need specific libraries. Check the sensor's documentation for details.
Q: Can I connect servo motors directly to the Sensor Shield?
A: Yes, the Sensor Shield includes dedicated servo headers for easy connection. Ensure the power supply is sufficient for the servos.