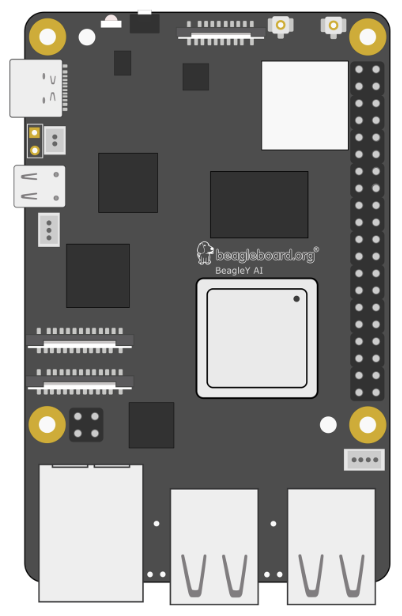
The BeagleY-AI, developed by BeagleBoard, is an advanced AI-focused single-board computer (SBC) designed for edge computing applications. It features a powerful processor, integrated AI accelerators, and extensive support for sensors and peripherals. This makes it an excellent choice for robotics, IoT, and machine learning projects. The BeagleY-AI is engineered to deliver high performance while maintaining energy efficiency, making it suitable for both prototyping and deployment in production environments.
Explore Projects Built with BeagleY-AI
Use Cirkit Designer to design, explore, and prototype these projects online. Some projects support real-time simulation. Click "Open Project" to start designing instantly!
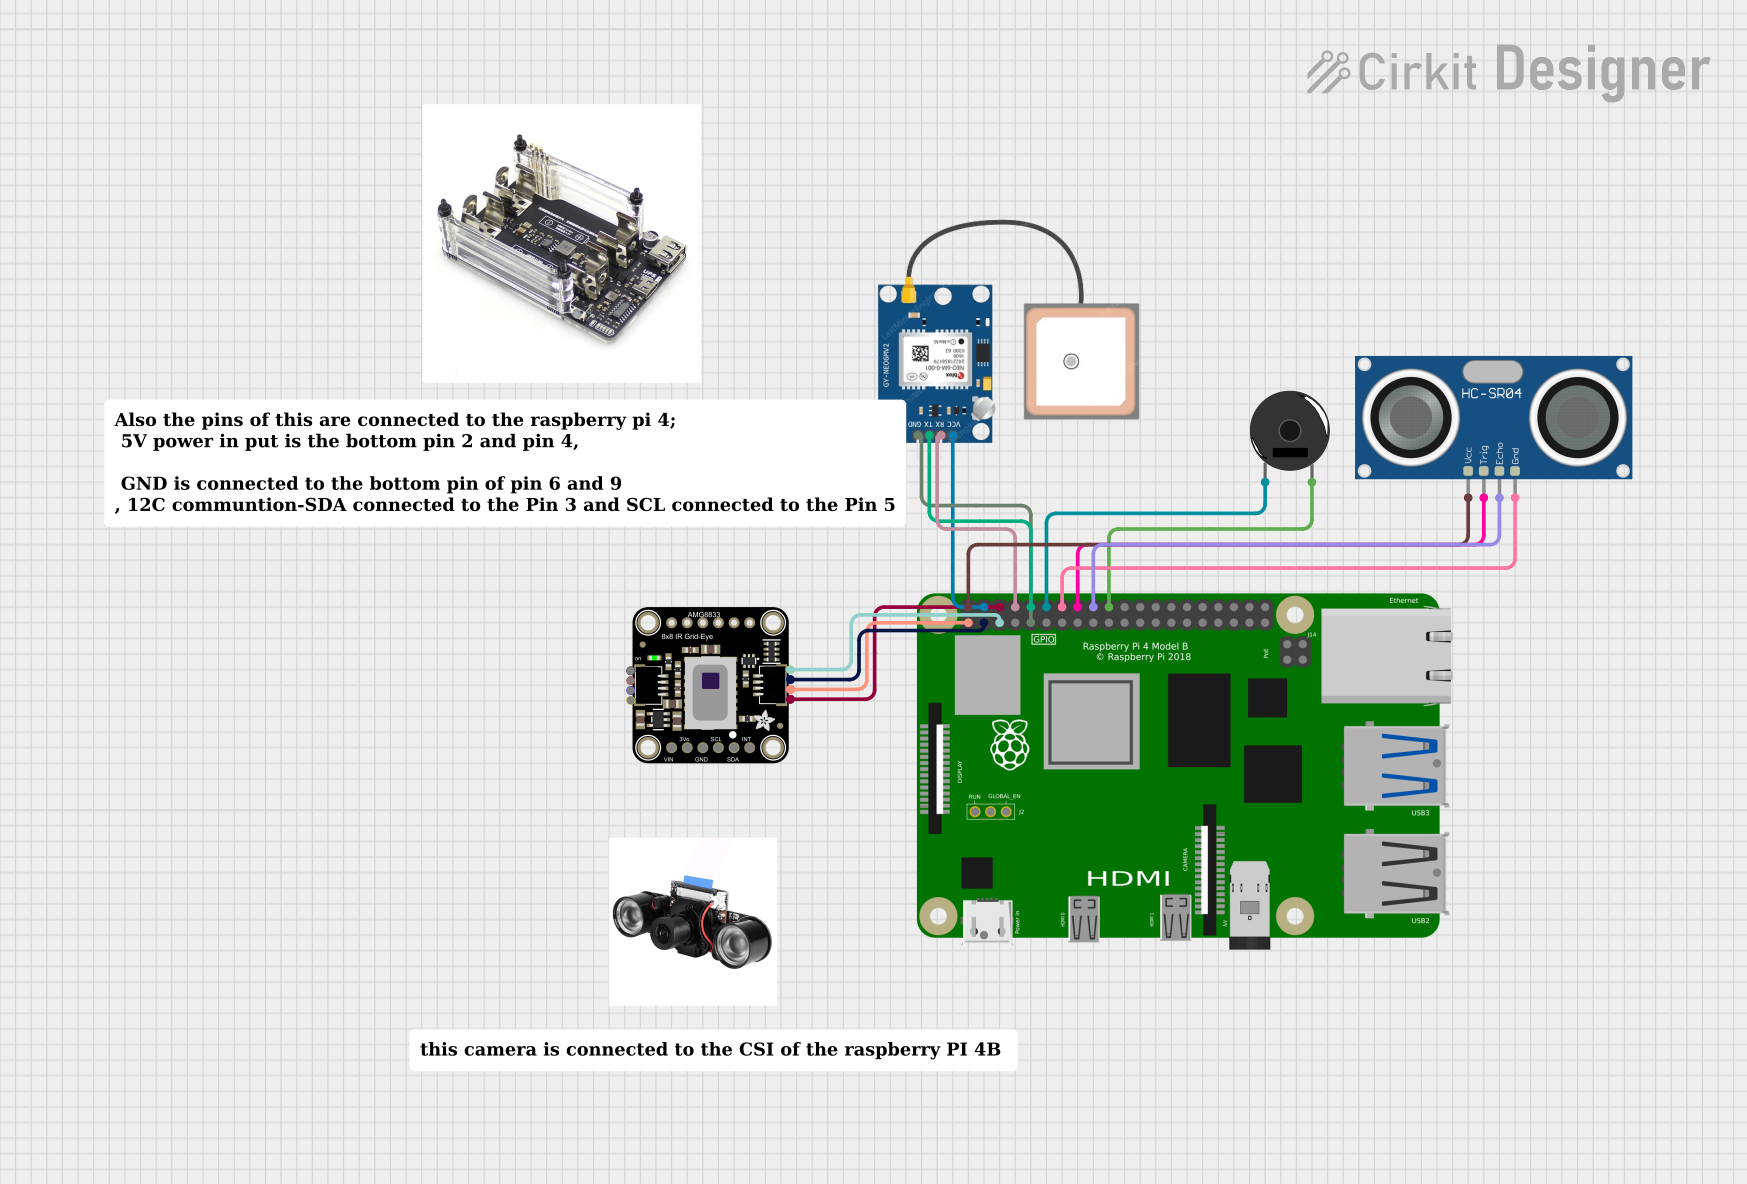
This circuit features a Raspberry Pi 4B as the central processing unit, interfaced with an Adafruit AMG8833 infrared thermal camera and a GPS NEO 6M module for location tracking. The Raspberry Pi also controls a Piezo Buzzer for audio feedback and an HC-SR04 Ultrasonic Sensor for distance measurement. The circuit is likely designed for applications requiring environmental sensing, location tracking, and proximity detection, with audible alerts provided by the buzzer.
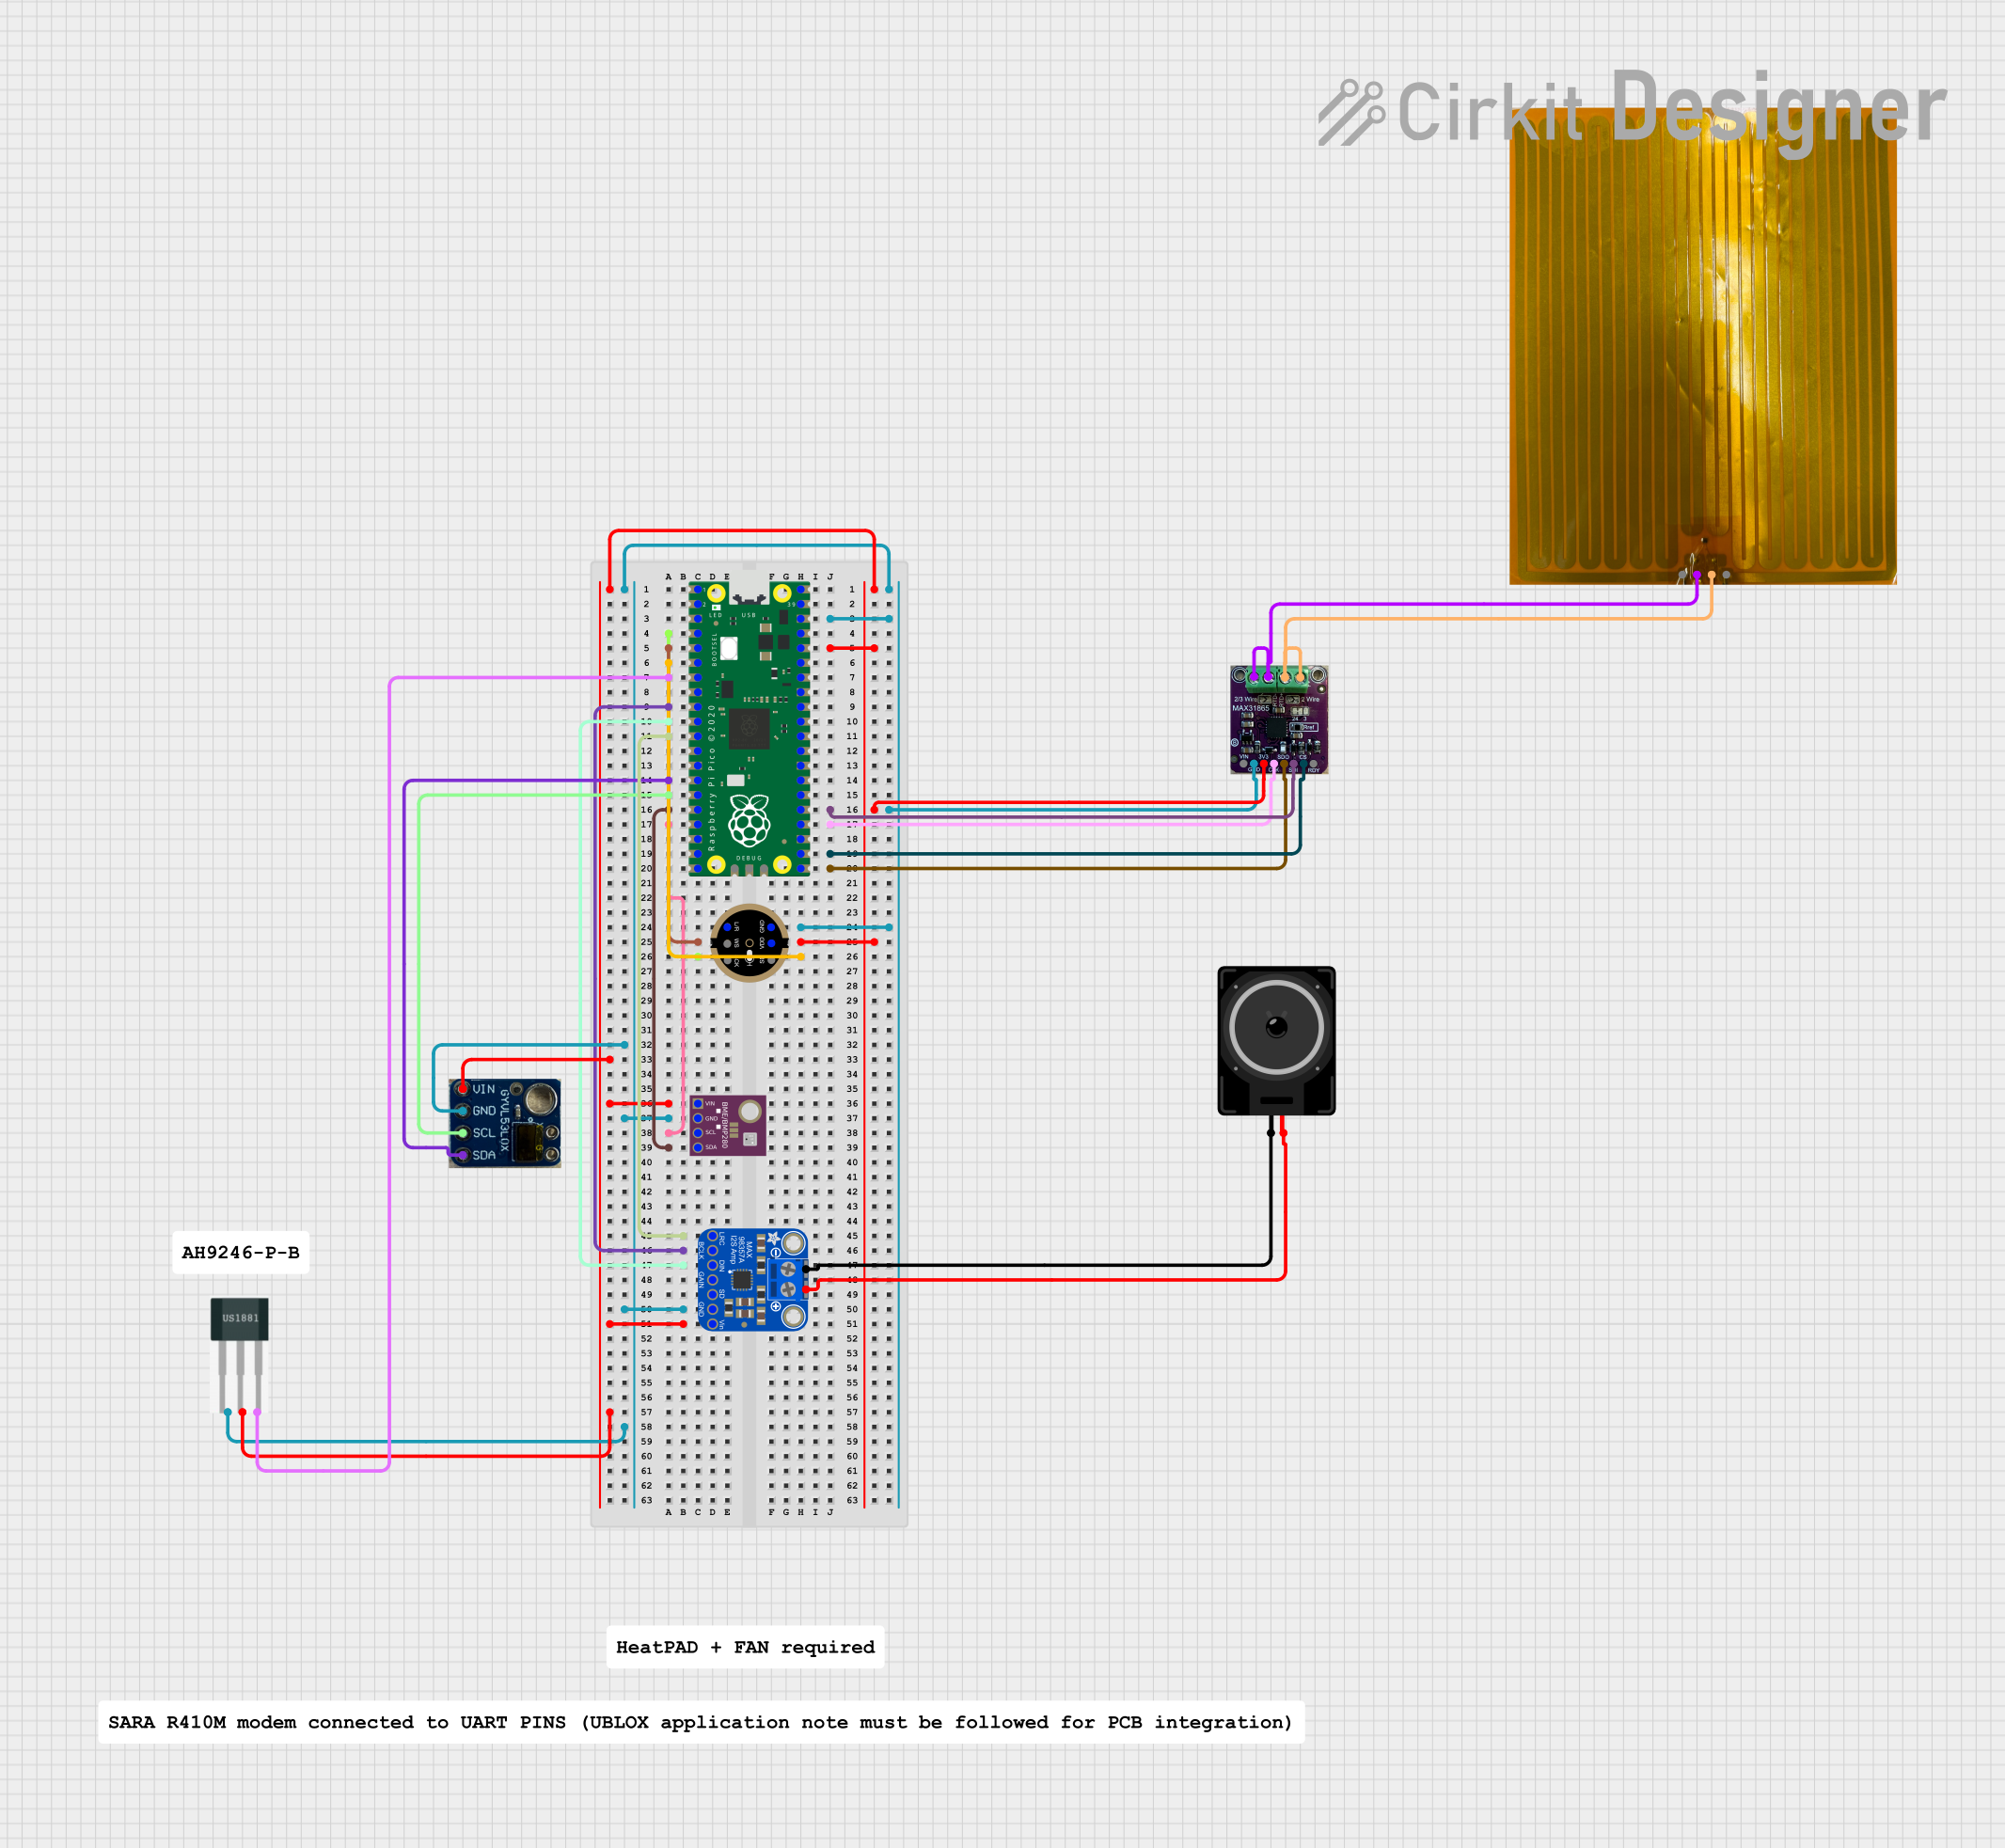
This circuit features a Raspberry Pi Pico microcontroller interfaced with various sensors and modules, including a BME/BMP280 for environmental sensing, an INMP441 microphone, a MAX31865 RTD-to-digital converter, a VL53L0X distance sensor, and a Hall sensor. Additionally, it includes an Adafruit MAX98357A DAC connected to a loudspeaker for audio output. The microcontroller manages data acquisition and processing from these sensors and controls the audio output.
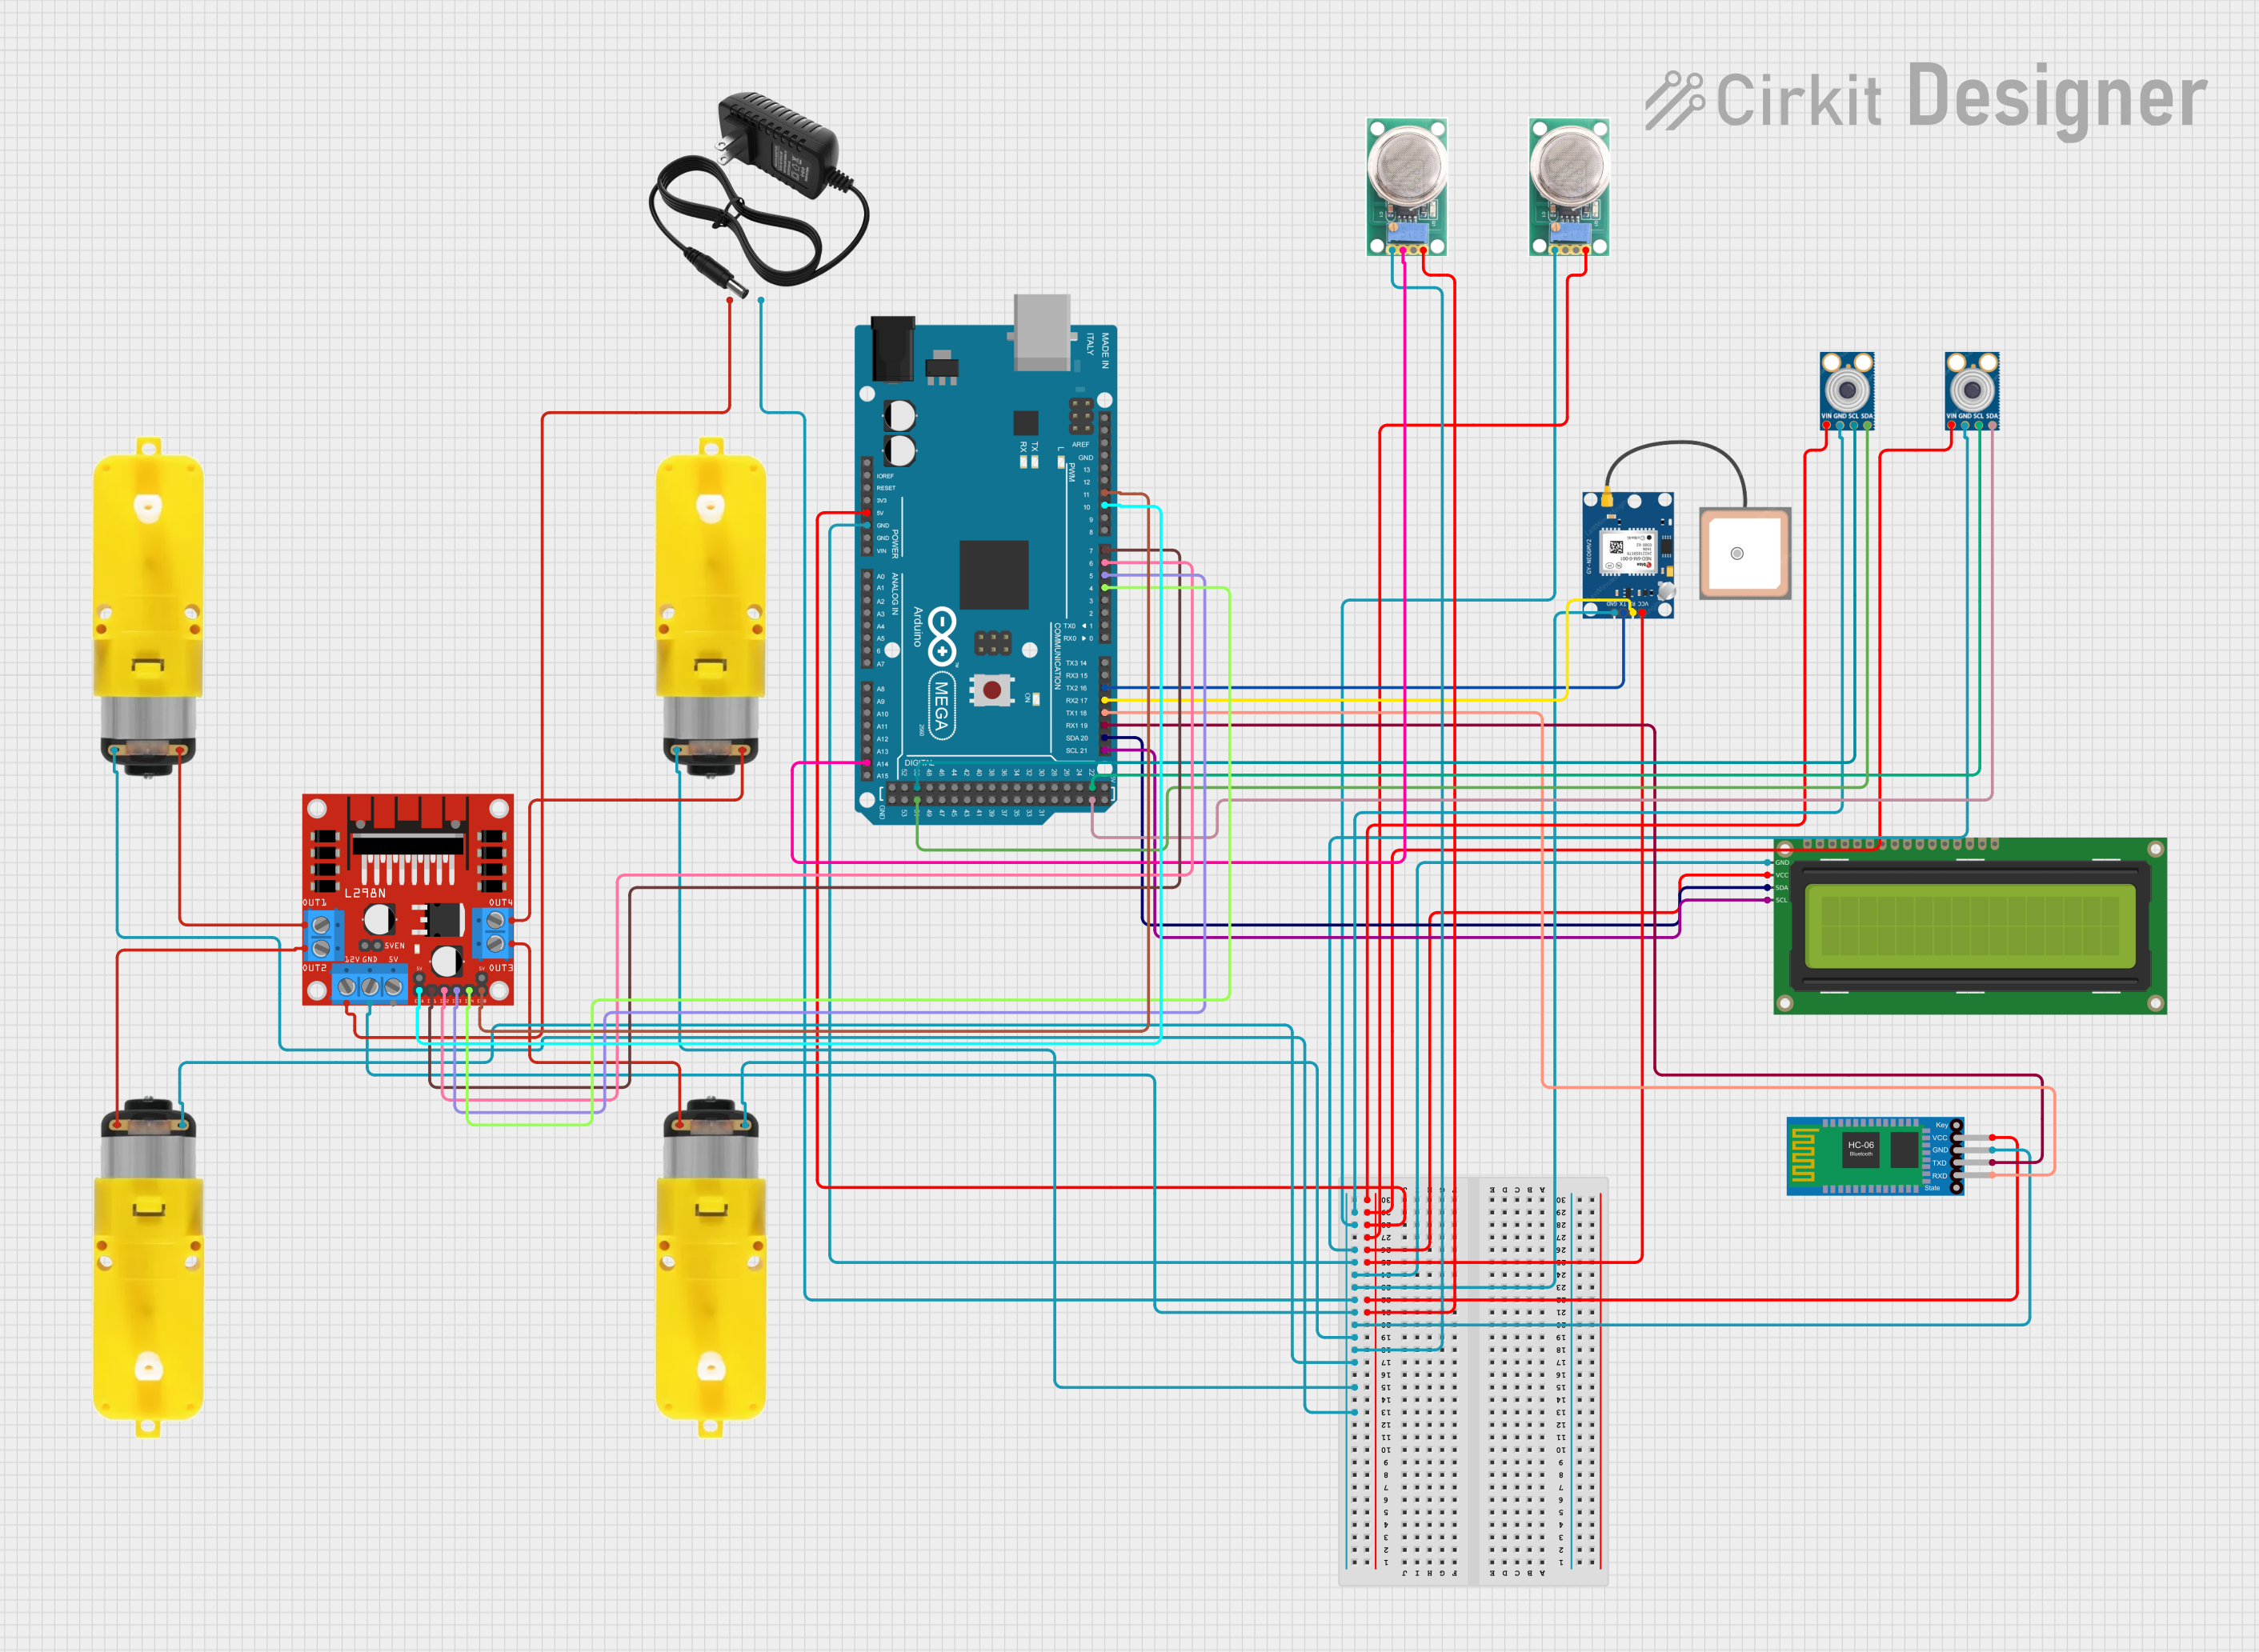
This circuit is a robotic system controlled by an Arduino Mega 2560, which uses multiple sensors including temperature sensors (MLX90614), gas sensors (MQ-136), a GPS module, and a Bluetooth module to navigate and detect environmental conditions. The system drives motors via an L298N motor driver and displays information on a 16x2 I2C LCD, with the ability to receive commands via Bluetooth.
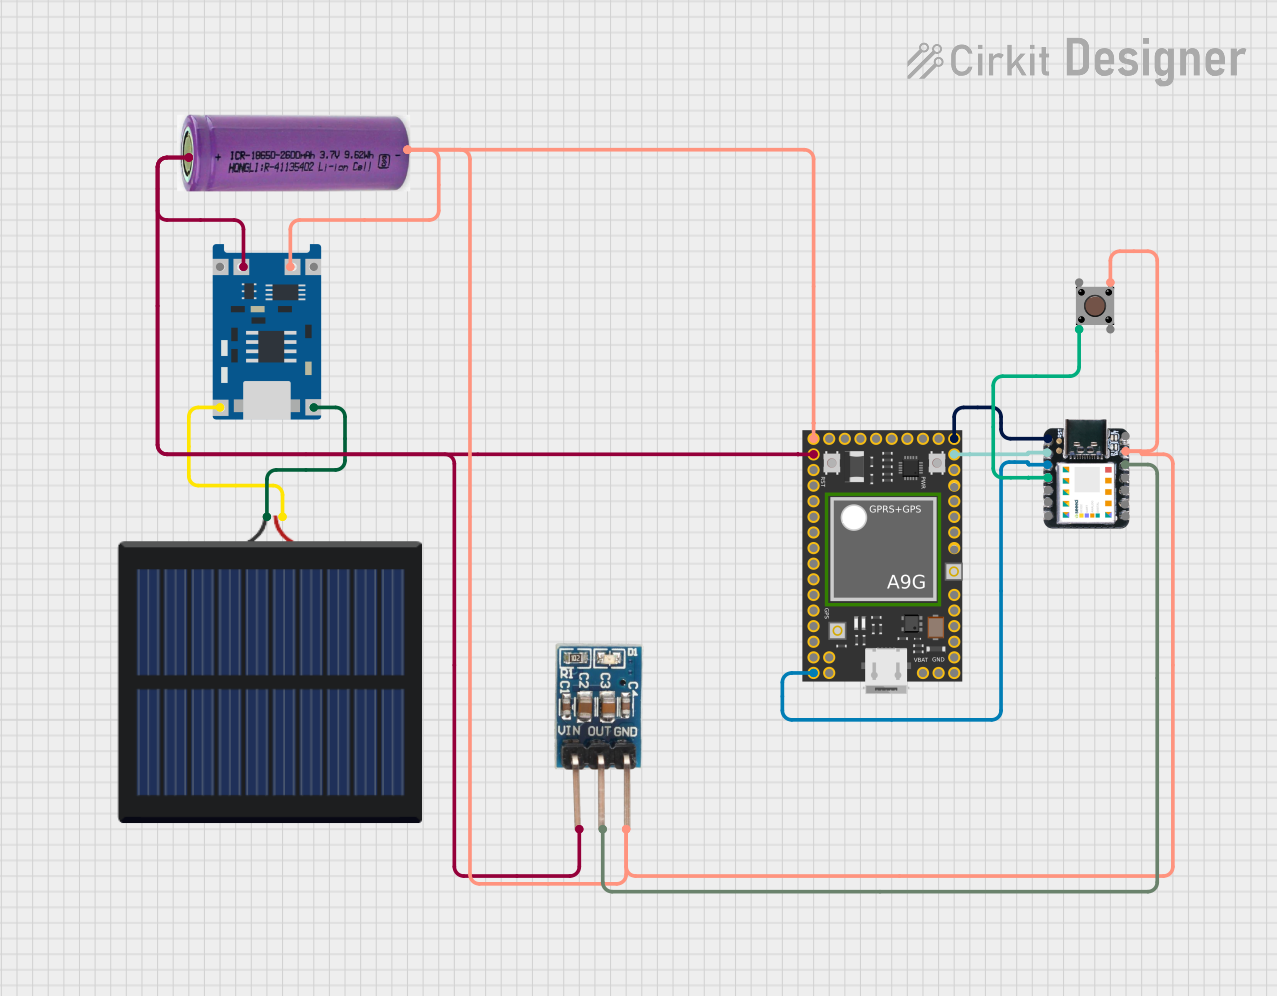
This circuit features an Ai Thinker A9G development board for GSM/GPRS and GPS/BDS connectivity, interfaced with a Seeeduino XIAO microcontroller for control and data processing. A solar cell, coupled with a TP4056 charging module, charges a 3.3V battery, which powers the system through a 3.3V regulator ensuring stable operation. The circuit likely serves for remote data communication and location tracking, with the capability to be powered by renewable energy and interfaced with additional sensors or input devices via the Seeeduino XIAO.
Robotics: Real-time object detection, path planning, and autonomous navigation.
IoT (Internet of Things): Smart home devices, industrial automation, and environmental monitoring.
Machine Learning: On-device inference for image recognition, natural language processing, and predictive analytics.
Edge Computing: Low-latency AI processing at the edge, reducing reliance on cloud services.
Computer Vision: Applications such as facial recognition, gesture control, and video analytics.
Technical Specifications
Key Technical Details
Specification
Details
Processor
Quad-core ARM Cortex-A72 @ 1.8 GHz
AI Accelerator
Dual-core AI processor with 4 TOPS (Tera Operations Per Second)
RAM
4 GB LPDDR4
Storage
16 GB eMMC, expandable via microSD card
Connectivity
Gigabit Ethernet, Wi-Fi 802.11ac, Bluetooth 5.0
USB Ports
2 x USB 3.0, 1 x USB Type-C (power and data)
GPIO Pins
40-pin header (compatible with Raspberry Pi HATs)
Video Output
HDMI 2.0 (4K @ 60 Hz)
Power Input
5V/3A via USB Type-C
Operating System Support
Linux (Debian-based distributions), Android
Dimensions
85 mm x 56 mm
Weight
50 grams
Pin Configuration and Descriptions
The BeagleY-AI features a 40-pin GPIO header, which is compatible with Raspberry Pi HATs. Below is the pinout description:
Pin Number
Pin Name
Function
Voltage Level
1
3.3V
Power Supply
3.3V
2
5V
Power Supply
5V
3
GPIO2 (I2C1 SDA)
General Purpose I/O, I2C Data
3.3V
4
5V
Power Supply
5V
5
GPIO3 (I2C1 SCL)
General Purpose I/O, I2C Clock
3.3V
6
GND
Ground
0V
7
GPIO4
General Purpose I/O
3.3V
8
GPIO14 (UART TX)
UART Transmit
3.3V
9
GND
Ground
0V
10
GPIO15 (UART RX)
UART Receive
3.3V
...
...
...
...
For the full pinout, refer to the official BeagleBoard documentation.
Usage Instructions
How to Use the BeagleY-AI in a Circuit
Powering the Board: Connect a 5V/3A power supply to the USB Type-C port. Ensure the power supply is stable to avoid damage.
Connecting Peripherals: Use the USB 3.0 ports for peripherals like keyboards, mice, or external storage. The HDMI port can be used to connect a display.
GPIO Usage: The 40-pin GPIO header allows you to interface with sensors, actuators, and other devices. Ensure proper voltage levels (3.3V) to avoid damaging the board.
AI Applications: Install AI frameworks like TensorFlow Lite or PyTorch to leverage the onboard AI accelerators for machine learning tasks.
Networking: Use the onboard Wi-Fi or Ethernet for internet connectivity. Bluetooth can be used for wireless communication with other devices.
Important Considerations and Best Practices
Cooling: The BeagleY-AI can get warm during intensive tasks. Use a heatsink or fan for better thermal management.
Static Protection: Handle the board with care to avoid electrostatic discharge (ESD) damage.
Software Updates: Regularly update the operating system and firmware to ensure optimal performance and security.
GPIO Voltage Levels: Always check the voltage levels of connected devices to prevent damage to the GPIO pins.
Example: Using BeagleY-AI with an Arduino UNO
The BeagleY-AI can communicate with an Arduino UNO via UART. Below is an example Python script to send data from the BeagleY-AI to the Arduino:
import serial
import time

# Initialize serial communication with Arduino
# Replace '/dev/ttyUSB0' with the correct port for your setup
arduino = serial.Serial('/dev/ttyUSB0', 9600, timeout=1)
time.sleep(2)  # Wait for the connection to initialize

# Send data to Arduino
try:
    while True:
        message = "Hello from BeagleY-AI!"
        arduino.write(message.encode())  # Send message as bytes
        print(f"Sent: {message}")
        time.sleep(1)  # Wait 1 second before sending the next message
except KeyboardInterrupt:
    print("Exiting program.")
finally:
    arduino.close()  # Close the serial connection
Note: Ensure the Arduino is configured to receive serial data at 9600 baud.
Troubleshooting and FAQs
Common Issues and Solutions
Board Not Powering On:
Cause: Insufficient power supply.
Solution: Use a 5V/3A power adapter and ensure the USB Type-C cable is of good quality.
Overheating:
Cause: Prolonged high-performance tasks without proper cooling.
Solution: Attach a heatsink or fan to the board.
No Display Output:
Cause: Incorrect HDMI connection or unsupported resolution.
Solution: Verify the HDMI cable and ensure the display supports 4K @ 60 Hz.
GPIO Not Responding:
Cause: Incorrect voltage levels or misconfigured pins.
Solution: Check the GPIO pinout and ensure connected devices operate at 3.3V.
Wi-Fi Not Connecting:
Cause: Incorrect network credentials or weak signal.
Solution: Double-check the Wi-Fi credentials and move closer to the router.
FAQs
Q: Can I run TensorFlow on the BeagleY-AI?
A: Yes, TensorFlow Lite is supported and optimized for the onboard AI accelerators.
Q: Is the BeagleY-AI compatible with Raspberry Pi HATs?
A: Yes, the 40-pin GPIO header is designed to be compatible with Raspberry Pi HATs.
Q: What operating systems are supported?
A: The BeagleY-AI supports Linux (Debian-based distributions) and Android.
Q: How do I update the firmware?
A: Firmware updates can be applied via the official BeagleBoard website. Follow the provided instructions for your specific operating system.
Q: Can I power the board using a battery?
A: Yes, as long as the battery provides a stable 5V/3A output via USB Type-C.
This concludes the documentation for the BeagleY-AI. For further assistance, refer to the official BeagleBoard resources or community forums.

 Open Project in Cirkit Designer