How to Use Adafruit LTR390 UV Light Sensor: Examples, Pinouts, and Specs

Introduction
The Adafruit LTR390 UV Light Sensor is a precision sensor module capable of detecting ultraviolet (UV) light and ambient light. It provides accurate UV index readings, which are essential for monitoring exposure to ultraviolet radiation. This sensor is commonly used in applications such as UV index monitoring, UV sterilization systems, environmental sensing, and wearable devices that track UV exposure.
Explore Projects Built with Adafruit LTR390 UV Light Sensor
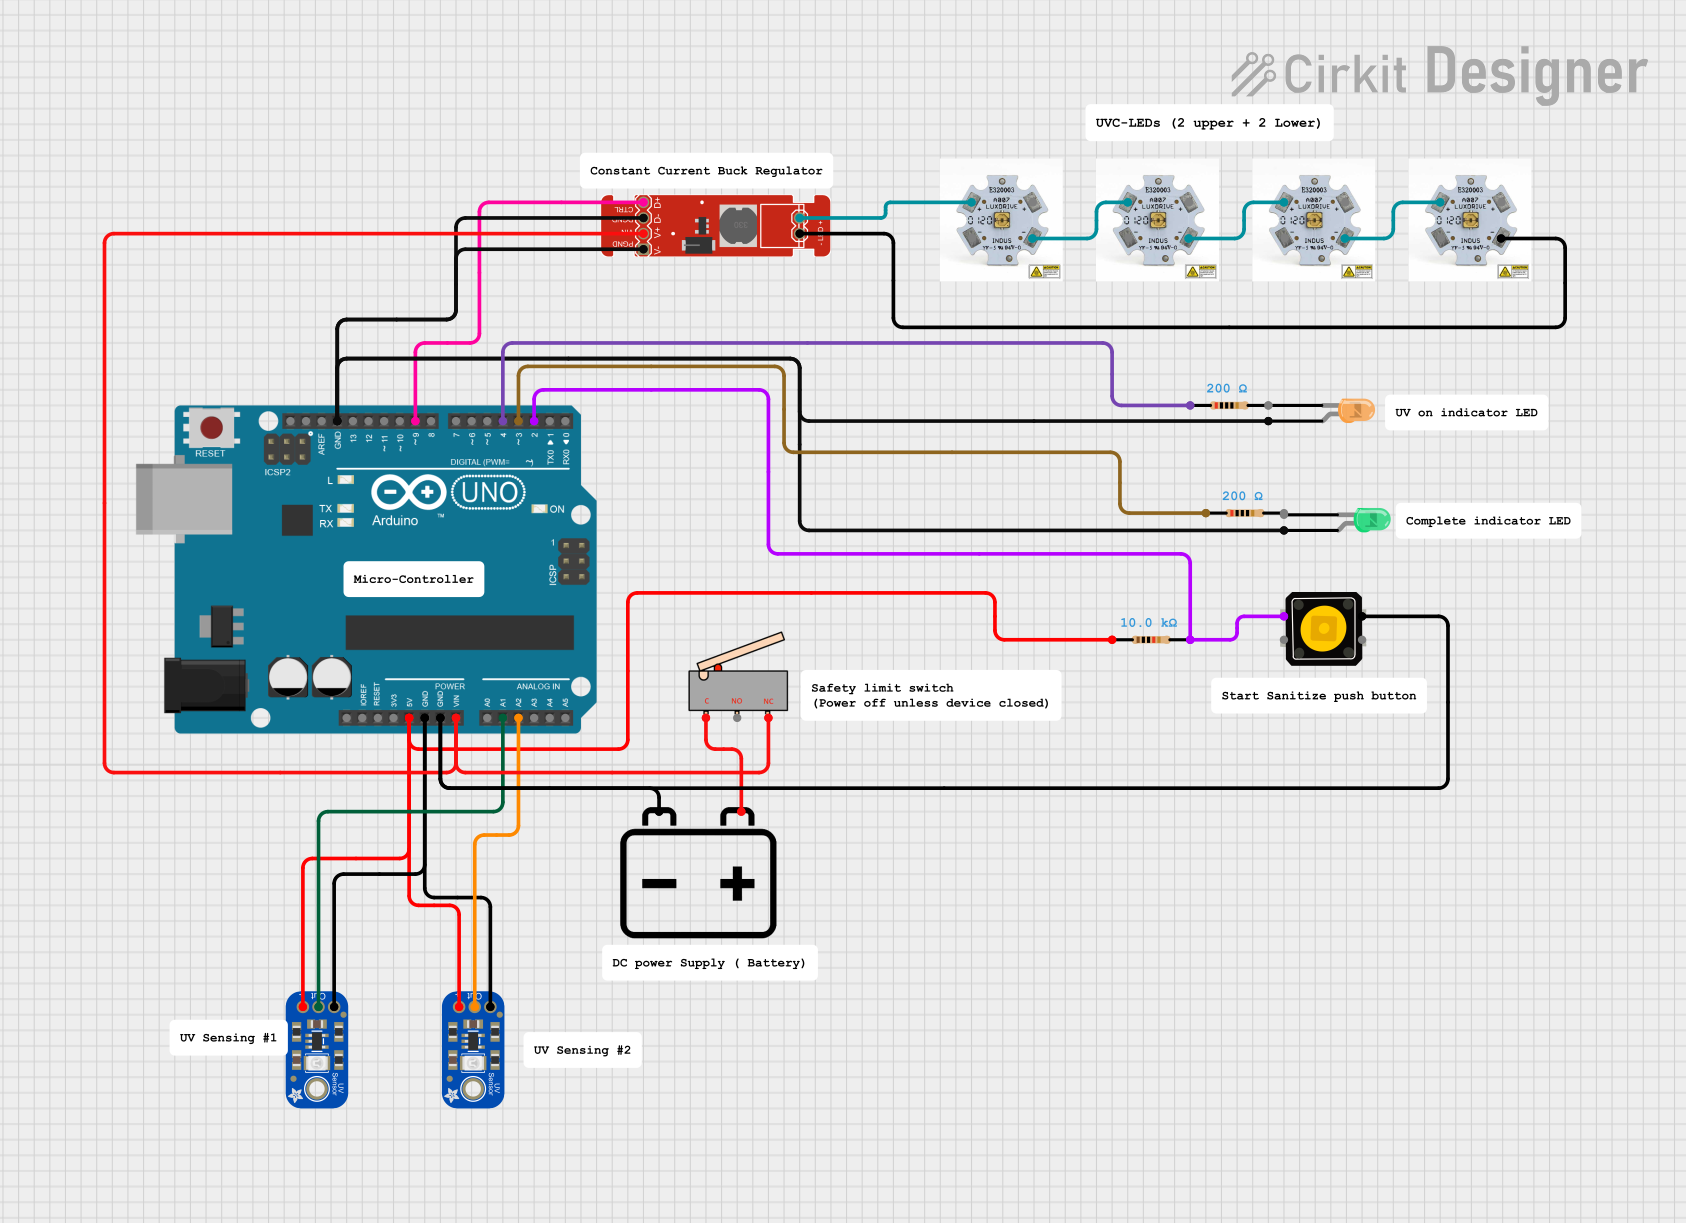
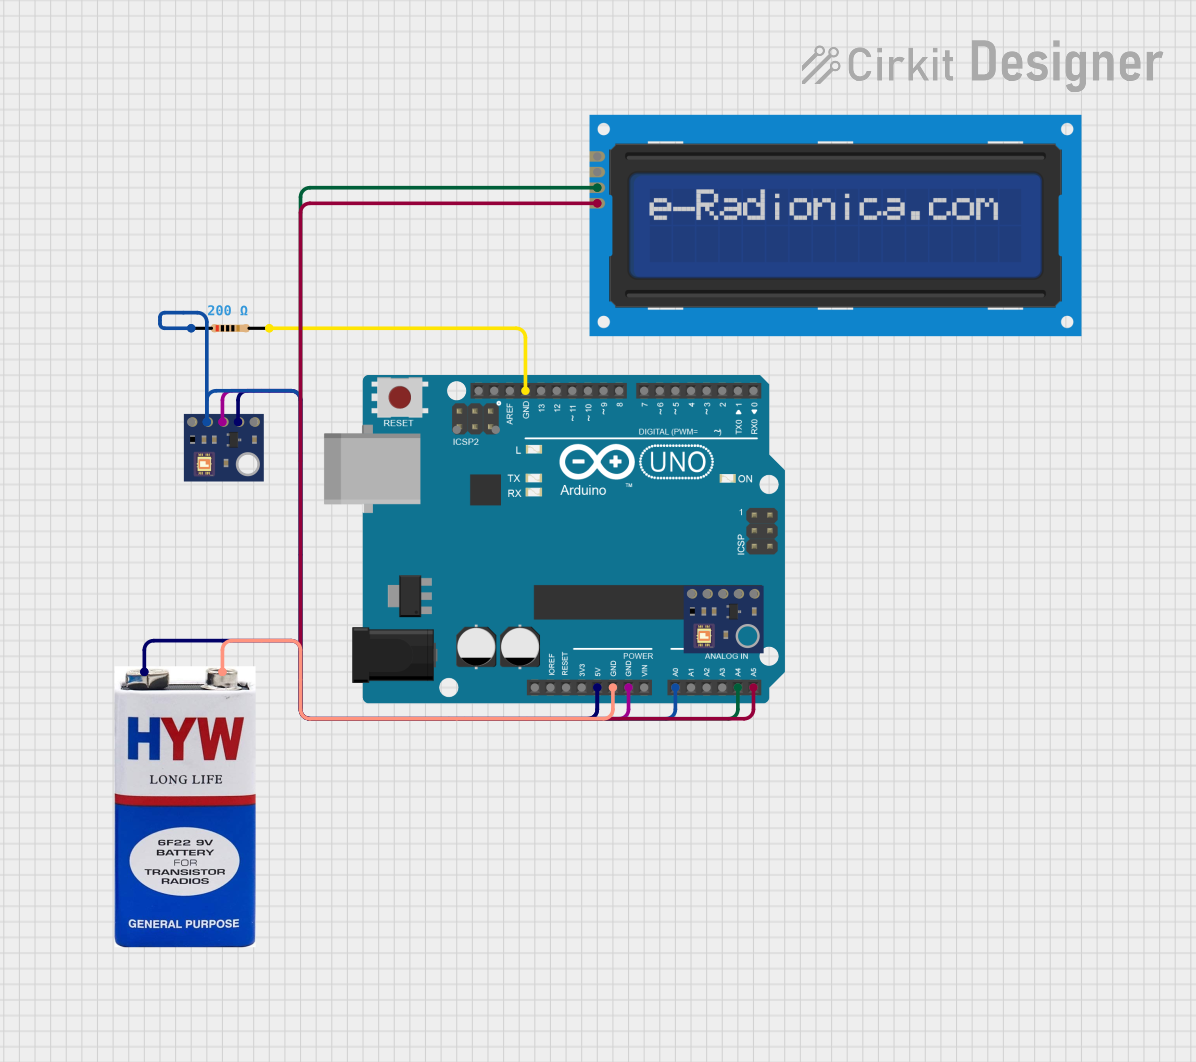
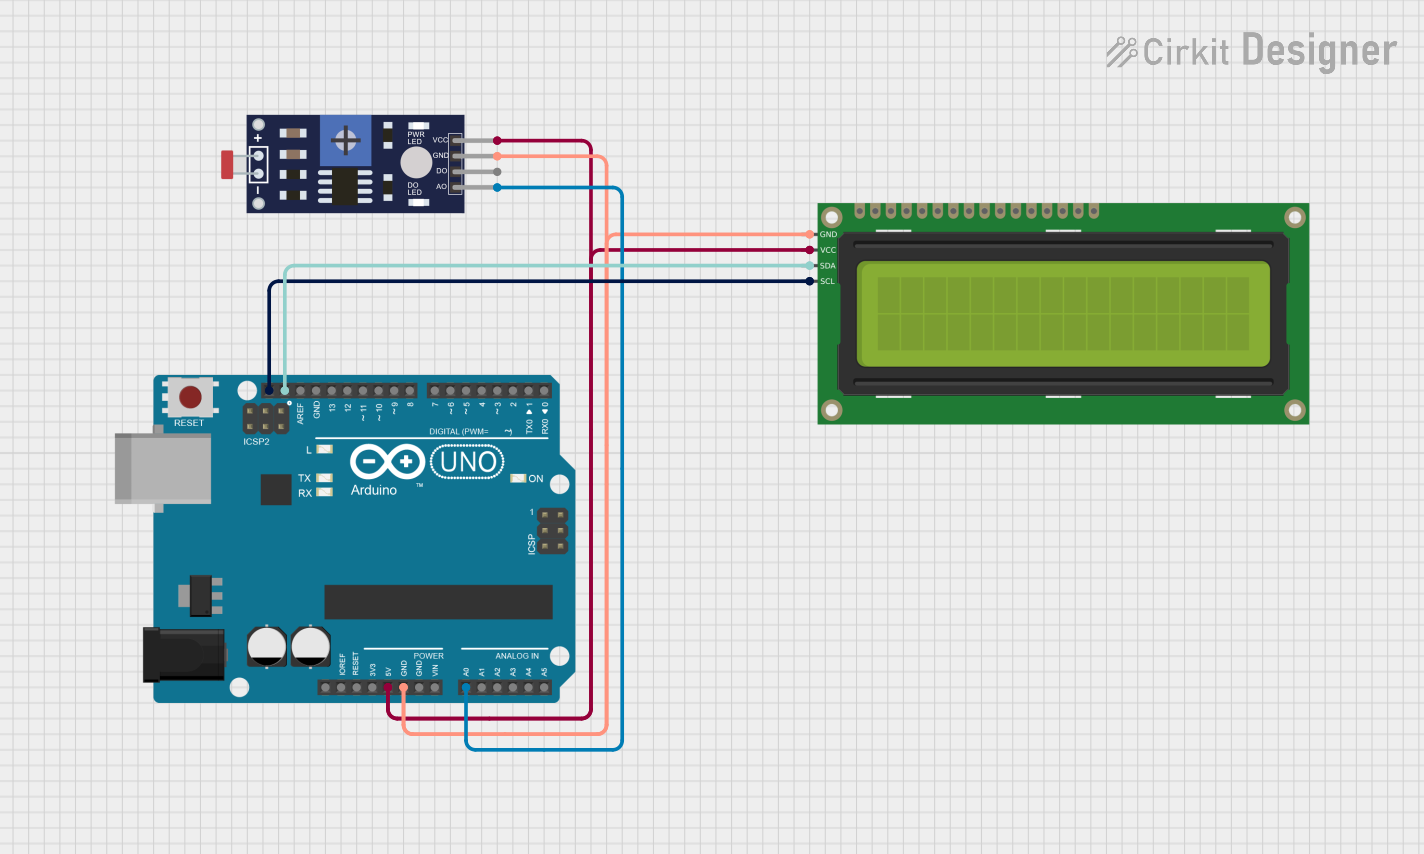
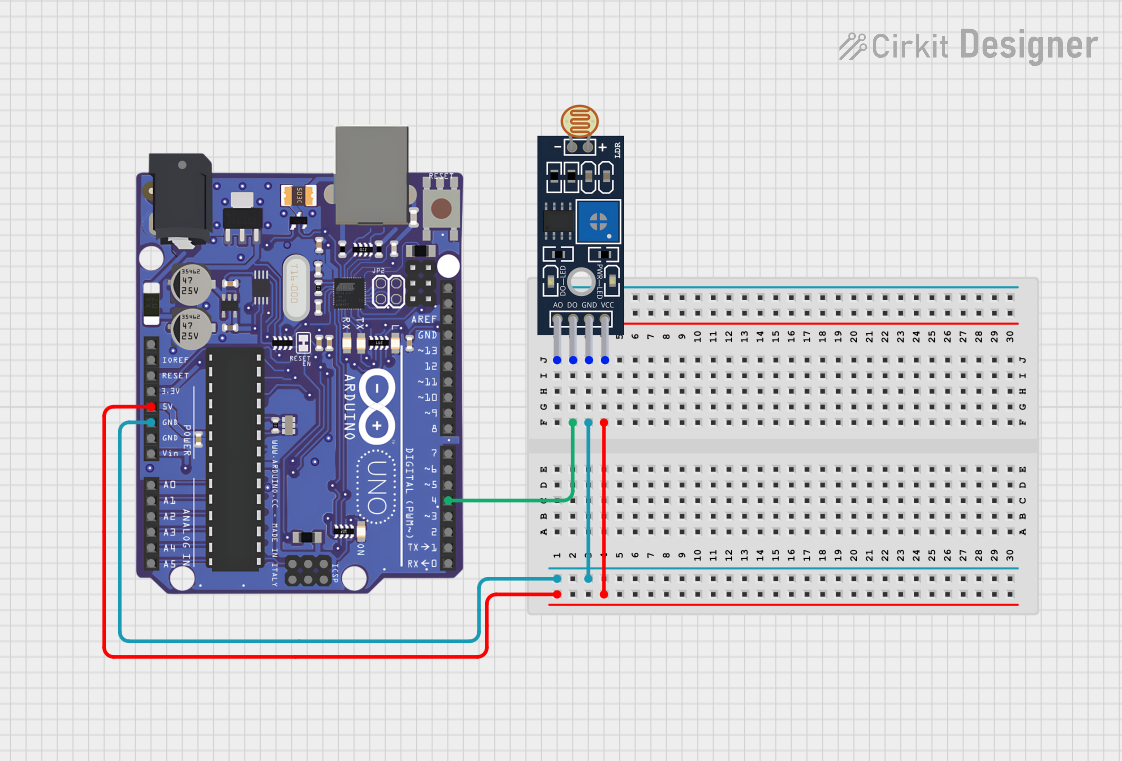
Explore Projects Built with Adafruit LTR390 UV Light Sensor
Technical Specifications
Key Features
- UV and ambient light sensing
- I2C interface for easy communication with microcontrollers
- Wide spectral range: 200nm to 800nm (UV and visible spectrum)
- Programmable gain and integration time
- UV Index measurement range: 0 to 11+
- Operating Voltage: 3.3V to 5V
Pin Configuration and Descriptions
| Pin Number | Name | Description |
|---|---|---|
| 1 | VIN | Power supply (3.3V to 5V) |
| 2 | GND | Ground connection |
| 3 | SCL | I2C clock line |
| 4 | SDA | I2C data line |
| 5 | INT | Interrupt pin (optional use) |
Usage Instructions
Connecting the Sensor
- Connect the VIN pin to the 3.3V or 5V output on your microcontroller.
- Connect the GND pin to the ground on your microcontroller.
- Connect the SCL pin to the I2C clock pin on your microcontroller.
- Connect the SDA pin to the I2C data pin on your microcontroller.
- (Optional) Connect the INT pin to an available digital pin if interrupt functionality is required.
Programming the Sensor with Arduino
To use the LTR390 with an Arduino UNO, you will need to use the I2C communication protocol. Below is a sample code snippet to get started with reading UV index values from the sensor.
#include <Wire.h>
#include <Adafruit_LTR390.h>

Adafruit_LTR390 uv = Adafruit_LTR390();

void setup() {
  Serial.begin(9600);
  // Initialize the sensor
  if (!uv.begin()) {
    Serial.println("Couldn't find LTR390 sensor!");
    while (1);
  }
  Serial.println("Found LTR390 sensor");
}

void loop() {
  // Perform a UV reading
  uint32_t uv_index = uv.readUVS();
  Serial.print("UV Index: ");
  Serial.println(uv_index);

  delay(1000); // Wait for 1 second before the next reading
}
Important Considerations and Best Practices
- Ensure that the sensor is not exposed to direct sunlight for extended periods to avoid damage.
- Use pull-up resistors on the I2C lines if your microcontroller does not have built-in pull-ups.
- Calibrate the sensor if precise measurements are critical for your application.
- Avoid placing the sensor near UV sources like black lights or UV LEDs that could saturate the sensor.
Troubleshooting and FAQs
Common Issues
- Sensor not detected: Ensure that the wiring is correct and that the sensor is properly powered.
- Inaccurate readings: Verify that the sensor is not being affected by direct sunlight or other strong UV sources.
Solutions and Tips
- Check I2C connections: Use a multimeter to ensure there is continuity between the sensor pins and the microcontroller.
- I2C address conflict: Make sure that no other devices on the I2C bus have the same address as the LTR390 sensor.
- Use the interrupt feature: To save power, use the INT pin to wake up your microcontroller when a certain threshold is reached.
FAQs
Q: Can the sensor measure visible light? A: Yes, the LTR390 can measure both UV and ambient light.
Q: What is the range of UV index values the sensor can measure? A: The sensor can measure UV index values from 0 to 11+.
Q: Is the sensor waterproof? A: No, the LTR390 is not waterproof. Protect it from moisture and water exposure.
Q: How do I calibrate the sensor? A: Calibration involves comparing the sensor readings to a known light source or a reference sensor. Adafruit provides a detailed guide on calibration procedures.
For further assistance, consult the Adafruit LTR390 datasheet and the Adafruit support forums.