How to Use Waveshare ESP32-S3-Nano: Examples, Pinouts, and Specs
Introduction
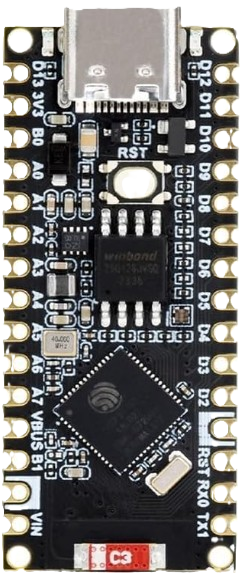
The Waveshare ESP32-S3-Nano is a compact development board built around the ESP32-S3 microcontroller. This microcontroller features dual-core Xtensa LX7 processors, integrated Wi-Fi (802.11 b/g/n) and Bluetooth 5.0 LE capabilities, and a rich set of peripherals, making it ideal for IoT applications, smart devices, and rapid prototyping. The board is designed to be small and efficient, offering a versatile platform for developers to create connected solutions.
Explore Projects Built with Waveshare ESP32-S3-Nano


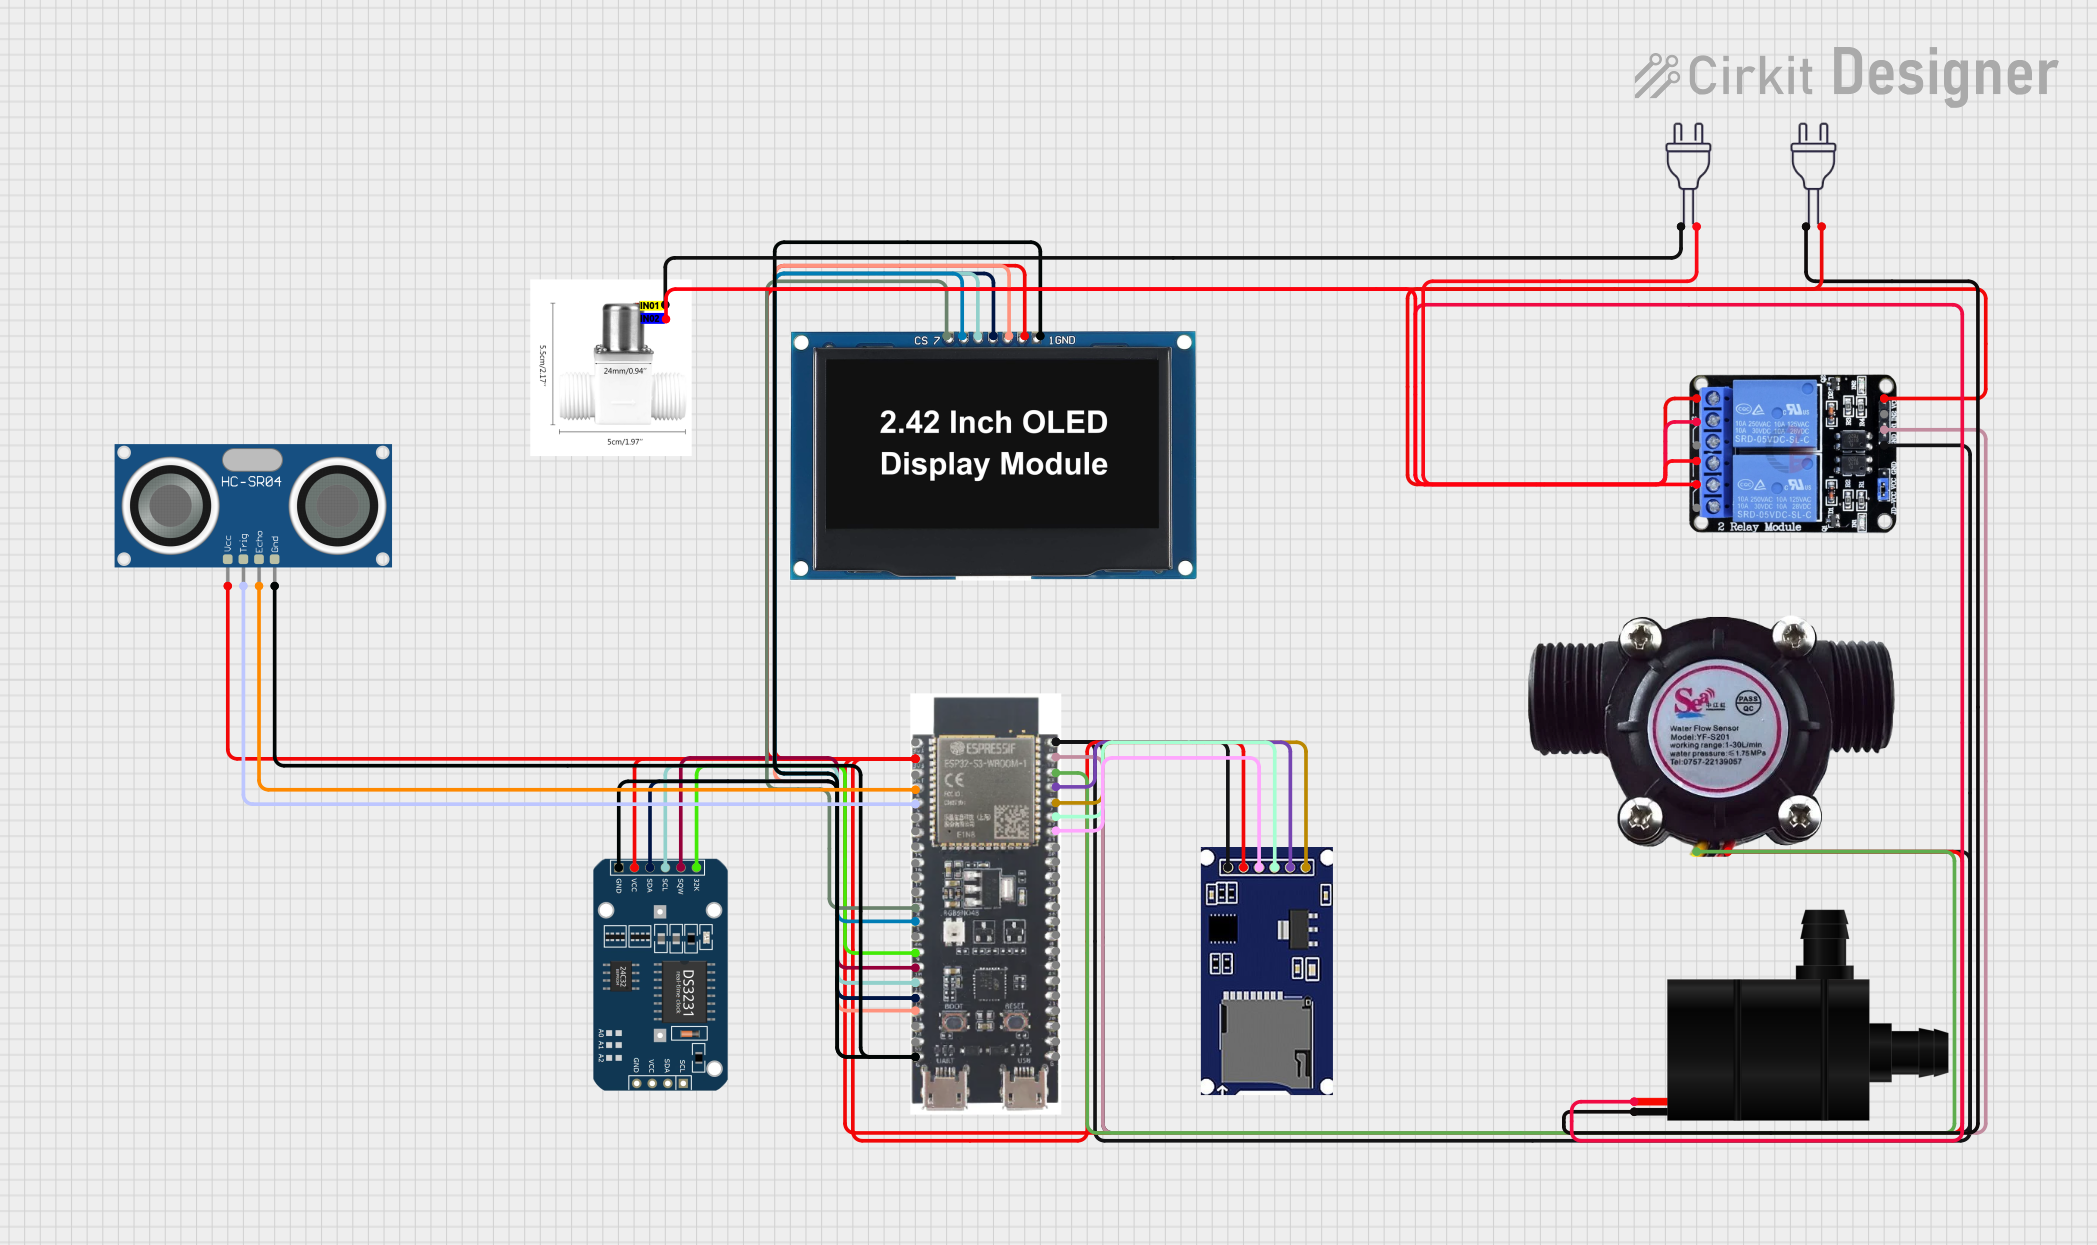
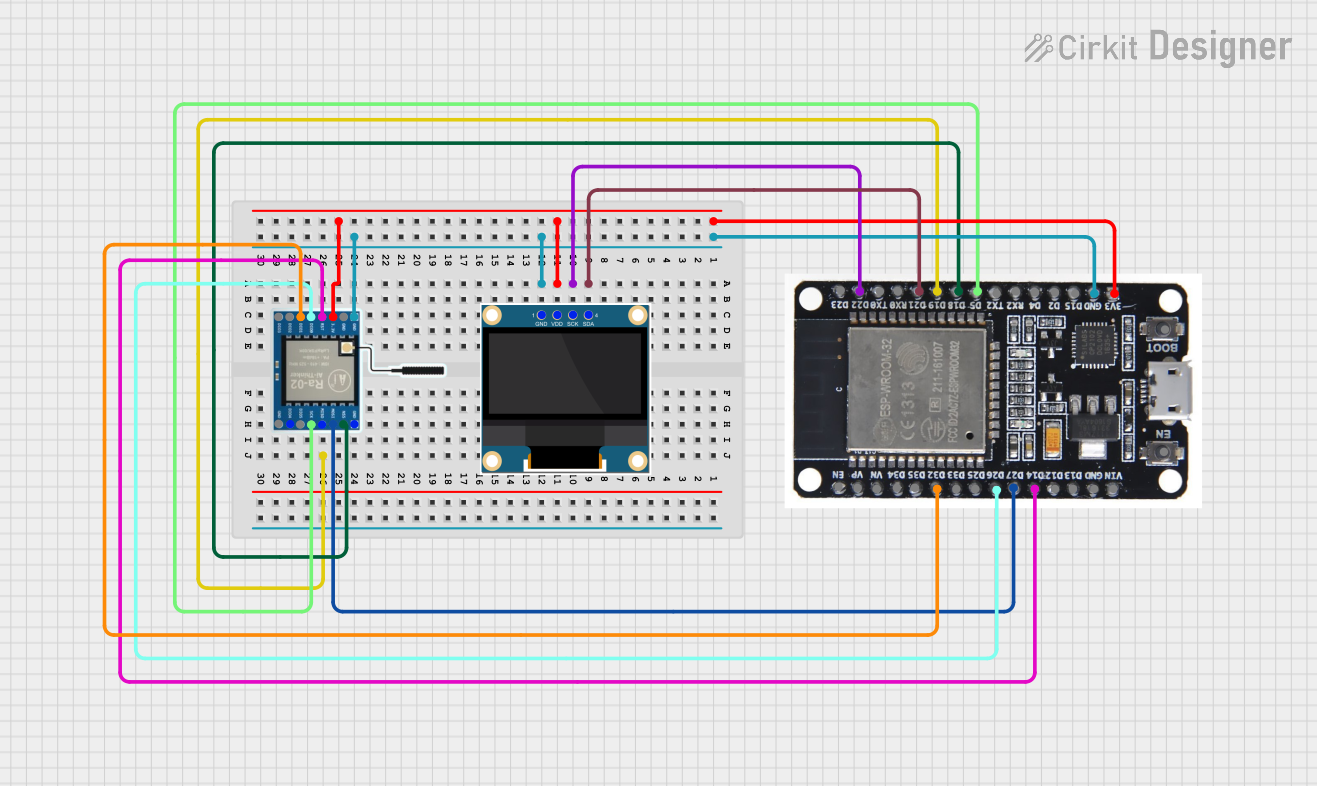
Explore Projects Built with Waveshare ESP32-S3-Nano
Common Applications and Use Cases
- IoT devices and smart home automation
- Wearable technology
- Wireless sensor networks
- Prototyping for AI and machine learning applications
- Bluetooth-enabled devices
- Low-power data logging and monitoring systems
Technical Specifications
The Waveshare ESP32-S3-Nano is packed with features that make it a powerful yet compact development board. Below are its key technical specifications:
Key Technical Details
- Microcontroller: ESP32-S3 (Xtensa LX7 dual-core processor)
- Clock Speed: Up to 240 MHz
- Flash Memory: 8 MB
- PSRAM: 8 MB
- Wireless Connectivity: Wi-Fi 802.11 b/g/n, Bluetooth 5.0 LE
- Operating Voltage: 3.3V
- GPIO Pins: 24 (multipurpose, including ADC, DAC, I2C, SPI, UART, PWM)
- USB Interface: USB Type-C (supports programming and power supply)
- Power Supply: 5V via USB or external power source
- Dimensions: 41mm x 20mm
Pin Configuration and Descriptions
The Waveshare ESP32-S3-Nano features a 24-pin layout. Below is the pin configuration:
| Pin | Name | Function |
|---|---|---|
| 1 | 3V3 | 3.3V power output |
| 2 | GND | Ground |
| 3 | IO0 | GPIO0, used for boot mode selection or general-purpose I/O |
| 4 | IO1 | GPIO1, general-purpose I/O |
| 5 | IO2 | GPIO2, general-purpose I/O |
| 6 | IO3 | GPIO3, general-purpose I/O |
| 7 | IO4 | GPIO4, general-purpose I/O |
| 8 | IO5 | GPIO5, general-purpose I/O |
| 9 | IO6 | GPIO6, general-purpose I/O |
| 10 | IO7 | GPIO7, general-purpose I/O |
| 11 | IO8 | GPIO8, general-purpose I/O |
| 12 | IO9 | GPIO9, general-purpose I/O |
| 13 | IO10 | GPIO10, general-purpose I/O |
| 14 | IO11 | GPIO11, general-purpose I/O |
| 15 | IO12 | GPIO12, general-purpose I/O |
| 16 | IO13 | GPIO13, general-purpose I/O |
| 17 | IO14 | GPIO14, general-purpose I/O |
| 18 | IO15 | GPIO15, general-purpose I/O |
| 19 | IO16 | GPIO16, general-purpose I/O |
| 20 | IO17 | GPIO17, general-purpose I/O |
| 21 | IO18 | GPIO18, general-purpose I/O |
| 22 | IO19 | GPIO19, general-purpose I/O |
| 23 | IO20 | GPIO20, general-purpose I/O |
| 24 | IO21 | GPIO21, general-purpose I/O |
Usage Instructions
The Waveshare ESP32-S3-Nano is easy to use and can be programmed using popular development environments such as Arduino IDE, PlatformIO, or ESP-IDF. Below are the steps to get started:
How to Use the Component in a Circuit
- Power the Board: Connect the board to your computer or a power source using a USB Type-C cable. Ensure the power supply provides 5V.
- Install Drivers: If required, install the USB-to-serial drivers for the ESP32-S3 on your computer.
- Set Up the Development Environment:
- Install the Arduino IDE or ESP-IDF.
- Add the ESP32 board package to the Arduino IDE via the Board Manager.
- Connect Peripherals: Use the GPIO pins to connect sensors, actuators, or other peripherals. Ensure proper voltage levels and connections.
- Upload Code: Write and upload your code to the board using the development environment.
Important Considerations and Best Practices
- Voltage Levels: Ensure all connected peripherals operate at 3.3V logic levels to avoid damaging the board.
- Boot Mode: To enter bootloader mode, hold the BOOT button while pressing the RESET button.
- Power Supply: Use a stable 5V power source to avoid unexpected resets or instability.
- Pin Multiplexing: Many GPIO pins have multiple functions (e.g., ADC, I2C, UART). Check the ESP32-S3 datasheet to avoid conflicts.
Example Code for Arduino IDE
Below is an example of how to blink an LED connected to GPIO2:
// Define the GPIO pin for the LED
#define LED_PIN 2

void setup() {
  // Set the LED pin as an output
  pinMode(LED_PIN, OUTPUT);
}

void loop() {
  // Turn the LED on
  digitalWrite(LED_PIN, HIGH);
  delay(1000); // Wait for 1 second

  // Turn the LED off
  digitalWrite(LED_PIN, LOW);
  delay(1000); // Wait for 1 second
}
Troubleshooting and FAQs
Common Issues Users Might Face
- Board Not Detected by Computer:
- Ensure the USB cable is functional and supports data transfer.
- Install the correct USB-to-serial drivers for the ESP32-S3.
- Code Upload Fails:
- Check the selected board and port in the Arduino IDE.
- Enter bootloader mode by holding the BOOT button while pressing RESET.
- Wi-Fi or Bluetooth Not Working:
- Verify the Wi-Fi credentials in your code.
- Ensure the board is within range of the Wi-Fi router or Bluetooth device.
- Unstable Operation:
- Use a stable power supply.
- Avoid connecting peripherals that draw excessive current.
Solutions and Tips for Troubleshooting
- Serial Monitor Debugging: Use the Serial Monitor in the Arduino IDE to print debug messages and identify issues.
- Check Connections: Double-check all wiring and connections to ensure they are secure and correct.
- Update Firmware: Ensure the ESP32-S3 firmware and libraries are up to date.
By following this documentation, you can effectively use the Waveshare ESP32-S3-Nano for your IoT and prototyping projects.