How to Use HM3301: Examples, Pinouts, and Specs
Introduction
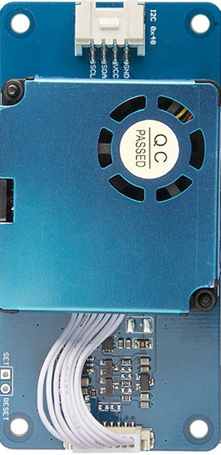
The HM3301 is a high-precision digital temperature and humidity sensor manufactured by GROVE (Part ID: 1). It is designed for accurate environmental monitoring and features a compact design, low power consumption, and digital output for seamless integration into various applications. The HM3301 is ideal for use in smart home systems, weather stations, HVAC systems, and industrial monitoring.
Explore Projects Built with HM3301


Explore Projects Built with HM3301
Common Applications and Use Cases
- Smart home automation for temperature and humidity control
- Weather monitoring stations
- HVAC (Heating, Ventilation, and Air Conditioning) systems
- Industrial and agricultural environmental monitoring
- IoT (Internet of Things) devices for environmental sensing
Technical Specifications
The HM3301 sensor is designed to provide reliable and precise measurements of temperature and humidity. Below are its key technical specifications:
| Parameter | Value |
|---|---|
| Operating Voltage | 3.3V to 5V |
| Operating Current | < 20mA |
| Temperature Range | -40°C to +85°C |
| Temperature Accuracy | ±0.3°C |
| Humidity Range | 0% to 100% RH |
| Humidity Accuracy | ±2% RH |
| Communication Protocol | I2C |
| Dimensions | 40mm x 20mm x 10mm |
| Output Format | Digital |
Pin Configuration and Descriptions
The HM3301 sensor has a 4-pin interface for easy connection to microcontrollers or development boards. Below is the pin configuration:
| Pin | Name | Description |
|---|---|---|
| 1 | VCC | Power supply pin (3.3V to 5V) |
| 2 | GND | Ground pin |
| 3 | SDA | I2C data line for communication |
| 4 | SCL | I2C clock line for communication |
Usage Instructions
The HM3301 sensor is straightforward to use in a circuit, thanks to its I2C communication protocol. Below are the steps to integrate and use the sensor:
Connecting the HM3301 to an Arduino UNO
- Connect the VCC pin of the HM3301 to the 5V pin on the Arduino UNO.
- Connect the GND pin of the HM3301 to the GND pin on the Arduino UNO.
- Connect the SDA pin of the HM3301 to the A4 pin on the Arduino UNO (I2C data line).
- Connect the SCL pin of the HM3301 to the A5 pin on the Arduino UNO (I2C clock line).
Sample Arduino Code
Below is a sample Arduino code to read temperature and humidity data from the HM3301 sensor:
#include <Wire.h>

// I2C address of the HM3301 sensor
#define HM3301_I2C_ADDRESS 0x40

void setup() {
  Wire.begin(); // Initialize I2C communication
  Serial.begin(9600); // Initialize serial communication for debugging
  Serial.println("HM3301 Sensor Initialization...");
}

void loop() {
  Wire.beginTransmission(HM3301_I2C_ADDRESS); // Start communication with sensor
  Wire.write(0x00); // Request data from the sensor
  Wire.endTransmission();

  Wire.requestFrom(HM3301_I2C_ADDRESS, 4); // Request 4 bytes of data
  if (Wire.available() == 4) {
    uint16_t temperature = (Wire.read() << 8) | Wire.read(); // Read temperature
    uint16_t humidity = (Wire.read() << 8) | Wire.read(); // Read humidity

    // Convert raw data to human-readable values
    float tempC = temperature / 100.0; // Temperature in Celsius
    float humPercent = humidity / 100.0; // Humidity in percentage

    // Print the results to the Serial Monitor
    Serial.print("Temperature: ");
    Serial.print(tempC);
    Serial.println(" °C");

    Serial.print("Humidity: ");
    Serial.print(humPercent);
    Serial.println(" %");
  } else {
    Serial.println("Error: Unable to read data from HM3301 sensor.");
  }

  delay(1000); // Wait for 1 second before the next reading
}
Important Considerations and Best Practices
- Ensure the operating voltage of the HM3301 matches the voltage level of your microcontroller (3.3V or 5V).
- Use pull-up resistors (typically 4.7kΩ) on the SDA and SCL lines if they are not already included in your setup.
- Avoid placing the sensor in environments with high condensation or direct water exposure, as this may damage the sensor.
- Allow the sensor to stabilize for a few seconds after powering it on before taking measurements.
Troubleshooting and FAQs
Common Issues and Solutions
No data is being read from the sensor.
- Ensure the wiring is correct and matches the pin configuration.
- Verify that the I2C address (0x40) is correct for your specific sensor.
- Check for loose connections or damaged wires.
Incorrect temperature or humidity readings.
- Ensure the sensor is not exposed to extreme environmental conditions beyond its specified range.
- Allow the sensor to stabilize after powering it on before taking measurements.
Arduino is unable to detect the sensor.
- Use an I2C scanner sketch to confirm the sensor's I2C address.
- Check if pull-up resistors are required on the SDA and SCL lines.
FAQs
Q: Can the HM3301 be used with a 3.3V microcontroller?
A: Yes, the HM3301 supports both 3.3V and 5V operating voltages, making it compatible with a wide range of microcontrollers.
Q: What is the maximum cable length for I2C communication with the HM3301?
A: The maximum cable length depends on the pull-up resistor values and the I2C clock speed. For standard setups, keep the cable length under 1 meter to ensure reliable communication.
Q: Does the HM3301 require calibration?
A: The HM3301 is factory-calibrated and does not require additional calibration for most applications. However, periodic validation against a reference sensor is recommended for critical applications.