How to Use BMP388: Examples, Pinouts, and Specs
Introduction
The BMP388 is a high-precision barometric pressure sensor designed to measure atmospheric pressure and temperature with exceptional accuracy. It is a compact and versatile sensor that operates over a wide range of pressures and temperatures, making it suitable for a variety of applications. The BMP388 is commonly used in weather forecasting, altitude measurement, indoor navigation, and drone flight stabilization. Its small size and low power consumption make it ideal for portable and battery-powered devices.
Explore Projects Built with BMP388
Explore Projects Built with BMP388
Technical Specifications
The BMP388 offers impressive performance and flexibility. Below are its key technical details:
Key Specifications
| Parameter | Value |
|---|---|
| Operating Voltage | 1.65V to 3.6V |
| Operating Current | 3.4 µA (typical in low-power mode) |
| Pressure Range | 300 hPa to 1250 hPa |
| Temperature Range | -40°C to +85°C |
| Pressure Accuracy | ±0.08 hPa (typical) |
| Temperature Accuracy | ±0.5°C |
| Interface | I2C and SPI |
| Dimensions | 2.0 mm x 2.0 mm x 0.75 mm |
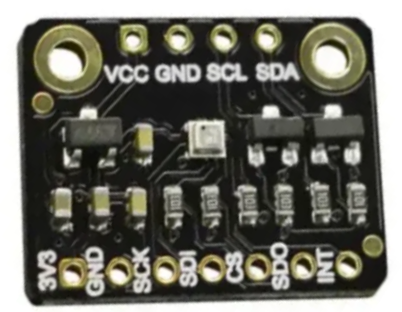
Pin Configuration
The BMP388 comes in a small LGA package with the following pinout:
| Pin Number | Pin Name | Description |
|---|---|---|
| 1 | VDD | Power supply (1.65V to 3.6V) |
| 2 | GND | Ground |
| 3 | SCL/SPC | I2C clock / SPI clock input |
| 4 | SDA/SDI | I2C data / SPI data input |
| 5 | CSB | Chip select for SPI (active low) |
| 6 | SDO | SPI data output / I2C address selection |
| 7 | VDDIO | I/O voltage reference (optional) |
Usage Instructions
The BMP388 can be easily integrated into a circuit using either the I2C or SPI communication protocol. Below are the steps to use the BMP388 in a typical setup:
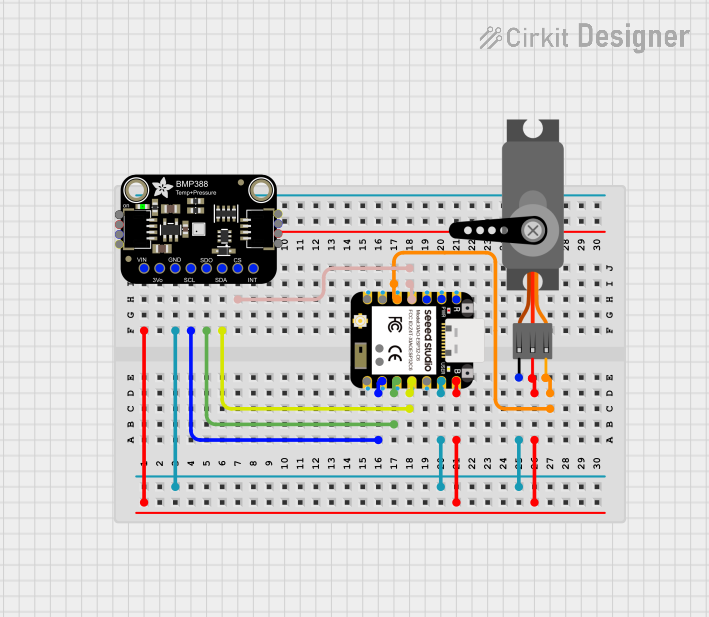
Connecting the BMP388 to an Arduino UNO
Wiring: Connect the BMP388 to the Arduino UNO as follows:
VDDto 3.3V on the Arduino.GNDto GND on the Arduino.SCL/SPCto A5 (I2C clock pin on Arduino UNO).SDA/SDIto A4 (I2C data pin on Arduino UNO).- Leave
CSBandSDOunconnected for I2C mode.
Install Libraries: Use the Adafruit BMP3XX library for easy integration. Install it via the Arduino Library Manager.
Example Code: Below is a sample Arduino sketch to read pressure and temperature data from the BMP388:
#include <Wire.h>
#include <Adafruit_Sensor.h>
#include <Adafruit_BMP3XX.h>

// Create an instance of the BMP3XX sensor
Adafruit_BMP3XX bmp;

void setup() {
  Serial.begin(9600);
  while (!Serial); // Wait for Serial Monitor to open

  // Initialize I2C communication
  if (!bmp.begin_I2C()) {
    Serial.println("Could not find a valid BMP388 sensor, check wiring!");
    while (1);
  }

  // Configure the sensor
  bmp.setTemperatureOversampling(BMP3_OVERSAMPLING_8X);
  bmp.setPressureOversampling(BMP3_OVERSAMPLING_4X);
  bmp.setIIRFilterCoeff(BMP3_IIR_FILTER_COEFF_3);
  bmp.setOutputDataRate(BMP3_ODR_50_HZ);
}

void loop() {
  // Read pressure and temperature
  if (!bmp.performReading()) {
    Serial.println("Failed to perform reading!");
    return;
  }

  // Print the results
  Serial.print("Temperature = ");
  Serial.print(bmp.temperature);
  Serial.println(" °C");

  Serial.print("Pressure = ");
  Serial.print(bmp.pressure / 100.0); // Convert Pa to hPa
  Serial.println(" hPa");

  delay(1000); // Wait 1 second before the next reading
}
Important Considerations
- Power Supply: Ensure the BMP388 is powered with a voltage between 1.65V and 3.6V. If using a 5V microcontroller, use a level shifter for I2C/SPI lines.
- I2C Address: The default I2C address is
0x76. IfSDOis connected toVDD, the address changes to0x77. - Environmental Factors: Avoid exposing the sensor to water or dust, as this may affect its accuracy.
Troubleshooting and FAQs
Common Issues
Sensor Not Detected:
- Cause: Incorrect wiring or I2C address mismatch.
- Solution: Double-check the connections and ensure the correct I2C address is used in the code.
Inaccurate Readings:
- Cause: Improper calibration or environmental interference.
- Solution: Use the sensor in a stable environment and apply any necessary calibration.
No Data Output:
- Cause: Faulty sensor initialization.
- Solution: Verify the sensor is properly powered and initialized in the code.
FAQs
Can the BMP388 measure altitude? Yes, the BMP388 can calculate altitude based on pressure readings using the barometric formula.
What is the maximum sampling rate? The BMP388 supports an output data rate of up to 200 Hz.
Is the BMP388 waterproof? No, the BMP388 is not waterproof. Use a protective enclosure if operating in humid or wet conditions.
By following this documentation, you can effectively integrate and use the BMP388 in your projects.