How to Use 12v Strip Light: Examples, Pinouts, and Specs
Introduction
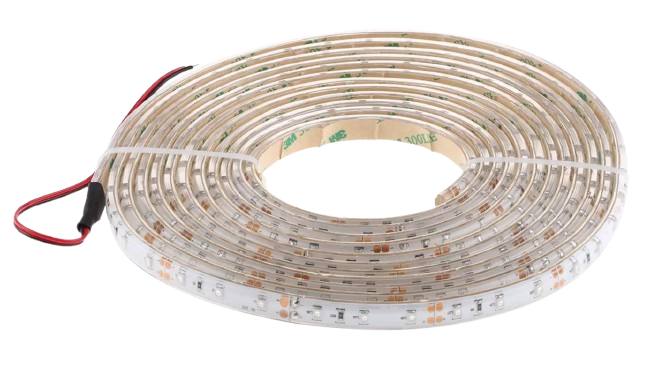
The 12V Strip Light is a flexible circuit board embedded with surface-mounted light-emitting diodes (LEDs) that emit bright and efficient illumination. Designed to operate on a 12V DC power supply, these strip lights are versatile and easy to install, making them ideal for a wide range of applications. They are commonly used for decorative lighting, accent lighting, task lighting, and even in automotive and commercial environments.
Explore Projects Built with 12v Strip Light
Explore Projects Built with 12v Strip Light
Common Applications and Use Cases
- Home Lighting: Under-cabinet lighting, cove lighting, and ambient lighting.
- Automotive: Interior and exterior vehicle lighting.
- Commercial Spaces: Display case lighting, signage, and architectural lighting.
- DIY Projects: Custom lighting designs for creative projects.
- Event Decoration: Temporary lighting for parties, weddings, and exhibitions.
Technical Specifications
The following table outlines the key technical details of a standard 12V Strip Light:
| Parameter | Specification |
|---|---|
| Operating Voltage | 12V DC |
| Power Consumption | Typically 4.8W to 14.4W per meter |
| LED Type | SMD (e.g., 3528, 5050, or 2835) |
| LED Density | 30, 60, or 120 LEDs per meter |
| Color Options | Single color (e.g., warm white, cool white) or RGB |
| Beam Angle | 120° |
| Dimmable | Yes (with compatible dimmer or controller) |
| Waterproof Rating | IP20 (non-waterproof) to IP68 (fully waterproof) |
| Operating Temperature | -20°C to 50°C |
| Lifespan | Up to 50,000 hours |
Pin Configuration and Descriptions
The 12V Strip Light typically has two or four connection points, depending on whether it is a single-color or RGB strip. Below is a description of the connections:
Single-Color Strip Light
| Pin | Description |
|---|---|
| +12V | Positive power input |
| GND | Ground (negative input) |
RGB Strip Light
| Pin | Description |
|---|---|
| +12V | Positive power input |
| R | Red channel (negative) |
| G | Green channel (negative) |
| B | Blue channel (negative) |
Usage Instructions
How to Use the 12V Strip Light in a Circuit
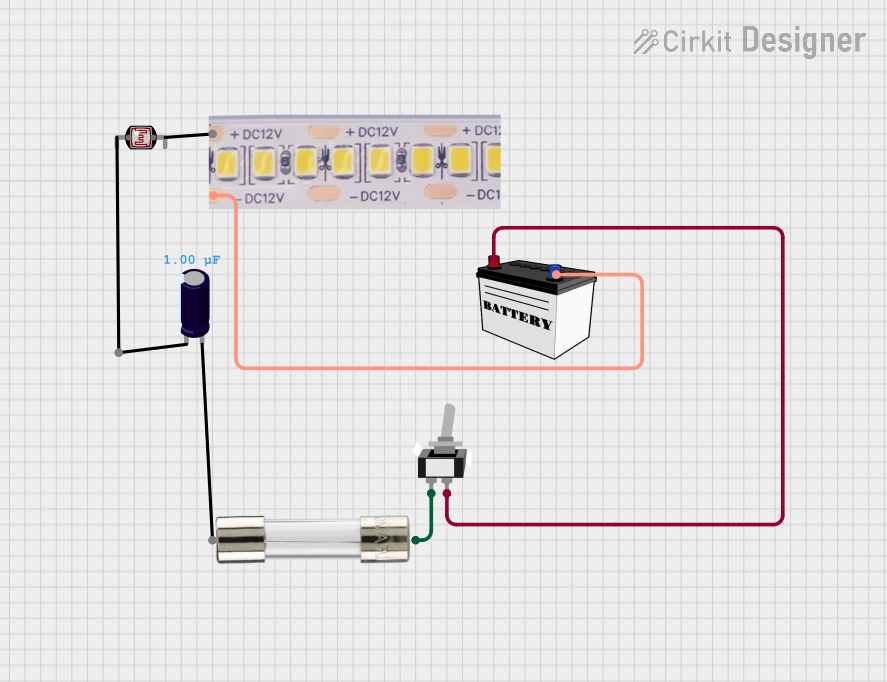
- Power Supply: Connect the strip light to a 12V DC power supply. Ensure the power supply can handle the total current draw of the strip (calculated as
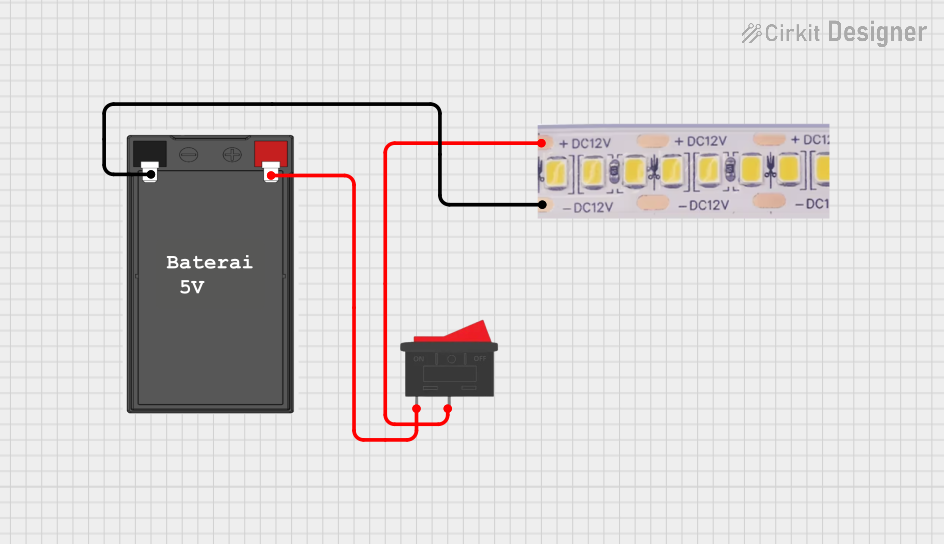
Power per meter × Length ÷ 12V). - Polarity: Match the polarity of the strip light with the power supply. Connect the
+12Vpin to the positive terminal and theGNDpin to the negative terminal. - Cutting and Joining: The strip can be cut at marked intervals (usually every 3 LEDs). Use compatible connectors or solder wires to join sections.
- Mounting: Peel off the adhesive backing and stick the strip to a clean, dry surface. For non-adhesive strips, use mounting clips.
- Dimming and Control: For dimming or color control (RGB strips), connect the strip to a compatible dimmer or RGB controller.
Important Considerations and Best Practices
- Power Supply Selection: Always use a regulated 12V DC power supply with sufficient current capacity.
- Heat Management: For high-power strips, consider using an aluminum channel or heat sink to dissipate heat.
- Waterproofing: Use IP65 or higher-rated strips for outdoor or wet environments.
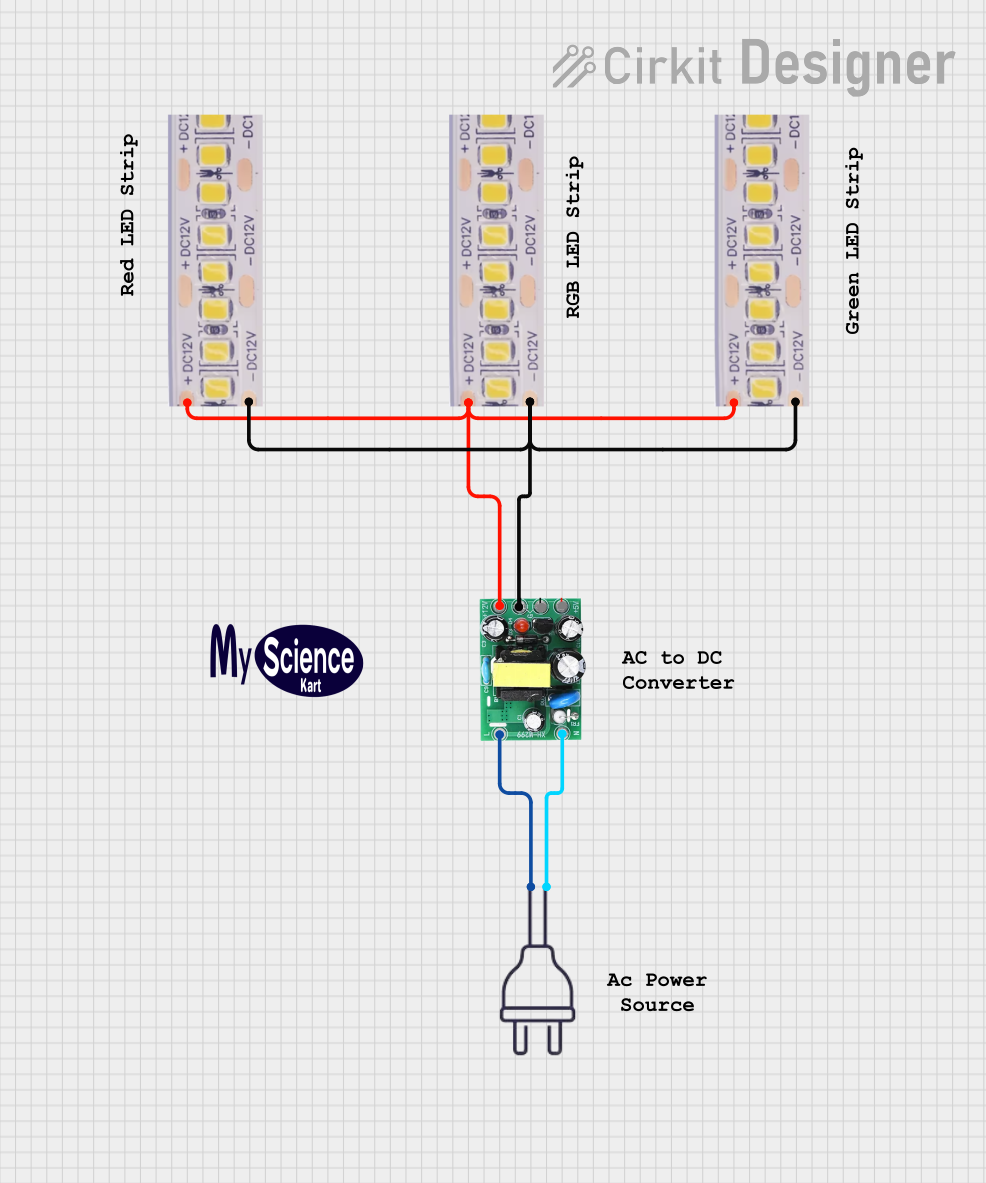
- Voltage Drop: For long runs, voltage drop may occur. Use power injection or split the strip into shorter sections powered separately.
- Soldering: If soldering connections, use a low-temperature soldering iron to avoid damaging the strip.
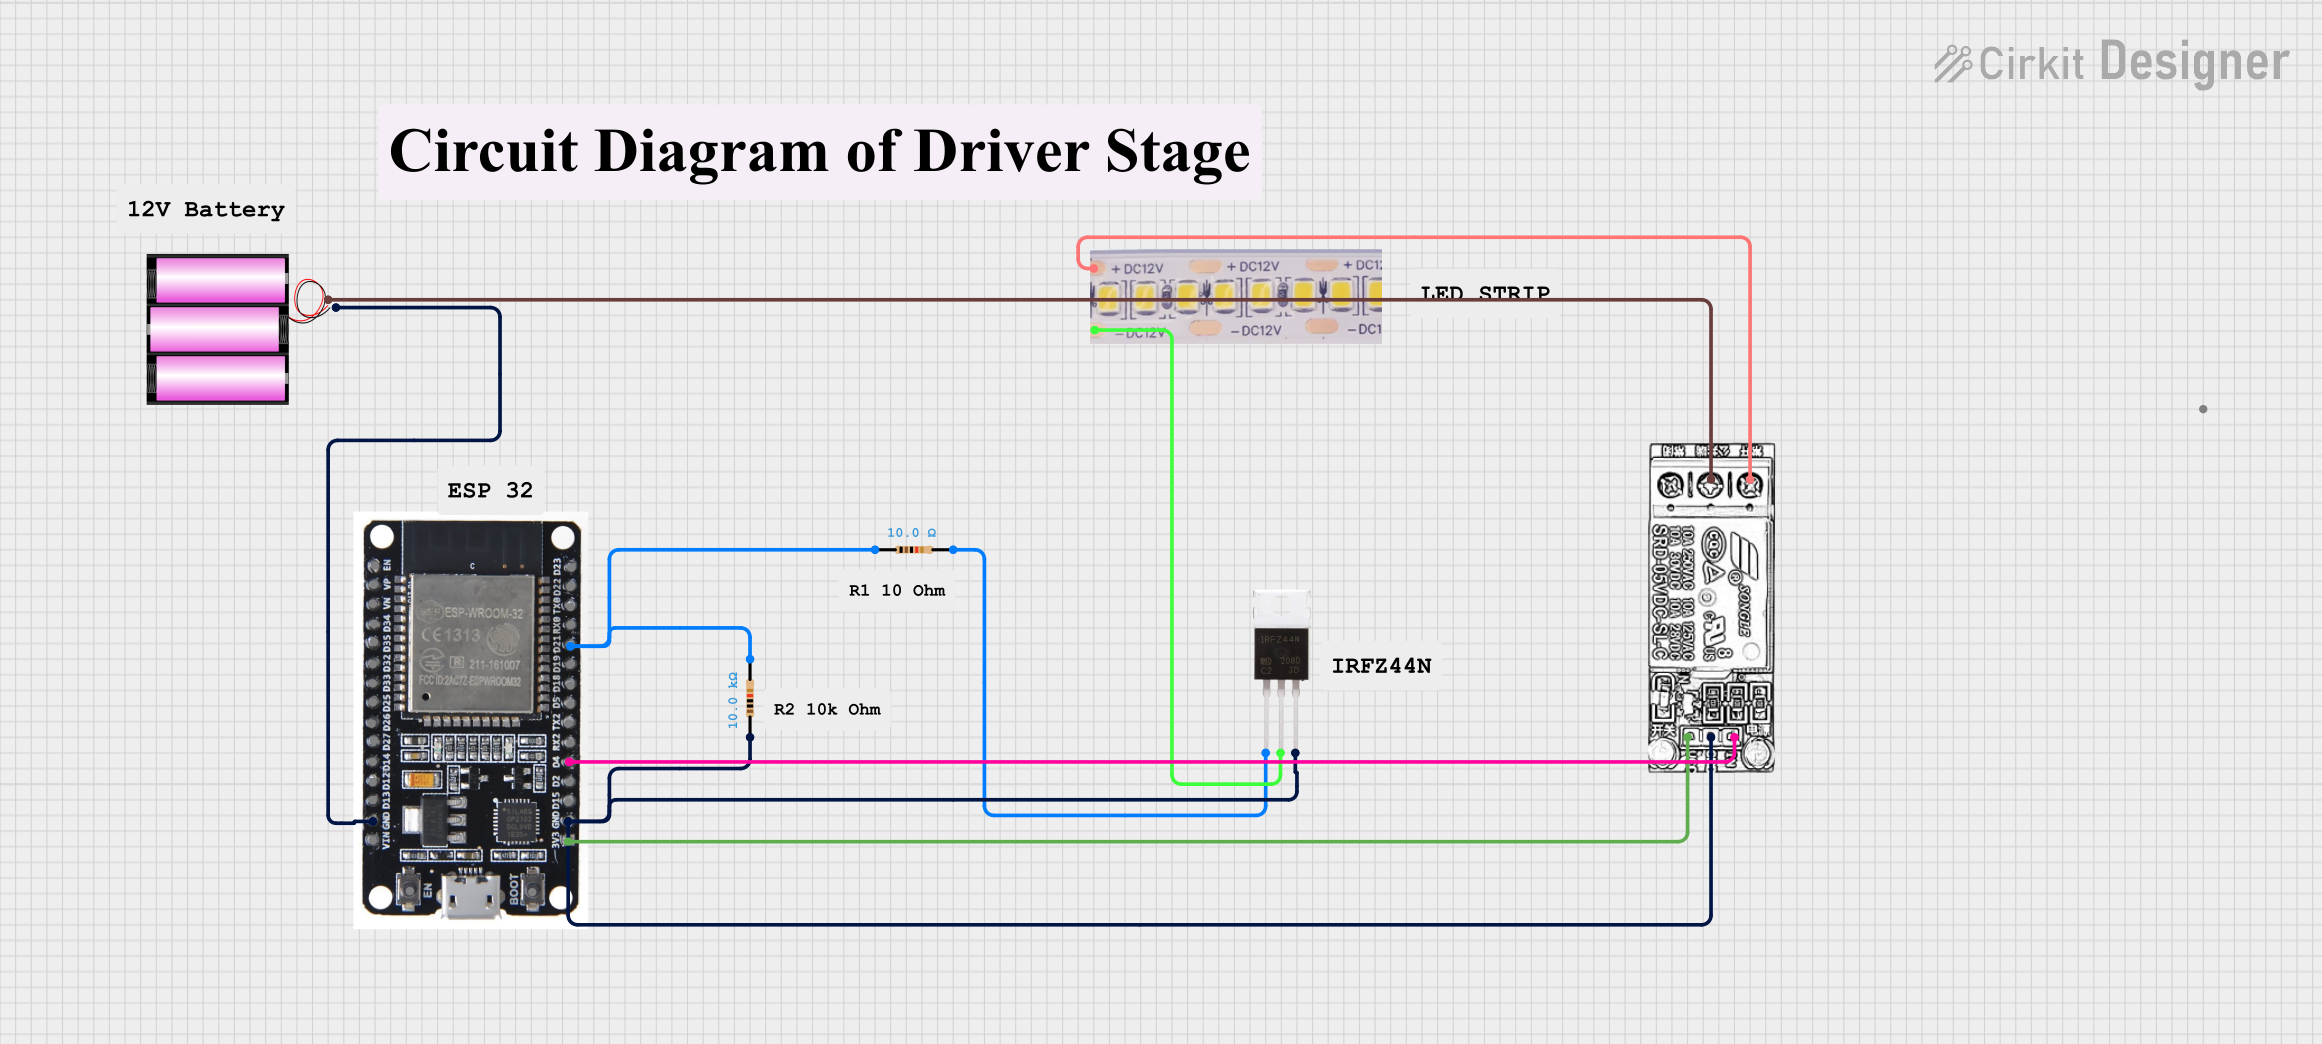
Example: Connecting an RGB Strip Light to an Arduino UNO
You can control an RGB strip light using an Arduino UNO and three MOSFETs. Below is an example code to control the strip's color:
// Example code to control an RGB strip light with Arduino UNO
// Connect the R, G, and B pins of the strip to PWM pins on the Arduino
// Use MOSFETs to handle the current required by the strip

// Define PWM pins for RGB channels
const int redPin = 9;   // Red channel connected to pin 9
const int greenPin = 10; // Green channel connected to pin 10
const int bluePin = 11;  // Blue channel connected to pin 11

void setup() {
  // Set RGB pins as outputs
  pinMode(redPin, OUTPUT);
  pinMode(greenPin, OUTPUT);
  pinMode(bluePin, OUTPUT);
}

void loop() {
  // Example: Cycle through colors
  setColor(255, 0, 0); // Red
  delay(1000);
  setColor(0, 255, 0); // Green
  delay(1000);
  setColor(0, 0, 255); // Blue
  delay(1000);
}

// Function to set RGB color
void setColor(int red, int green, int blue) {
  analogWrite(redPin, red);   // Set red intensity (0-255)
  analogWrite(greenPin, green); // Set green intensity (0-255)
  analogWrite(bluePin, blue);  // Set blue intensity (0-255)
}
Troubleshooting and FAQs
Common Issues and Solutions
Strip Light Does Not Turn On
- Cause: Incorrect wiring or insufficient power supply.
- Solution: Verify the polarity and ensure the power supply matches the strip's voltage and current requirements.
Uneven Brightness or Color
- Cause: Voltage drop over long runs.
- Solution: Use shorter sections or inject power at intervals.
Overheating
- Cause: High power density without proper heat dissipation.
- Solution: Use an aluminum channel or ensure adequate ventilation.
Flickering
- Cause: Unstable power supply or loose connections.
- Solution: Use a regulated power supply and check all connections.
Adhesive Fails to Stick
- Cause: Dusty or uneven surface.
- Solution: Clean the surface thoroughly or use mounting clips.
FAQs
Can I cut the strip light to a custom length? Yes, you can cut the strip at marked intervals (usually every 3 LEDs). Ensure you cut only at the designated points.
Can I connect multiple strips together? Yes, but ensure the power supply can handle the total current draw. For long runs, consider using power injection.
Are 12V strip lights safe to use? Yes, they are low voltage and safe for most applications. However, follow proper wiring practices to avoid short circuits.
Can I use a 12V strip light with a battery? Yes, as long as the battery provides a stable 12V output and sufficient current.
How do I control an RGB strip light? Use an RGB controller or a microcontroller like Arduino with MOSFETs to control the color and brightness.