How to Use hdmi monitor: Examples, Pinouts, and Specs
Introduction
An HDMI monitor is a display device that uses the High-Definition Multimedia Interface (HDMI) standard to receive digital video and audio signals from a source device, such as a computer, gaming console, or media player. HDMI monitors are widely used for their ability to deliver high-quality image and sound output with a single cable, simplifying connectivity and reducing clutter.
Explore Projects Built with hdmi monitor

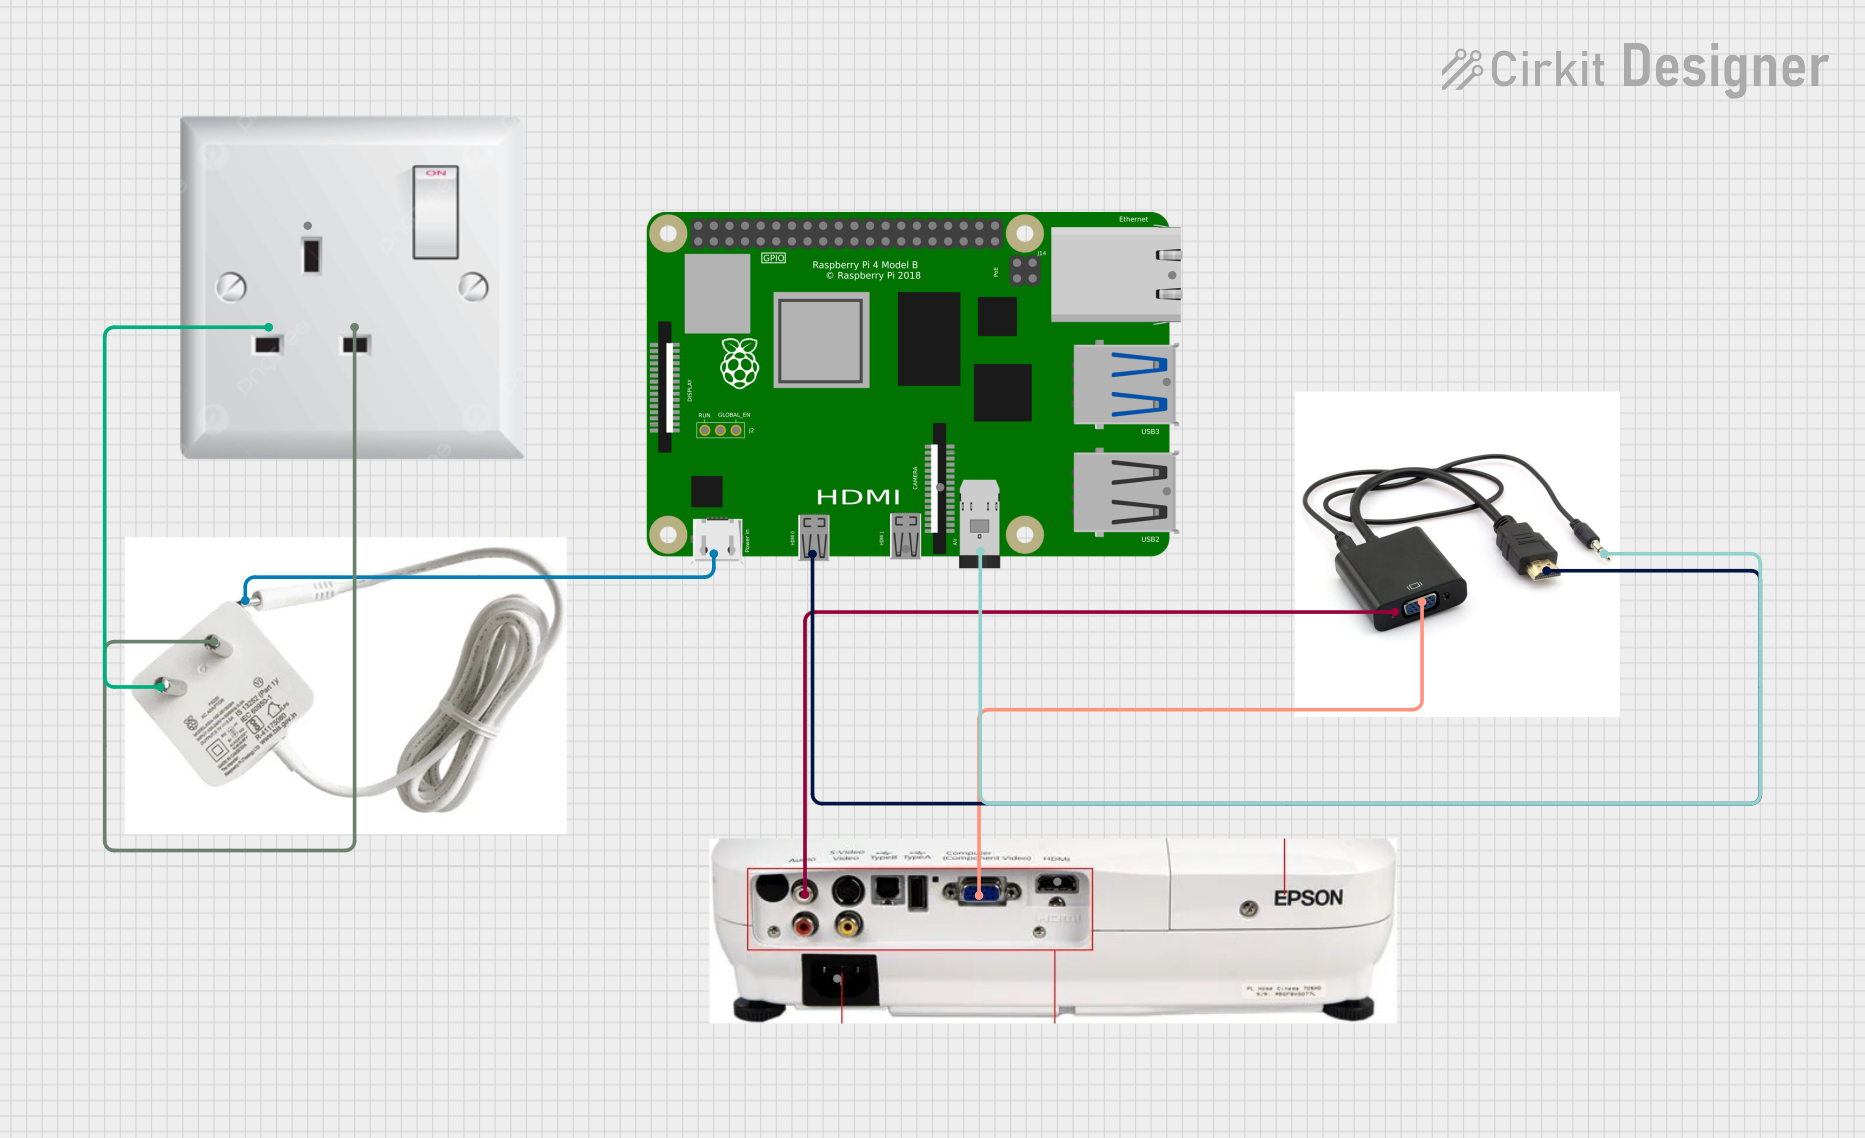
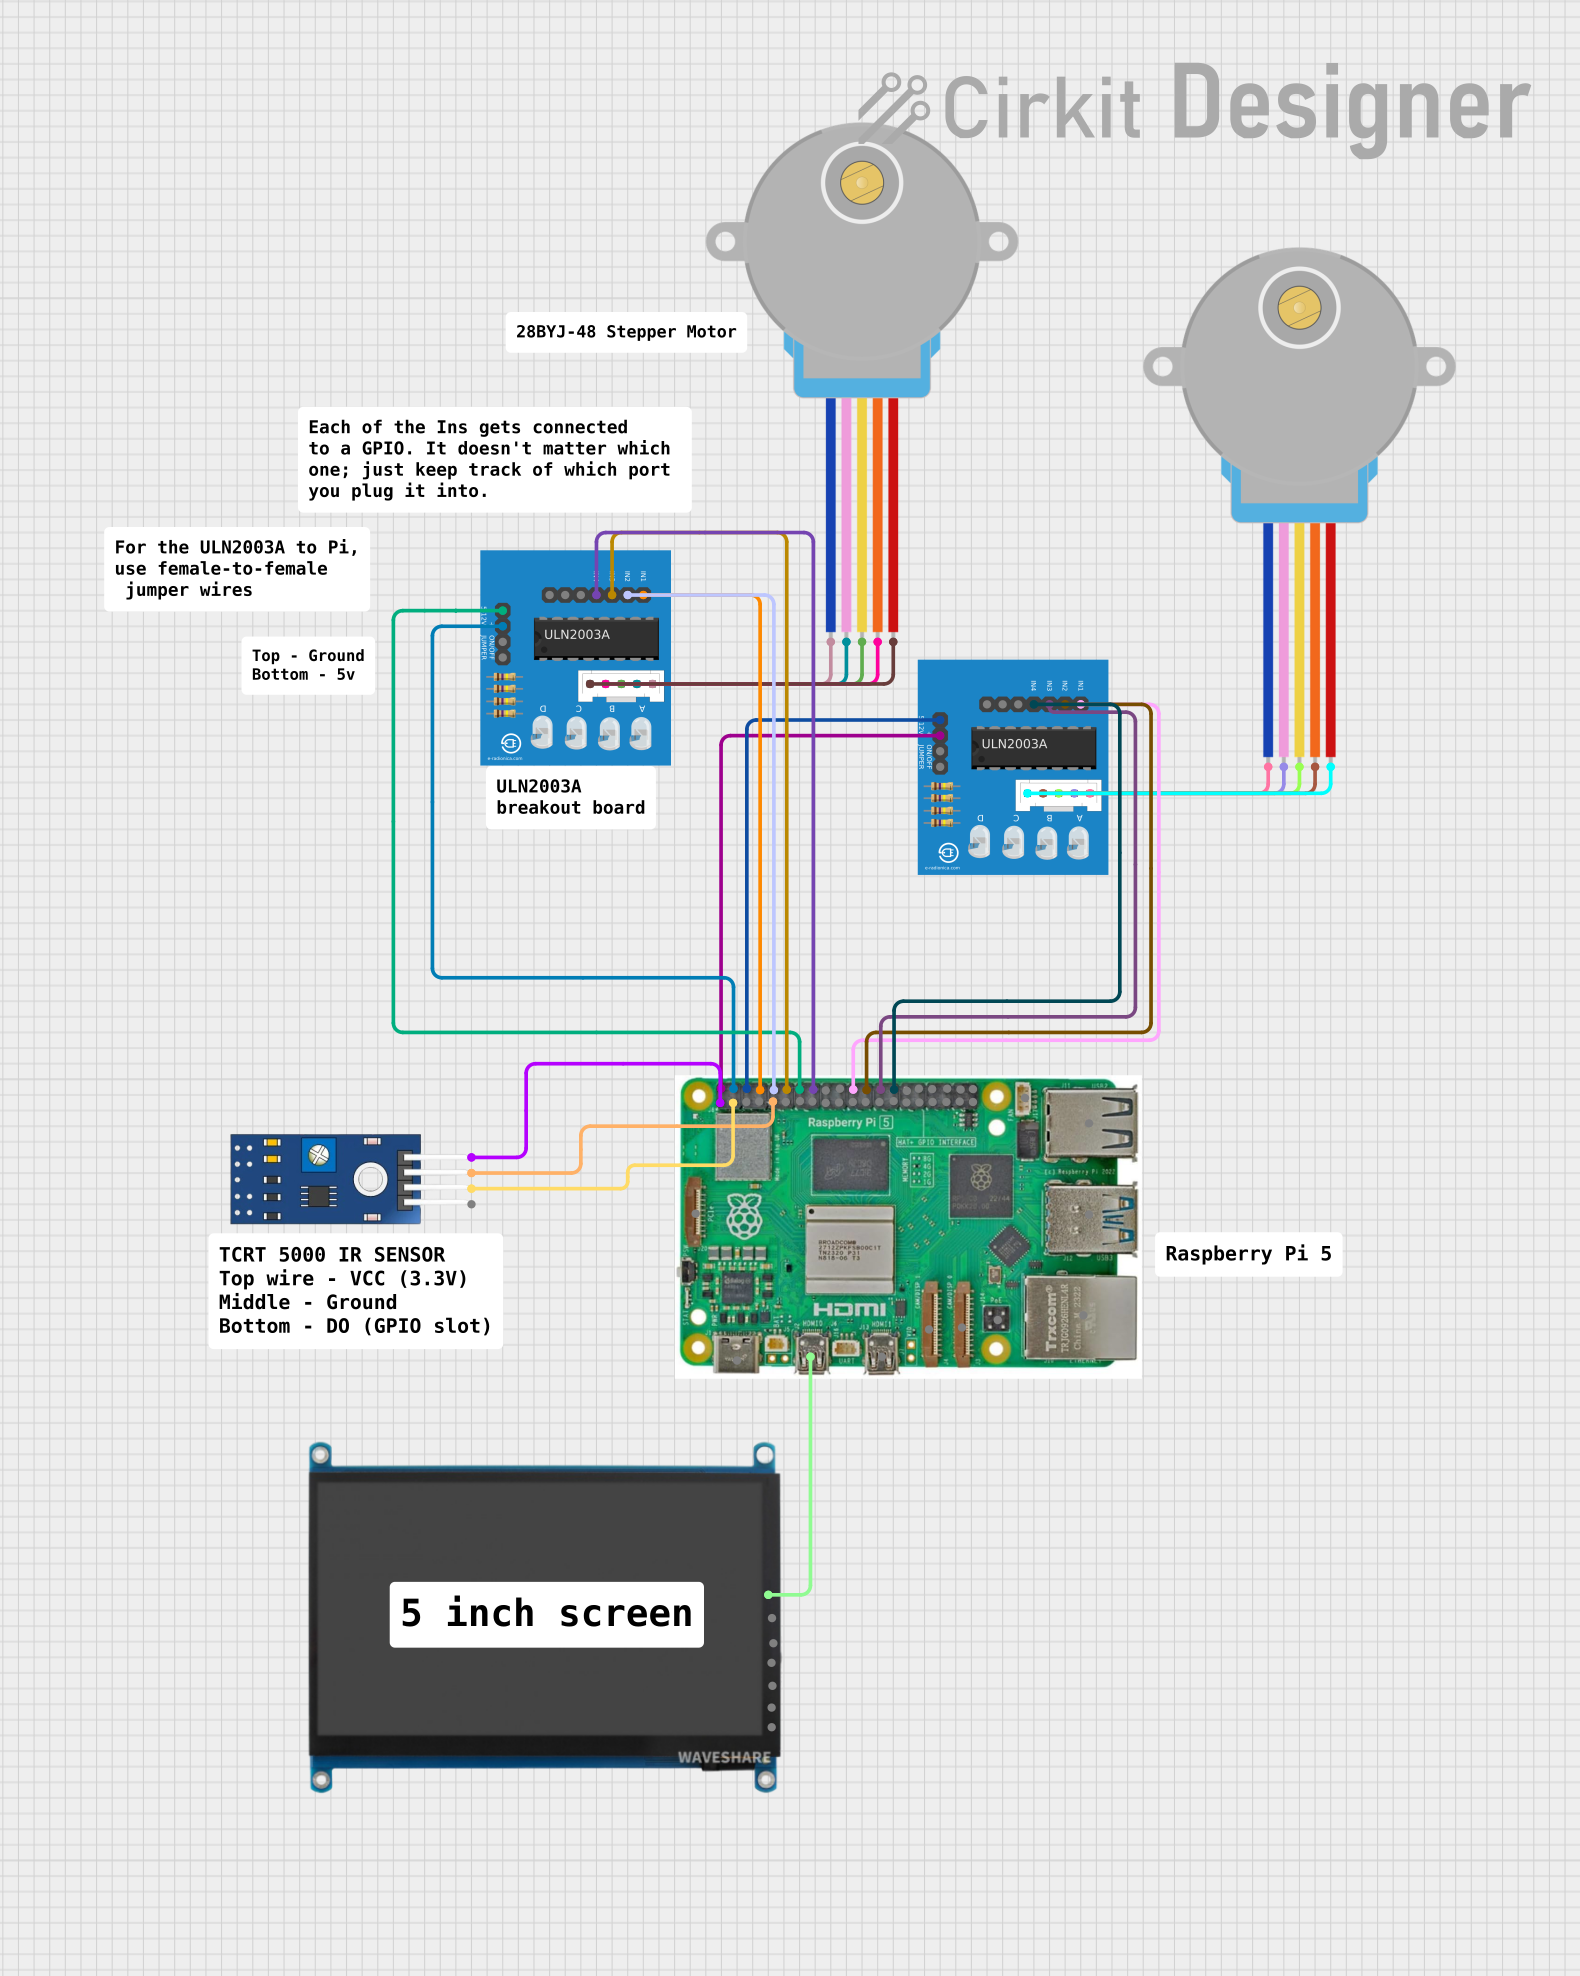

Explore Projects Built with hdmi monitor
Common Applications and Use Cases
- Personal Computing: Used as primary or secondary displays for desktops and laptops.
- Gaming: Provides high-resolution and low-latency visuals for gaming consoles and PCs.
- Media Playback: Displays high-definition video and audio from streaming devices, Blu-ray players, or set-top boxes.
- Professional Workstations: Utilized in video editing, graphic design, and other tasks requiring high-resolution displays.
- Presentations: Commonly used in offices and classrooms for projecting content from laptops or other devices.
Technical Specifications
Below are the general technical specifications for an HDMI monitor. Note that specific models may vary in their features and capabilities.
Key Technical Details
| Specification | Description |
|---|---|
| Resolution | Common resolutions include 1920x1080 (Full HD), 2560x1440 (QHD), and 3840x2160 (4K). |
| Aspect Ratio | Typically 16:9, though some monitors support 21:9 or other ultrawide formats. |
| Refresh Rate | Ranges from 60Hz to 240Hz, depending on the model and intended use (e.g., gaming). |
| Input Ports | HDMI 1.4, HDMI 2.0, or HDMI 2.1, depending on the monitor's capabilities. |
| Audio Output | Some monitors include built-in speakers or a 3.5mm headphone jack. |
| Power Supply | Typically 100-240V AC input, with power consumption ranging from 20W to 100W. |
| Color Support | Standard monitors support 8-bit color, while advanced models may support 10-bit or HDR. |
| Response Time | Typically 1ms to 5ms for gaming monitors, higher for general-purpose displays. |
Pin Configuration and Descriptions
The HDMI monitor connects via an HDMI cable, which uses the following pin configuration:
| Pin Number | Signal Name | Description |
|---|---|---|
| 1 | TMDS Data2+ | Transmits video and audio data. |
| 2 | TMDS Data2 Shield | Shield for TMDS Data2. |
| 3 | TMDS Data2- | Transmits video and audio data. |
| 4 | TMDS Data1+ | Transmits video and audio data. |
| 5 | TMDS Data1 Shield | Shield for TMDS Data1. |
| 6 | TMDS Data1- | Transmits video and audio data. |
| 7 | TMDS Data0+ | Transmits video and audio data. |
| 8 | TMDS Data0 Shield | Shield for TMDS Data0. |
| 9 | TMDS Data0- | Transmits video and audio data. |
| 10 | TMDS Clock+ | Transmits the clock signal for synchronization. |
| 11 | TMDS Clock Shield | Shield for TMDS Clock. |
| 12 | TMDS Clock- | Transmits the clock signal for synchronization. |
| 13 | CEC | Consumer Electronics Control for device communication. |
| 14 | Reserved (N.C.) | Reserved for future use. |
| 15 | SCL | I2C Serial Clock for EDID communication. |
| 16 | SDA | I2C Serial Data for EDID communication. |
| 17 | DDC/CEC Ground | Ground for DDC and CEC. |
| 18 | +5V Power | Provides 5V power for HDMI devices. |
| 19 | Hot Plug Detect | Detects when an HDMI device is connected. |
Usage Instructions
How to Use the HDMI Monitor in a Setup
- Connect the HDMI Cable:
- Plug one end of the HDMI cable into the HDMI port on the monitor.
- Connect the other end to the HDMI output port of the source device (e.g., computer, gaming console).
- Power On the Monitor:
- Connect the monitor to a power source using the provided power cable.
- Press the power button to turn on the monitor.
- Select the Input Source:
- Use the monitor's on-screen display (OSD) menu or input button to select the correct HDMI input if multiple ports are available.
- Adjust Display Settings:
- Configure the resolution, refresh rate, and other settings on the source device to match the monitor's capabilities.
- Use the monitor's OSD menu to adjust brightness, contrast, and other preferences.
Important Considerations and Best Practices
- Cable Quality: Use a high-quality HDMI cable, especially for 4K or higher resolutions, to ensure reliable signal transmission.
- Refresh Rate: Ensure the source device supports the monitor's refresh rate for optimal performance, particularly in gaming setups.
- Audio Output: If the monitor lacks built-in speakers, connect external speakers or headphones to the source device or the monitor's audio output (if available).
- Firmware Updates: Check the manufacturer's website for firmware updates to improve compatibility and performance.
- Avoid Overheating: Ensure proper ventilation around the monitor to prevent overheating during extended use.
Example: Connecting an HDMI Monitor to an Arduino UNO
While the Arduino UNO does not natively support HDMI output, you can use an HDMI shield or an external HDMI driver module to interface with an HDMI monitor. Below is an example of how to display basic graphics using an HDMI shield:
#include <Adafruit_GFX.h>  // Graphics library for drawing shapes and text
#include <Adafruit_HDMI.h> // Hypothetical library for HDMI shield

Adafruit_HDMI hdmi; // Create an HDMI object

void setup() {
  hdmi.begin(); // Initialize the HDMI shield
  hdmi.fillScreen(HDMI_BLACK); // Clear the screen with a black background
  hdmi.setTextColor(HDMI_WHITE); // Set text color to white
  hdmi.setCursor(10, 10); // Set cursor position
  hdmi.print("Hello, HDMI Monitor!"); // Display text on the screen
}

void loop() {
  // Add any dynamic updates or animations here
}
Note: Replace
Adafruit_HDMIwith the actual library name for your HDMI shield or module. Ensure the shield is compatible with the Arduino UNO.
Troubleshooting and FAQs
Common Issues and Solutions
- No Signal Detected:
- Cause: Loose or faulty HDMI cable.
- Solution: Check the cable connections and replace the cable if necessary.
- Blurry or Distorted Image:
- Cause: Incorrect resolution or refresh rate settings.
- Solution: Adjust the display settings on the source device to match the monitor's native resolution and refresh rate.
- No Audio Output:
- Cause: Audio output is not routed to the HDMI device.
- Solution: Configure the source device's audio settings to output sound via HDMI.
- Monitor Not Powering On:
- Cause: Faulty power cable or insufficient power supply.
- Solution: Verify the power connection and try a different outlet.
FAQs
Q: Can I use an HDMI monitor with older devices that lack HDMI ports?
A: Yes, you can use an HDMI adapter (e.g., VGA-to-HDMI or DVI-to-HDMI) to connect older devices, though some adapters may not support audio.Q: What is the difference between HDMI 1.4, 2.0, and 2.1?
A: HDMI 1.4 supports up to 4K at 30Hz, HDMI 2.0 supports 4K at 60Hz, and HDMI 2.1 supports 4K at 120Hz or 8K at 60Hz, along with additional features like variable refresh rate (VRR).Q: Can I use an HDMI splitter to connect multiple monitors?
A: Yes, but the same content will be displayed on all monitors. For extended displays, use a device that supports multiple HDMI outputs.Q: How do I clean my HDMI monitor?
A: Use a microfiber cloth and a screen-safe cleaning solution. Avoid using abrasive materials or spraying liquid directly onto the screen.