How to Use SparkFun Air Quality Breakout - CCS811: Examples, Pinouts, and Specs
Introduction
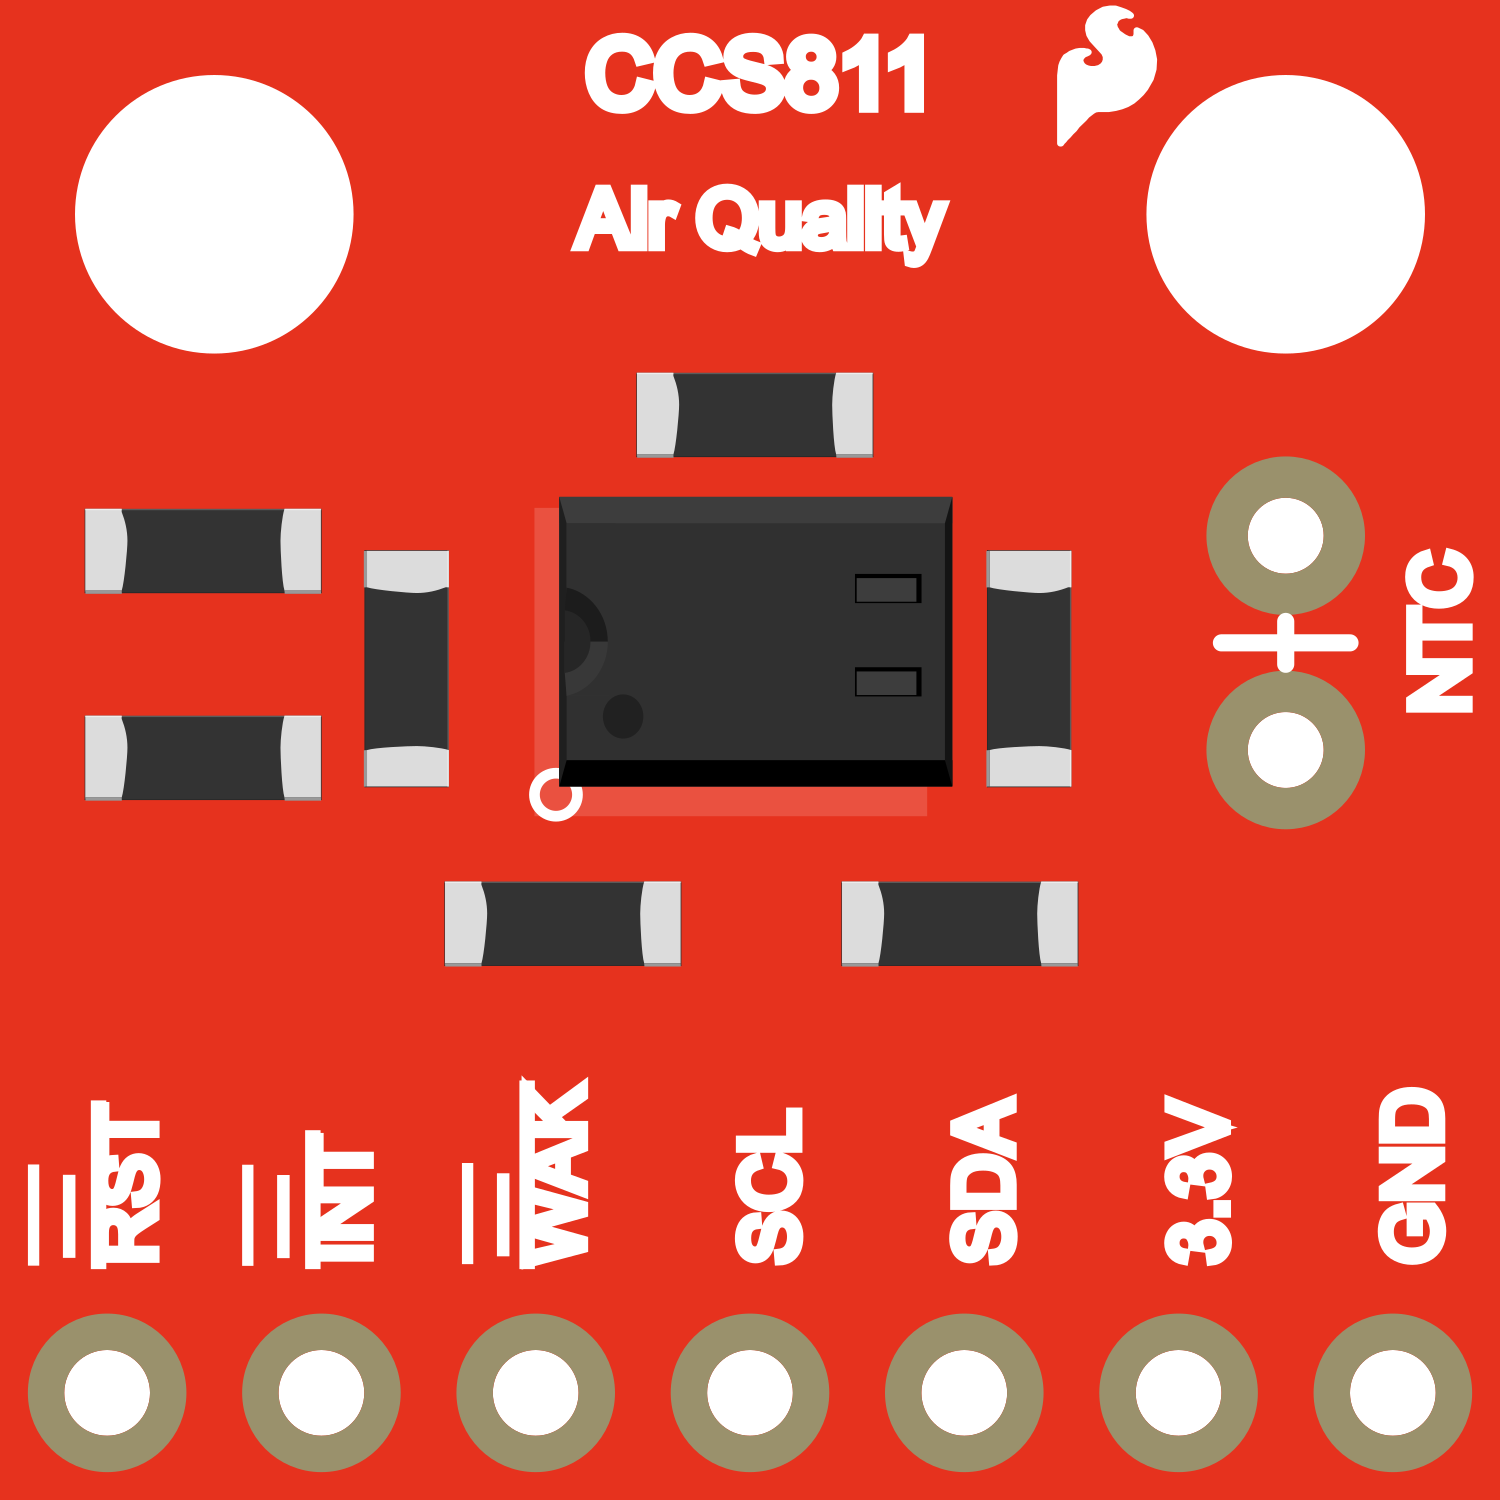
The SparkFun Air Quality Breakout featuring the CCS811 is an advanced sensor that measures the levels of volatile organic compounds (VOCs) and equivalent carbon dioxide (eCO2) in the air. This sensor is designed for indoor air quality monitoring and can be used in various applications such as smart homes, HVAC systems, and air purifiers.
Explore Projects Built with SparkFun Air Quality Breakout - CCS811
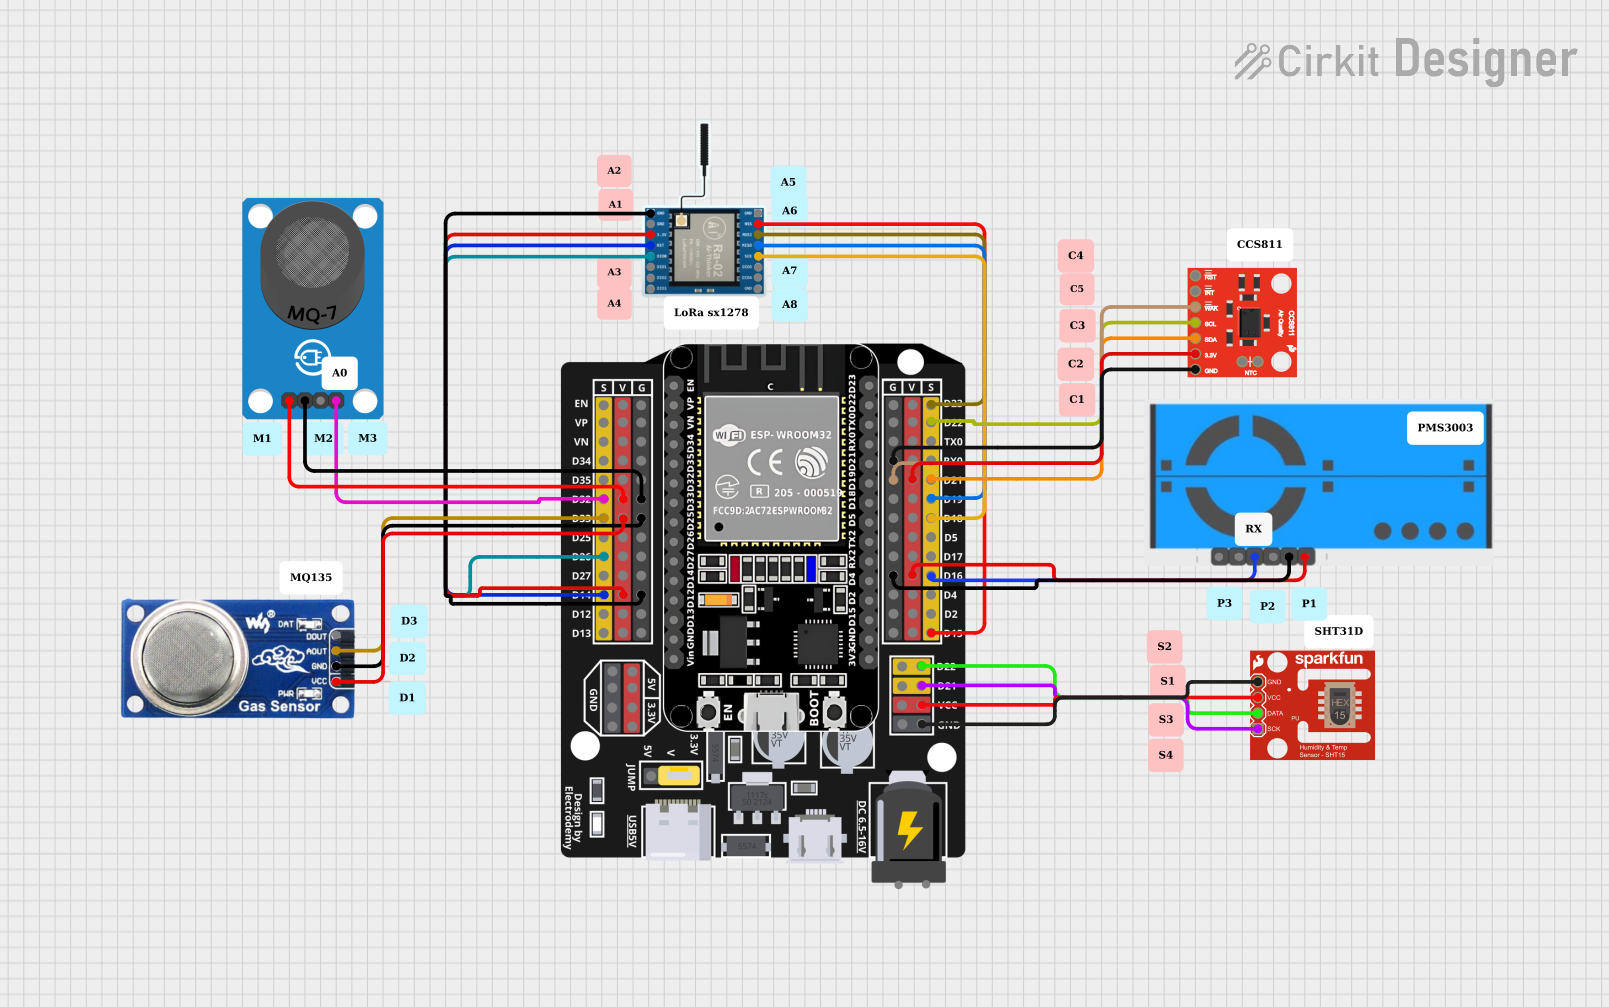
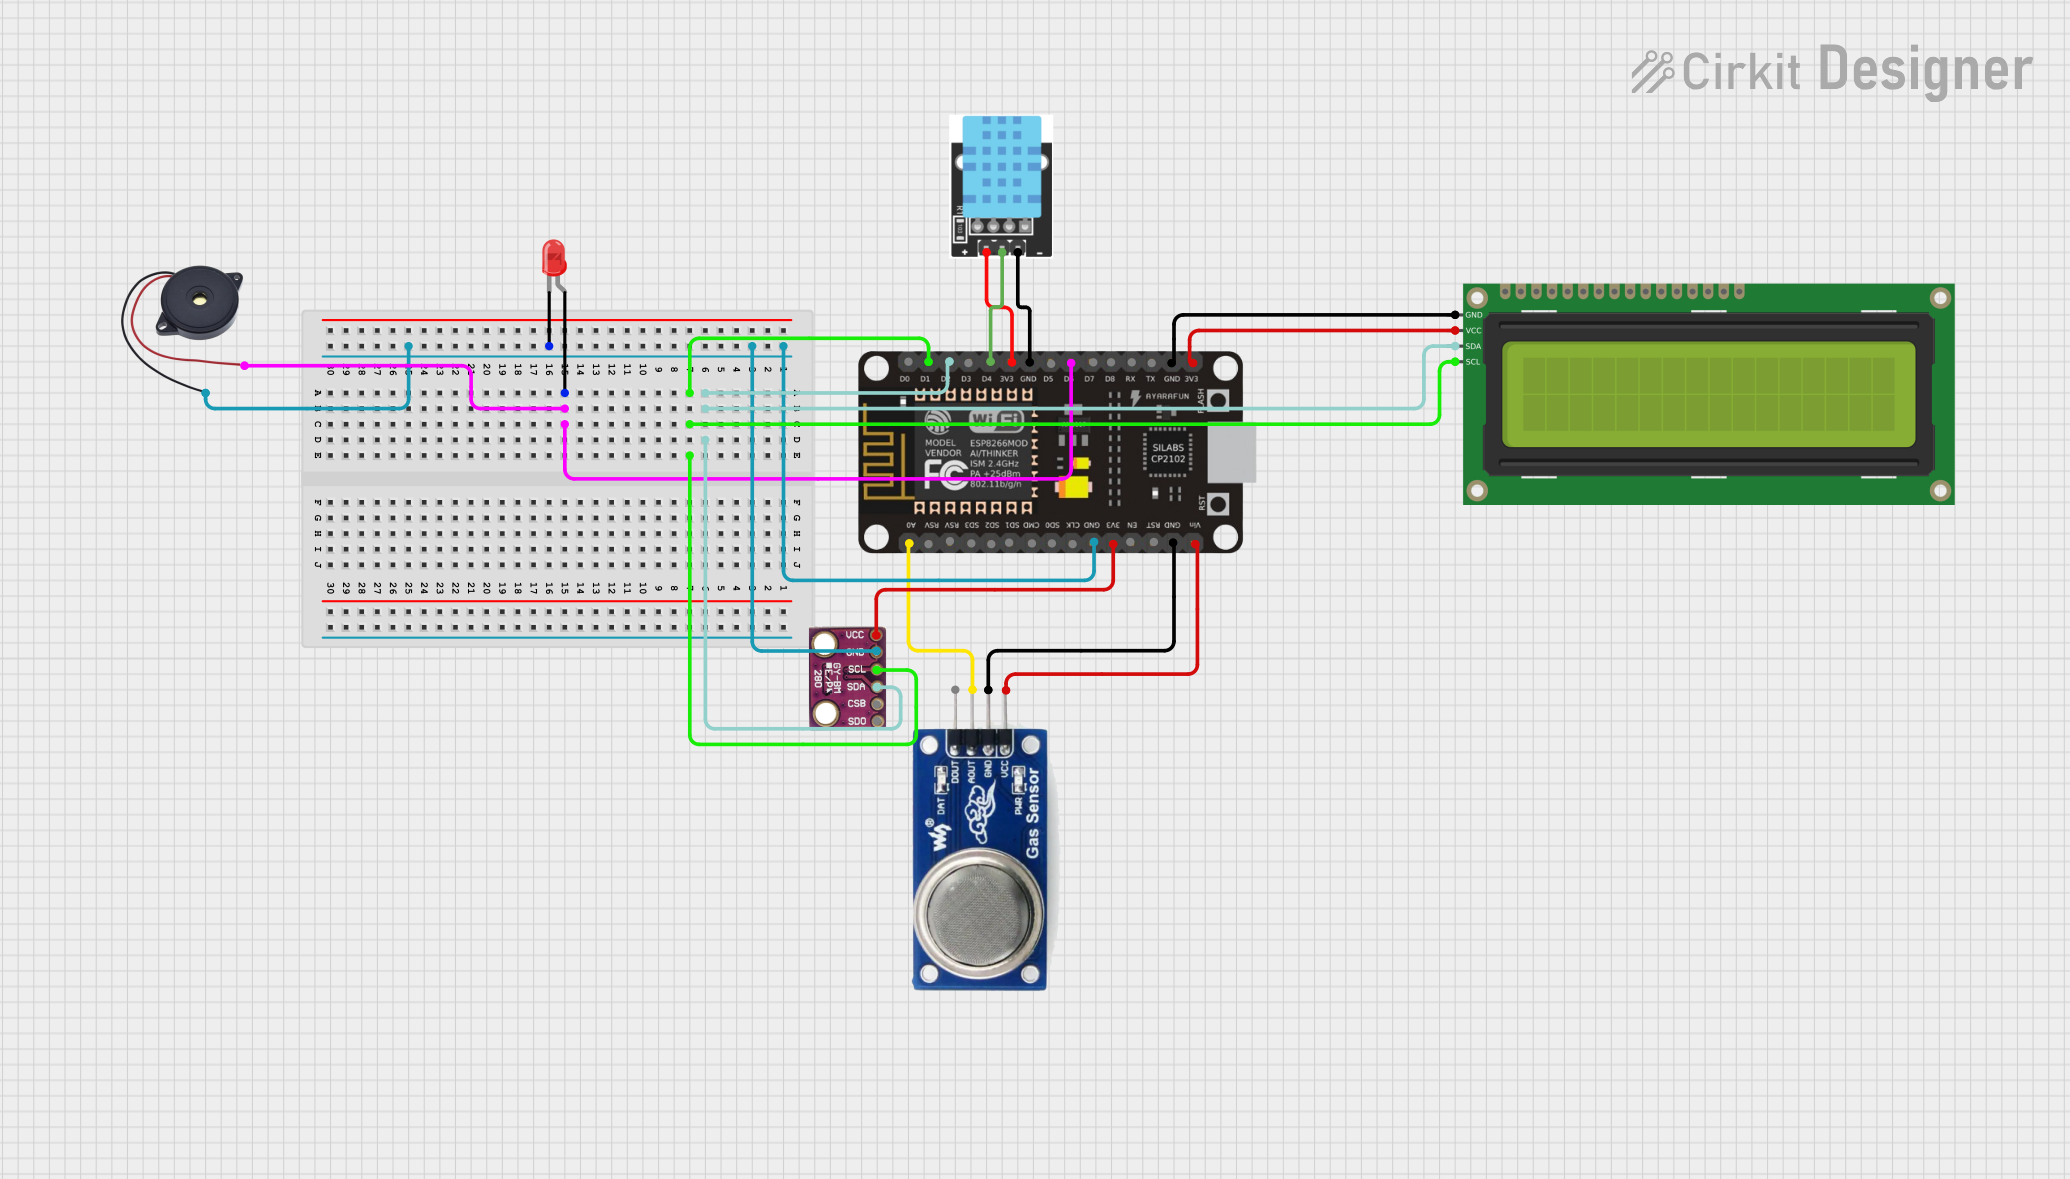
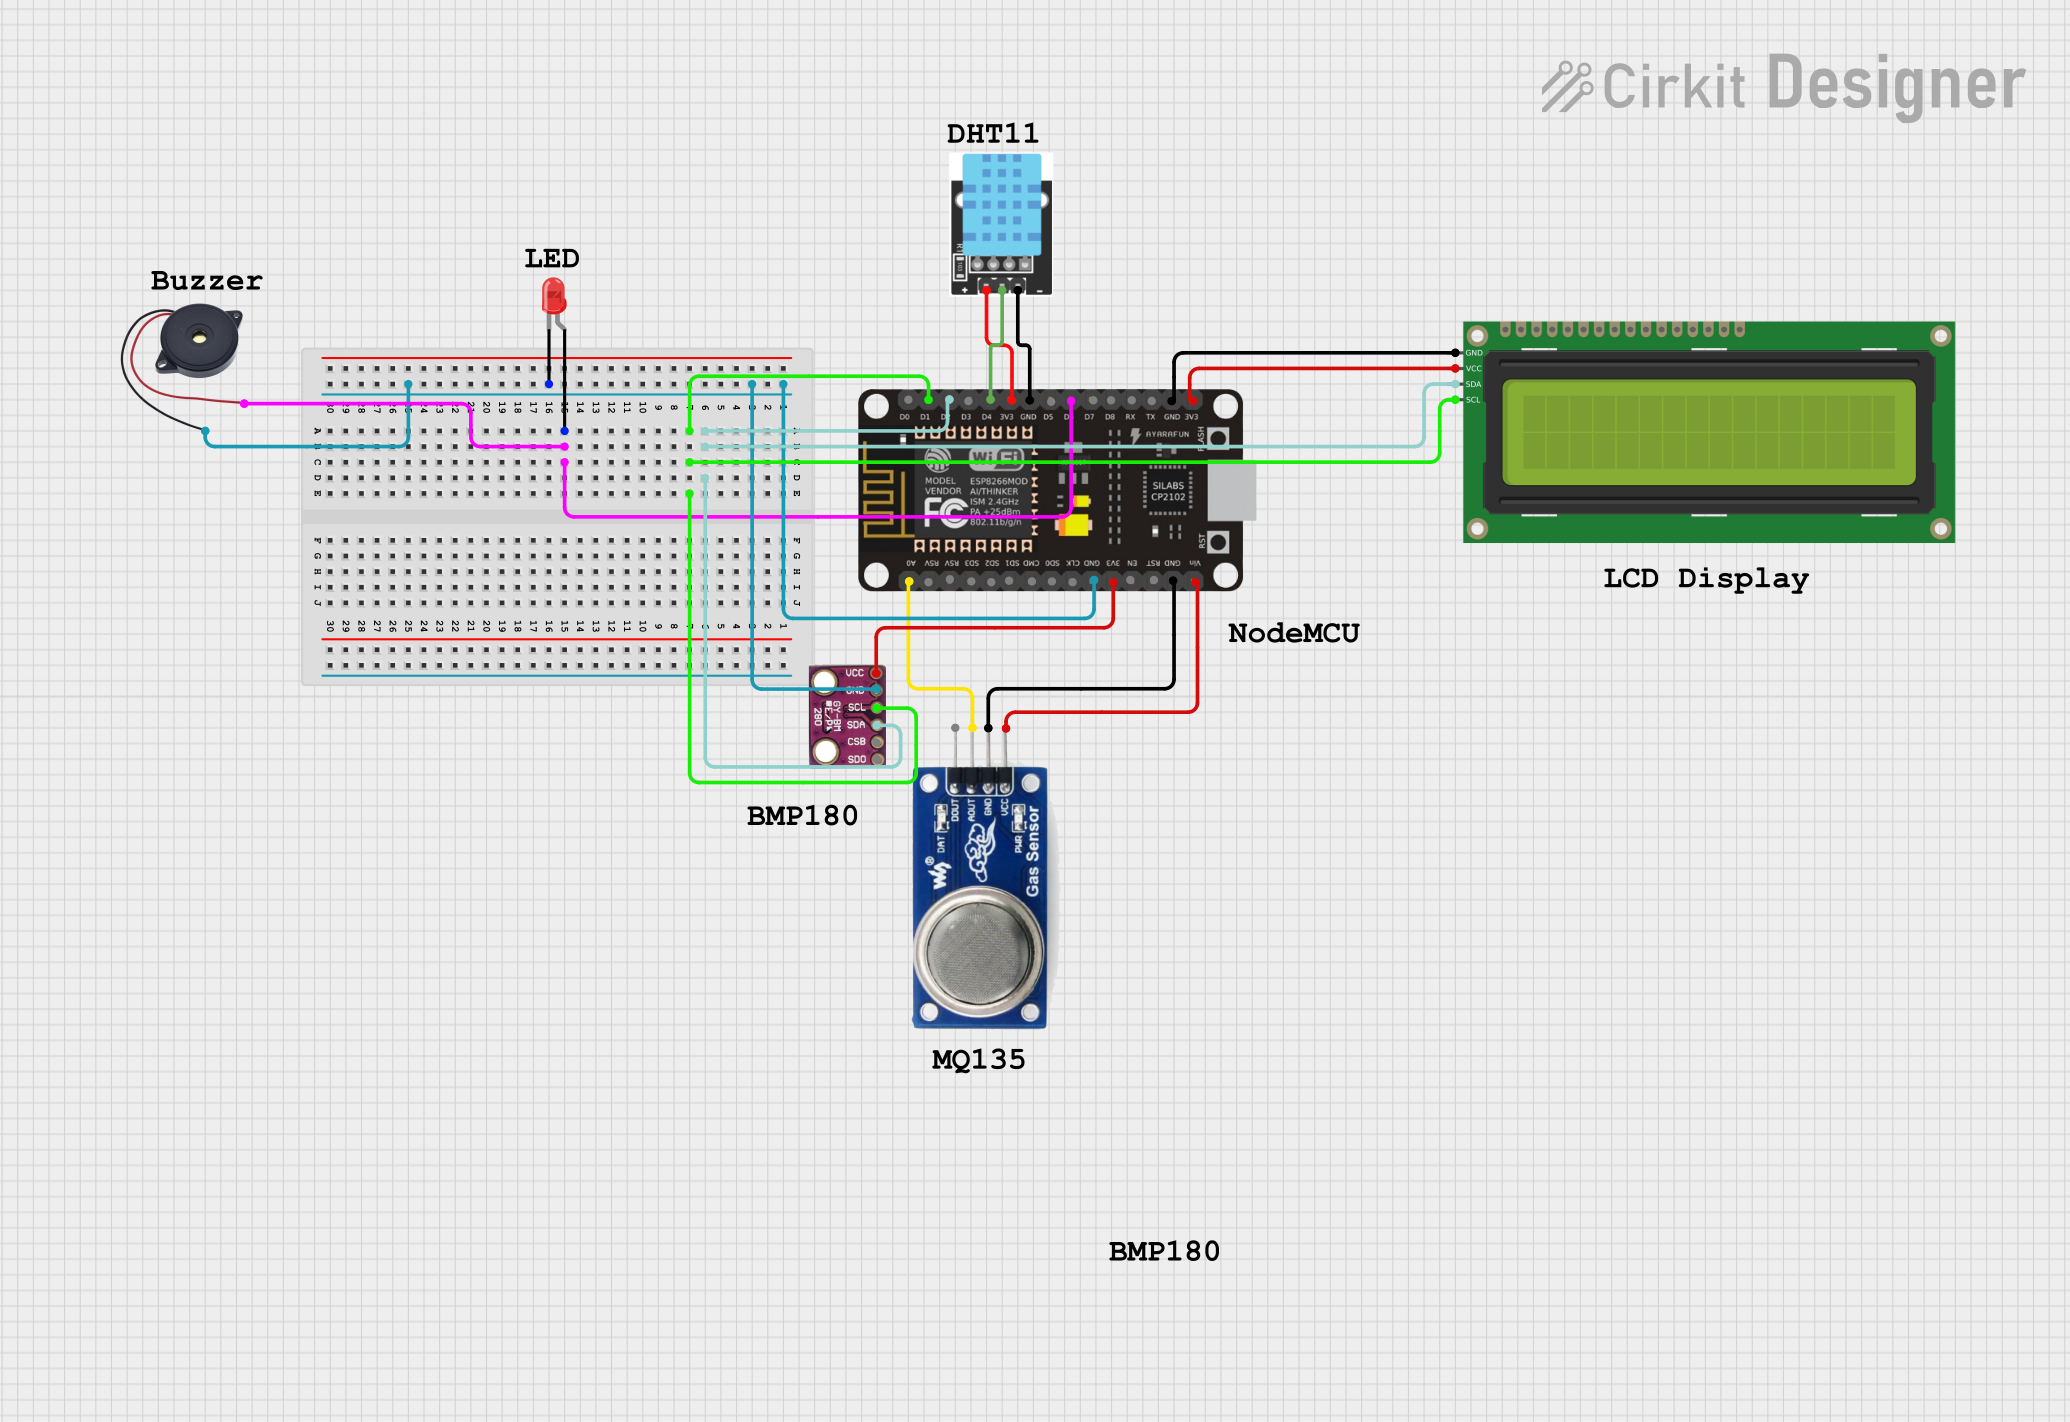
Explore Projects Built with SparkFun Air Quality Breakout - CCS811
Technical Specifications
Key Technical Details
- Measurement Range (eCO2): 400 to 8192 parts per million (ppm)
- Measurement Range (TVOC): 0 to 1187 parts per billion (ppb)
- Interface: I2C
- Supply Voltage: 3.3V
- Current Consumption: 30mA (typical)
- Operating Temperature: -40°C to 85°C
Pin Configuration and Descriptions
| Pin Number | Pin Name | Description |
|---|---|---|
| 1 | VCC | Power supply (3.3V) |
| 2 | GND | Ground |
| 3 | SDA | I2C Data |
| 4 | SCL | I2C Clock |
| 5 | WAKE | Wake pin (active low) |
| 6 | INT | Interrupt pin |
| 7 | RST | Reset pin (active low) |
| 8 | ADDR | I2C Address select (float or tie to GND) |
Usage Instructions
Integration with a Circuit
To use the CCS811 sensor in a circuit:
- Connect the VCC pin to a 3.3V power supply.
- Connect the GND pin to the ground of the power supply.
- Connect the SDA and SCL pins to the I2C data and clock lines, respectively.
- The WAKE pin can be connected to ground to keep the sensor awake.
- The INT pin can be left unconnected if the interrupt feature is not used.
- The RST pin can be connected to a digital pin on a microcontroller for software reset functionality.
- The ADDR pin can be left floating or connected to ground to set the I2C address.
Best Practices
- Ensure that the power supply is stable and clean.
- Avoid placing the sensor in direct sunlight or near strong heat sources.
- Allow the sensor to preheat for at least 20 minutes for accurate readings.
- Calibrate the sensor periodically to maintain accuracy.
Example Code for Arduino UNO
#include <Wire.h>
#include "SparkFunCCS811.h"  // Include the CCS811 library

#define CCS811_ADDR 0x5A  // Default I2C Address
CCS811 mySensor(CCS811_ADDR);

void setup() {
  Serial.begin(9600);
  Wire.begin();

  if (mySensor.begin() == false) {
    Serial.println("CCS811 sensor not found. Please check wiring.");
    while (1);
  }
}

void loop() {
  // Check if data is available to read
  if (mySensor.dataAvailable()) {
    mySensor.readAlgorithmResults();  // Read sensor data
    Serial.print("CO2: ");
    Serial.print(mySensor.getCO2());
    Serial.print(" ppm, TVOC: ");
    Serial.print(mySensor.getTVOC());
    Serial.println(" ppb");
  }
  delay(500);  // Delay between readings
}
Troubleshooting and FAQs
Common Issues
- Sensor not responding: Check the wiring, ensure the sensor is properly powered.
- Inaccurate readings: Allow the sensor to preheat, check for environmental factors.
- I2C communication failure: Verify the I2C address and connections.
Solutions and Tips
- Preheating: Run the sensor for at least 20 minutes before taking measurements.
- Calibration: Follow the manufacturer's guidelines for calibration.
- Avoid Contamination: Keep the sensor away from smoke and solvents.
FAQs
Q: Can the sensor measure CO2 directly? A: No, the sensor measures eCO2 which is an estimation based on VOC levels.
Q: What is the lifespan of the sensor? A: The CCS811 sensor has a typical lifespan of five years when operated within its specifications.
Q: How often should the sensor be calibrated? A: Calibration frequency depends on the application, but a monthly check is a good practice.
For further assistance, consult the manufacturer's datasheet and the SparkFun CCS811 library documentation.