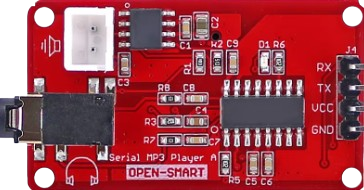
The Serial MP3 Player is a compact audio module that can play MP3 files stored on a microSD card. It is designed for easy integration into various electronic projects, including interactive installations, sound effects for toys, or as a standalone MP3 player. The device is controlled via serial commands, making it compatible with microcontrollers such as Arduino, Raspberry Pi, and others.
Explore Projects Built with Serial MP3 Player
Use Cirkit Designer to design, explore, and prototype these projects online. Some projects support real-time simulation. Click "Open Project" to start designing instantly!
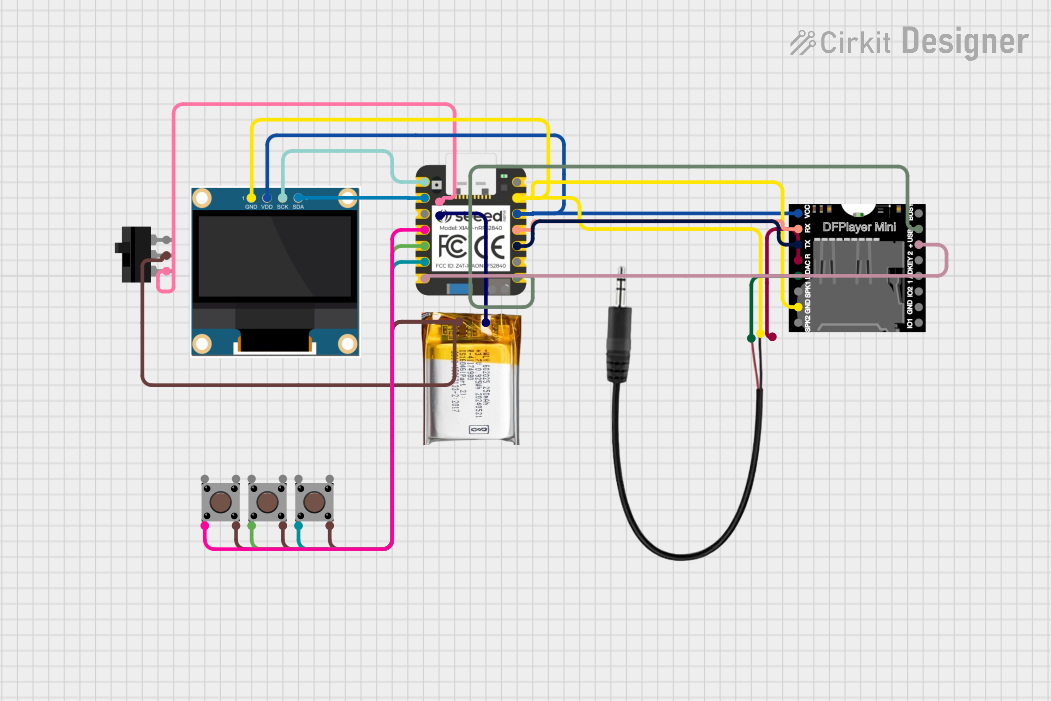
This circuit is an MP3 player system controlled by a Seeed Studio nRF52840 microcontroller. It includes a DFPlayer MINI for audio playback, a 0.96" OLED display for visual feedback, and multiple pushbuttons for user interaction. The system is powered by a 3.7V LiPo battery and outputs audio through a 3.5mm audio jack.
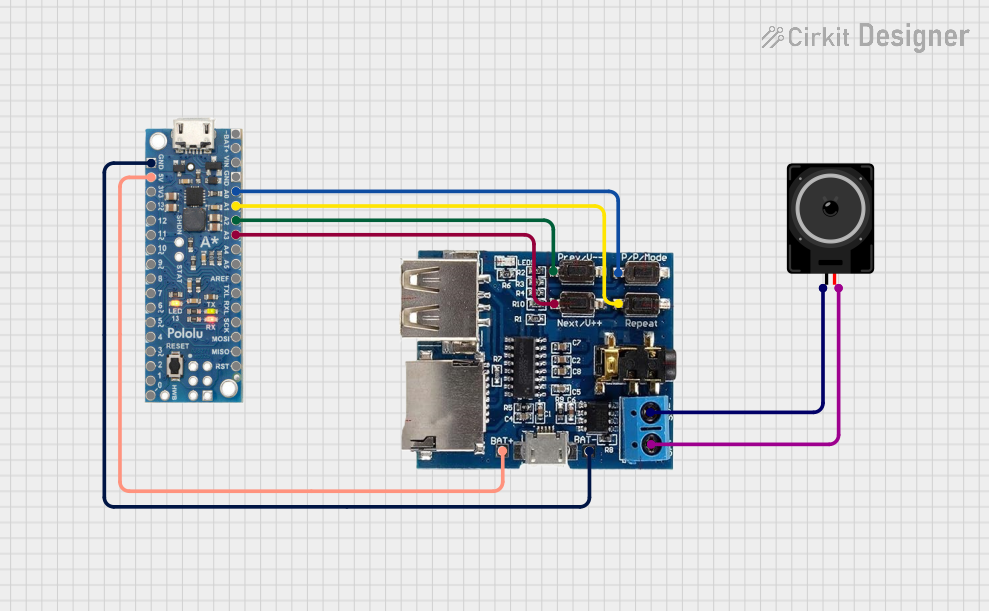
This circuit integrates an A-Star 32U4 Mini microcontroller with an MP3 Decoder Player Module to create a basic MP3 player system. The microcontroller is likely used to control playback functions such as mode selection and track navigation, as indicated by the connections to the Mode, Repeat, Prev/V--, and Next/V++ pins of the MP3 module. The Loudspeaker is connected to the MP3 module to output the audio signal.
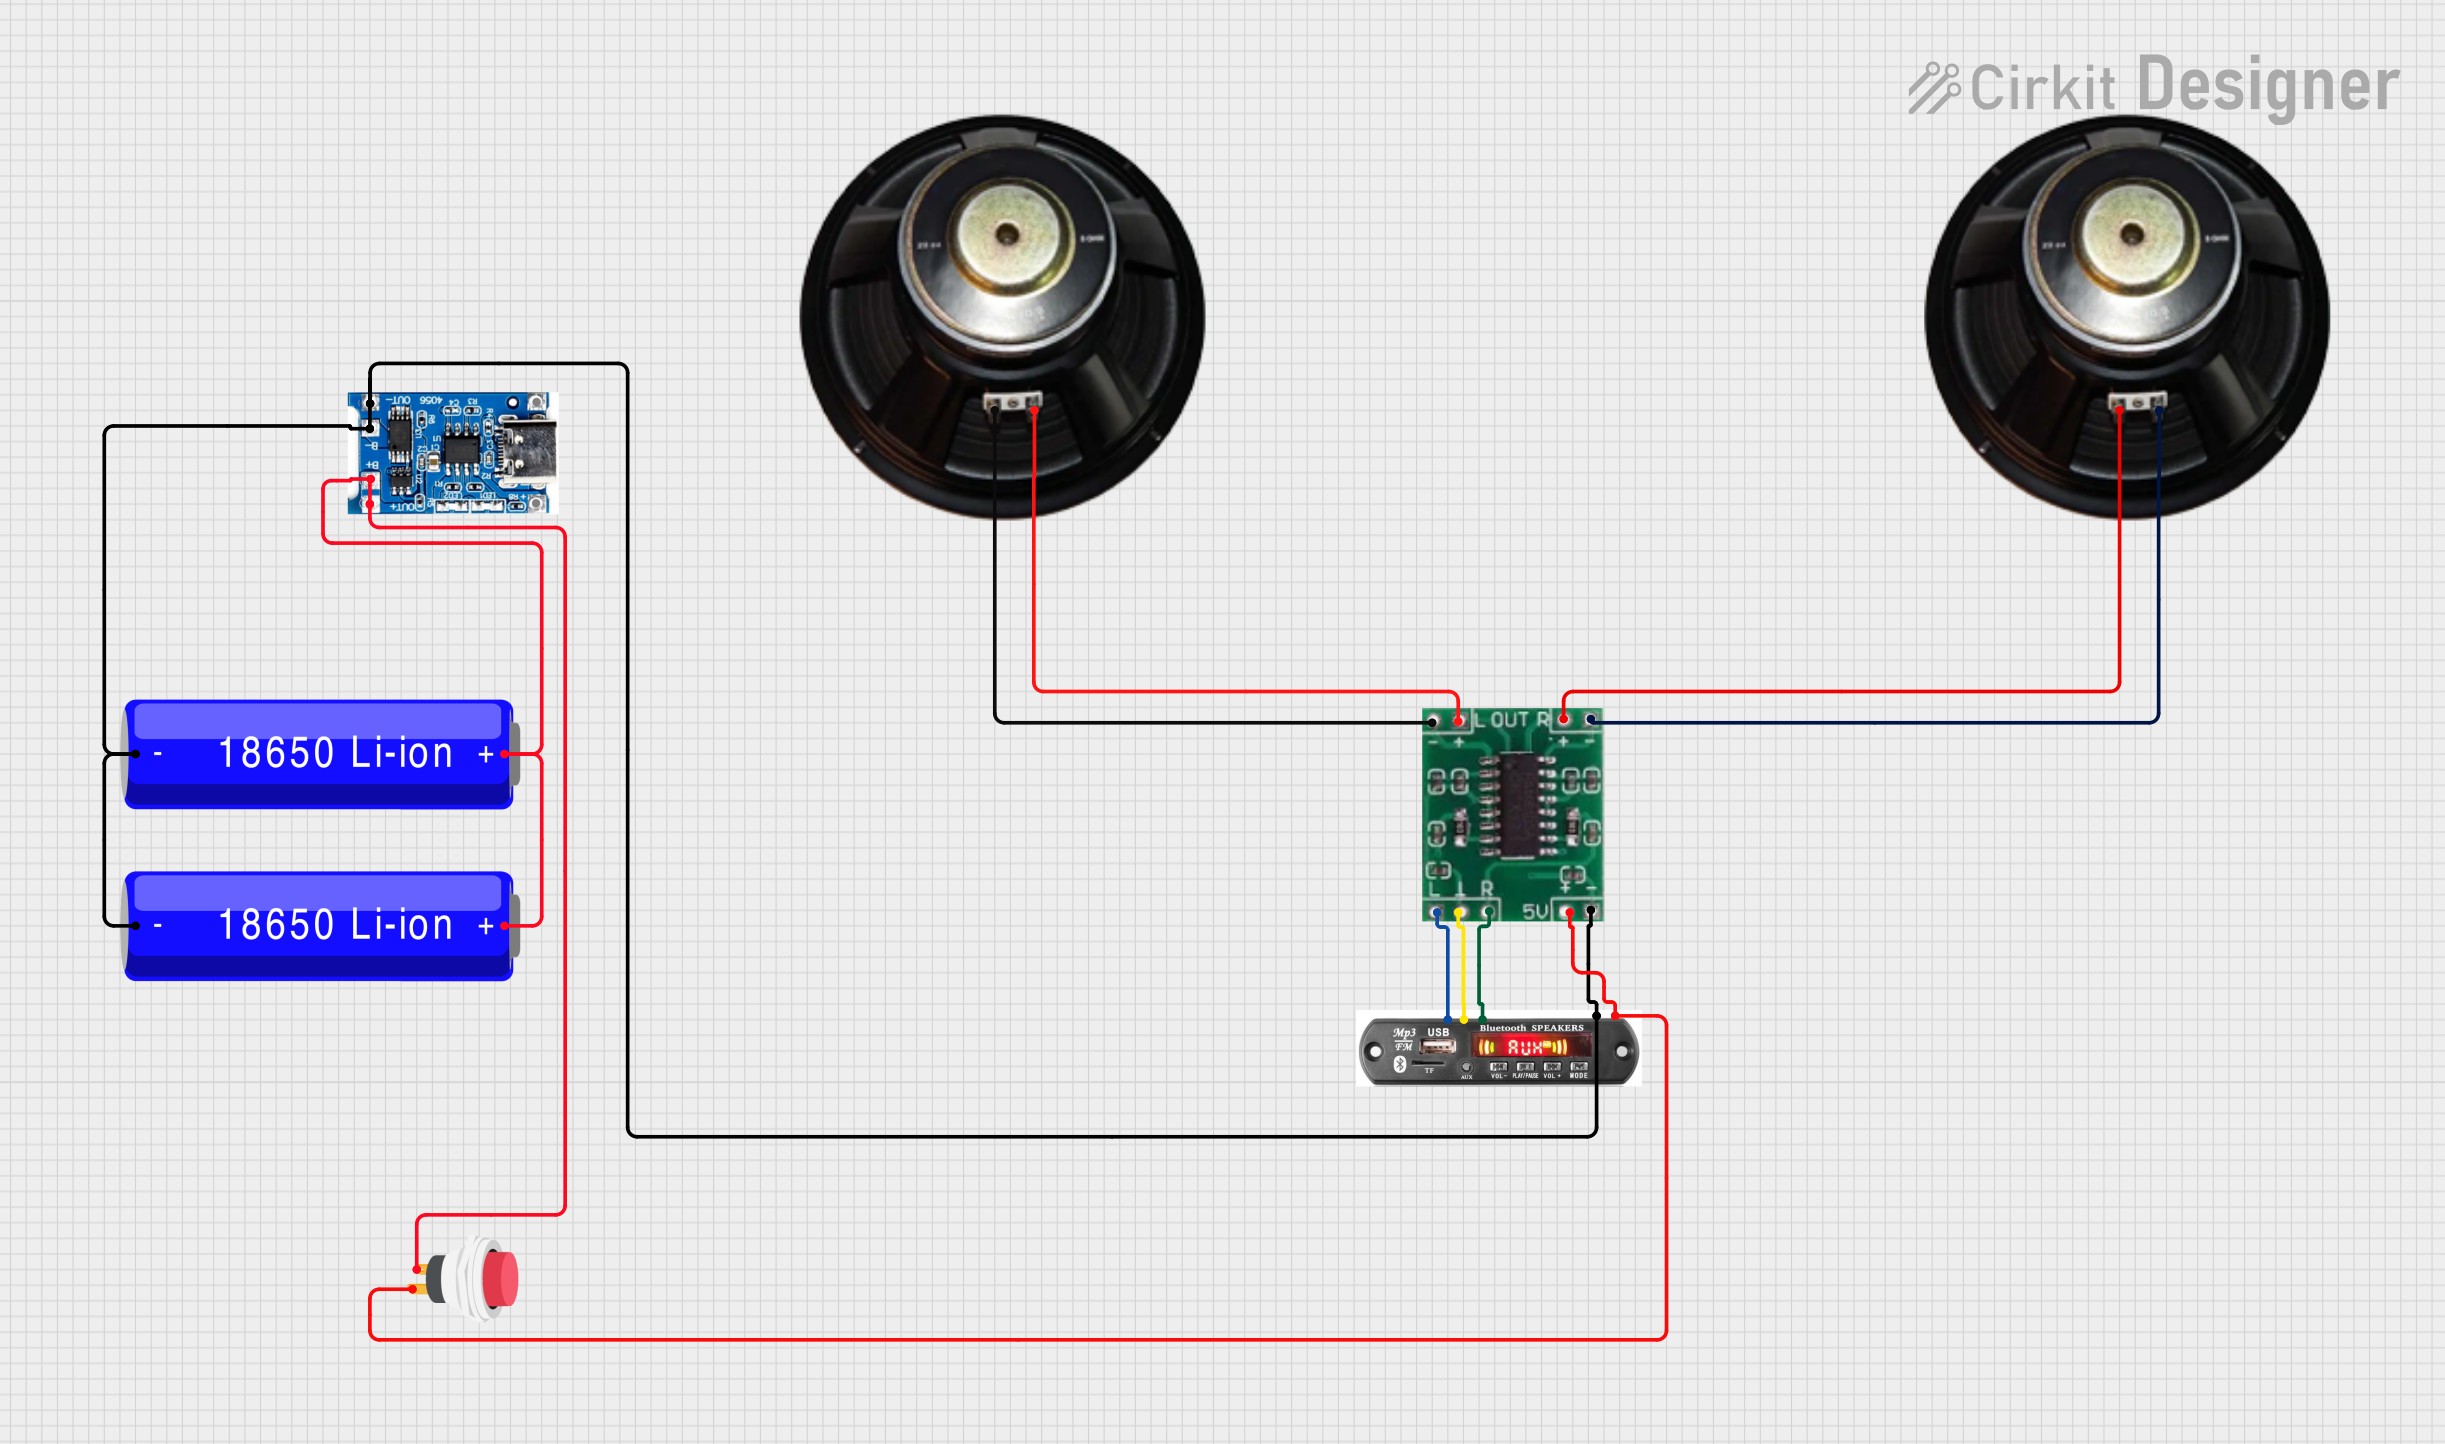
This circuit is a portable audio playback system powered by two 18650 Li-ion batteries, which are charged and protected by a TP4056 module. The MP3 module provides audio signals to a 5V amplifier board, which then drives two speakers. A push switch is used to control the power to the MP3 module and amplifier.
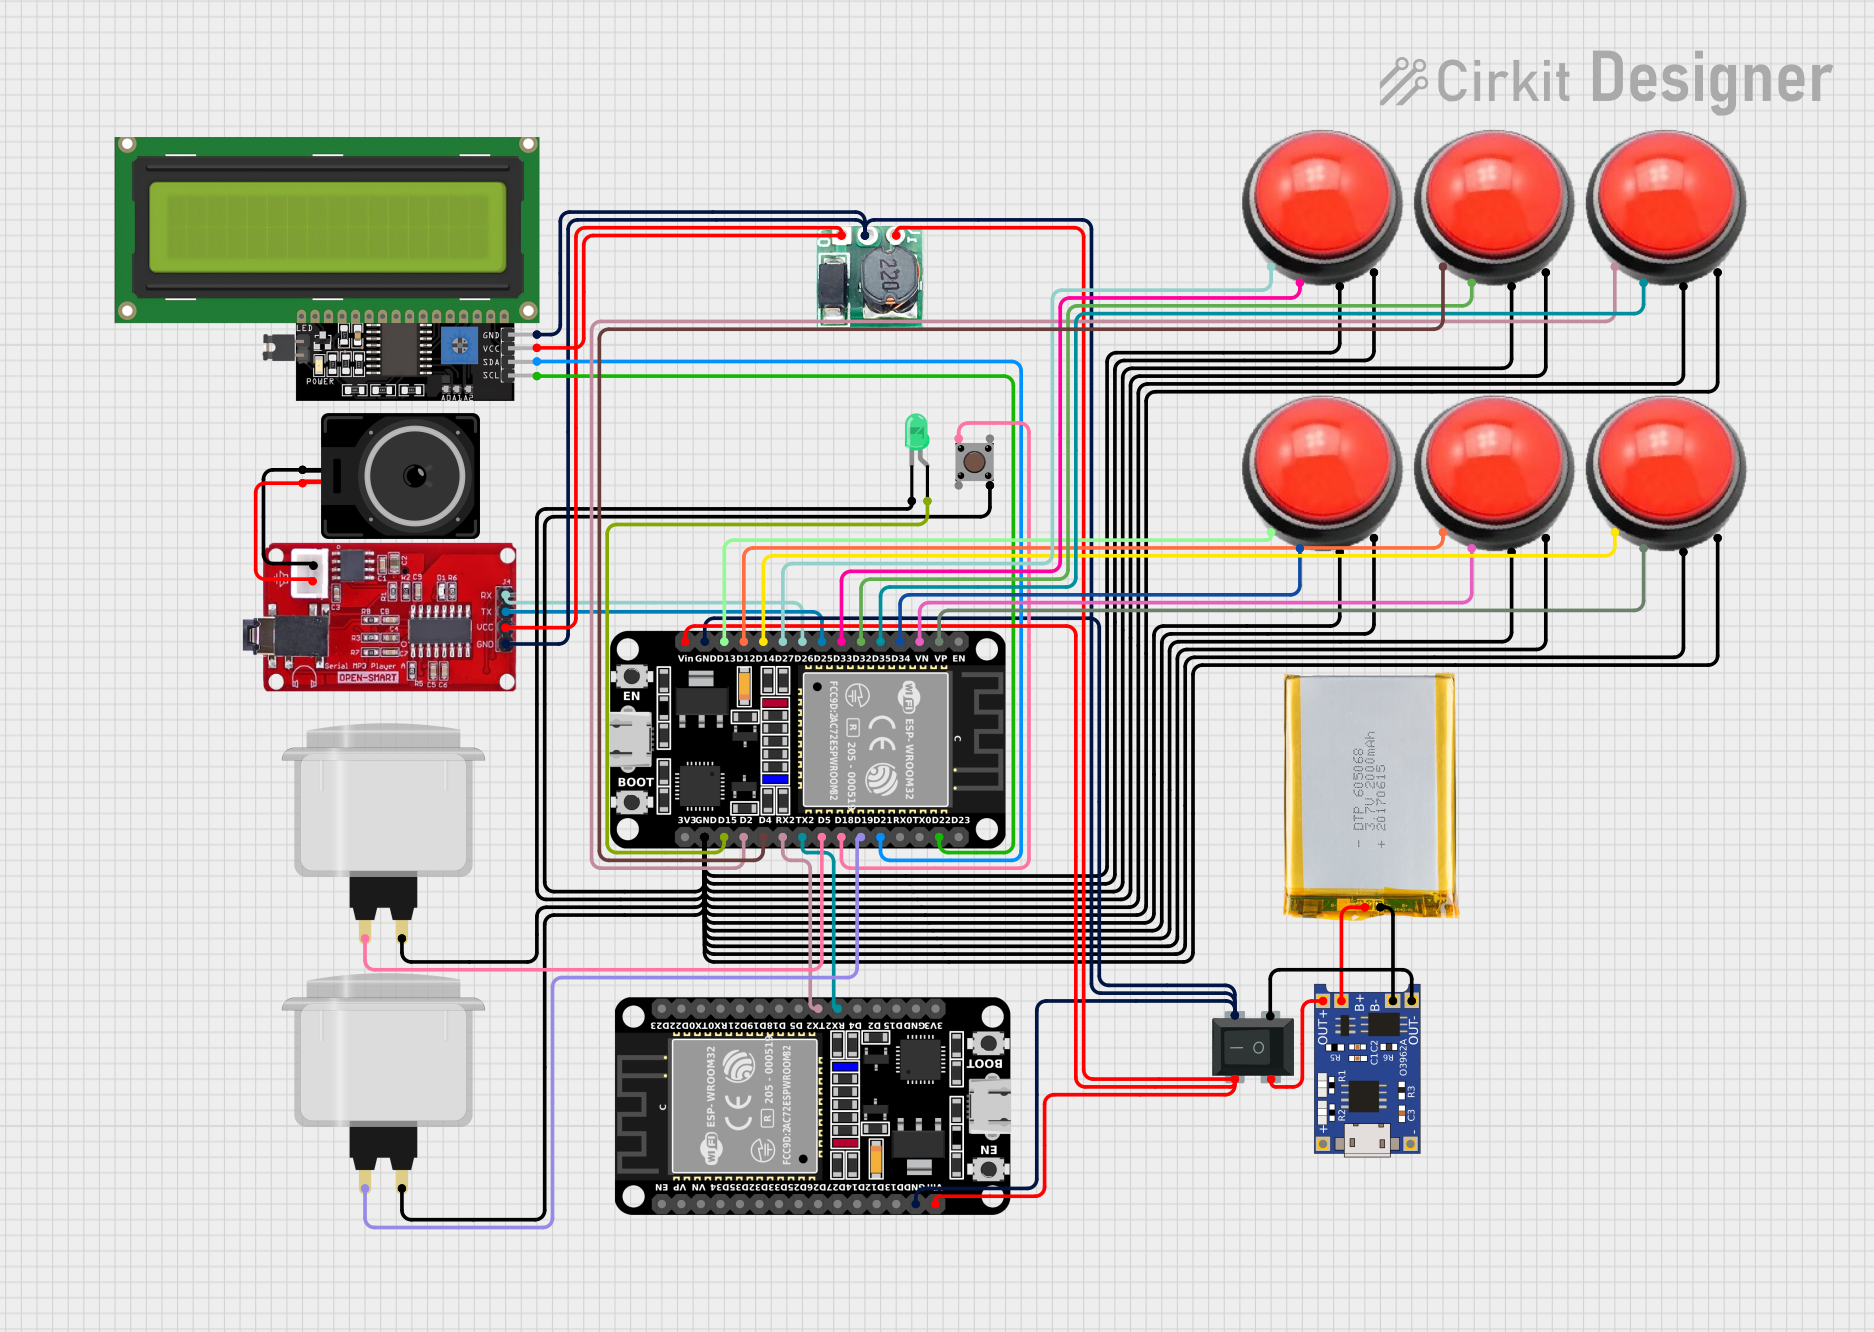
This is a microcontroller-based interactive device featuring an ESP32 for control, a Serial MP3 Player for audio output, an LCD display for user interface, and various buttons for input. It includes a battery with a charging module and voltage regulation, and uses a rocker switch for power control. The system's functionality is determined by the embedded code, which is currently a placeholder for future development.
Educational tools for learning about electronics and programming
Customizable alarms and notification systems
Technical Specifications
Key Technical Details
Supported Formats: MP3, WAV
Supply Voltage: 3.2V - 5.25V
Operating Current: 20 - 60mA
Standby Current: <3mA
Output: DAC 2-channel stereo output
Signal-to-Noise Ratio: 90dB
Distortion: 0.06%
Storage: microSD card (supports up to 32GB)
Pin Configuration and Descriptions
Pin Number
Name
Description
1
VCC
Power supply (3.2V - 5.25V)
2
GND
Ground connection
3
TX
Serial transmit, connects to RX on the microcontroller
4
RX
Serial receive, connects to TX on the microcontroller
5
SPK1
Speaker output 1
6
SPK2
Speaker output 2
Usage Instructions
How to Use the Component in a Circuit
Connect the VCC pin to a power supply within the specified voltage range.
Connect the GND pin to the ground of the power supply.
Connect the TX pin of the Serial MP3 Player to the RX pin of your microcontroller.
Connect the RX pin of the Serial MP3 Player to the TX pin of your microcontroller.
Attach a speaker to the SPK1 and SPK2 pins.
Important Considerations and Best Practices
Ensure that the power supply voltage does not exceed the recommended range to prevent damage.
Format the microSD card to FAT16 or FAT32 and store MP3 files in the root directory or folders.
Use a level shifter if the microcontroller operates at a different logic level than the Serial MP3 Player.
Keep the serial communication lines as short as possible to reduce noise and interference.
Example Code for Arduino UNO
#include <SoftwareSerial.h>

// RX and TX connected to pins 10 and 11 on the Arduino
SoftwareSerial mySerial(10, 11);

void setup() {
  // Open serial communications
  Serial.begin(9600);
  while (!Serial) {
    ; // Wait for serial port to connect
  }

  // Set the baud rate for the MP3 player
  mySerial.begin(9600);
  delay(500); // Wait for MP3 player to initialize
  mySerial.write(0x7E); // Starting byte
  mySerial.write(0xFF); // Version
  mySerial.write(0x06); // Command length
  mySerial.write(0x09); // Command name (Play)
  mySerial.write(0x00); // Feedback (0x00 = no, 0x01 = yes)
  mySerial.write(0x00); // Parameter 1 (0x00 = no repeat, 0x01 = repeat)
  mySerial.write(0x01); // Parameter 2 (song number)
  mySerial.write(0xEF); // Ending byte
}

void loop() {
  // Here, you can add code to control the MP3 player further,
  // such as play, pause, next, previous, volume control, etc.
}
Troubleshooting and FAQs
Common Issues Users Might Face
No Audio Output: Ensure the speaker is properly connected and the volume is not set to zero.
Serial Communication Failure: Check the wiring between the Serial MP3 Player and the microcontroller, and ensure the correct baud rate is set.
File Not Playing: Verify the microSD card is formatted correctly and the MP3 files are not corrupted.
Solutions and Tips for Troubleshooting
If the device is not responding, reset the power supply and check all connections.
Use a different microSD card to rule out issues with the card itself.
Ensure that the MP3 file names are in a format that the Serial MP3 Player can recognize.
FAQs
Q: Can I connect the Serial MP3 Player directly to an Arduino without a level shifter?
A: Yes, if the Arduino operates at 5V, it is within the acceptable voltage range for the Serial MP3 Player.
Q: How many audio files can the Serial MP3 Player handle?
A: It can handle as many files as the microSD card can store, up to the card's capacity limit.
Q: Can I power the Serial MP3 Player from the Arduino's 5V pin?
A: Yes, as long as the Arduino's power supply can handle the additional current draw.

 Open Project in Cirkit Designer