How to Use Atlas Scientific pH Probe: Examples, Pinouts, and Specs
Introduction
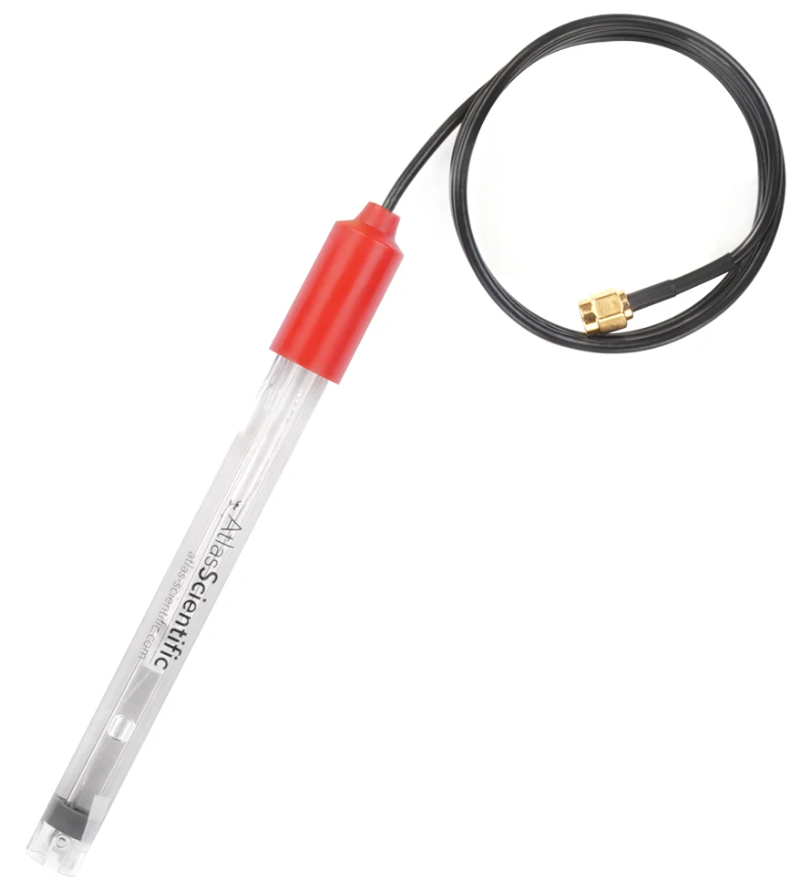
The Atlas Scientific pH Probe (KIT-103P) is a highly accurate sensor designed for measuring the pH level of liquids. pH, which stands for "potential of hydrogen," is a scale used to specify the acidity or basicity of an aqueous solution. The probe is commonly used in a variety of applications including environmental monitoring, aquariums, hydroponics, and laboratory research. When paired with the Atlas Scientific pH Circuit, it provides reliable and precise pH readings that are essential for quality control and scientific analysis.
Explore Projects Built with Atlas Scientific pH Probe
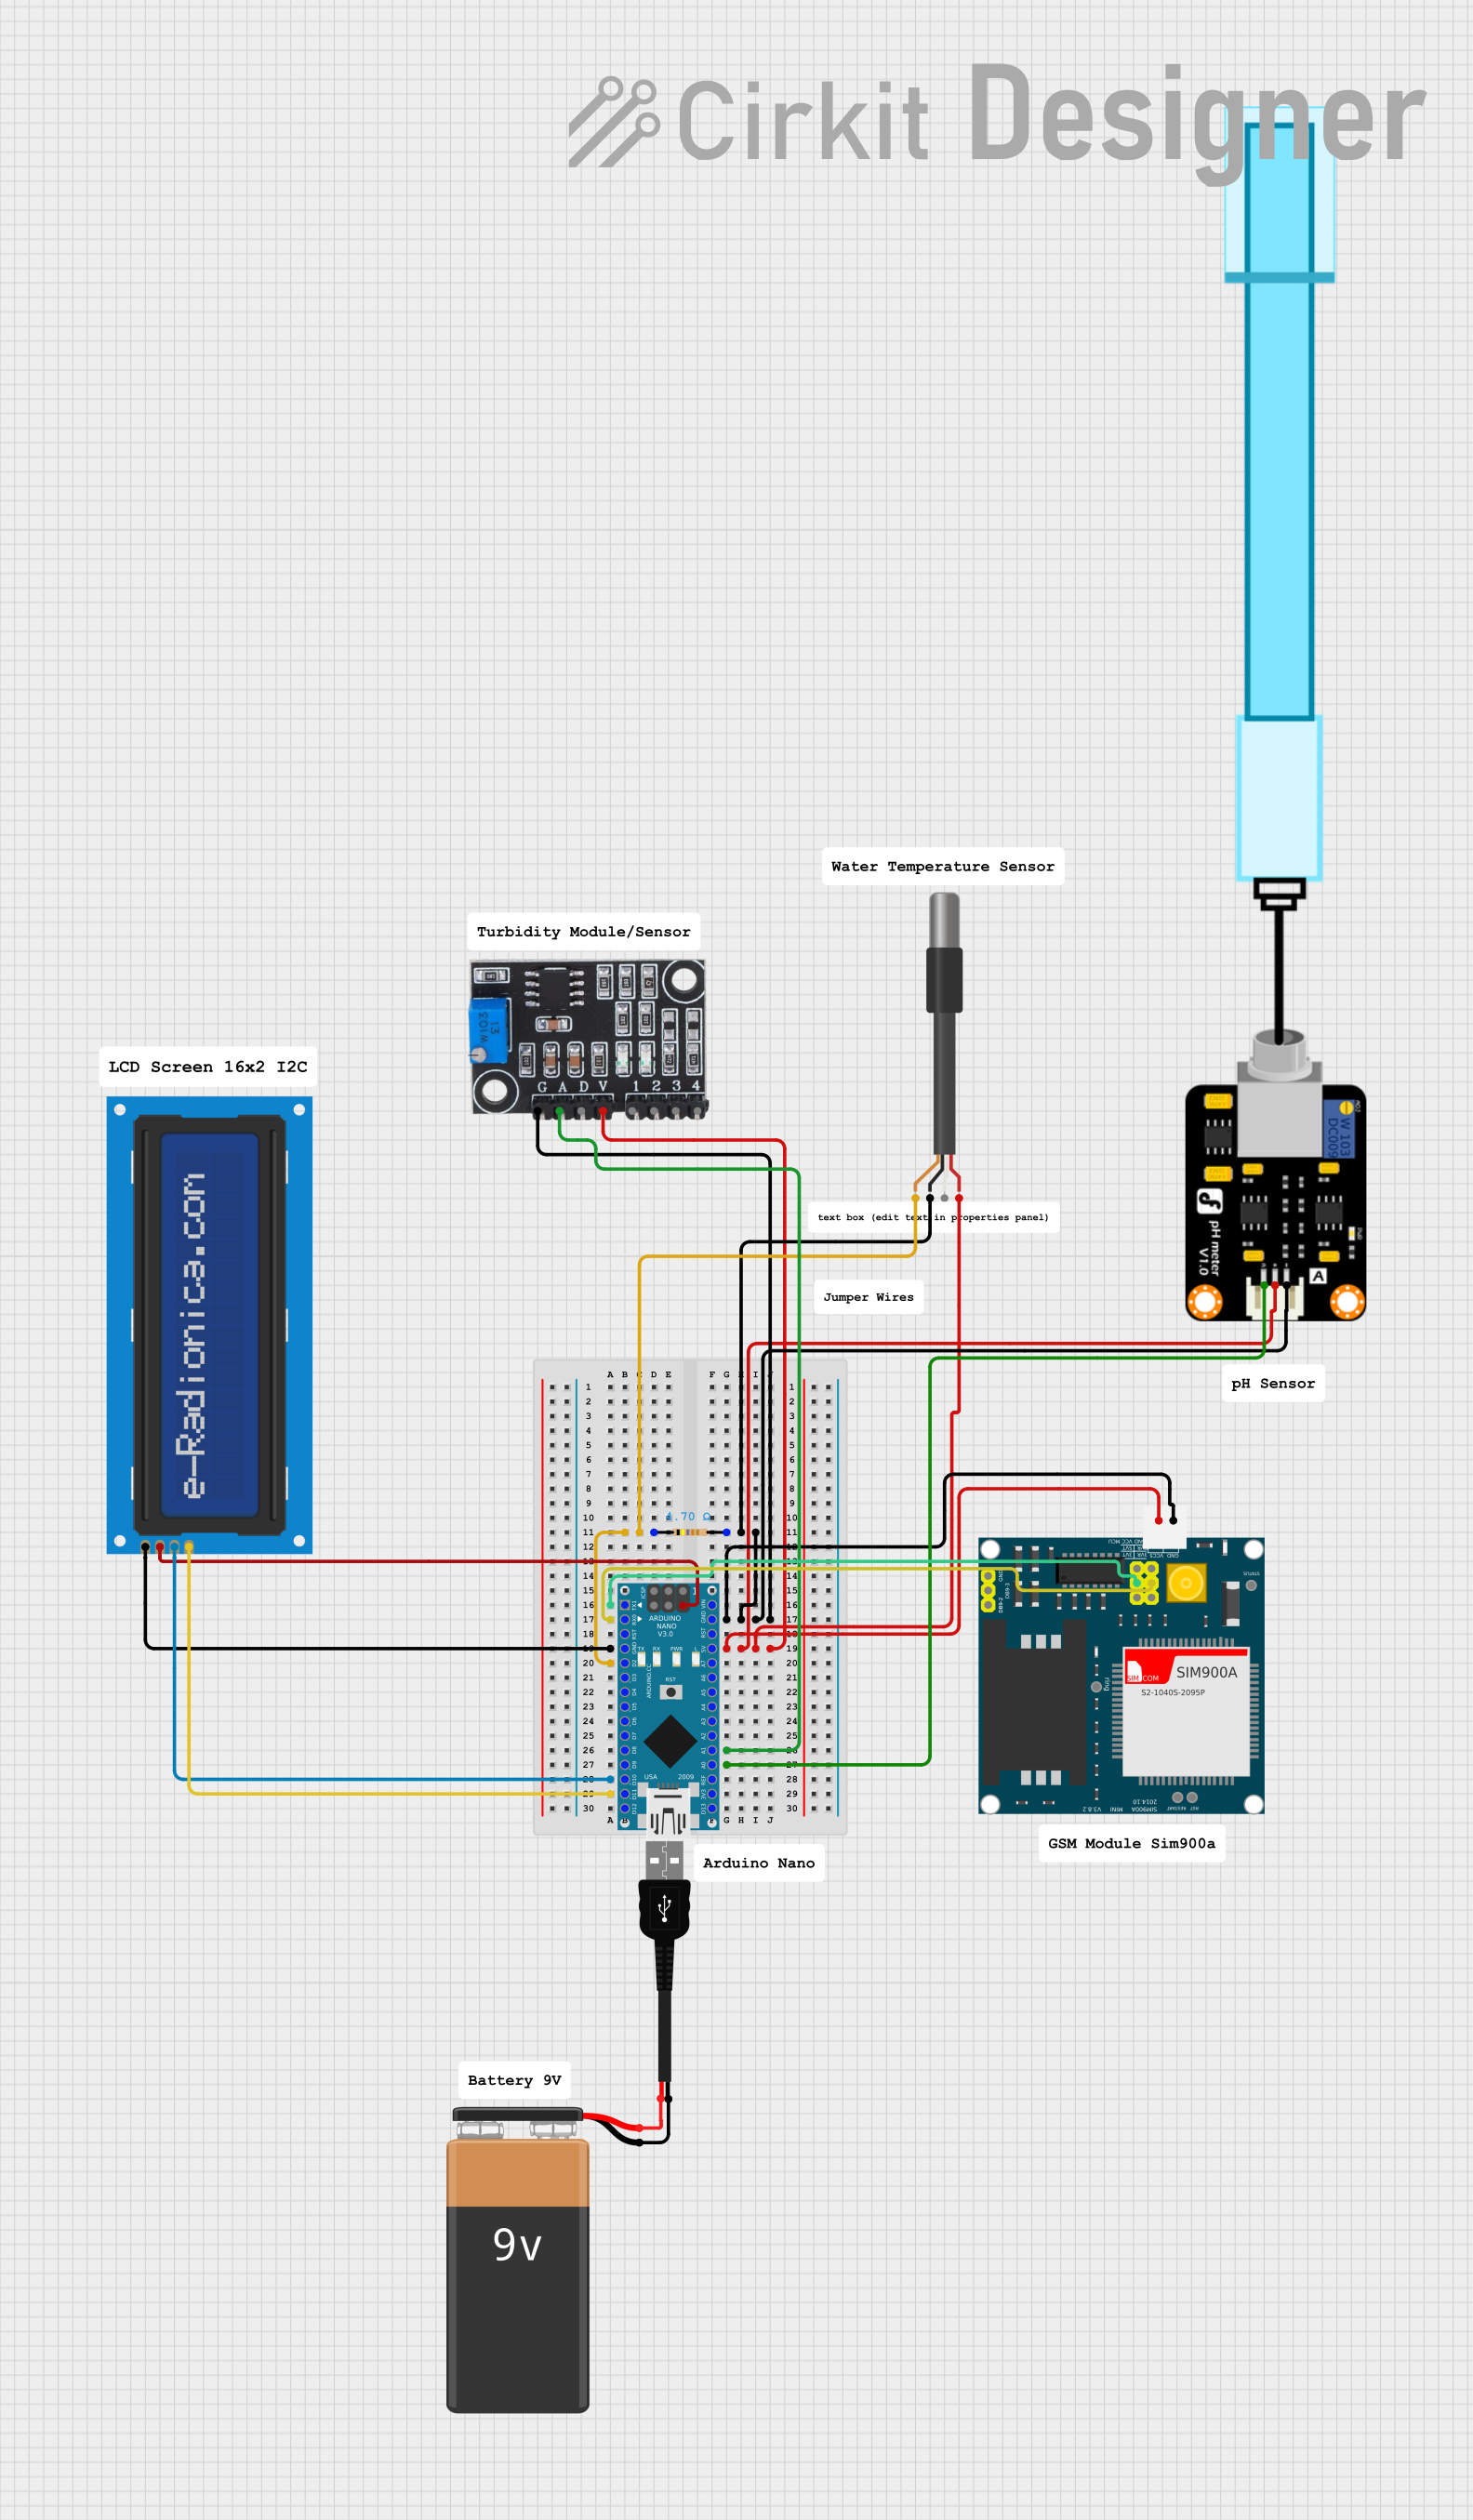
Explore Projects Built with Atlas Scientific pH Probe
Technical Specifications
Key Technical Details
- Measurement Range: 0 - 14 pH
- Accuracy: ± 0.002 pH
- Response Time: 95% in 1 second
- Max Pressure: 689 kPa (100 PSI)
- Temperature Range: 1°C - 99°C
- Cable Length: 1 meter
- BNC Connector: Yes
- Probe Type: Lab grade, gel-filled, non-refillable
Pin Configuration and Descriptions
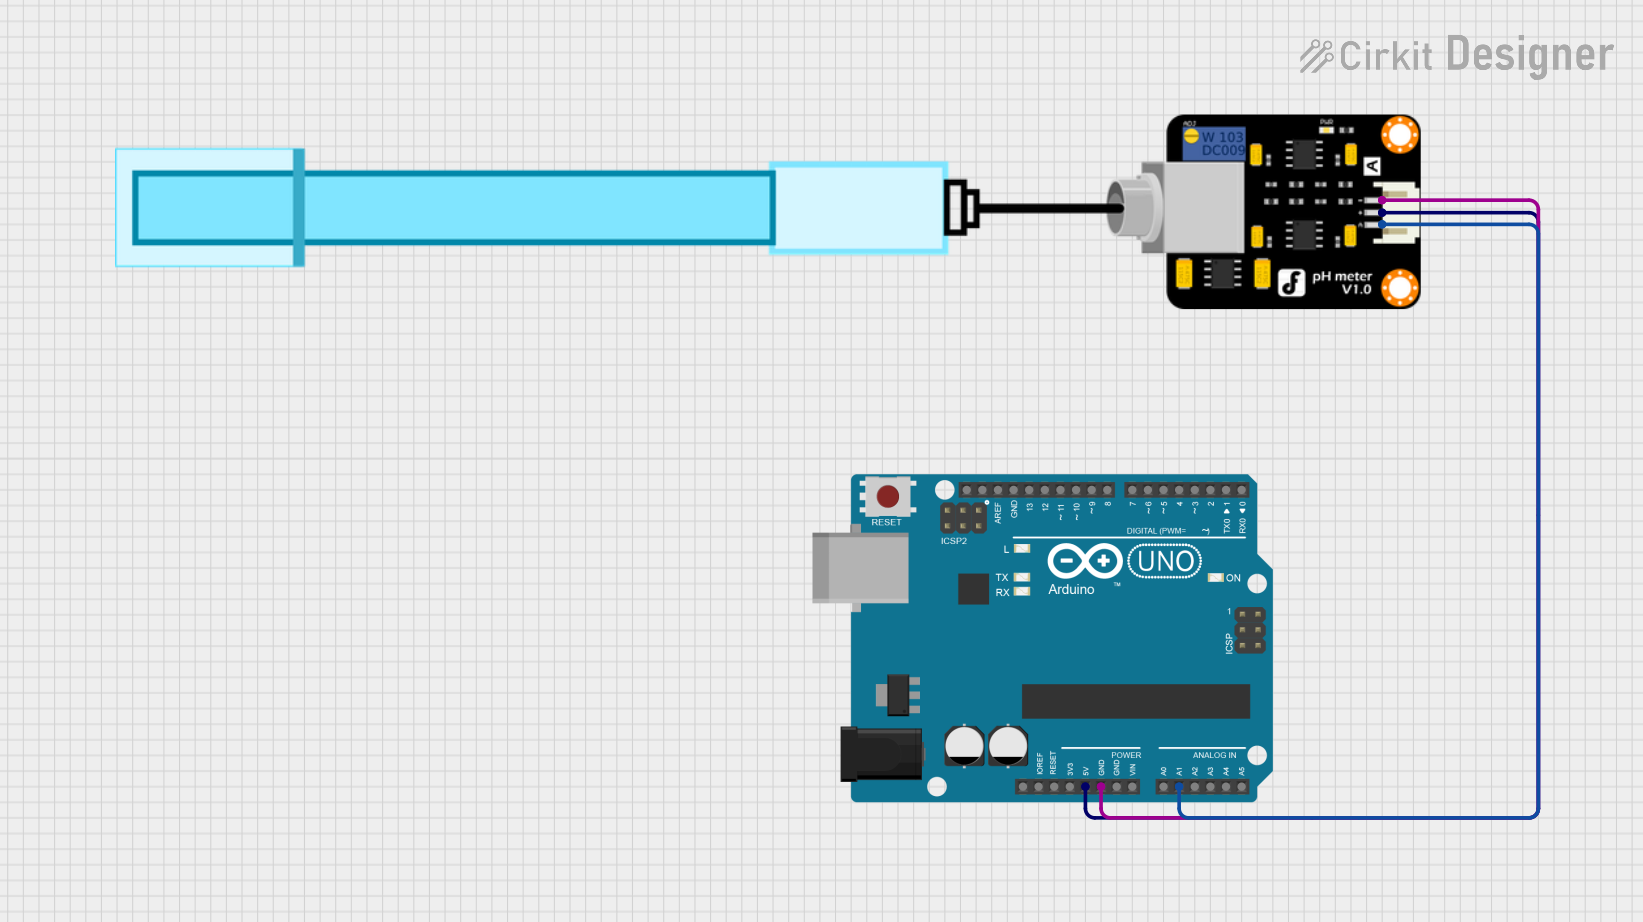
The Atlas Scientific pH Probe is designed to interface with the Atlas Scientific pH Circuit. The pH Circuit has a standard BNC connector for the probe and various pins for interfacing with microcontrollers like the Arduino UNO. Below is the pin configuration for the pH Circuit board:
| Pin Label | Function | Description |
|---|---|---|
| VCC | Power Supply | Connect to 3.3V - 5V power supply. |
| GND | Ground | Connect to the ground of the power supply. |
| TX | Transmit | Serial data output. Connect to RX pin of the microcontroller. |
| RX | Receive | Serial data input. Connect to TX pin of the microcontroller. |
| PGND | Probe Ground | Connect to the ground sleeve of the BNC connector. |
| Po | Probe Output | Connect to the signal wire of the BNC connector. |
Usage Instructions
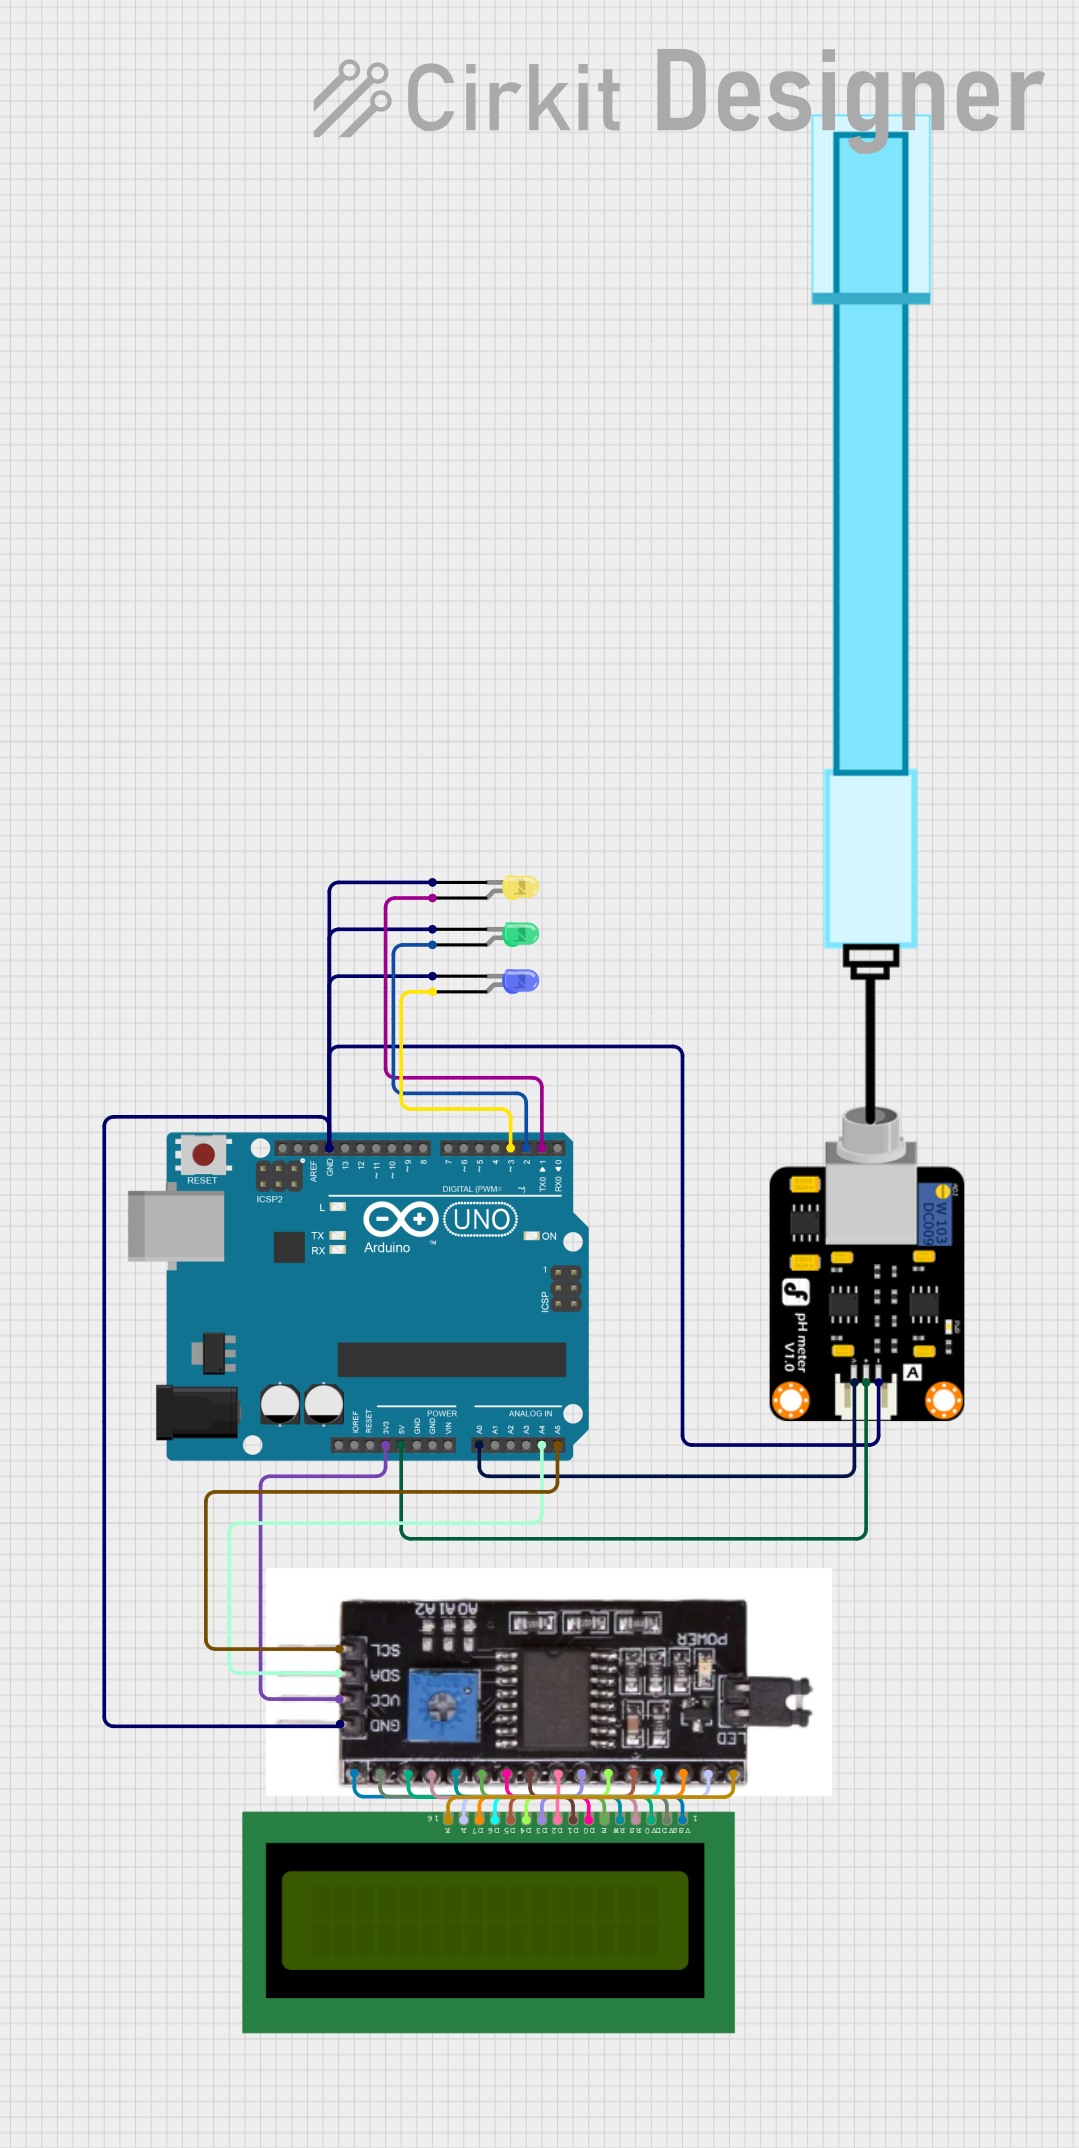
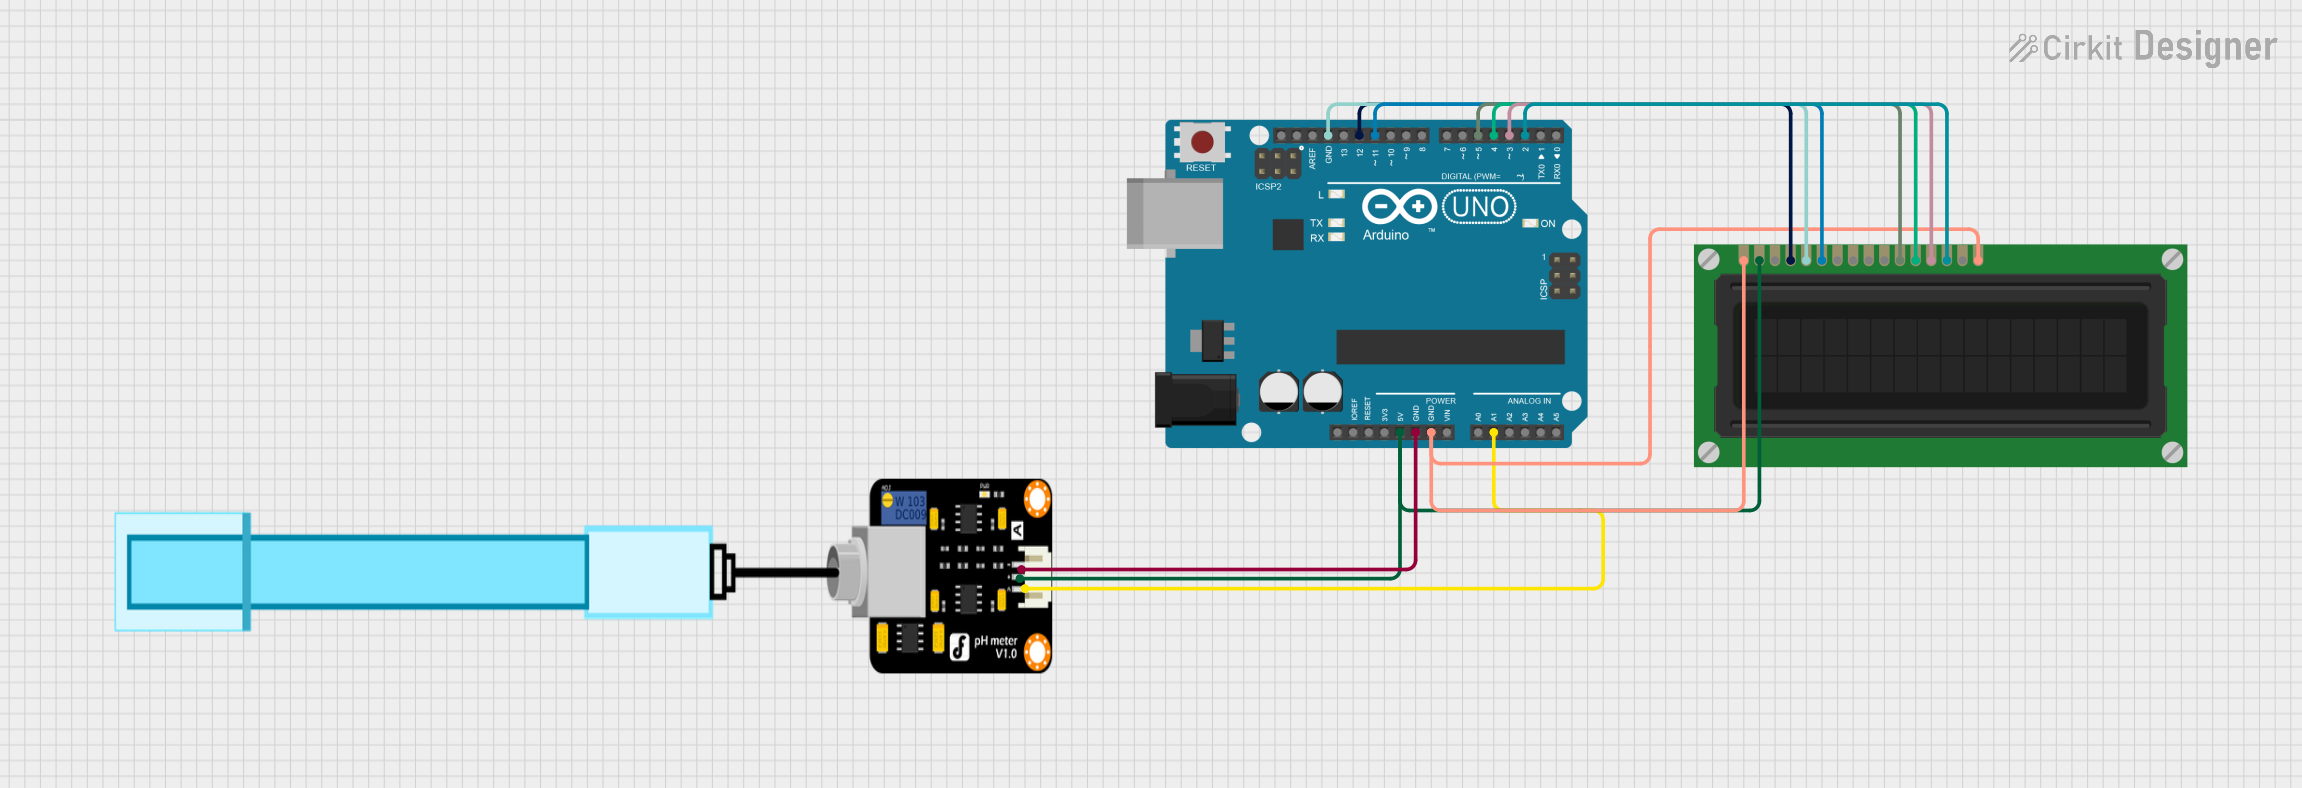
Interfacing with Arduino
To use the Atlas Scientific pH Probe with an Arduino UNO, follow these steps:
Connect the pH Circuit board to the Arduino as follows:
- VCC to 5V
- GND to GND
- TX to Arduino's RX (Pin 0)
- RX to Arduino's TX (Pin 1)
Attach the pH Probe to the BNC connector on the pH Circuit board.
Calibrate the probe using the provided calibration solutions and following the manufacturer's instructions.
Upload the following sample code to the Arduino to read pH values:
#include <SoftwareSerial.h>

SoftwareSerial mySerial(1, 0); // RX, TX

void setup() {
  Serial.begin(9600);
  mySerial.begin(9600);
}

void loop() {
  if (mySerial.available()) {
    char inChar = (char)mySerial.read();
    Serial.print(inChar);
  }

  if (Serial.available()) {
    char inChar = (char)Serial.read();
    mySerial.print(inChar);
  }
}
Important Considerations and Best Practices
- Always handle the pH probe with care to avoid damaging the sensitive glass bulb.
- Store the probe in a proper storage solution when not in use to prevent drying out.
- Regularly calibrate the probe for accurate measurements.
- Avoid exposing the probe to extreme temperatures and pressures beyond its specified range.
- Ensure the BNC connector is securely attached to prevent signal interference.
Troubleshooting and FAQs
Common Issues
- Inaccurate Readings: Ensure the probe is calibrated correctly. Check for any damage to the probe.
- No Readings: Verify connections between the probe, pH Circuit, and Arduino. Ensure the code is uploaded correctly.
- Drifting Readings: This may indicate that the probe needs to be cleaned or replaced.
Solutions and Tips
- Calibration: Follow the calibration procedure as outlined in the manufacturer's manual.
- Cleaning: Rinse the probe with distilled water and gently clean the bulb with a soft brush if necessary.
- Storage: Use a proper storage solution and cap the probe when not in use.
FAQs
Q: How often should I calibrate the pH probe? A: Calibration should be performed at least once a month or whenever the accuracy of the readings is in question.
Q: Can the pH probe be used in non-aqueous solutions? A: The KIT-103P is designed for use in aqueous solutions. Using it in non-aqueous solutions may damage the probe and void the warranty.
Q: What should I do if the probe gets dry? A: If the probe dries out, immerse it in the storage solution for at least an hour to rehydrate the sensor before use.
For further assistance, refer to the manufacturer's detailed documentation and support resources.