How to Use NUCLEO-WL55JC1: Examples, Pinouts, and Specs
Introduction
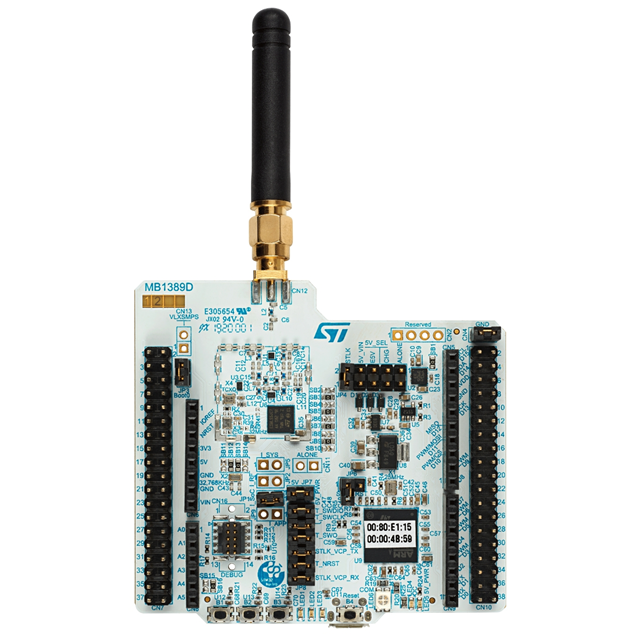
The NUCLEO-WL55JC1 is a development board manufactured by STMicroelectronics, featuring the STM32WL55JC microcontroller. This microcontroller integrates an Arm Cortex-M4 core with a sub-GHz radio transceiver, making it ideal for IoT applications. The board is designed to simplify prototyping and development, offering a wide range of connectivity options, peripherals, and compatibility with the Arduino ecosystem.
Explore Projects Built with NUCLEO-WL55JC1
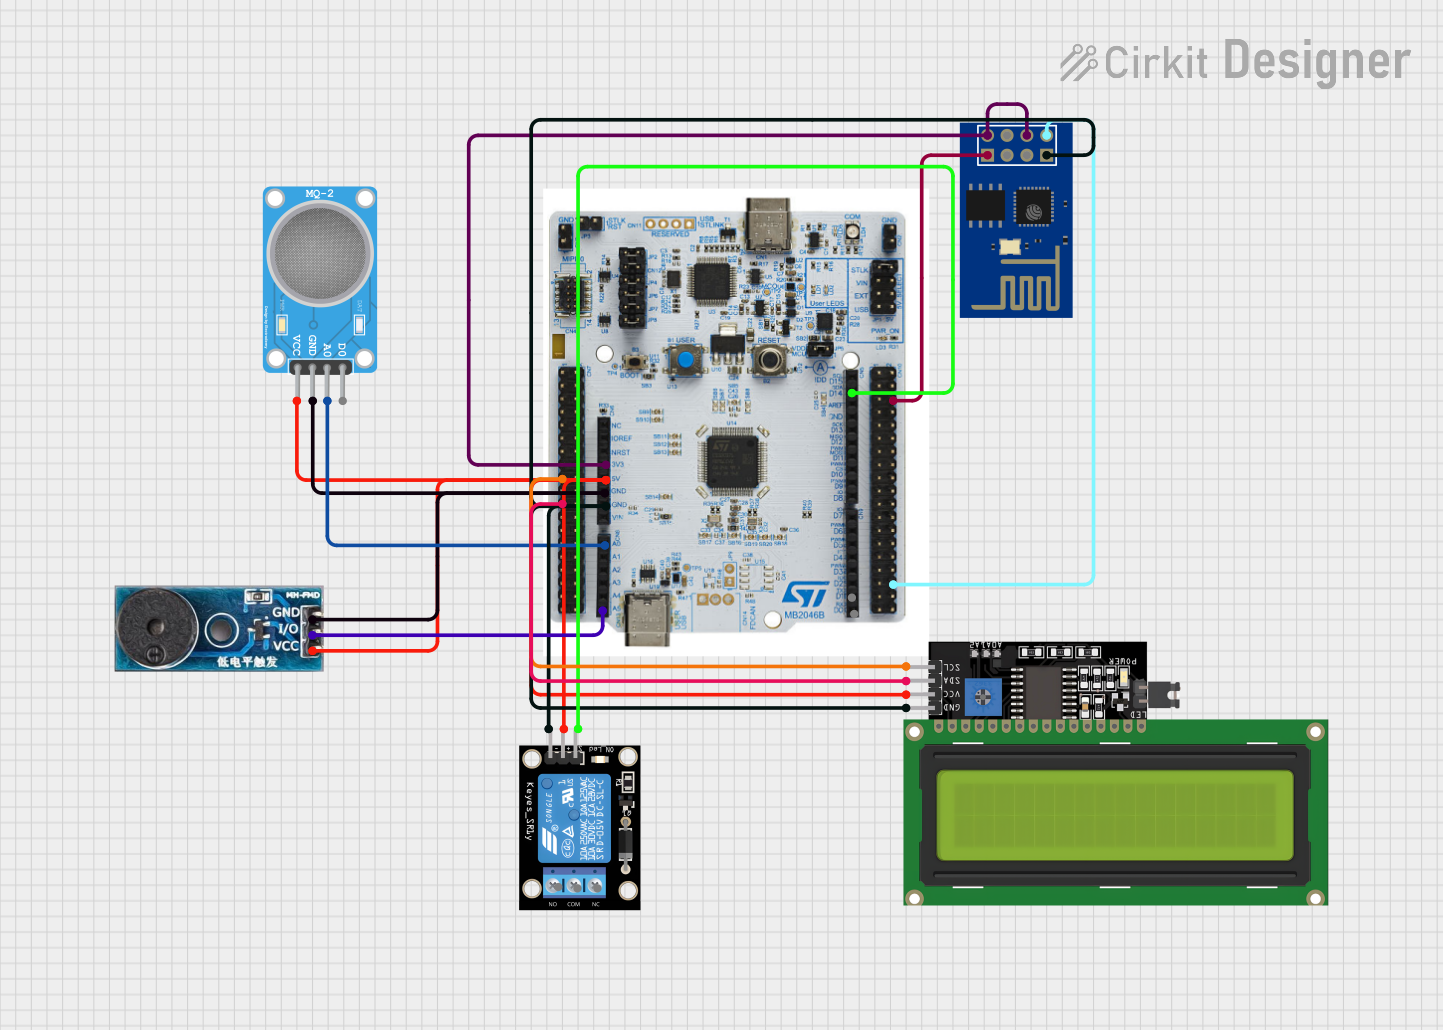

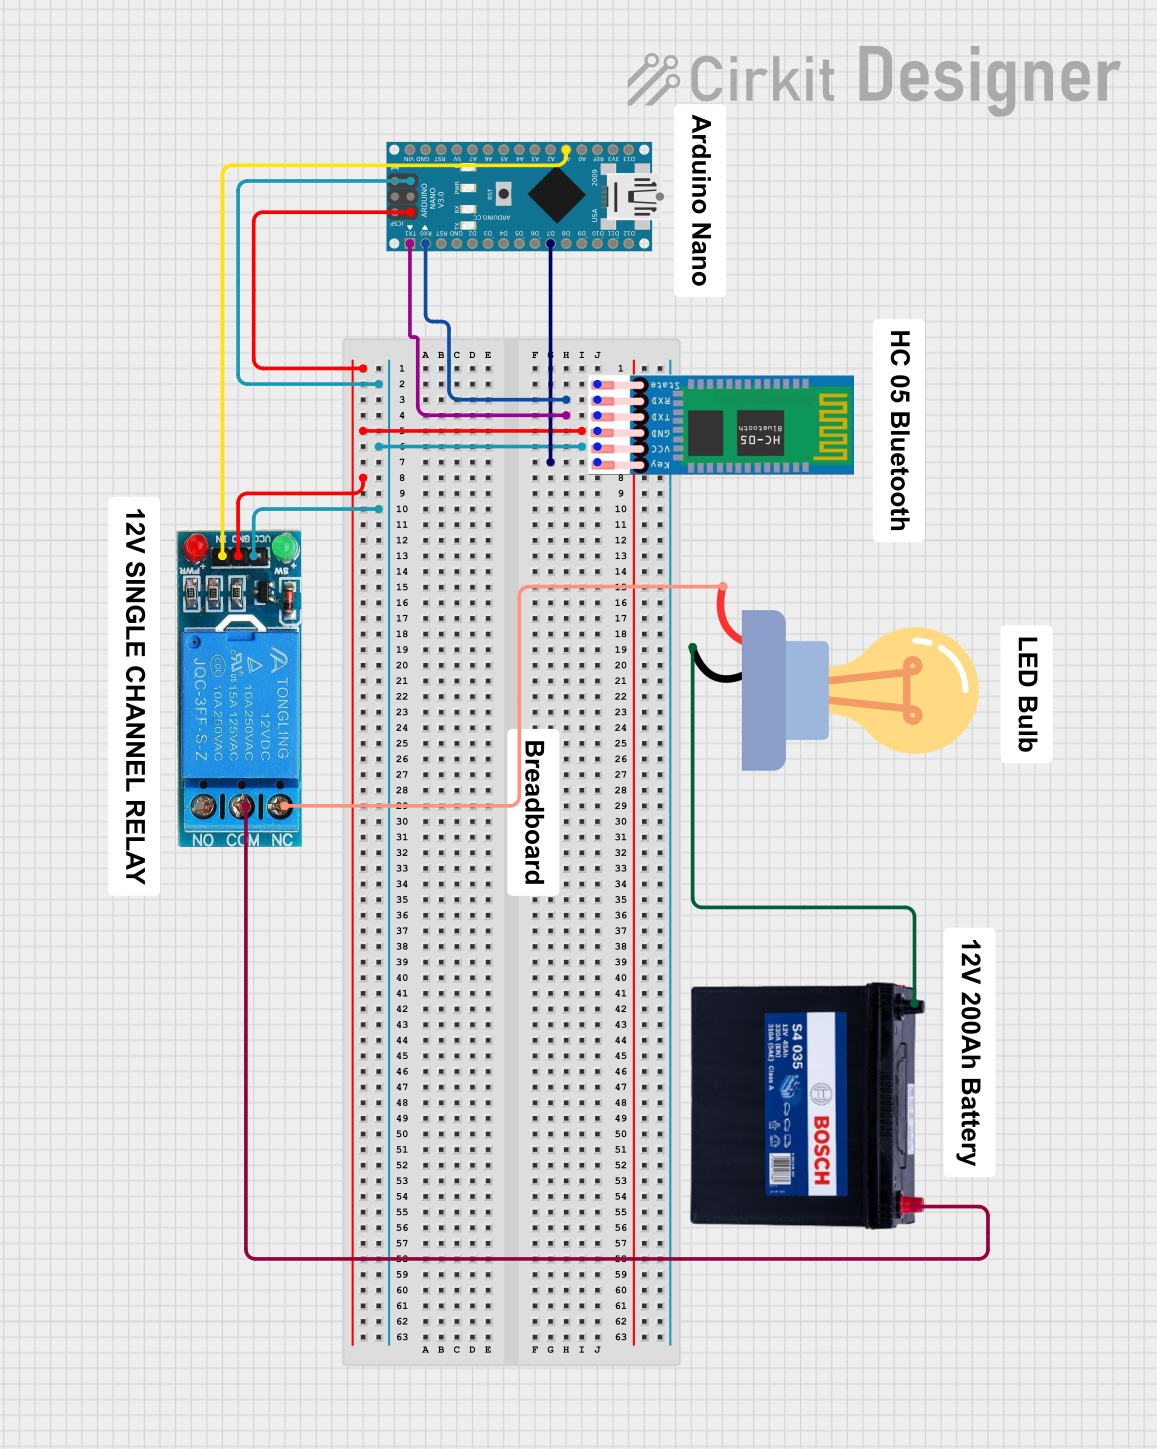
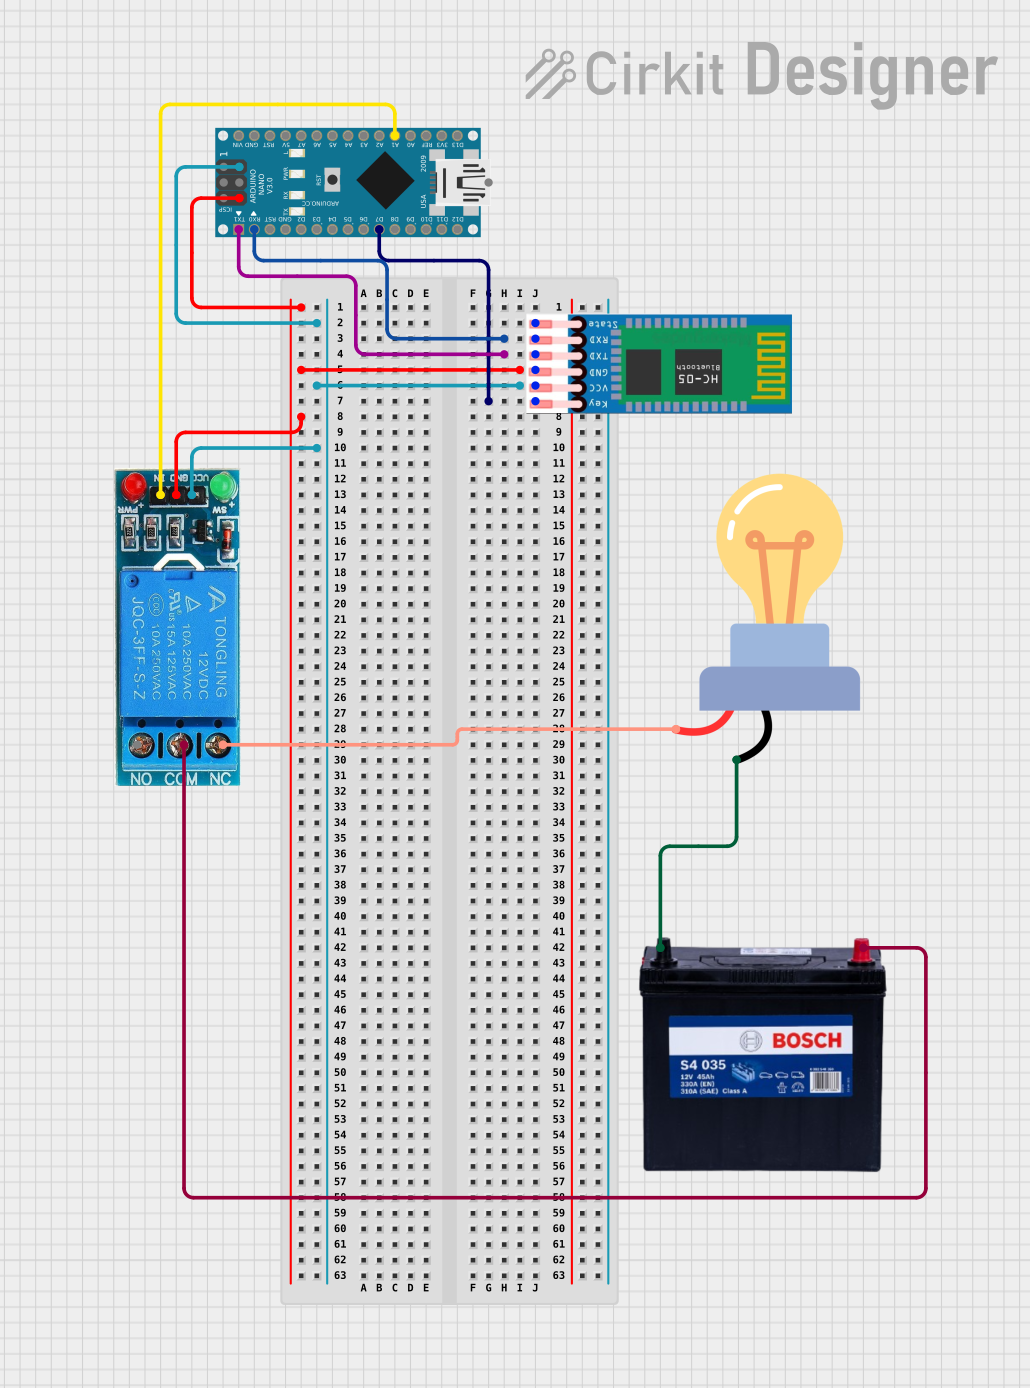
Explore Projects Built with NUCLEO-WL55JC1
Common Applications and Use Cases
- IoT (Internet of Things): Smart sensors, connected devices, and remote monitoring.
- Low-Power Wireless Communication: LoRaWAN, Sigfox, and other sub-GHz protocols.
- Industrial Automation: Wireless control and data acquisition.
- Smart Agriculture: Environmental monitoring and precision farming.
- Prototyping and Development: Rapid development of wireless-enabled applications.
Technical Specifications
Key Technical Details
| Feature | Specification |
|---|---|
| Microcontroller | STM32WL55JC (Arm Cortex-M4 @ 48 MHz + Cortex-M0+ for radio control) |
| Radio Frequency | Sub-GHz (150 MHz to 960 MHz) |
| Flash Memory | 256 KB |
| RAM | 64 KB |
| Operating Voltage | 3.3 V |
| Power Supply | USB or external power supply (VIN: 7-12 V) |
| Connectivity | LoRa, Sigfox, (G)FSK, (G)MSK, BPSK |
| Interfaces | UART, SPI, I2C, ADC, GPIO |
| Arduino Compatibility | Arduino Uno V3 pin headers |
| Debugging | ST-LINK/V2-1 debugger/programmer integrated |
| Dimensions | 68.9 mm x 53.4 mm |
Pin Configuration and Descriptions
The NUCLEO-WL55JC1 features Arduino Uno V3-compatible headers and additional pins for extended functionality. Below is the pinout description:
Arduino-Compatible Header Pins
| Pin | Function | Description |
|---|---|---|
| D0 | UART RX | UART receive pin |
| D1 | UART TX | UART transmit pin |
| D2-D13 | Digital I/O | General-purpose digital input/output pins |
| A0-A5 | Analog Input | 12-bit ADC channels for analog signal input |
| VIN | Power Input | External power supply input (7-12 V) |
| 3.3V | Power Output | 3.3 V regulated output |
| 5V | Power Output | 5 V regulated output |
| GND | Ground | Ground connection |
Additional Pins
| Pin | Function | Description |
|---|---|---|
| SWDIO | Debug Interface | Serial Wire Debug I/O for programming and debugging |
| SWCLK | Debug Clock | Serial Wire Debug clock |
| RF_IO | RF Antenna | Connection for external RF antenna |
| BOOT0 | Boot Configuration | Selects boot mode (user flash or system memory) |
Usage Instructions
How to Use the NUCLEO-WL55JC1 in a Circuit
Powering the Board:
- Connect the board to your computer via the USB cable for power and programming.
- Alternatively, use an external power supply (7-12 V) connected to the VIN pin.
Programming the Board:
- Use the integrated ST-LINK/V2-1 debugger to program the STM32WL55JC microcontroller.
- Compatible IDEs include STM32CubeIDE, Keil MDK, and IAR Embedded Workbench.
Connecting Peripherals:
- Use the Arduino-compatible headers to connect sensors, actuators, or other modules.
- For RF communication, connect an external antenna to the RF_IO pin.
Configuring the Sub-GHz Radio:
- Use the STM32CubeWL software package to configure the LoRaWAN or Sigfox stack.
- Ensure the correct frequency band is selected based on your region (e.g., 868 MHz for Europe, 915 MHz for the US).
Important Considerations and Best Practices
- Antenna Selection: Use a high-quality antenna for optimal RF performance. Ensure the antenna matches the frequency band of your application.
- Power Supply: Avoid voltage fluctuations by using a stable power source. If using an external supply, ensure it is within the 7-12 V range.
- Firmware Updates: Regularly update the firmware using STM32CubeProgrammer to access the latest features and bug fixes.
- Debugging: Use the SWD interface for advanced debugging and troubleshooting.
Example Code for Arduino IDE
The NUCLEO-WL55JC1 can be programmed using the Arduino IDE. Below is an example of toggling an LED connected to pin D13:
// Example: Blink an LED on pin D13
void setup() {
  pinMode(13, OUTPUT); // Set pin D13 as an output
}

void loop() {
  digitalWrite(13, HIGH); // Turn the LED on
  delay(1000);            // Wait for 1 second
  digitalWrite(13, LOW);  // Turn the LED off
  delay(1000);            // Wait for 1 second
}
Troubleshooting and FAQs
Common Issues and Solutions
The board is not detected by the computer:
- Ensure the USB cable is properly connected and supports data transfer.
- Check if the ST-LINK driver is installed on your computer.
RF communication is not working:
- Verify that the correct frequency band is configured in the firmware.
- Ensure the antenna is securely connected to the RF_IO pin.
The board does not power on:
- Check the power source and ensure it meets the voltage requirements (7-12 V for VIN).
- Verify that the USB cable or external power supply is functional.
Programming fails or the board is unresponsive:
- Reset the board by pressing the reset button.
- Check the BOOT0 pin configuration to ensure the correct boot mode is selected.
FAQs
Q: Can I use the NUCLEO-WL55JC1 with LoRaWAN?
A: Yes, the STM32WL55JC microcontroller supports LoRaWAN. Use the STM32CubeWL software package to configure and implement LoRaWAN communication.
Q: Is the board compatible with Arduino shields?
A: Yes, the NUCLEO-WL55JC1 features Arduino Uno V3-compatible headers, allowing you to use most Arduino shields.
Q: How do I update the firmware on the board?
A: Use the STM32CubeProgrammer tool to update the firmware via the ST-LINK interface.
Q: What is the maximum range of the sub-GHz radio?
A: The range depends on factors such as antenna quality, transmission power, and environmental conditions. In ideal conditions, the range can exceed 10 km for LoRa communication.
Q: Can I use the board for Sigfox communication?
A: Yes, the STM32WL55JC microcontroller supports Sigfox. Configure the Sigfox stack using the STM32CubeWL software package.