How to Use MATEK H743 SLIM: Examples, Pinouts, and Specs
Introduction
The MATEK H743 SLIM is a compact and high-performance flight controller designed for drones and UAVs. It features advanced processing capabilities, multiple input/output (I/O) ports, and support for a wide range of sensors and communication protocols. This flight controller is ideal for applications requiring precise control, efficient power management, and seamless integration with modern drone systems.
Explore Projects Built with MATEK H743 SLIM


Explore Projects Built with MATEK H743 SLIM
Common Applications and Use Cases
- Multirotor drones for aerial photography and videography
- Fixed-wing UAVs for mapping and surveying
- FPV (First-Person View) racing drones
- Autonomous robotics and experimental UAV projects
- Educational and research platforms for flight control systems
Technical Specifications
The MATEK H743 SLIM is built with robust hardware to meet the demands of modern UAV systems. Below are its key technical details:
Key Technical Details
- Processor: STM32H743VI (480 MHz, ARM Cortex-M7)
- IMU (Inertial Measurement Unit): Dual IMUs (MPU6000 and ICM20602)
- Barometer: BMP280
- Input Voltage Range: 7V–36V (2S–8S LiPo)
- BEC Output: 5V/2A and 9V/2A
- Flash Memory: 16 MB
- UART Ports: 7 UARTs (serial communication)
- I2C Ports: 2 I2C buses
- CAN Bus: 2 CAN ports for advanced communication
- PWM Outputs: 8 PWM outputs for motor control
- Dimensions: 68mm x 25mm
- Weight: 8 grams
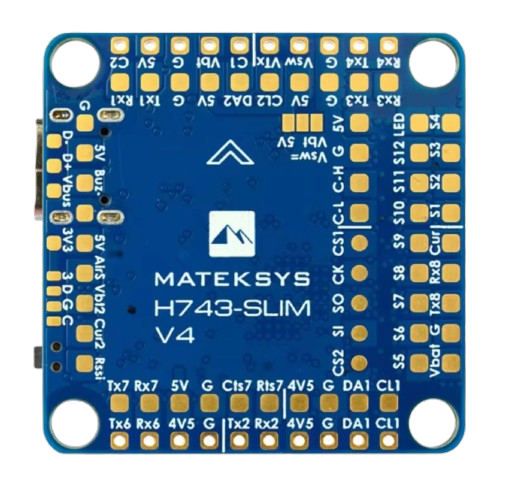
Pin Configuration and Descriptions
The MATEK H743 SLIM features a well-organized pin layout for easy integration. Below is the pin configuration:
| Pin Name | Description |
|---|---|
| GND | Ground connection |
| VIN | Power input (7V–36V) |
| 5V | 5V output for peripherals |
| 9V | 9V output for peripherals |
| UART1-TX | UART1 Transmit |
| UART1-RX | UART1 Receive |
| UART2-TX | UART2 Transmit |
| UART2-RX | UART2 Receive |
| I2C1-SCL | I2C1 Clock |
| I2C1-SDA | I2C1 Data |
| CAN1-H | CAN Bus High |
| CAN1-L | CAN Bus Low |
| PWM1–PWM8 | PWM outputs for motor/servo control |
| BOOT | Bootloader mode selection |
| LED_STRIP | Addressable LED control |
Usage Instructions
The MATEK H743 SLIM is designed for seamless integration into drone systems. Follow these steps to use the component effectively:
Step 1: Powering the Flight Controller
- Connect a 2S–8S LiPo battery to the VIN and GND pins.
- Ensure the input voltage is within the 7V–36V range to avoid damage.
- Use the onboard BEC outputs (5V or 9V) to power external peripherals like receivers or cameras.
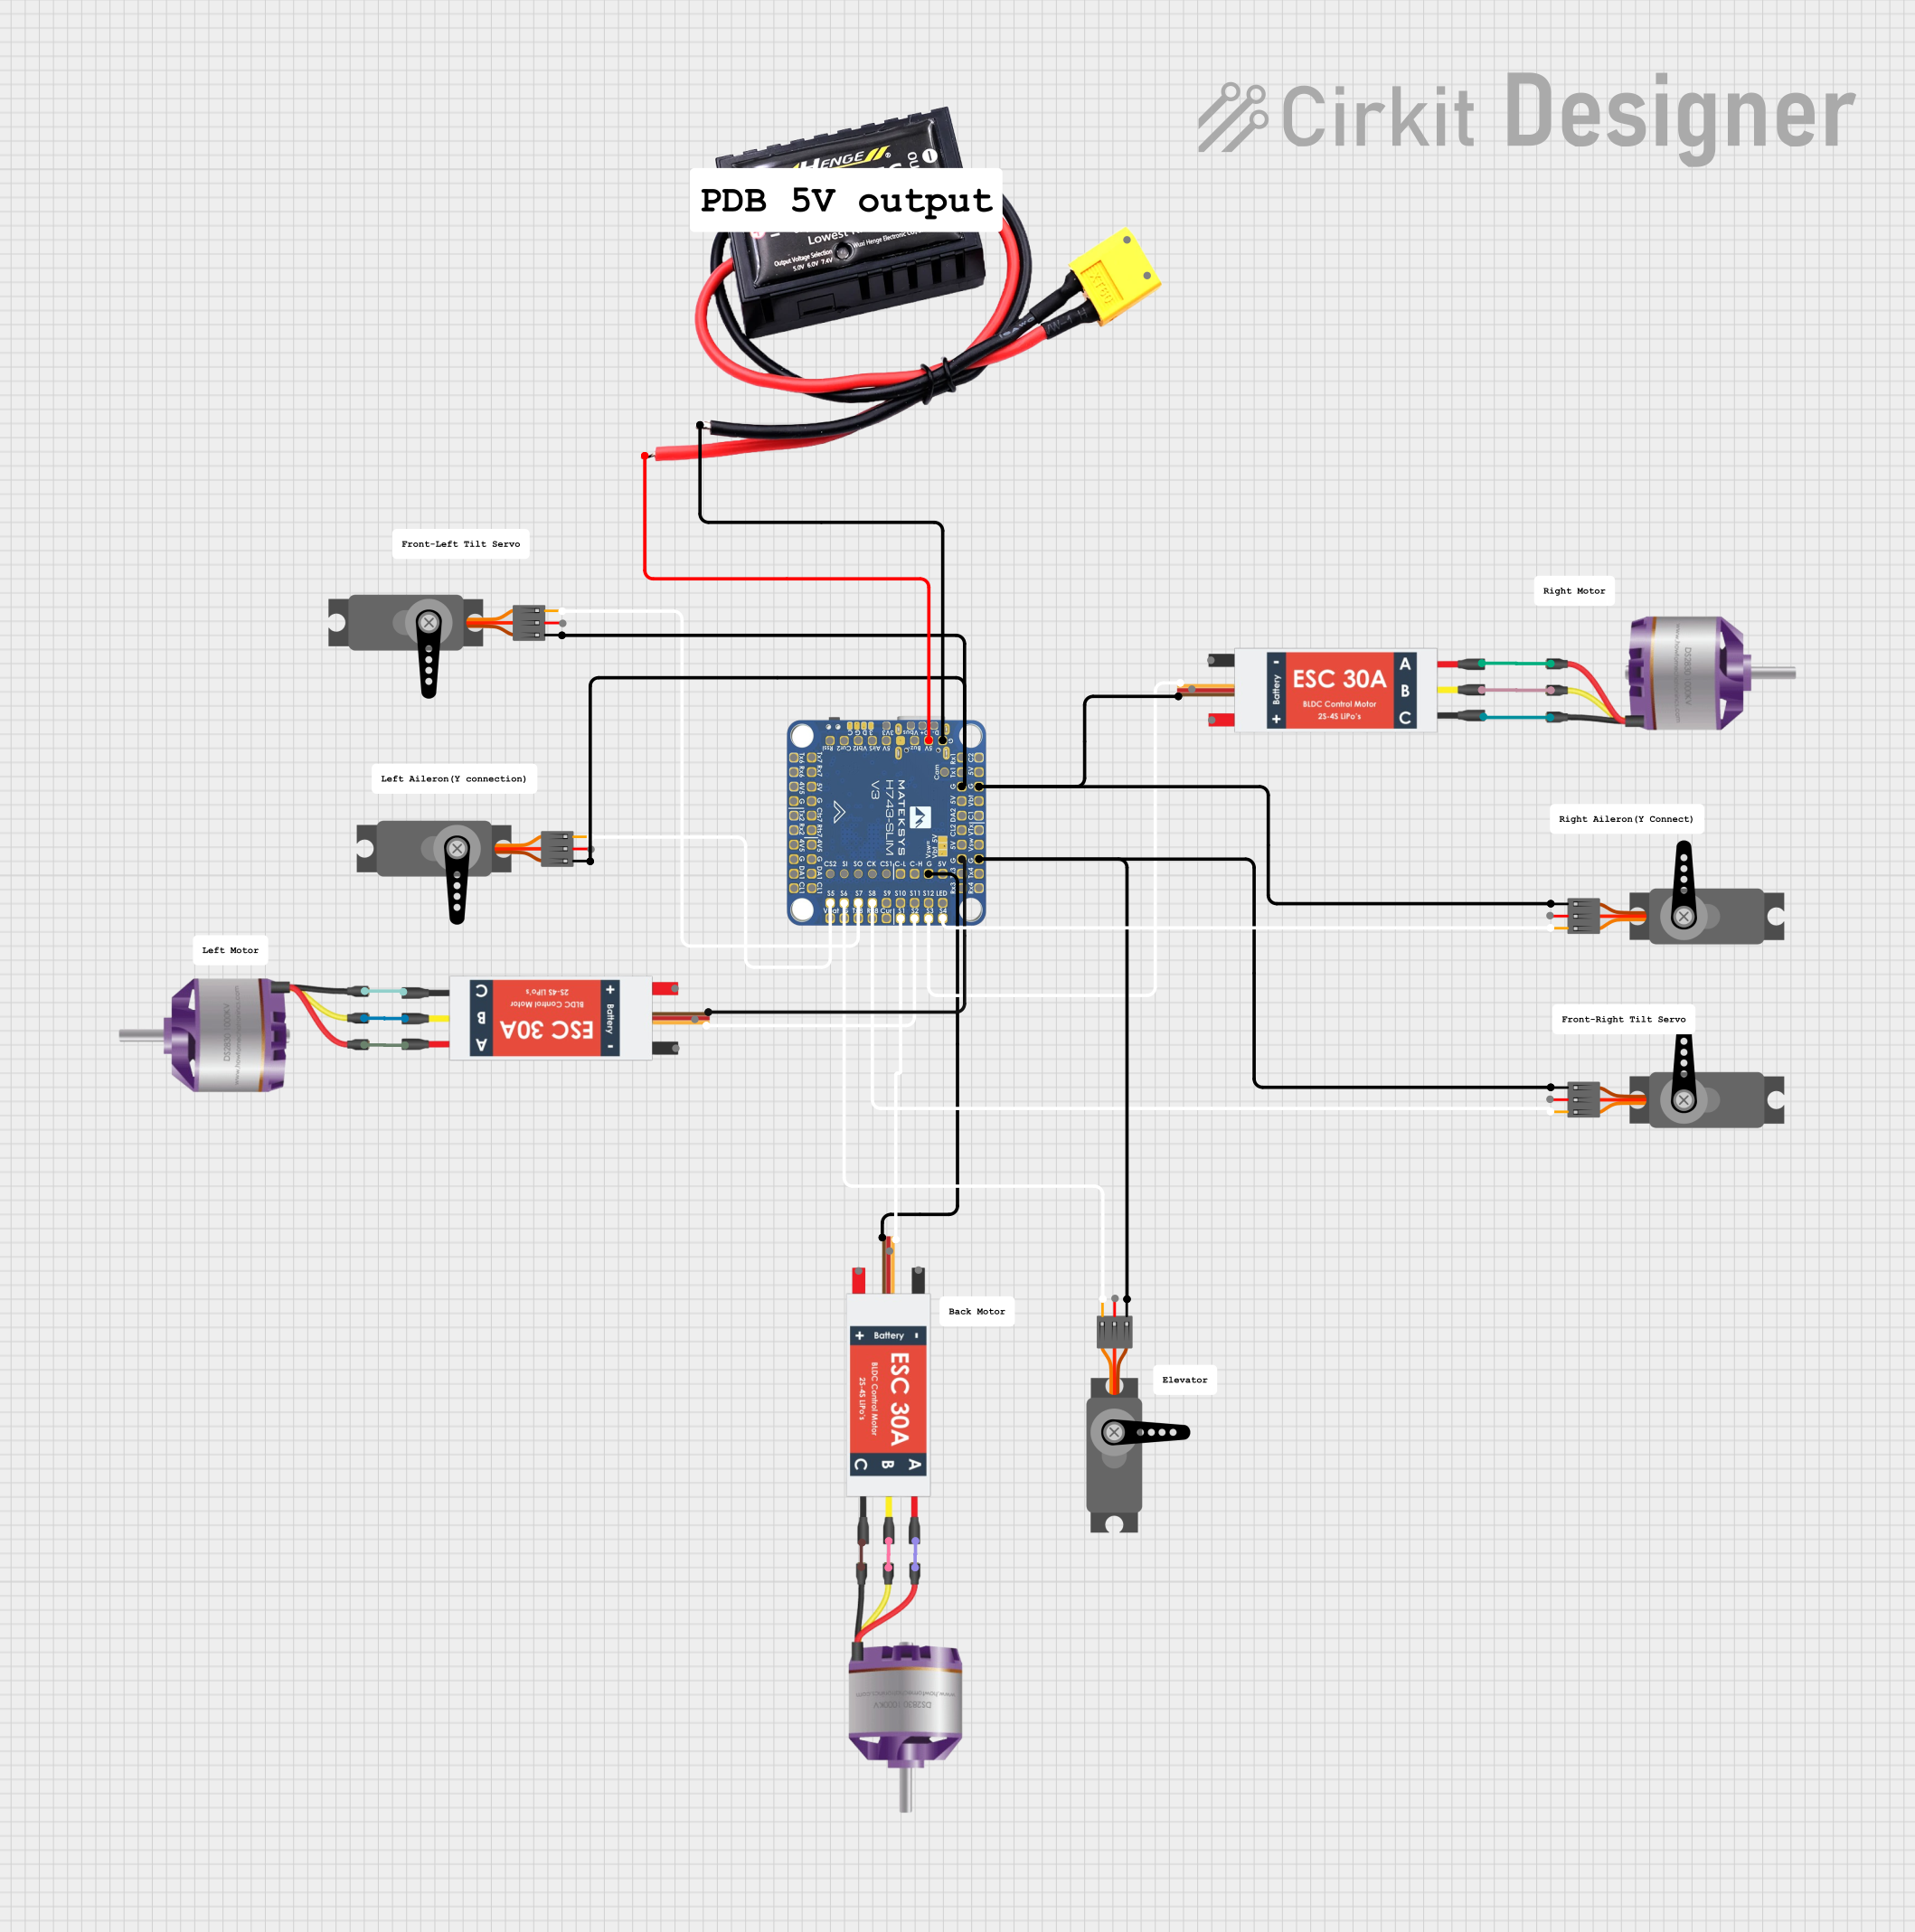
Step 2: Connecting Peripherals
- Motors/Servos: Connect up to 8 motors or servos to the PWM1–PWM8 pins.
- Receiver: Use one of the UART ports (e.g., UART1) to connect an SBUS, DSMX, or CRSF receiver.
- GPS Module: Connect the GPS module to a UART port and configure the baud rate in the flight control software.
- I2C Sensors: Attach I2C-based sensors (e.g., magnetometers) to the I2C1-SCL and I2C1-SDA pins.
- CAN Devices: Use the CAN1-H and CAN1-L pins for advanced peripherals like LiDAR or autopilot systems.
Step 3: Configuring the Flight Controller
- Install a compatible firmware such as Betaflight, INAV, or ArduPilot.
- Use a USB cable to connect the flight controller to your computer.
- Open the configuration software (e.g., Betaflight Configurator) and select the correct COM port.
- Flash the firmware and configure settings such as motor mapping, receiver type, and PID tuning.
Step 4: Testing and Calibration
- Calibrate the IMU and compass using the configuration software.
- Test motor outputs and ensure proper rotation direction.
- Verify receiver input and failsafe settings before flight.
Arduino UNO Integration Example
While the MATEK H743 SLIM is not typically used with an Arduino UNO, it can communicate via UART for data exchange. Below is an example of how to send data from an Arduino UNO to the flight controller:
#include <SoftwareSerial.h>

// Define RX and TX pins for SoftwareSerial
SoftwareSerial mySerial(10, 11); // RX = pin 10, TX = pin 11

void setup() {
  // Initialize serial communication
  Serial.begin(9600); // Arduino's default serial port
  mySerial.begin(115200); // UART communication with flight controller

  // Print a message to indicate startup
  Serial.println("Arduino UNO to MATEK H743 SLIM communication started.");
}

void loop() {
  // Send a test message to the flight controller
  mySerial.println("Hello, MATEK H743 SLIM!");

  // Check if data is received from the flight controller
  if (mySerial.available()) {
    String receivedData = mySerial.readString();
    Serial.print("Received: ");
    Serial.println(receivedData);
  }

  delay(1000); // Wait for 1 second
}
Important Considerations
- Always double-check wiring to avoid short circuits or incorrect connections.
- Use appropriate firmware for your application (e.g., Betaflight for racing drones, ArduPilot for autonomous UAVs).
- Ensure proper cooling and ventilation, especially when operating at high power levels.
Troubleshooting and FAQs
Common Issues and Solutions
Flight Controller Not Powering On
- Check the input voltage and ensure it is within the 7V–36V range.
- Verify the battery connection and polarity.
No Communication with Configuration Software
- Ensure the USB cable is data-capable (not charge-only).
- Check the COM port settings in the configuration software.
- Try reinstalling the USB drivers.
Motors Not Spinning
- Verify motor connections to the PWM pins.
- Check motor output settings in the configuration software.
- Ensure the ESCs are properly calibrated.
Receiver Not Detected
- Confirm the receiver is connected to the correct UART port.
- Check the receiver protocol settings in the configuration software.
- Ensure the receiver is bound to the transmitter.
FAQs
Q: Can I use the MATEK H743 SLIM with a 6S LiPo battery?
A: Yes, the flight controller supports 2S–8S LiPo batteries, including 6S.
Q: What firmware is compatible with the MATEK H743 SLIM?
A: The flight controller supports Betaflight, INAV, and ArduPilot firmware.
Q: How do I update the firmware?
A: Use a USB cable to connect the flight controller to your computer, open the configuration software, and follow the firmware flashing instructions.
Q: Can I connect multiple I2C sensors?
A: Yes, the flight controller has two I2C buses, allowing multiple sensors to be connected.
By following this documentation, you can effectively integrate and operate the MATEK H743 SLIM in your drone or UAV project.