Cirkit Designer Logo
Cirkit Designer
Your all-in-one circuit design IDE
Home / 
Component Documentation

How to Use Connector geel: Examples, Pinouts, and Specs

Image of Connector geel
Cirkit Designer LogoDesign with Connector geel in Cirkit Designer

Introduction

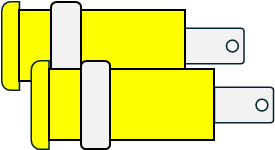
The Connector GEEL is an electronic component designed to facilitate the joining of two or more electrical circuits. This versatile connector is commonly used in a variety of applications, including consumer electronics, automotive systems, industrial machinery, and hobbyist projects such as those involving Arduino boards.

Explore Projects Built with Connector geel

Use Cirkit Designer to design, explore, and prototype these projects online. Some projects support real-time simulation. Click "Open Project" to start designing instantly!
Dual Motor Control System with DPDT Switches and Planetary Gearbox Motors
Image of LEAD SCREW : A project utilizing Connector geel in a practical application
This circuit features two DPDT switches that control the direction of two MRB Planetary gearbox motors. The switches are connected to a connector, allowing for external control inputs to change the motor directions.
Cirkit Designer LogoOpen Project in Cirkit Designer
Pushbutton-Controlled Interface with 40-Pin Connector and UBS Power Supply
Image of connect 4: A project utilizing Connector geel in a practical application
This circuit consists of a 40-pin connector interfacing with four pushbuttons and a UBS power supply. The pushbuttons are used as inputs to the connector, which then relays the signals to other components or systems. The UBS power supply provides the necessary 24V power to the pushbuttons and the common ground for the circuit.
Cirkit Designer LogoOpen Project in Cirkit Designer
Multi-Channel Load Cell Measurement System with JYS60 Amplifiers and DAQ Integration
Image of Load Cell Circuit: A project utilizing Connector geel in a practical application
This is a multi-channel load cell measurement system with several JYS60 amplifiers connected to load cells for weight or force sensing. The amplified signals are directed to a DAQ system for data capture, and power is supplied through a barrel jack. Grounding is achieved via an AdaGator Side Black component.
Cirkit Designer LogoOpen Project in Cirkit Designer
Cellular-Enabled IoT Device with Real-Time Clock and Power Management
Image of LRCM PHASE 2 BASIC: A project utilizing Connector geel in a practical application
This circuit features a LilyGo-SIM7000G module for cellular communication and GPS functionality, interfaced with an RTC DS3231 for real-time clock capabilities. It includes voltage sensing through two voltage sensor modules, and uses an 8-channel opto-coupler for isolating different parts of the circuit. Power management is handled by a buck converter connected to a DC power source and batteries, with a fuse for protection and a rocker switch for on/off control. Additionally, there's an LED for indication purposes.
Cirkit Designer LogoOpen Project in Cirkit Designer

Explore Projects Built with Connector geel

Use Cirkit Designer to design, explore, and prototype these projects online. Some projects support real-time simulation. Click "Open Project" to start designing instantly!
Image of LEAD SCREW : A project utilizing Connector geel in a practical application
Dual Motor Control System with DPDT Switches and Planetary Gearbox Motors
This circuit features two DPDT switches that control the direction of two MRB Planetary gearbox motors. The switches are connected to a connector, allowing for external control inputs to change the motor directions.
Cirkit Designer LogoOpen Project in Cirkit Designer
Image of connect 4: A project utilizing Connector geel in a practical application
Pushbutton-Controlled Interface with 40-Pin Connector and UBS Power Supply
This circuit consists of a 40-pin connector interfacing with four pushbuttons and a UBS power supply. The pushbuttons are used as inputs to the connector, which then relays the signals to other components or systems. The UBS power supply provides the necessary 24V power to the pushbuttons and the common ground for the circuit.
Cirkit Designer LogoOpen Project in Cirkit Designer
Image of Load Cell Circuit: A project utilizing Connector geel in a practical application
Multi-Channel Load Cell Measurement System with JYS60 Amplifiers and DAQ Integration
This is a multi-channel load cell measurement system with several JYS60 amplifiers connected to load cells for weight or force sensing. The amplified signals are directed to a DAQ system for data capture, and power is supplied through a barrel jack. Grounding is achieved via an AdaGator Side Black component.
Cirkit Designer LogoOpen Project in Cirkit Designer
Image of LRCM PHASE 2 BASIC: A project utilizing Connector geel in a practical application
Cellular-Enabled IoT Device with Real-Time Clock and Power Management
This circuit features a LilyGo-SIM7000G module for cellular communication and GPS functionality, interfaced with an RTC DS3231 for real-time clock capabilities. It includes voltage sensing through two voltage sensor modules, and uses an 8-channel opto-coupler for isolating different parts of the circuit. Power management is handled by a buck converter connected to a DC power source and batteries, with a fuse for protection and a rocker switch for on/off control. Additionally, there's an LED for indication purposes.
Cirkit Designer LogoOpen Project in Cirkit Designer

Technical Specifications

General Specifications

  • Type: Generic Electrical Connector (GEEL)
  • Material: High-conductivity metals with insulating outer shell
  • Rated Voltage: Varies by model (e.g., 5V, 12V, 24V)
  • Rated Current: Varies by model (e.g., 1A, 2A, 5A)
  • Operating Temperature: -20°C to 85°C

Pin Configuration and Descriptions

Pin Number Description Notes
1 Power (+) Varies by model, check voltage
2 Ground (-) Common ground reference
3-N Signal/Additional For multi-pin connectors

Note: The actual pin configuration may vary depending on the specific model of the Connector GEEL. Always refer to the manufacturer's datasheet for exact pinout information.

Usage Instructions

Integration into a Circuit

  1. Identify the Connector Type: Determine the specific model of your Connector GEEL to understand its voltage and current ratings.
  2. Circuit Design: Ensure that the connector is compatible with the circuit's voltage and current requirements.
  3. Wiring: Connect the power and ground pins to the respective power supply lines. Signal pins, if present, should be connected to the corresponding signal lines in the circuit.
  4. Inspection: Double-check all connections for correct polarity and secure attachment.

Best Practices

  • Avoid Overloading: Do not exceed the rated voltage and current specifications of the connector.
  • Secure Connections: Ensure that all connections are tight and secure to prevent accidental disconnections.
  • Use Strain Relief: Implement strain relief techniques to prevent stress on the connector's pins and solder joints.
  • Environmental Considerations: Keep in mind the operating temperature range and protect the connector from harsh environmental conditions.

Troubleshooting and FAQs

Common Issues

  • Intermittent Connections: Loose or corroded connections can cause intermittent signal or power transmission. Check and clean the connector pins and ensure a secure fit.
  • Overheating: If the connector is hot to the touch, it may be carrying too much current. Disconnect the power and verify that the current is within the safe operating range.
  • Signal Noise: Poor shielding or grounding can introduce noise. Ensure that the connector is properly grounded and consider using shielded cables.

FAQs

Q: Can I use the Connector GEEL for high-power applications? A: It depends on the model's specifications. Always check the voltage and current ratings before use in high-power applications.

Q: Is the Connector GEEL waterproof? A: Standard models are not typically waterproof. Specialized models with waterproof ratings are available for applications requiring moisture protection.

Q: How do I know if the connector is properly seated? A: Most connectors will have an audible click or a tactile feel when fully engaged. Inspect visually to ensure a proper connection.

Example Code for Arduino UNO

// Example code to demonstrate the use of Connector GEEL with an Arduino UNO
// This example assumes the connector is used to interface with a simple LED circuit

const int ledPin = 13; // LED connected to digital pin 13 through Connector GEEL

void setup() {
  pinMode(ledPin, OUTPUT); // Initialize the digital pin as an output
}

void loop() {
  digitalWrite(ledPin, HIGH); // Turn the LED on
  delay(1000);                // Wait for a second
  digitalWrite(ledPin, LOW);  // Turn the LED off
  delay(1000);                // Wait for a second
}

// Note: Ensure that the LED's current and voltage requirements are compatible
// with the Arduino's output and that the Connector GEEL is rated for this use.

Note: The above code is a simple blink sketch that interfaces an LED through the Connector GEEL to an Arduino UNO. The actual implementation may vary based on the specific application and the connector's configuration.