Cirkit Designer Logo
Cirkit Designer
Your all-in-one circuit design IDE
Home / 
Component Documentation

How to Use touch display: Examples, Pinouts, and Specs

Image of touch display
Cirkit Designer LogoDesign with touch display in Cirkit Designer

Introduction

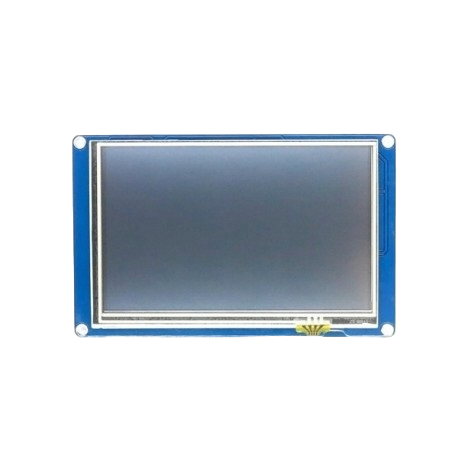
A touch display is an electronic visual display that can detect the presence and location of a touch within the display area. It combines the functionality of a traditional display and an input device, allowing users to interact directly with what is displayed, rather than using a mouse, touchpad, or other intermediate devices. Touch displays are widely used in a variety of applications, including smartphones, tablets, ATMs, kiosks, industrial controls, and medical equipment.

Explore Projects Built with touch display

Use Cirkit Designer to design, explore, and prototype these projects online. Some projects support real-time simulation. Click "Open Project" to start designing instantly!
Arduino UNO Controlled Interface with TFT Display and Feedback Indicators
Image of Mission Control: A project utilizing touch display in a practical application
This circuit features an Arduino UNO microcontroller connected to a capacitive touch TFT display for user interface, three LEDs for visual feedback, a buzzer for audio alerts, and multiple pushbuttons for user input. It is designed to interact with users through the display and buttons, control visual and audio indicators, and can be customized via the provided code template.
Cirkit Designer LogoOpen Project in Cirkit Designer
Bluetooth-Controlled Multi-Function Arduino Nano Gadget
Image of Copy of Smarttt: A project utilizing touch display in a practical application
This is a portable, microcontroller-driven interactive device featuring Bluetooth connectivity, visual (RGB LED), auditory (loudspeaker), and haptic (vibration motor) feedback, user input (pushbutton), and a rechargeable power system (TP4056 with Li-ion battery).
Cirkit Designer LogoOpen Project in Cirkit Designer
Arduino Mega 2560 Controlled TFT Touchscreen Interface with 4-Channel Relay Automation
Image of Display relay: A project utilizing touch display in a practical application
This circuit features an Arduino Mega 2560 microcontroller connected to an ILI9488 HD TFT LCD screen and a 4-channel relay module, powered by a 5V battery. The Arduino controls the LCD to display interactive buttons and uses digital output pins to toggle the state of the relays based on touch input. The code provided facilitates a user interface on the LCD for controlling devices connected to the relays, making it suitable for home automation or similar applications.
Cirkit Designer LogoOpen Project in Cirkit Designer
ESP32-Based Health Monitoring System with Touch Interface
Image of HEALTH  MONITORING  SYSTEM : A project utilizing touch display in a practical application
This circuit features an ESP32 Devkit V1 microcontroller connected to a MAX30100 pulse oximeter sensor, an mlx90614 infrared thermometer, a 128x64 OLED display, and four TTP233 touch sensors. The ESP32 facilitates communication with the I2C devices (MAX30100, mlx90614, OLED display) using its dedicated SDA and SCL pins, and it interfaces with each touch sensor through individual GPIO pins. The circuit is likely designed for a health monitoring system with touch input capability and visual output on the OLED display.
Cirkit Designer LogoOpen Project in Cirkit Designer

Explore Projects Built with touch display

Use Cirkit Designer to design, explore, and prototype these projects online. Some projects support real-time simulation. Click "Open Project" to start designing instantly!
Image of Mission Control: A project utilizing touch display in a practical application
Arduino UNO Controlled Interface with TFT Display and Feedback Indicators
This circuit features an Arduino UNO microcontroller connected to a capacitive touch TFT display for user interface, three LEDs for visual feedback, a buzzer for audio alerts, and multiple pushbuttons for user input. It is designed to interact with users through the display and buttons, control visual and audio indicators, and can be customized via the provided code template.
Cirkit Designer LogoOpen Project in Cirkit Designer
Image of Copy of Smarttt: A project utilizing touch display in a practical application
Bluetooth-Controlled Multi-Function Arduino Nano Gadget
This is a portable, microcontroller-driven interactive device featuring Bluetooth connectivity, visual (RGB LED), auditory (loudspeaker), and haptic (vibration motor) feedback, user input (pushbutton), and a rechargeable power system (TP4056 with Li-ion battery).
Cirkit Designer LogoOpen Project in Cirkit Designer
Image of Display relay: A project utilizing touch display in a practical application
Arduino Mega 2560 Controlled TFT Touchscreen Interface with 4-Channel Relay Automation
This circuit features an Arduino Mega 2560 microcontroller connected to an ILI9488 HD TFT LCD screen and a 4-channel relay module, powered by a 5V battery. The Arduino controls the LCD to display interactive buttons and uses digital output pins to toggle the state of the relays based on touch input. The code provided facilitates a user interface on the LCD for controlling devices connected to the relays, making it suitable for home automation or similar applications.
Cirkit Designer LogoOpen Project in Cirkit Designer
Image of HEALTH  MONITORING  SYSTEM : A project utilizing touch display in a practical application
ESP32-Based Health Monitoring System with Touch Interface
This circuit features an ESP32 Devkit V1 microcontroller connected to a MAX30100 pulse oximeter sensor, an mlx90614 infrared thermometer, a 128x64 OLED display, and four TTP233 touch sensors. The ESP32 facilitates communication with the I2C devices (MAX30100, mlx90614, OLED display) using its dedicated SDA and SCL pins, and it interfaces with each touch sensor through individual GPIO pins. The circuit is likely designed for a health monitoring system with touch input capability and visual output on the OLED display.
Cirkit Designer LogoOpen Project in Cirkit Designer

Common Applications and Use Cases

  • Consumer Electronics: Smartphones, tablets, and smartwatches.
  • Home Automation: Control panels for managing smart home devices.
  • Industrial Control: Interfaces for machinery and process control.
  • Medical Devices: Patient monitoring systems and diagnostic equipment.
  • Retail and Hospitality: Point of sale systems and information kiosks.

Technical Specifications

Key Technical Details

Specification Detail
Screen Size X inches/cm diagonally
Resolution XXXX x XXXX pixels
Touch Technology Capacitive/Resistive/Infrared
Operating Voltage X.XV to X.XV
Current Consumption XX mA (typical)
Interface SPI/I2C/Serial/Parallel
Operating Temperature -XX to XX °C

Pin Configuration and Descriptions

Pin Number Name Description
1 VCC Power supply (X.XV to X.XV)
2 GND Ground
3 SDA Serial Data for I2C/SPI
4 SCL Serial Clock for I2C/SPI
5 RES Reset pin, active low
6 DC Data/Command control pin (SPI mode)
7 CS Chip Select for SPI
8 T_IRQ Touch Interrupt, active low (optional)
9 T_DO Touch Data Output for SPI (optional)
10 T_DIN Touch Data Input for SPI (optional)
11 T_CLK Touch Serial Clock for SPI (optional)
12 T_CS Touch Chip Select for SPI (optional)

Usage Instructions

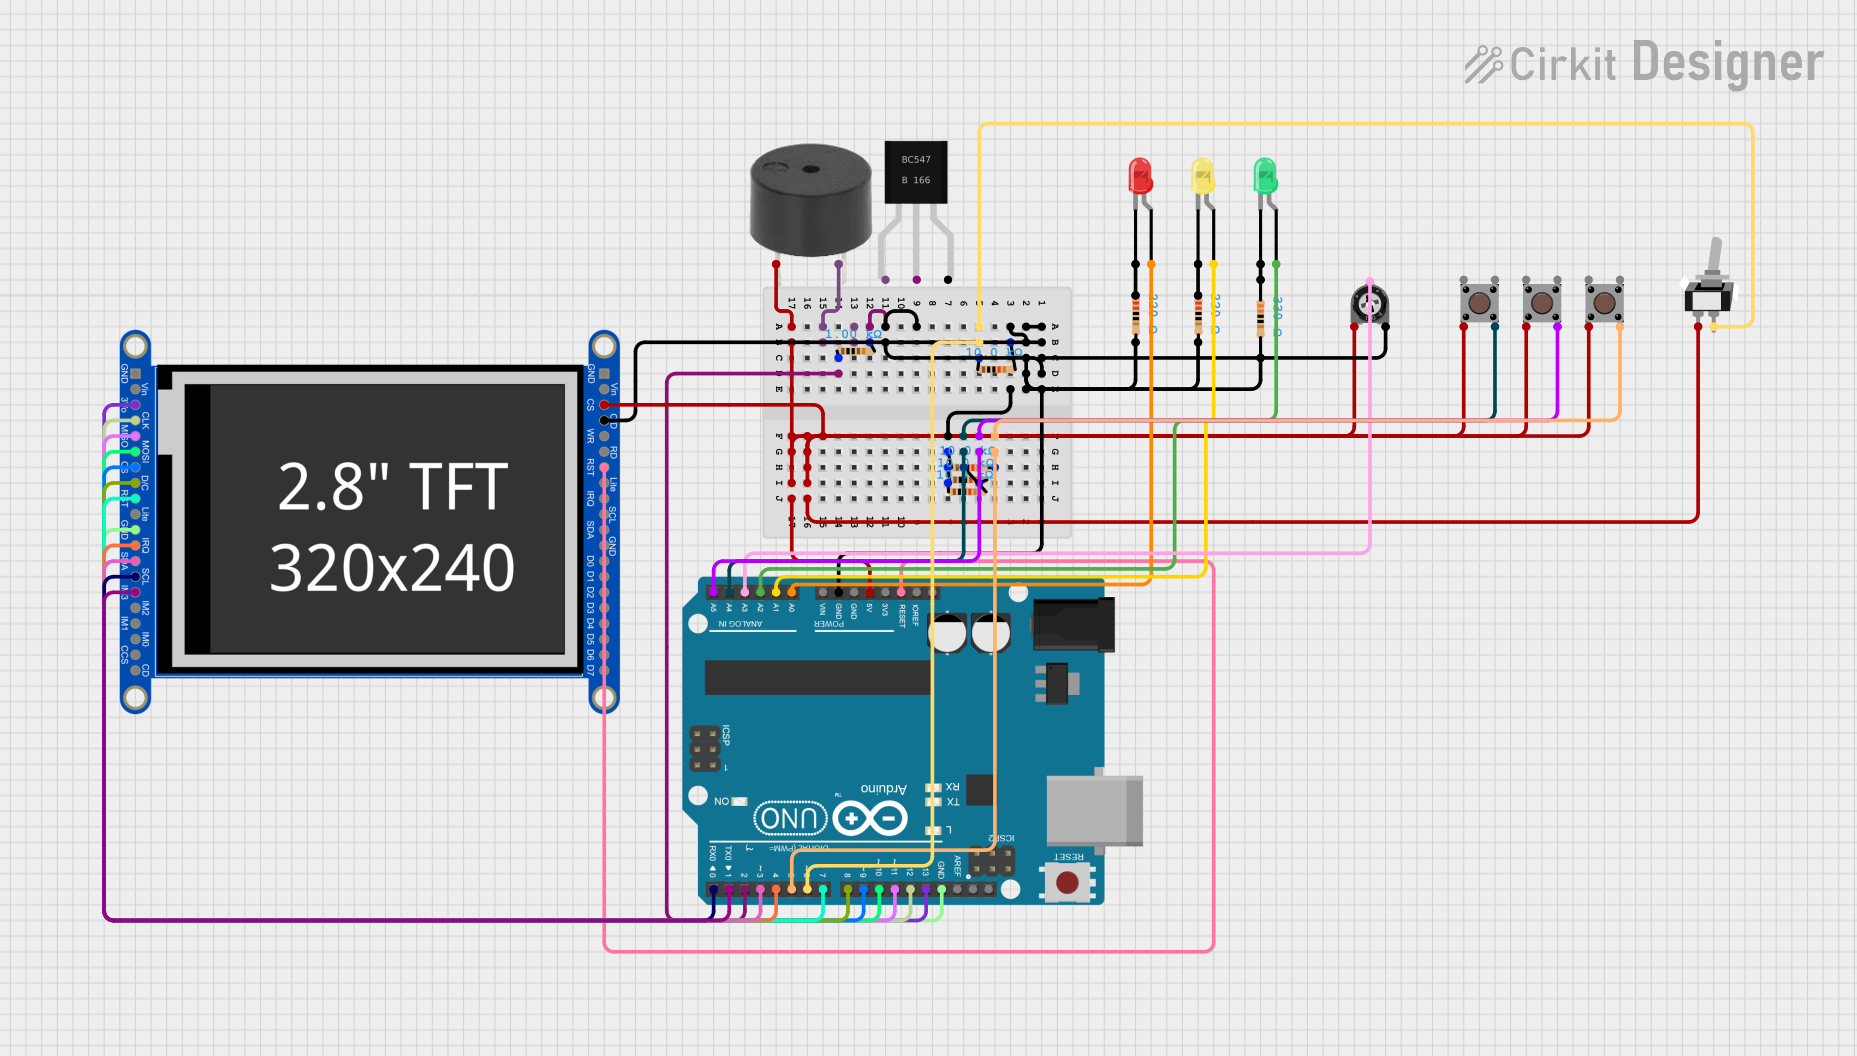
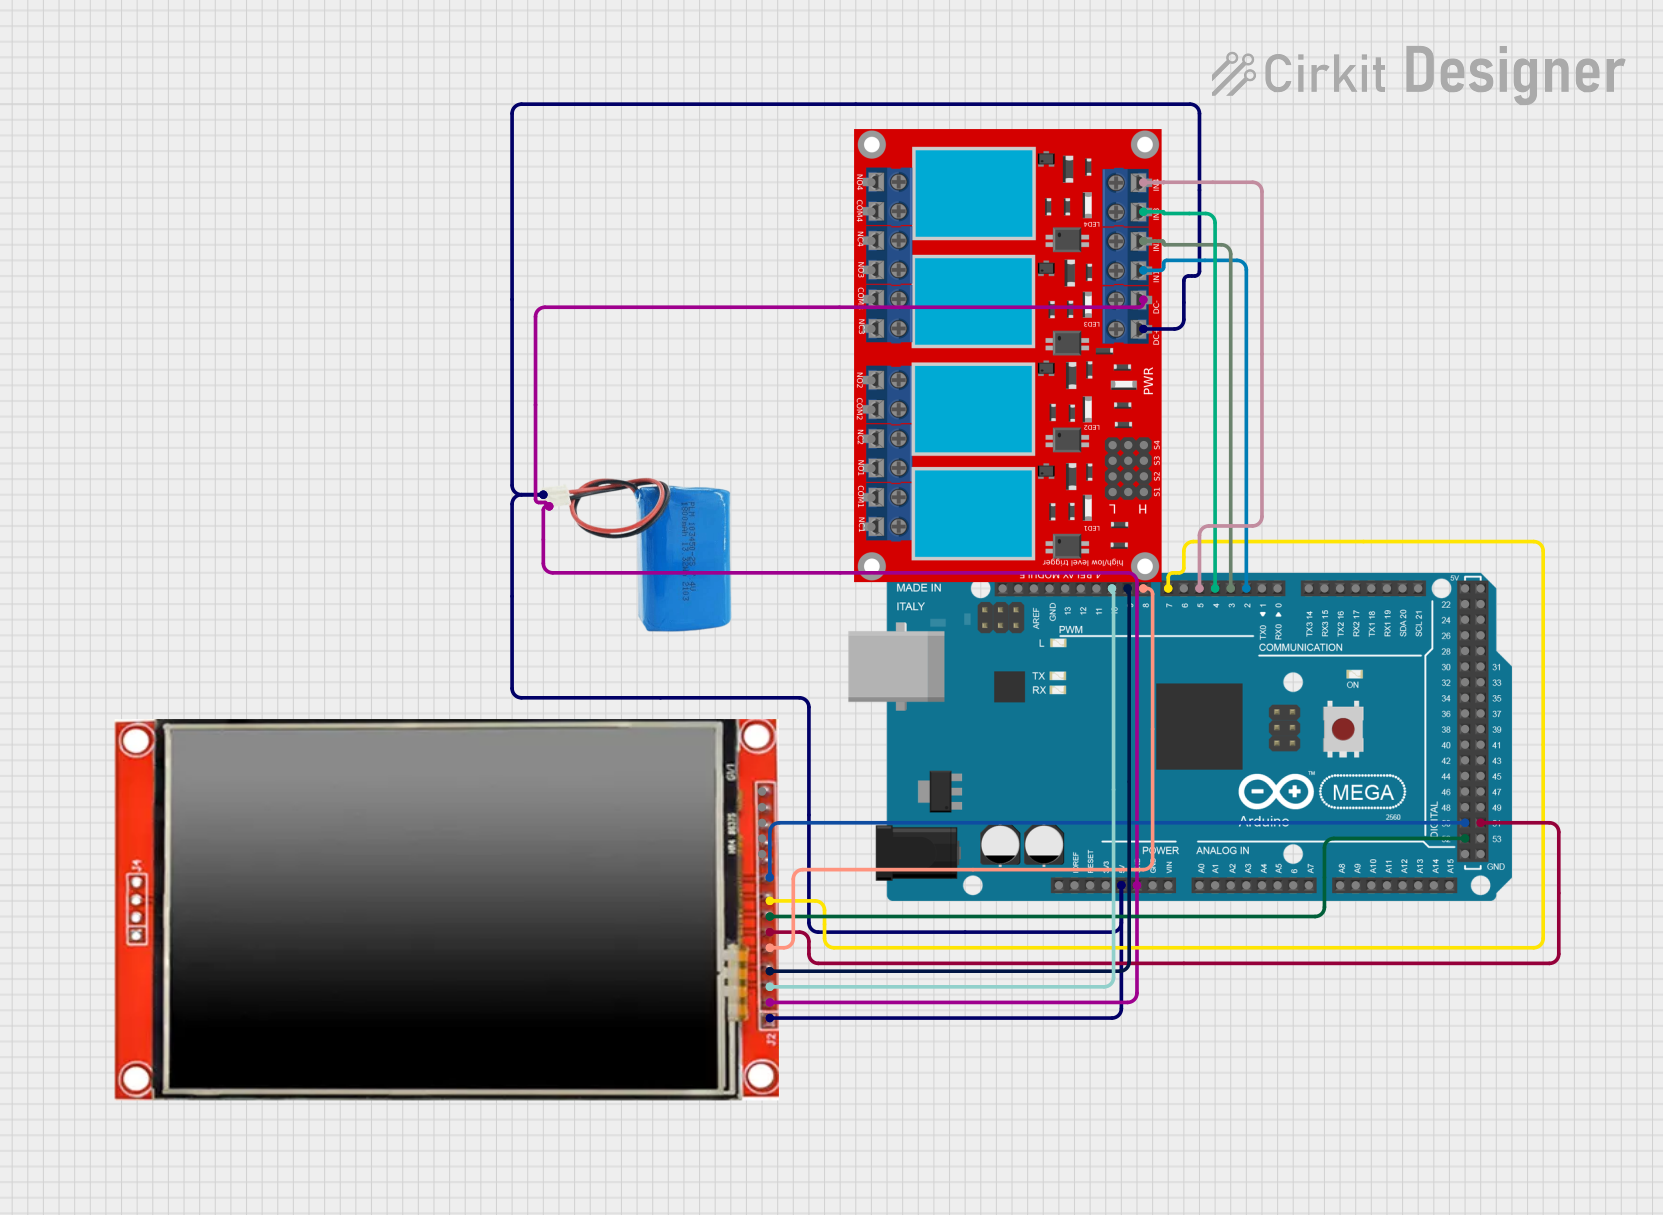
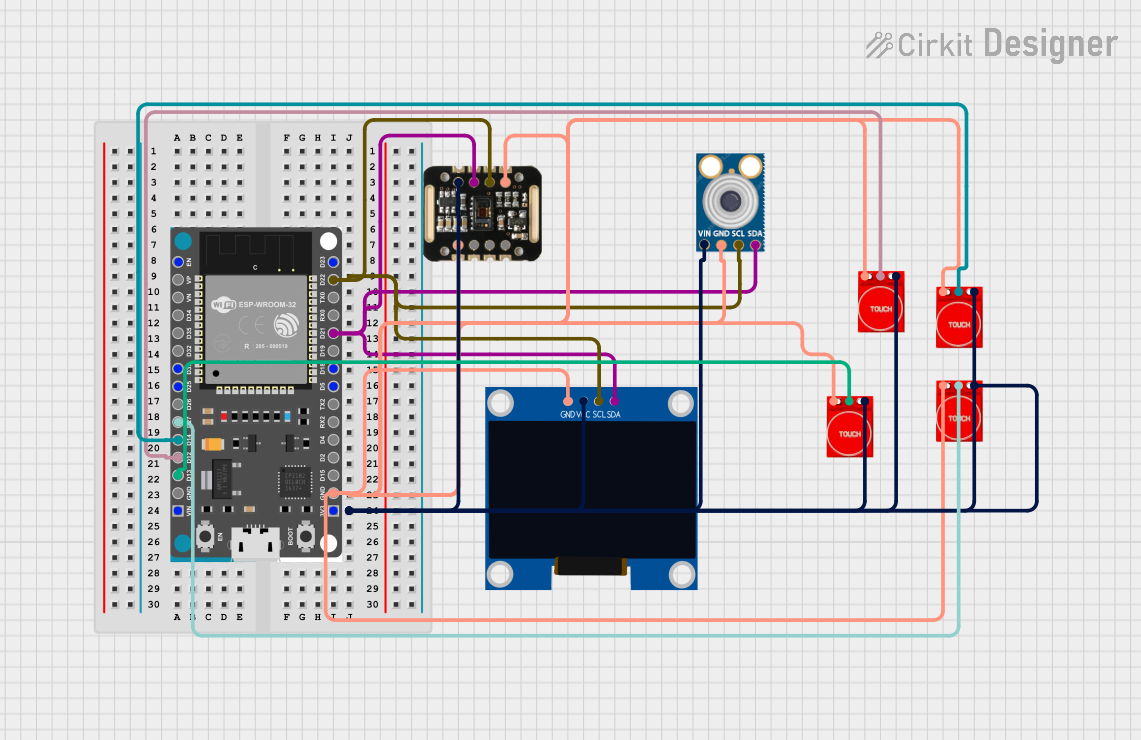
How to Use the Touch Display in a Circuit

  1. Power Supply: Connect the VCC and GND pins to your power source, ensuring it matches the operating voltage of the display.
  2. Data Interface: Connect the SDA and SCL (or corresponding SPI pins) to your microcontroller or processor.
  3. Reset and Control: Connect the RES and DC pins if required by your specific module.
  4. Touch Interface: If your display has separate touch pins (T_IRQ, T_DO, T_DIN, T_CLK, T_CS), connect them to the microcontroller.
  5. Initialization: On power-up, initialize the display and touch controller as per the manufacturer's datasheet.

Important Considerations and Best Practices

  • Power Requirements: Ensure the power supply is stable and within the specified range to avoid damaging the display.
  • Electrostatic Discharge (ESD): Use proper grounding and ESD protection when handling the touch display.
  • Calibration: Calibrate the touch screen for accurate touch detection.
  • Display Protection: Consider using a screen protector to prevent scratches and damage to the touch surface.

Troubleshooting and FAQs

Common Issues

  • Unresponsive Touch: Check the touch interface connections and ensure the touch controller is properly initialized.
  • Display Artifacts: Verify the data interface connections and ensure the correct initialization sequence is followed.
  • Intermittent Operation: Check for loose connections and ensure a stable power supply.

Solutions and Tips for Troubleshooting

  • Reboot the Device: Sometimes, simply resetting the power can resolve temporary glitches.
  • Recheck Wiring: Ensure all connections are secure and correct as per the pin configuration.
  • Update Firmware: Ensure the firmware for the touch controller is up to date.

FAQs

Q: Can I use the touch display with an Arduino UNO? A: Yes, touch displays can be interfaced with an Arduino UNO using the appropriate libraries and connections.

Q: How do I calibrate the touch screen? A: Calibration typically involves running a calibration routine provided by the touch controller's library, which will prompt you to touch certain points on the screen.

Q: What should I do if the display is not turning on? A: Check the power supply connections, ensure the voltage is within the specified range, and verify that the display's initialization sequence is correctly implemented in your code.

Example Code for Arduino UNO

#include <SPI.h>
#include <Wire.h>
// Include libraries for the specific touch display model you are using

// Define pin connections
#define CS_PIN   7
#define DC_PIN   6
#define RESET_PIN 5

// Initialize display object with pin configuration
// Replace with the specific constructor and pins for your display
DisplayClass myDisplay(CS_PIN, DC_PIN, RESET_PIN);

void setup() {
  // Initialize the display
  myDisplay.begin();
  // Clear the display to start fresh
  myDisplay.clearDisplay();
  // Set rotation if needed
  myDisplay.setRotation(1);
}

void loop() {
  // Check for touch
  if (myDisplay.touched()) {
    // Get the touch coordinates
    TS_Point p = myDisplay.getTouch();
    // Use the touch coordinates (p.x, p.y) as needed
  }
  // Other display and touch handling code goes here
}

Note: The above code is a generic template and needs to be adapted to the specific touch display module and library you are using. Always refer to the library's documentation for the correct initialization and usage procedures.