How to Use TOUCH: Examples, Pinouts, and Specs
Introduction
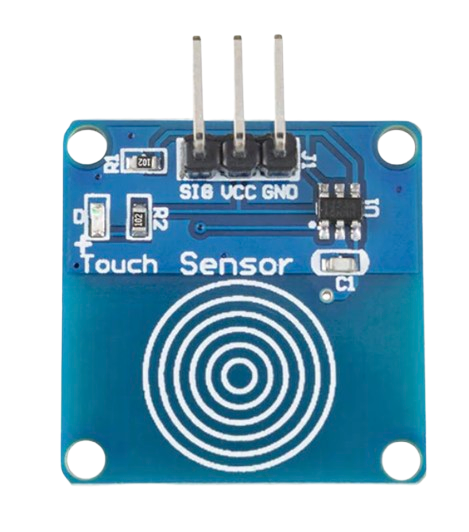
The TOUCH sensor is a versatile electronic component designed to detect physical contact or pressure. It is commonly used in user interfaces to enable interaction with electronic devices, such as touchscreens, touch-sensitive buttons, and gesture-based controls. This sensor provides a simple and reliable way to add touch-based functionality to a wide range of projects, from consumer electronics to DIY hobbyist applications.
Explore Projects Built with TOUCH
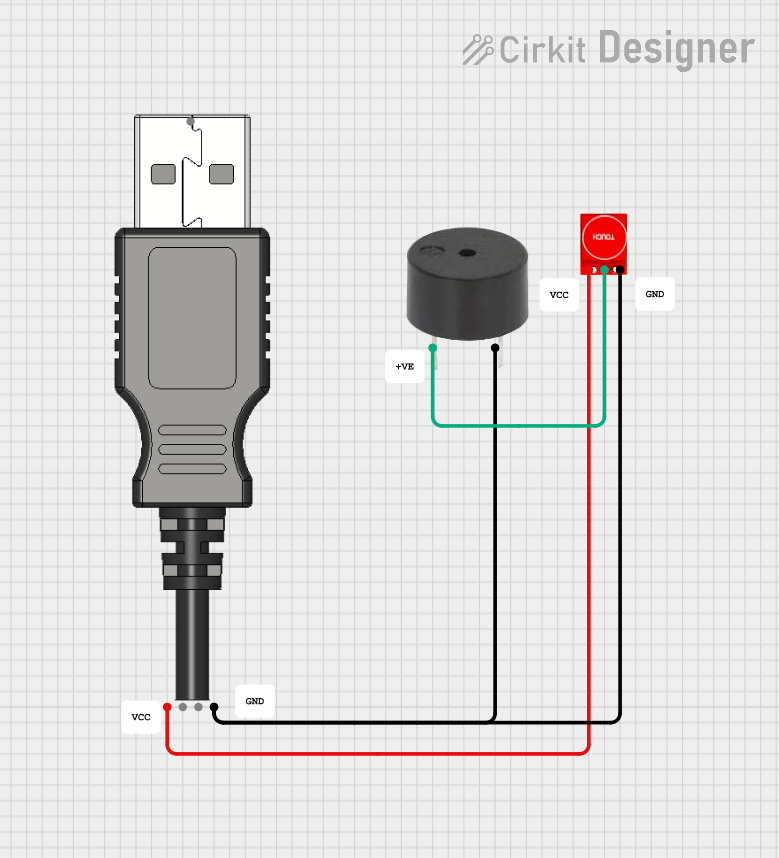
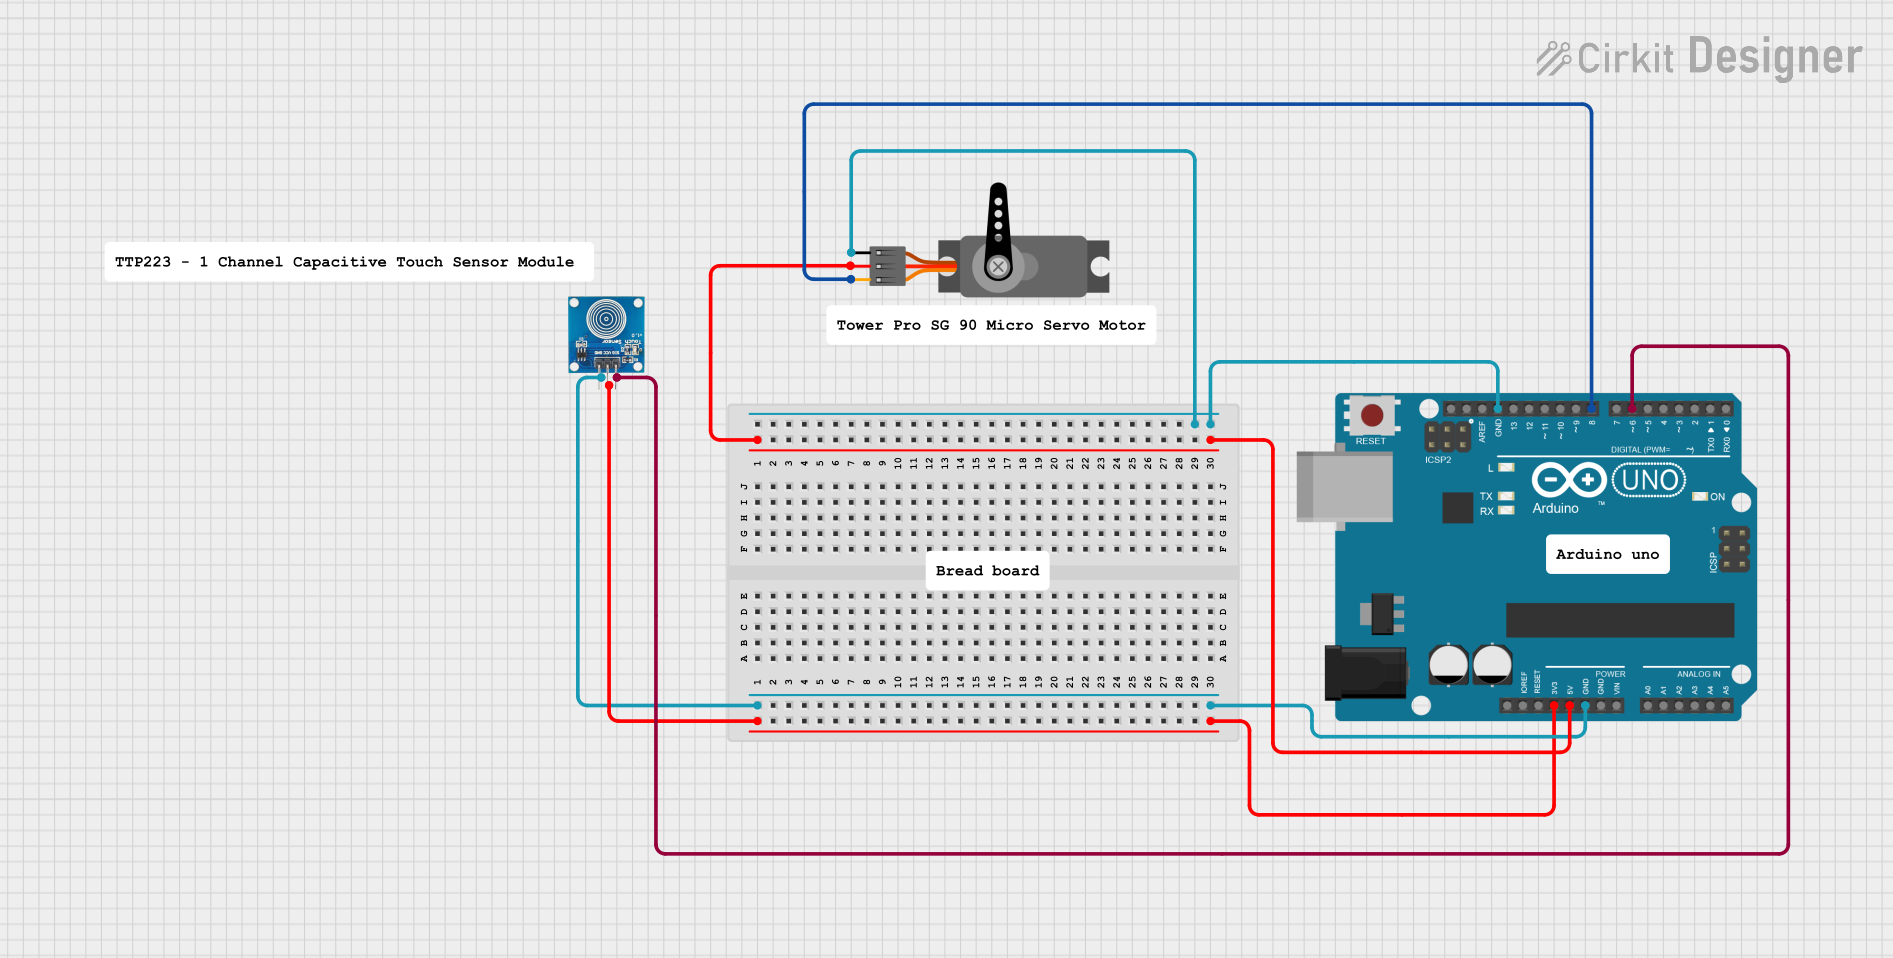
Explore Projects Built with TOUCH
Common Applications
- Touch-sensitive buttons for home appliances
- Interactive displays and touchscreens
- Gesture-based control systems
- Wearable devices and smart gadgets
- Robotics and automation systems
Technical Specifications
The TOUCH sensor is available in various configurations, but the following are typical specifications for a standard capacitive touch sensor module:
| Parameter | Value |
|---|---|
| Operating Voltage | 2.0V to 5.5V |
| Operating Current | < 10mA |
| Response Time | ~60ms |
| Output Type | Digital (High/Low) |
| Interface | 3-pin (VCC, GND, OUT) |
| Sensitivity Range | ~0-10mm (depending on material) |
| Operating Temperature | -20°C to 70°C |
Pin Configuration
The TOUCH sensor module typically has three pins, as described below:
| Pin | Name | Description |
|---|---|---|
| 1 | VCC | Power supply pin (connect to 3.3V or 5V) |
| 2 | GND | Ground pin (connect to the ground of the circuit) |
| 3 | OUT | Digital output pin (HIGH when touched, LOW otherwise) |
Usage Instructions
How to Use the TOUCH Sensor in a Circuit
- Power the Sensor: Connect the VCC pin to a 3.3V or 5V power source and the GND pin to the ground of your circuit.
- Connect the Output: Attach the OUT pin to a digital input pin of your microcontroller or other logic circuit.
- Test the Sensor: When the sensor detects a touch, the OUT pin will output a HIGH signal. Otherwise, it will remain LOW.
Important Considerations
- Power Supply: Ensure the sensor operates within its specified voltage range to avoid damage.
- Sensitivity: The sensor's sensitivity may vary depending on the material and thickness of the surface it is mounted under. Test and adjust placement as needed.
- Debouncing: If the sensor is used for button-like functionality, consider implementing software debouncing to avoid false triggers.
- Interference: Avoid placing the sensor near high-frequency components or strong electromagnetic fields, as these may affect its performance.
Example: Using the TOUCH Sensor with Arduino UNO
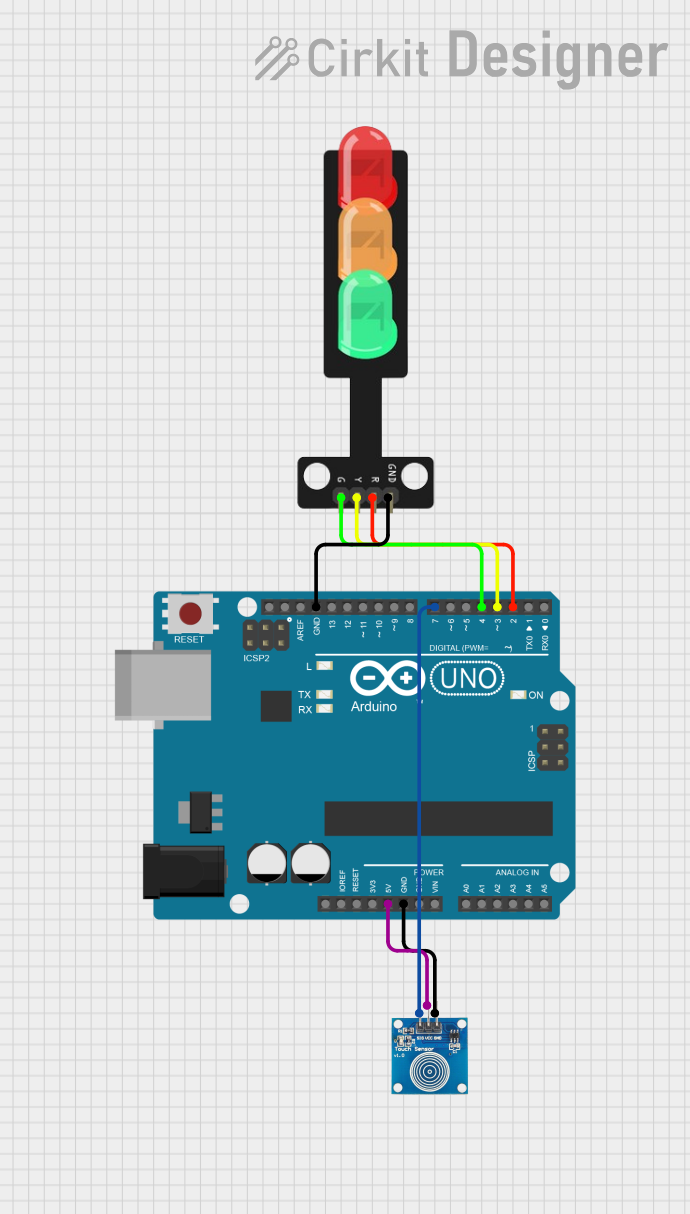
Below is an example of how to connect and use the TOUCH sensor with an Arduino UNO:
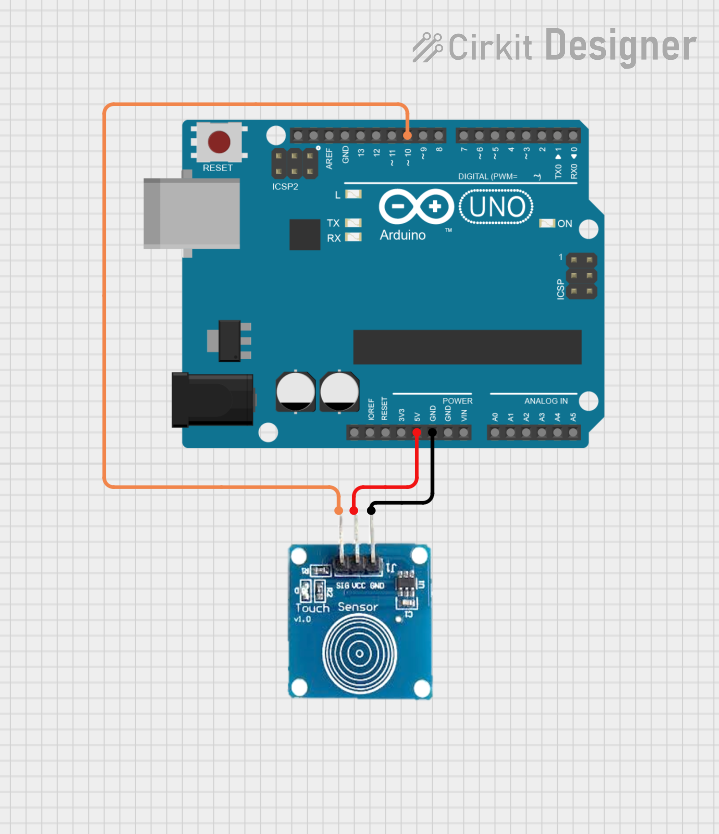
Circuit Connections
- Connect the VCC pin of the TOUCH sensor to the 5V pin on the Arduino.
- Connect the GND pin of the TOUCH sensor to the GND pin on the Arduino.
- Connect the OUT pin of the TOUCH sensor to digital pin 2 on the Arduino.
Arduino Code
// TOUCH Sensor Example with Arduino UNO
// This code reads the state of the TOUCH sensor and turns on an LED when touched.

const int touchPin = 2;  // Pin connected to the OUT pin of the TOUCH sensor
const int ledPin = 13;   // Pin connected to the built-in LED on the Arduino

void setup() {
  pinMode(touchPin, INPUT);  // Set the touch sensor pin as input
  pinMode(ledPin, OUTPUT);   // Set the LED pin as output
  Serial.begin(9600);        // Initialize serial communication for debugging
}

void loop() {
  int touchState = digitalRead(touchPin);  // Read the state of the TOUCH sensor

  if (touchState == HIGH) {
    // If the sensor is touched, turn on the LED
    digitalWrite(ledPin, HIGH);
    Serial.println("Touch detected!");  // Print message to serial monitor
  } else {
    // If no touch is detected, turn off the LED
    digitalWrite(ledPin, LOW);
  }

  delay(50);  // Small delay to stabilize readings
}
Troubleshooting and FAQs
Common Issues
Sensor Not Responding
- Cause: Incorrect wiring or insufficient power supply.
- Solution: Double-check the connections and ensure the power supply voltage is within the specified range.
False Triggers
- Cause: Electromagnetic interference or improper grounding.
- Solution: Place the sensor away from high-frequency components and ensure a solid ground connection.
Low Sensitivity
- Cause: Thick or non-conductive surface material.
- Solution: Test the sensor with different materials or reduce the thickness of the surface.
FAQs
Can the TOUCH sensor detect through glass or plastic?
- Yes, the sensor can detect touch through thin layers of glass or plastic, but sensitivity may decrease with thicker materials.
Is the TOUCH sensor waterproof?
- Most TOUCH sensors are not waterproof. If water resistance is required, consider using a protective covering or a waterproof sensor variant.
Can I adjust the sensitivity of the TOUCH sensor?
- Some modules allow sensitivity adjustment via a potentiometer or by modifying the circuit. Check the datasheet for details.
What is the maximum distance for touch detection?
- The detection range is typically up to 10mm, depending on the material and environmental conditions.
By following this documentation, you can effectively integrate the TOUCH sensor into your projects and troubleshoot common issues with ease.