How to Use Arduino Nano CNC Shield V4: Examples, Pinouts, and Specs

Introduction
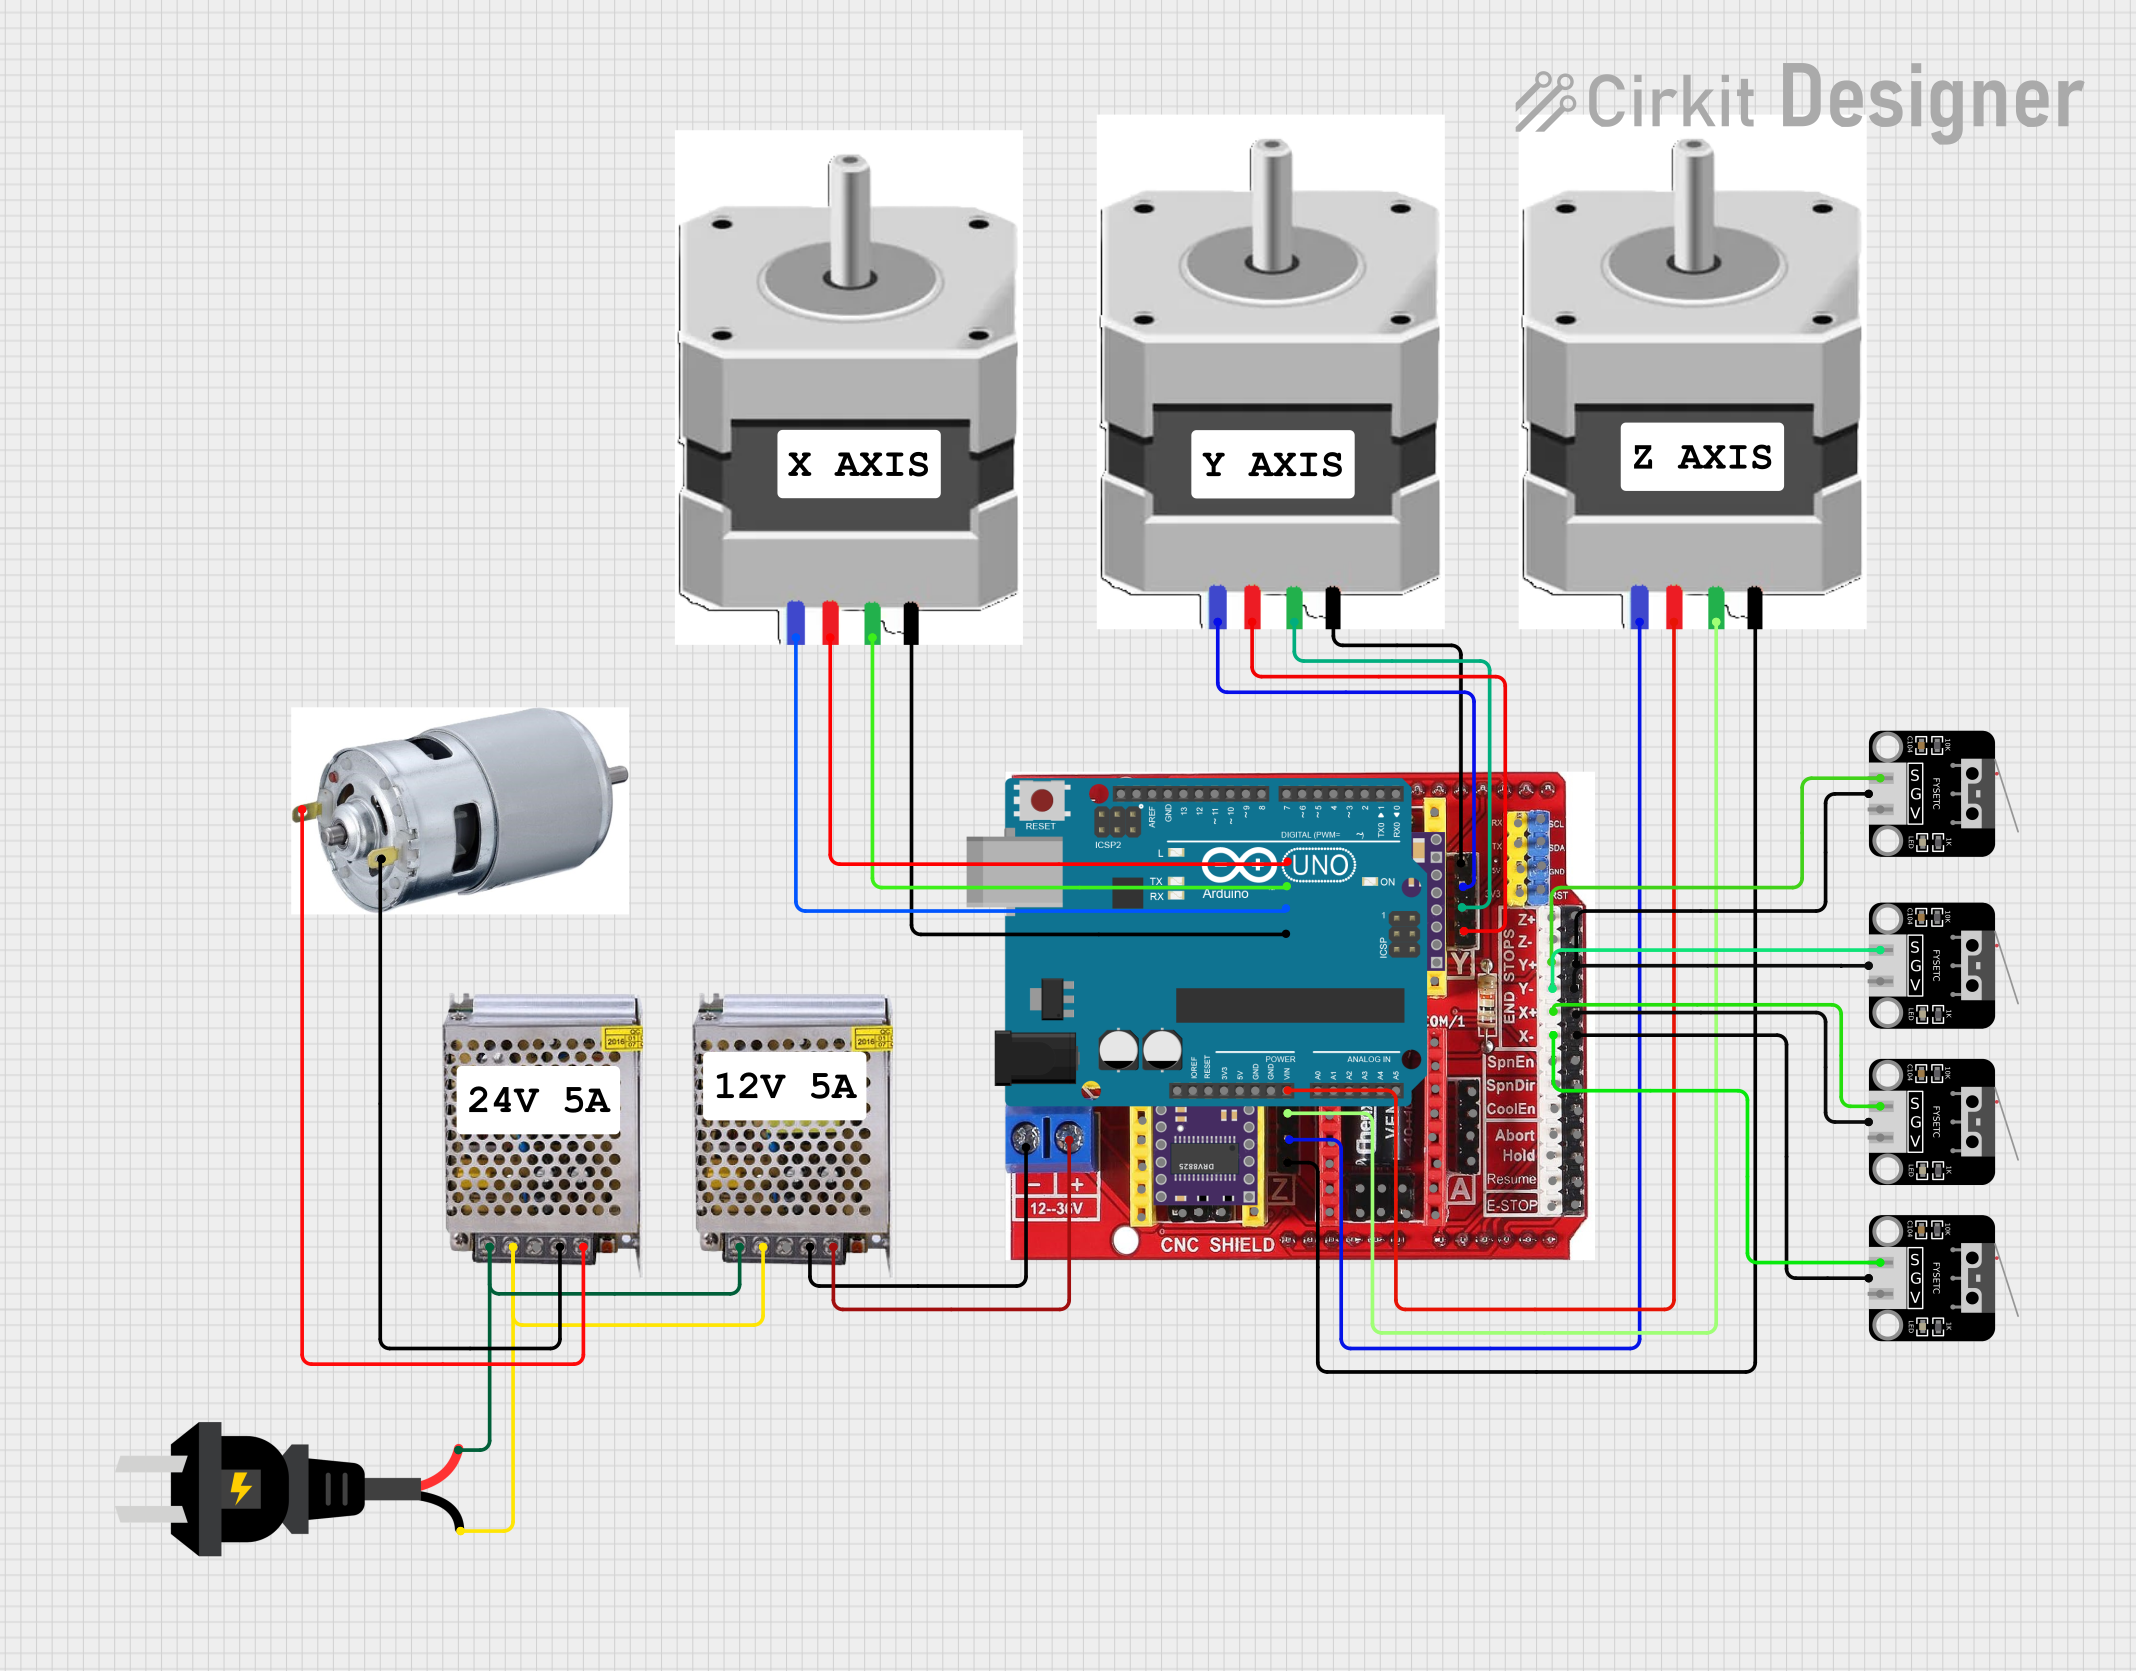
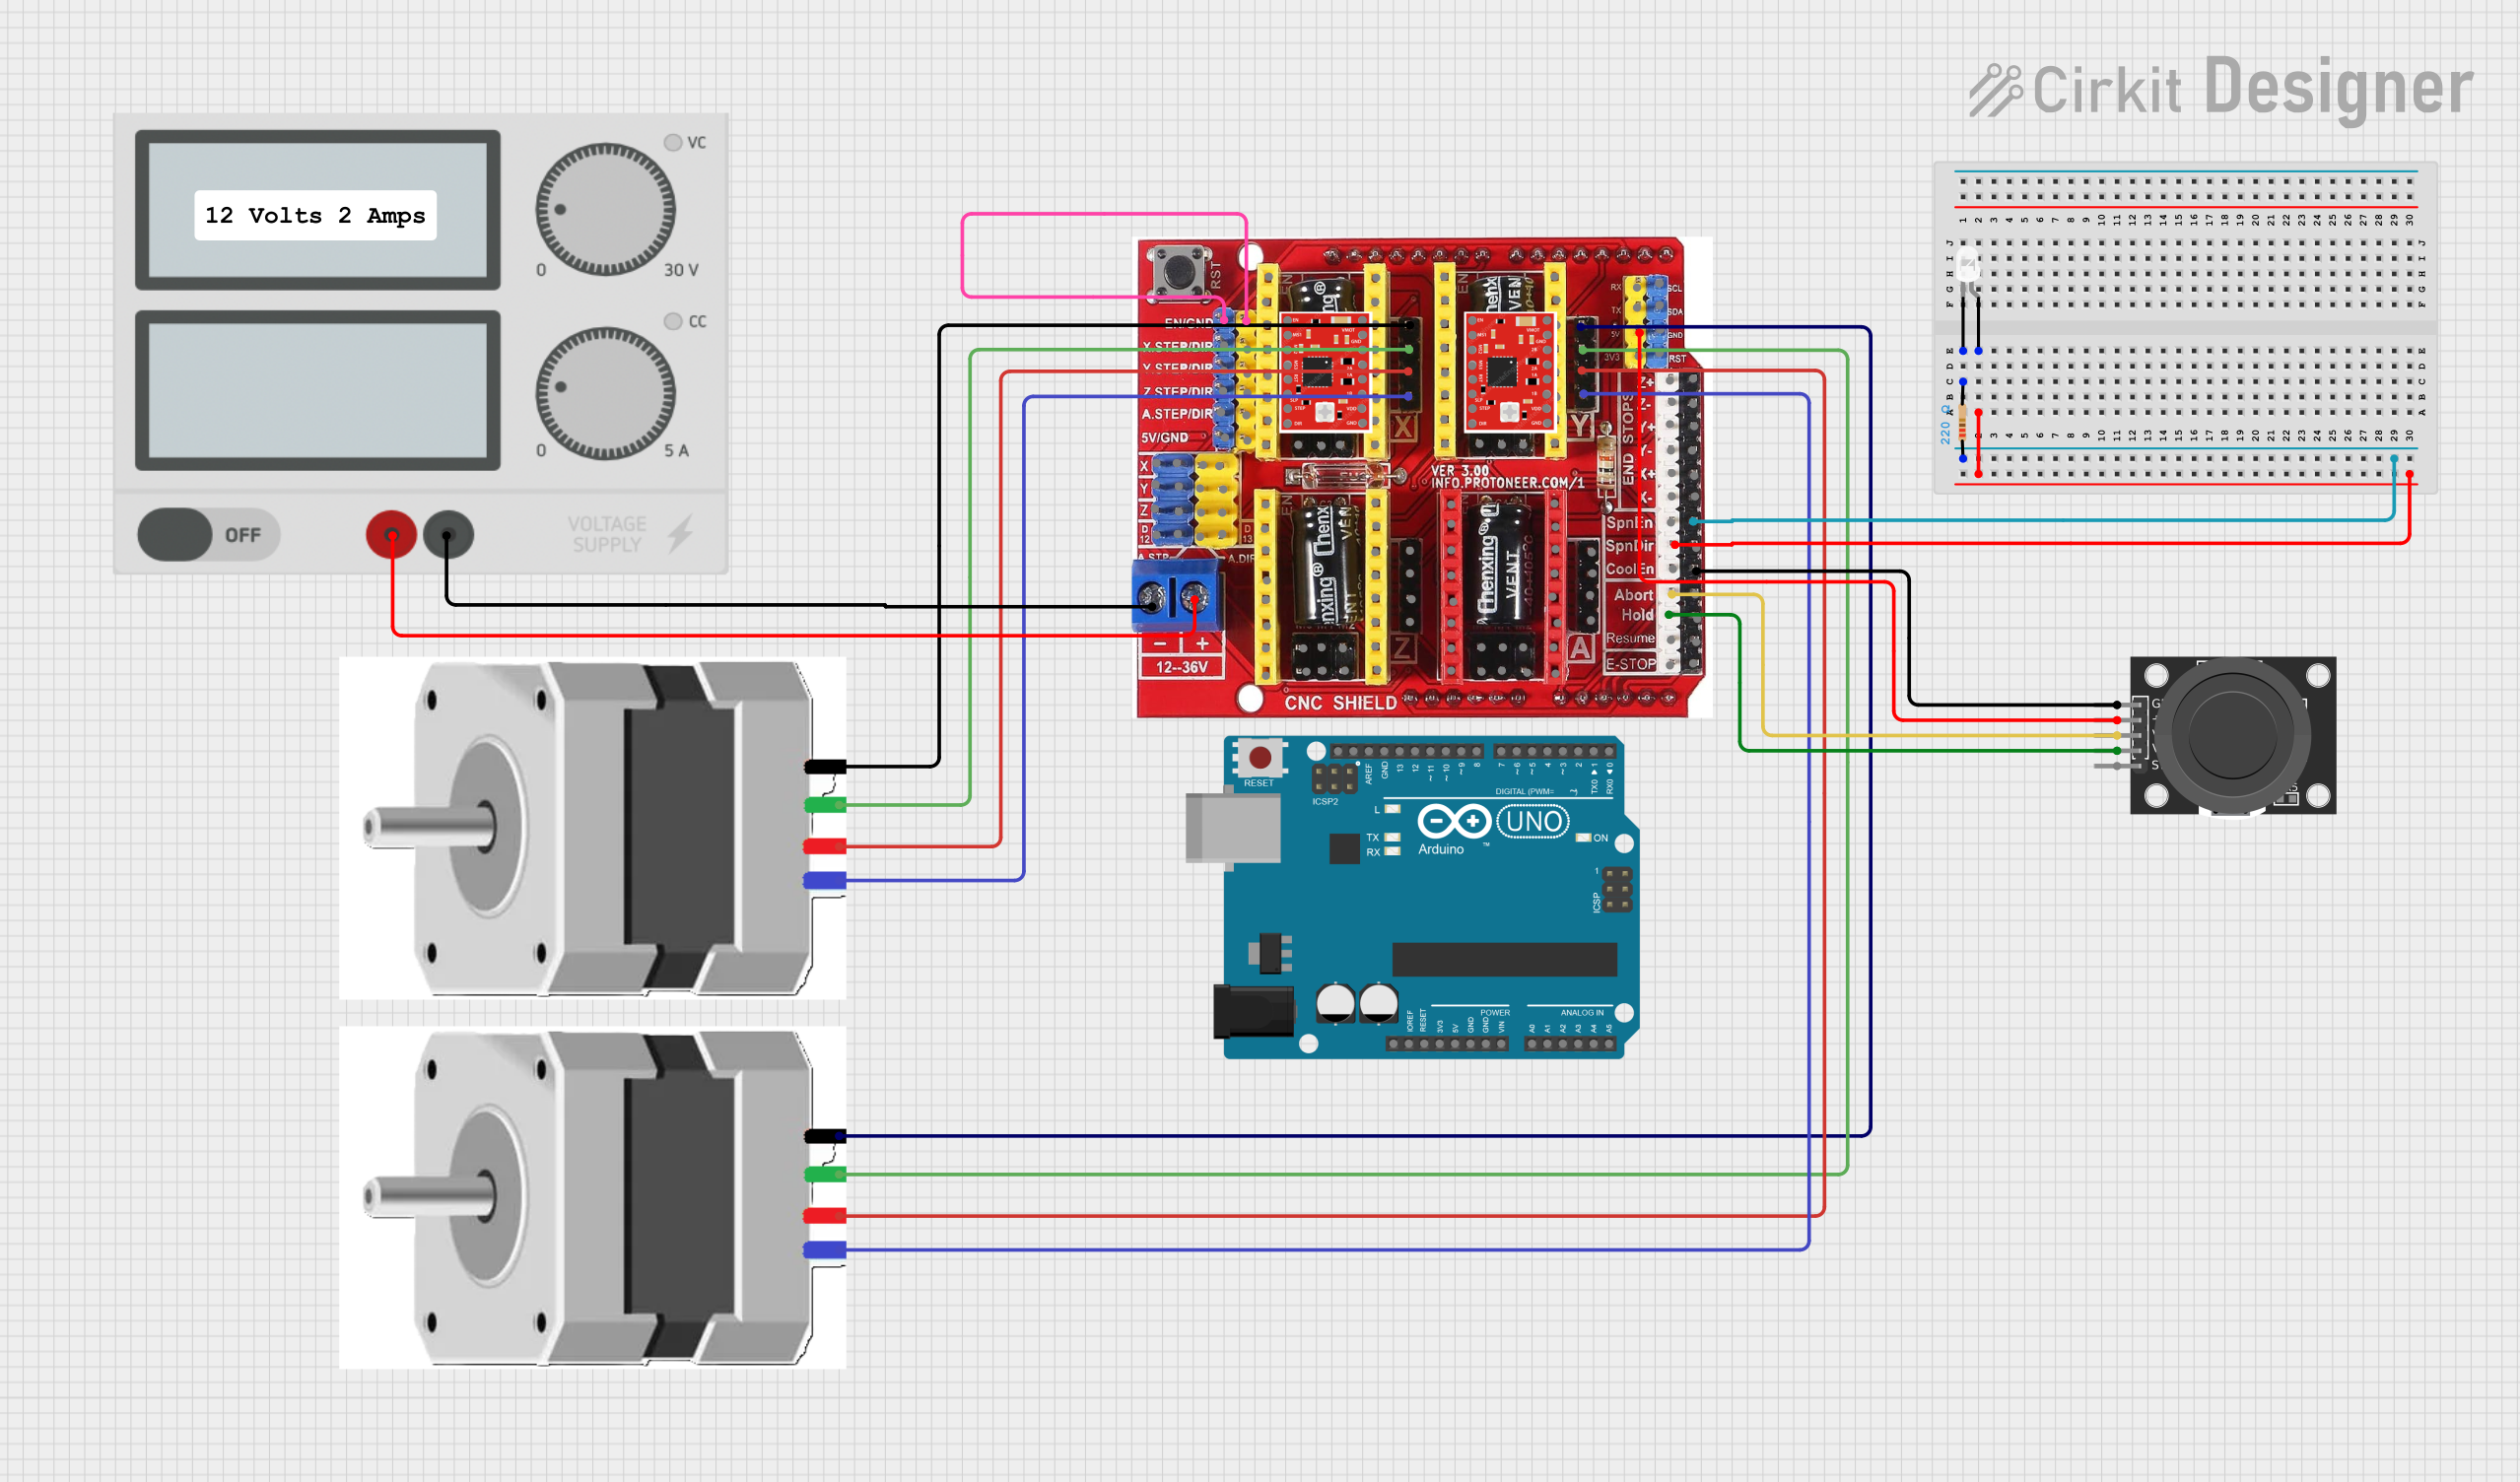
The Arduino Nano CNC Shield V4 (Manufacturer: Keyes Studio, Part ID: KS0152) is a versatile expansion board designed to simplify the connection of stepper motors, limit switches, and other components for CNC machines and 3D printers. This shield is specifically tailored for the Arduino Nano, providing a compact and efficient solution for motion control applications. It supports up to three stepper motor drivers (e.g., A4988 or DRV8825) and includes connectors for limit switches, spindle control, and more.
Explore Projects Built with Arduino Nano CNC Shield V4


Explore Projects Built with Arduino Nano CNC Shield V4
Common Applications and Use Cases
- DIY CNC machines
- 3D printers
- Laser engravers
- Robotics projects requiring precise motion control
- Educational projects involving stepper motor control
Technical Specifications
Below are the key technical details and pin configurations for the Arduino Nano CNC Shield V4:
Key Technical Details
| Parameter | Specification |
|---|---|
| Compatible Microcontroller | Arduino Nano |
| Stepper Motor Drivers | Supports A4988, DRV8825, and similar |
| Number of Axes Supported | 3 (X, Y, Z) |
| Input Voltage | 12V-36V (via external power supply) |
| Logic Voltage | 5V (provided by Arduino Nano) |
| Limit Switch Inputs | 3 (X, Y, Z) |
| Spindle Control | PWM output for spindle speed control |
| Dimensions | 59mm x 54mm |
Pin Configuration and Descriptions
Stepper Motor Driver Sockets
| Pin Name | Description |
|---|---|
| VMOT | Motor power supply (12V-36V) |
| GND | Ground |
| STEP | Step pulse input |
| DIR | Direction control input |
| EN | Enable/disable motor driver |
Limit Switch Inputs
| Pin Name | Description |
|---|---|
| X- | X-axis limit switch (negative end) |
| X+ | X-axis limit switch (positive end) |
| Y- | Y-axis limit switch (negative end) |
| Y+ | Y-axis limit switch (positive end) |
| Z- | Z-axis limit switch (negative end) |
| Z+ | Z-axis limit switch (positive end) |
Spindle Control
| Pin Name | Description |
|---|---|
| PWM | Pulse-width modulation for spindle |
| GND | Ground |
Power and Communication
| Pin Name | Description |
|---|---|
| VIN | External power input (12V-36V) |
| GND | Ground |
| 5V | 5V output from Arduino Nano |
| TX | Serial communication (transmit) |
| RX | Serial communication (receive) |
Usage Instructions
How to Use the Component in a Circuit
- Install the Arduino Nano: Insert the Arduino Nano into the dedicated socket on the CNC Shield V4, ensuring proper alignment of the pins.
- Connect Stepper Motor Drivers: Plug in up to three stepper motor drivers (e.g., A4988 or DRV8825) into the corresponding sockets. Ensure correct orientation as per the driver’s datasheet.
- Connect Stepper Motors: Attach the stepper motors to the motor output terminals (X, Y, Z).
- Connect Limit Switches: Wire the limit switches to the corresponding inputs (X-, X+, Y-, Y+, Z-, Z+).
- Power the Shield: Provide an external power supply (12V-36V) to the VIN and GND terminals.
- Upload Code: Use the Arduino IDE to upload motion control code to the Arduino Nano.
Important Considerations and Best Practices
- Driver Configuration: Set the current limit on the stepper motor drivers according to the motor specifications to prevent overheating or damage.
- Power Supply: Use a stable and adequately rated power supply to ensure reliable operation.
- Cooling: If using high-current stepper motors, consider adding heatsinks or a cooling fan to the stepper motor drivers.
- Wiring: Double-check all connections to avoid short circuits or incorrect wiring.
- Firmware: For CNC applications, consider using GRBL firmware, which is compatible with this shield.
Example Code for Arduino Nano
Below is an example code snippet to control a stepper motor connected to the X-axis using the CNC Shield V4:
// Example code to control a stepper motor on the X-axis using Arduino Nano
#define X_STEP_PIN 2  // Pin for step signal
#define X_DIR_PIN  5  // Pin for direction signal
#define X_EN_PIN   8  // Pin for enable signal

void setup() {
  pinMode(X_STEP_PIN, OUTPUT); // Set step pin as output
  pinMode(X_DIR_PIN, OUTPUT);  // Set direction pin as output
  pinMode(X_EN_PIN, OUTPUT);   // Set enable pin as output

  digitalWrite(X_EN_PIN, LOW); // Enable the motor driver
}

void loop() {
  digitalWrite(X_DIR_PIN, HIGH); // Set direction to forward
  for (int i = 0; i < 200; i++) { // Move 200 steps
    digitalWrite(X_STEP_PIN, HIGH); // Generate step pulse
    delayMicroseconds(500);         // Wait 500 microseconds
    digitalWrite(X_STEP_PIN, LOW);  // End step pulse
    delayMicroseconds(500);         // Wait 500 microseconds
  }
  delay(1000); // Wait 1 second before reversing direction

  digitalWrite(X_DIR_PIN, LOW); // Set direction to reverse
  for (int i = 0; i < 200; i++) { // Move 200 steps
    digitalWrite(X_STEP_PIN, HIGH);
    delayMicroseconds(500);
    digitalWrite(X_STEP_PIN, LOW);
    delayMicroseconds(500);
  }
  delay(1000); // Wait 1 second before repeating
}
Troubleshooting and FAQs
Common Issues and Solutions
Stepper Motor Not Moving
- Cause: Incorrect wiring or loose connections.
- Solution: Verify all connections, especially between the motor, driver, and shield.
Overheating Drivers
- Cause: Current limit not set correctly on the stepper motor driver.
- Solution: Adjust the current limit using the potentiometer on the driver.
Limit Switches Not Working
- Cause: Incorrect wiring or faulty switches.
- Solution: Check the wiring and test the switches with a multimeter.
Arduino Nano Not Recognized by PC
- Cause: Missing or incorrect USB driver.
- Solution: Install the correct USB driver for the Arduino Nano.
Spindle Not Responding
- Cause: Incorrect PWM signal or wiring.
- Solution: Verify the PWM output and ensure proper connection to the spindle controller.
FAQs
Can I use this shield with an Arduino Uno?
- No, this shield is specifically designed for the Arduino Nano form factor.
What firmware is recommended for CNC applications?
- GRBL firmware is highly recommended for CNC and 3D printing applications.
Can I control more than three axes?
- No, this shield supports up to three axes (X, Y, Z) only.
Is it compatible with NEMA 23 stepper motors?
- Yes, as long as the stepper motor driver and power supply are appropriately rated.
Do I need external pull-up resistors for limit switches?
- No, the shield includes built-in pull-up resistors for limit switch inputs.