How to Use SparkFun Soil Moisture Sensor: Examples, Pinouts, and Specs
Introduction
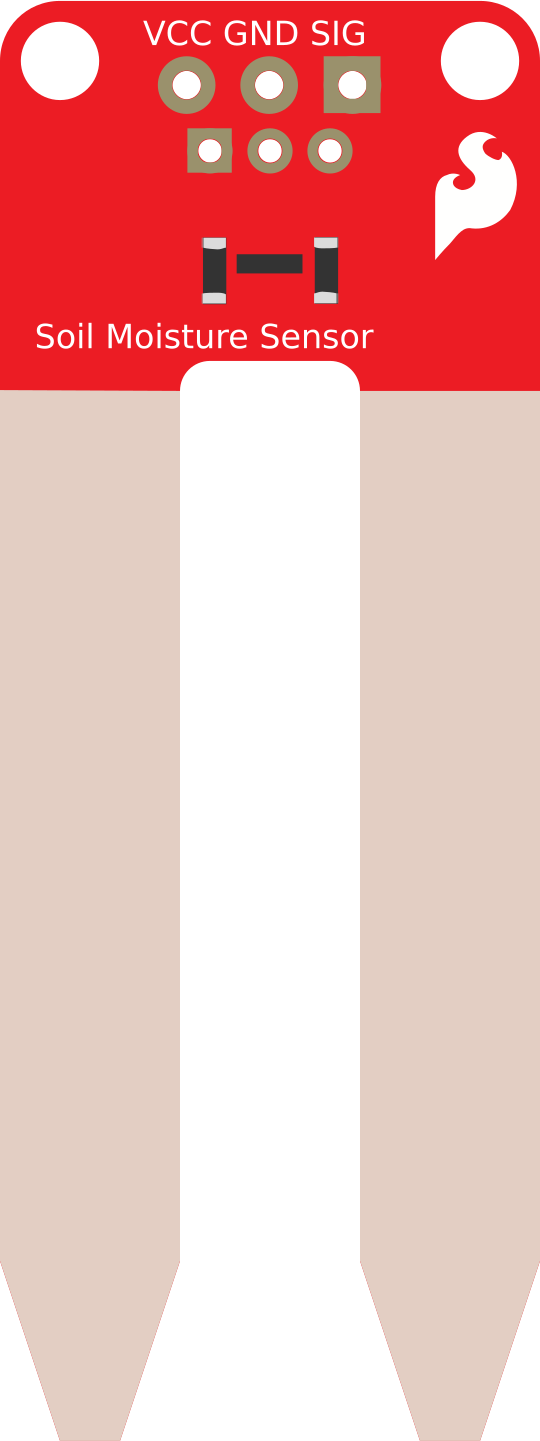
The SparkFun Soil Moisture Sensor is a device designed to measure the volumetric water content in soil. It provides an analog output that corresponds to the moisture level, making it an essential tool for applications such as precision agriculture, automated gardening systems, and environmental monitoring. By integrating this sensor into your project, you can monitor soil conditions and optimize irrigation schedules, ensuring healthier plants and efficient water usage.
Explore Projects Built with SparkFun Soil Moisture Sensor
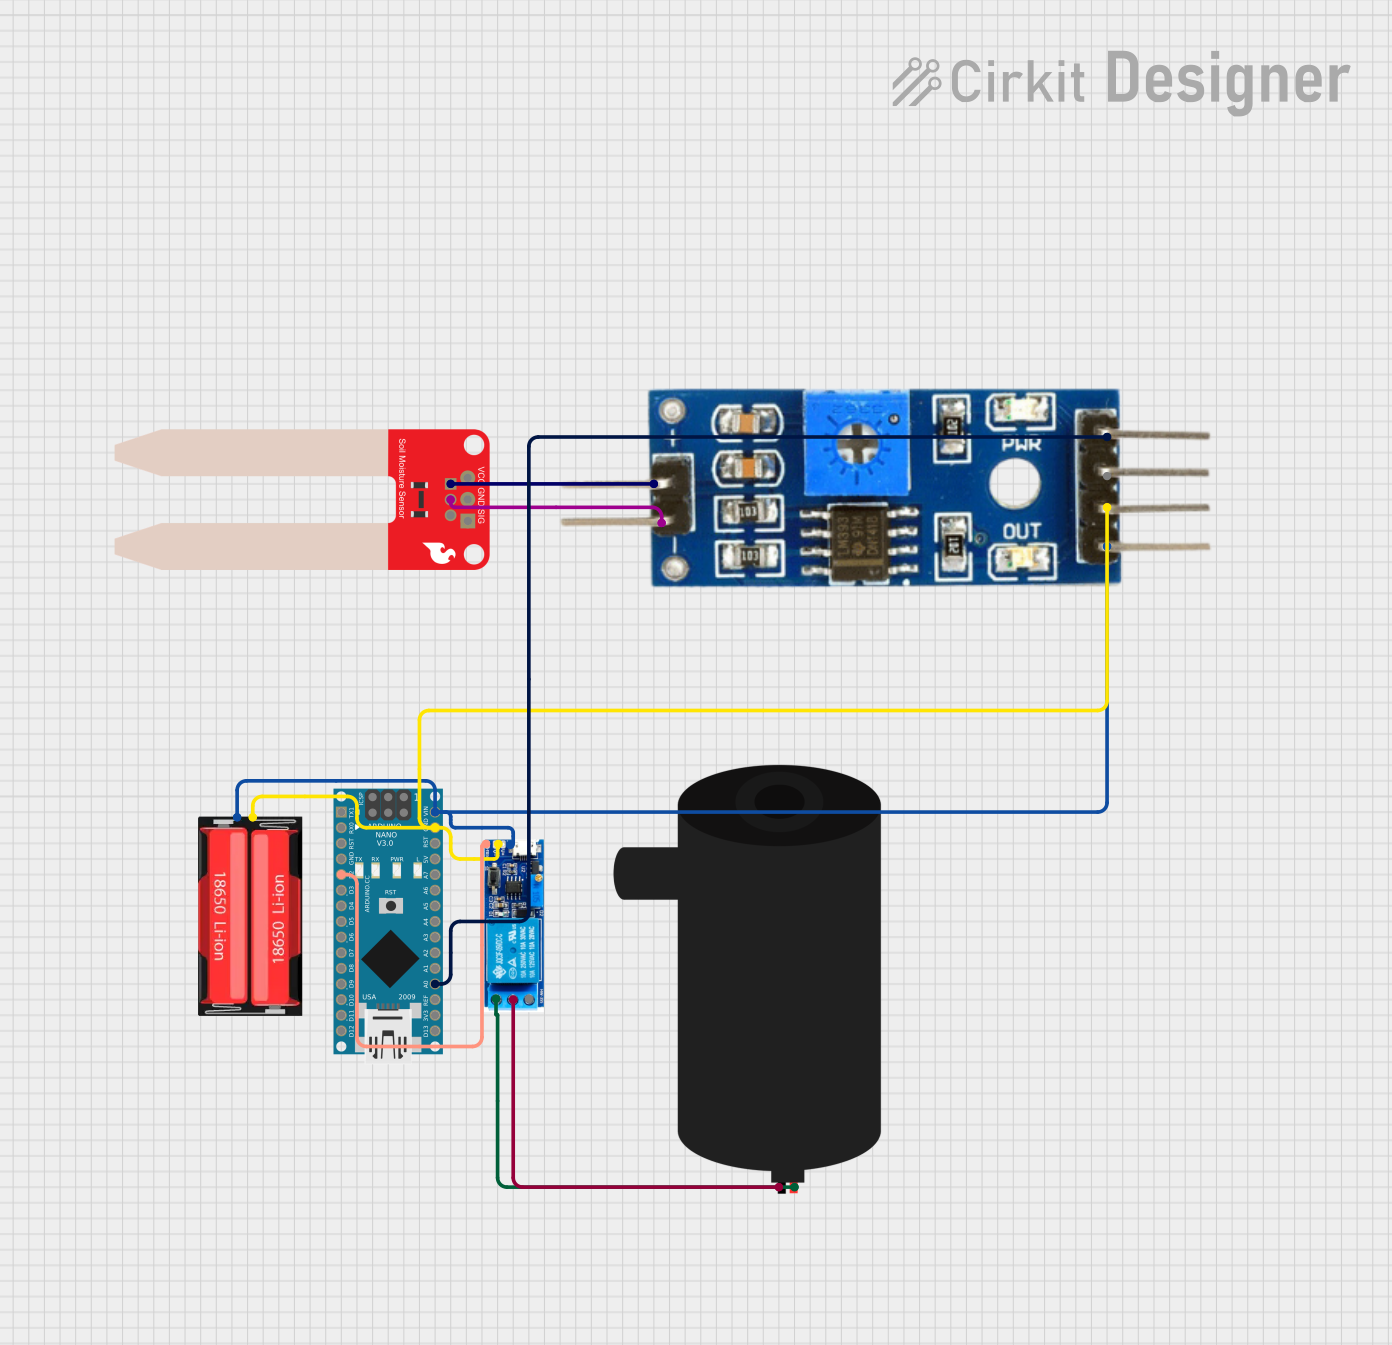
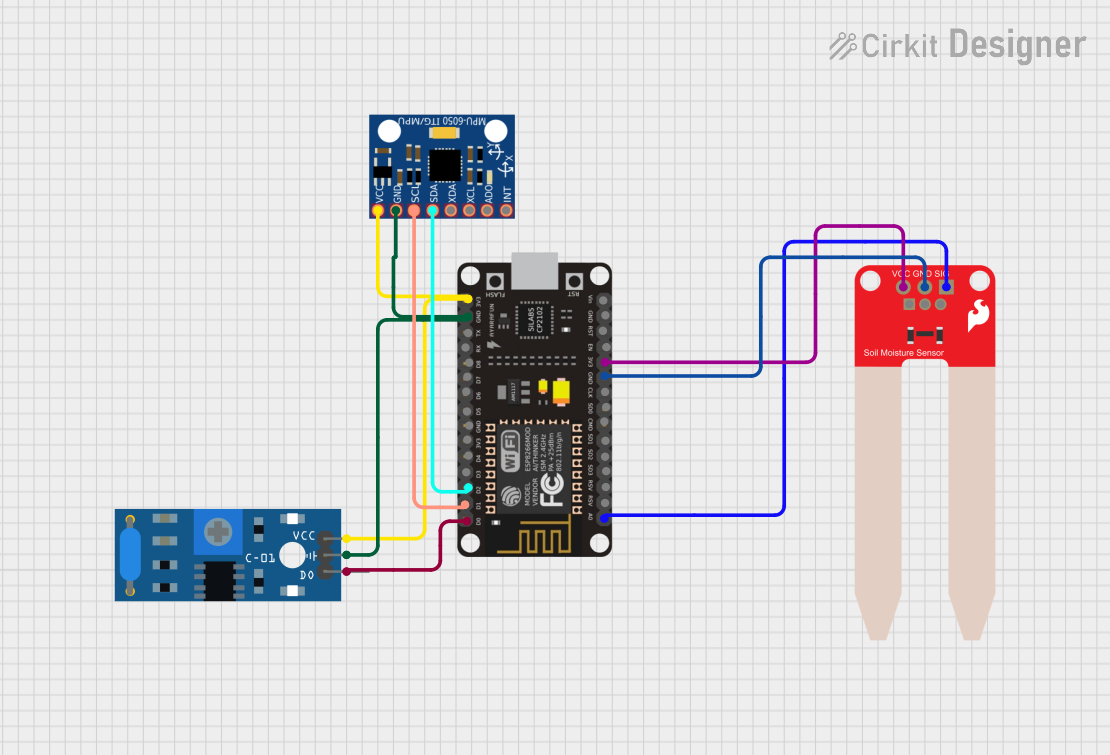
Explore Projects Built with SparkFun Soil Moisture Sensor
Common Applications and Use Cases
- Automated irrigation systems
- Smart gardening projects
- Agricultural monitoring
- Environmental research and data collection
- DIY plant care systems
Technical Specifications
The SparkFun Soil Moisture Sensor is a simple yet effective tool for measuring soil moisture. Below are its key technical details and pin configuration:
Key Technical Details
| Parameter | Value |
|---|---|
| Operating Voltage | 3.3V to 5V |
| Output Type | Analog |
| Output Voltage Range | 0V (dry soil) to ~3.3V (wet soil) |
| Current Consumption | ~5mA |
| Dimensions | 60mm x 20mm |
| Connector Type | 3-pin header |
Pin Configuration and Descriptions
| Pin Name | Description |
|---|---|
| VCC | Power supply pin (3.3V to 5V) |
| GND | Ground pin |
| SIG | Analog signal output pin (provides moisture data) |
Usage Instructions
The SparkFun Soil Moisture Sensor is easy to integrate into your circuit. Follow the steps below to use it effectively:
Connecting the Sensor
- Power the Sensor: Connect the
VCCpin to a 3.3V or 5V power source and theGNDpin to the ground of your circuit. - Read the Signal: Connect the
SIGpin to an analog input pin on your microcontroller (e.g., Arduino UNO).
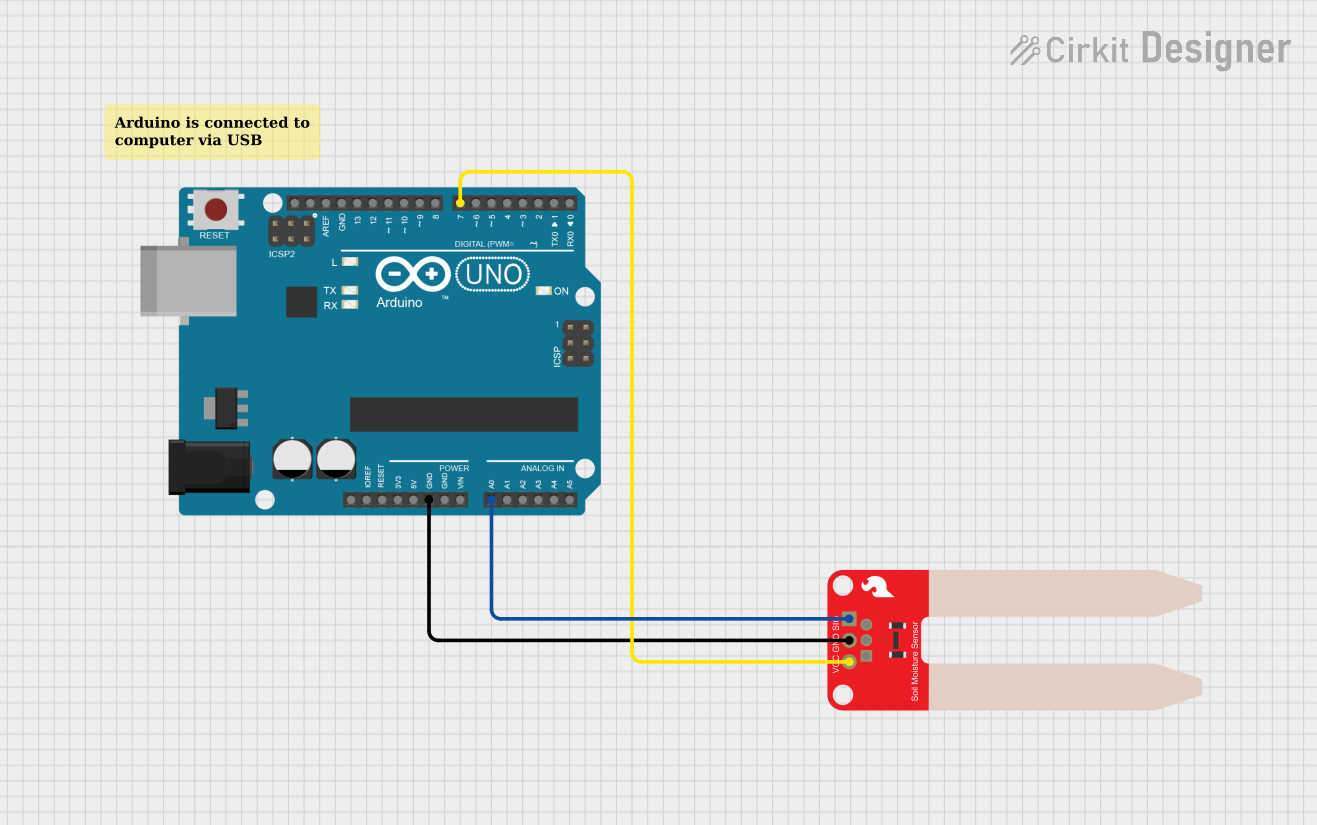
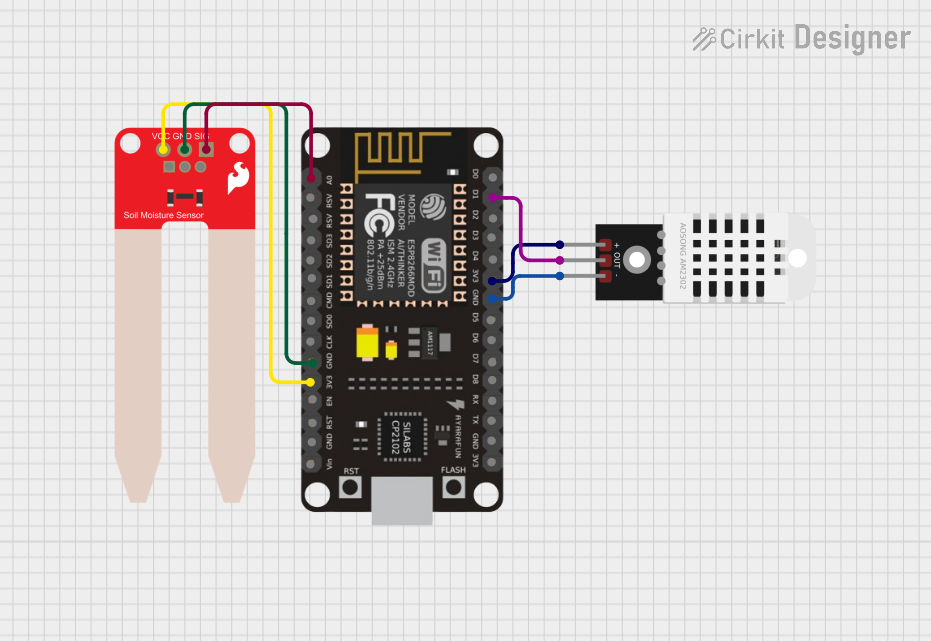
Example Circuit
Below is an example of how to connect the SparkFun Soil Moisture Sensor to an Arduino UNO:
VCC→ Arduino5VGND→ ArduinoGNDSIG→ ArduinoA0
Sample Arduino Code
The following code reads the sensor's analog output and prints the soil moisture level to the Serial Monitor:
// Define the analog pin connected to the sensor's SIG pin
const int sensorPin = A0;

void setup() {
  // Initialize the Serial Monitor for debugging
  Serial.begin(9600);
}

void loop() {
  // Read the analog value from the sensor
  int sensorValue = analogRead(sensorPin);

  // Map the sensor value to a percentage (0% = dry, 100% = wet)
  int moisturePercent = map(sensorValue, 0, 1023, 0, 100);

  // Print the moisture level to the Serial Monitor
  Serial.print("Soil Moisture: ");
  Serial.print(moisturePercent);
  Serial.println("%");

  // Wait for 1 second before the next reading
  delay(1000);
}
Important Considerations and Best Practices
- Avoid Corrosion: The sensor's probes can corrode over time if left in the soil continuously. To extend its lifespan, consider using it intermittently (e.g., power it only when taking a reading).
- Calibration: The sensor's output may vary depending on soil type. Calibrate the sensor for your specific soil by testing it in dry and wet conditions.
- Placement: Insert the sensor probes fully into the soil for accurate readings. Ensure the probes are clean and free of debris before use.
- Power Supply: Use a stable power source to avoid fluctuations in the sensor's output.
Troubleshooting and FAQs
Common Issues and Solutions
No Output or Incorrect Readings
- Cause: Loose or incorrect wiring.
- Solution: Double-check all connections, ensuring the
VCC,GND, andSIGpins are properly connected.
Fluctuating Readings
- Cause: Unstable power supply or electrical noise.
- Solution: Use a decoupling capacitor (e.g., 0.1µF) between
VCCandGNDto stabilize the power supply.
Sensor Corrosion
- Cause: Continuous exposure to moisture.
- Solution: Use the sensor intermittently or coat the probes with a protective layer (e.g., waterproof paint).
Inconsistent Results in Different Soils
- Cause: Soil type affects sensor output.
- Solution: Calibrate the sensor for each soil type by testing in known dry and wet conditions.
FAQs
Q: Can this sensor be used with a 3.3V microcontroller?
A: Yes, the sensor operates at both 3.3V and 5V, making it compatible with most microcontrollers.
Q: How do I interpret the sensor's analog output?
A: The output voltage increases with soil moisture. Dry soil produces a low voltage (0V), while wet soil produces a higher voltage (3.3V).
Q: Is the sensor waterproof?
A: The probes are designed for soil insertion, but the PCB is not waterproof. Avoid exposing the PCB to water.
Q: How often should I take readings?
A: To minimize sensor wear, take readings at intervals (e.g., every few hours) rather than continuously.
By following this documentation, you can effectively integrate the SparkFun Soil Moisture Sensor into your projects and ensure reliable performance.