How to Use mini esp32 s3 ai voice development board: Examples, Pinouts, and Specs
Introduction
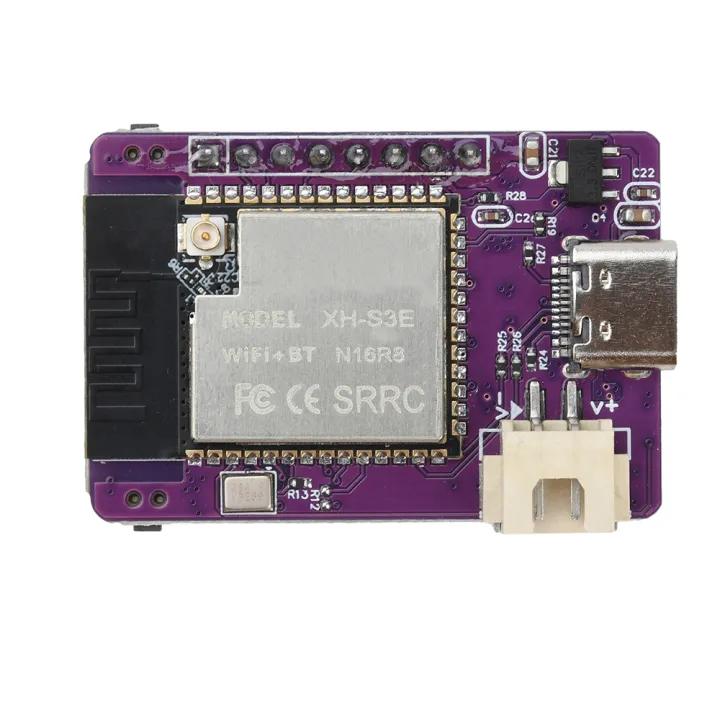
The Mini ESP32-S3 AI Voice Development Board, manufactured by Espressif Systems (Part ID: ESP32-S3-N16R8), is a compact and versatile development platform designed for AI voice applications. Powered by the ESP32-S3 chip, this board integrates advanced features such as Wi-Fi and Bluetooth connectivity, making it ideal for IoT projects, voice recognition systems, and smart home devices. Its small form factor and robust processing capabilities make it a popular choice for developers working on AI and machine learning tasks.
Explore Projects Built with mini esp32 s3 ai voice development board
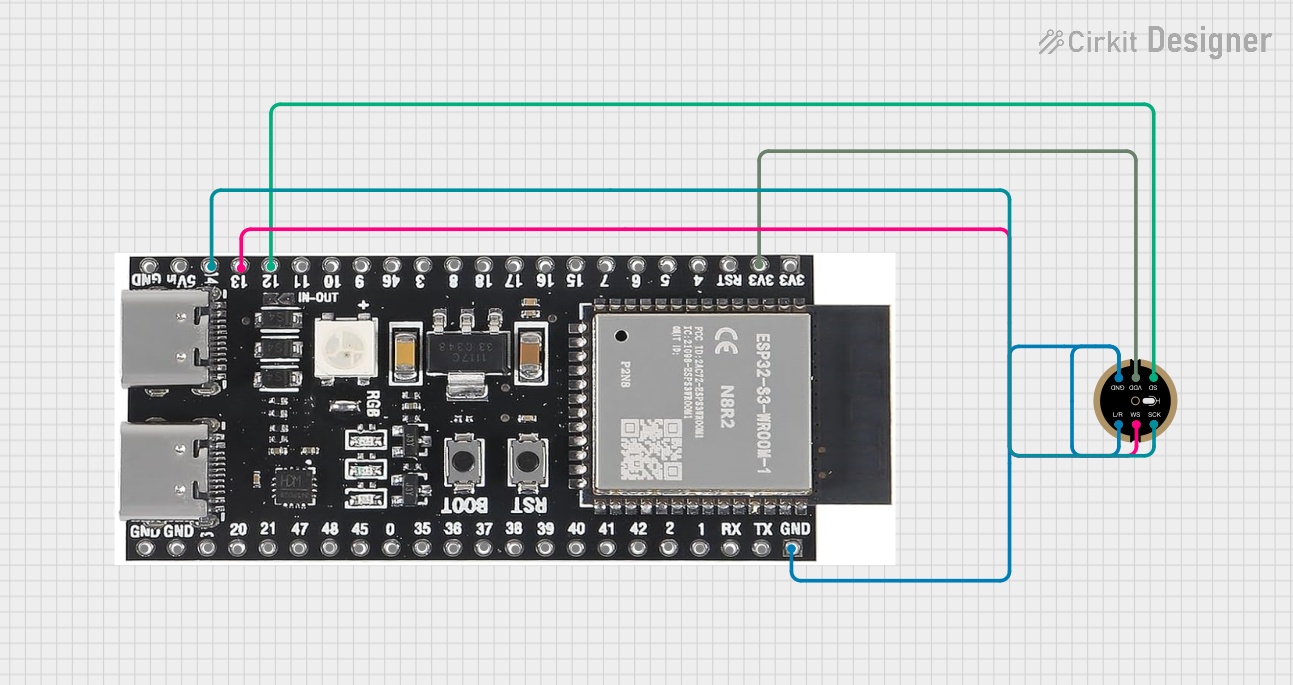

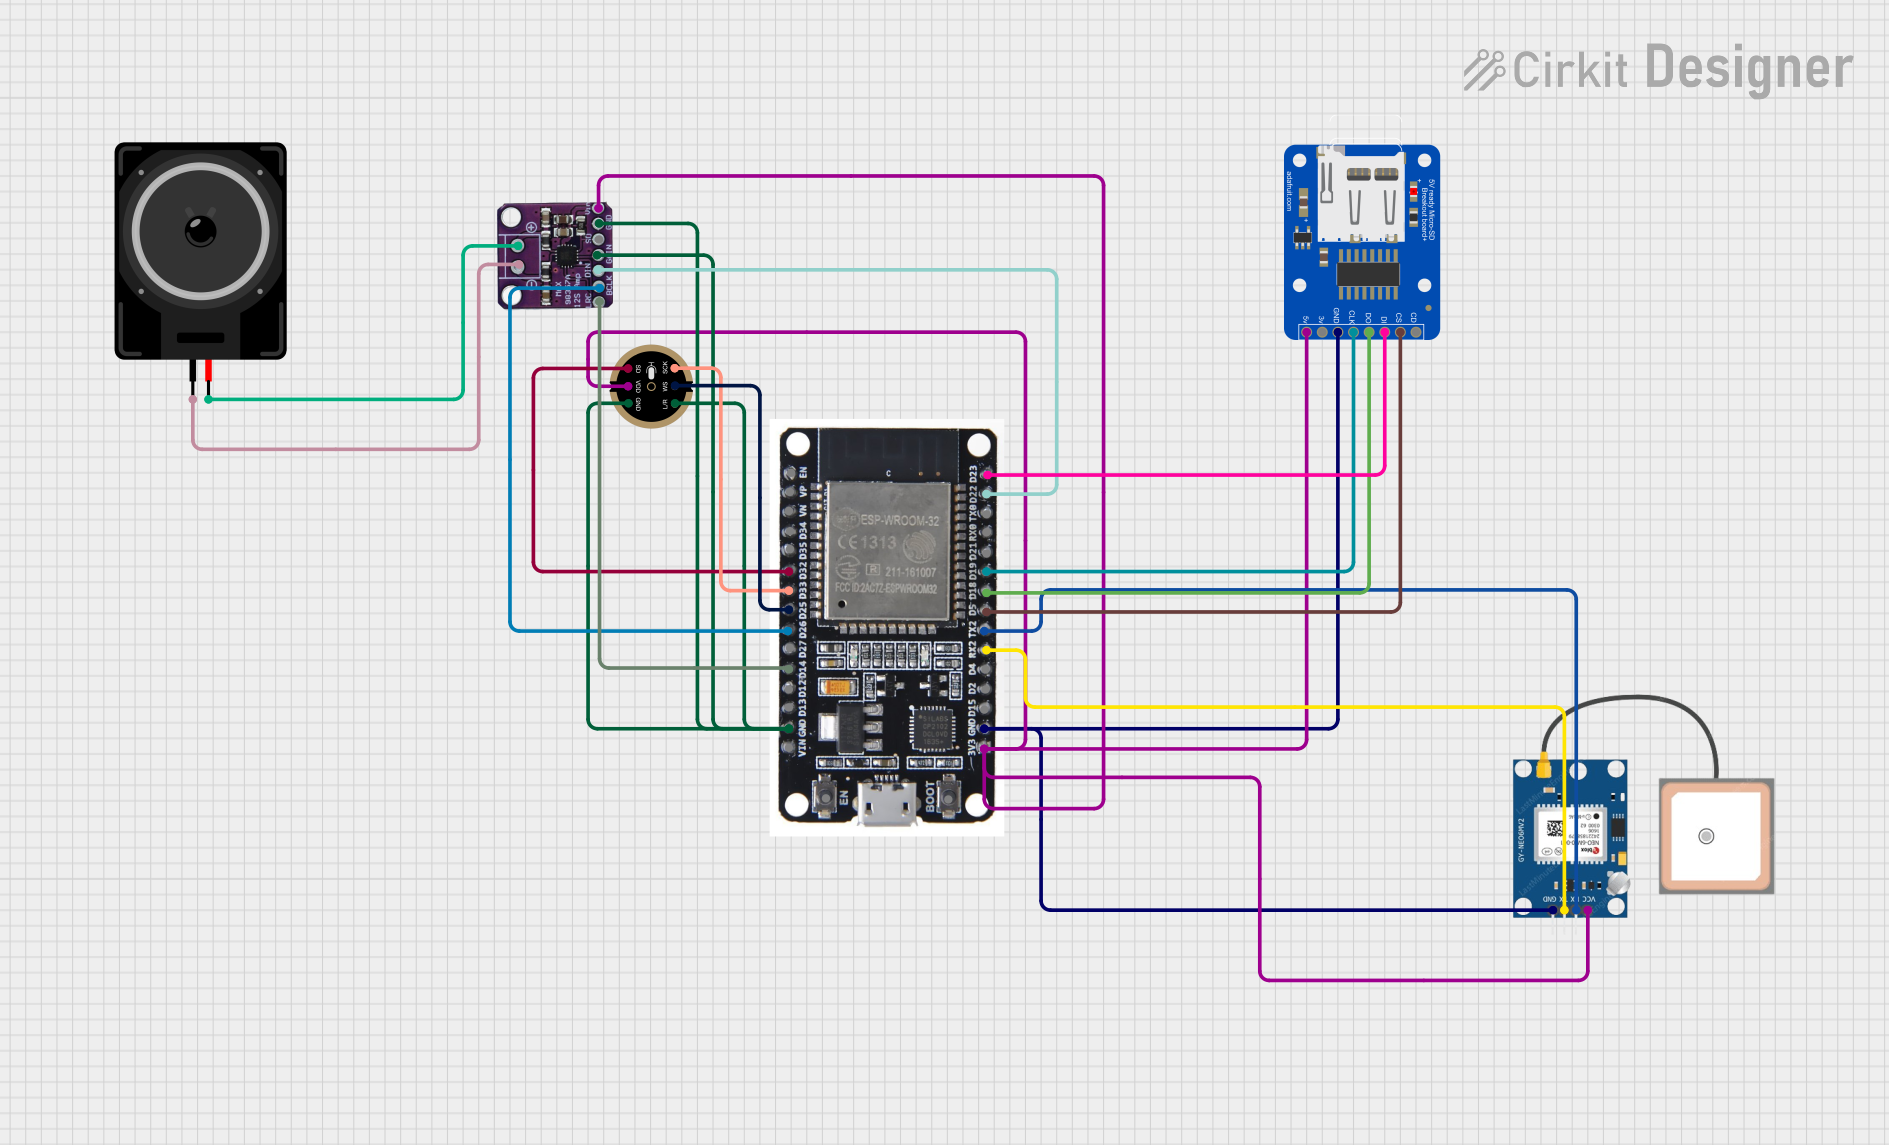

Explore Projects Built with mini esp32 s3 ai voice development board
Common Applications and Use Cases
- Voice-controlled IoT devices
- Smart home automation systems
- AI-powered voice assistants
- Speech recognition and processing
- Edge computing for audio-based AI tasks
- Prototyping for wearable devices with voice interaction
Technical Specifications
The Mini ESP32-S3 AI Voice Development Board is built around the ESP32-S3 chip, which offers a dual-core processor and AI acceleration capabilities. Below are the key technical details:
Key Specifications
| Feature | Specification |
|---|---|
| Microcontroller | ESP32-S3 (Xtensa® 32-bit LX7 dual-core processor) |
| Flash Memory | 16 MB (N16) |
| PSRAM | 8 MB (R8) |
| Wireless Connectivity | Wi-Fi 802.11 b/g/n, Bluetooth 5.0 (LE) |
| AI Acceleration | Vector instructions for machine learning and signal processing |
| GPIO Pins | 27 GPIO pins |
| Operating Voltage | 3.3V |
| Input Voltage Range | 5V (via USB-C) |
| Interfaces | I2C, SPI, UART, I2S, PWM, ADC, DAC |
| Audio Features | Built-in support for voice wake-up and speech recognition |
| Dimensions | 48 mm x 25 mm |
Pin Configuration and Descriptions
The Mini ESP32-S3 AI Voice Development Board features a variety of pins for interfacing with peripherals. Below is the pinout description:
| Pin Number | Pin Name | Function Description |
|---|---|---|
| 1 | GND | Ground |
| 2 | 3V3 | 3.3V power output |
| 3 | GPIO0 | General-purpose I/O, boot mode selection |
| 4 | GPIO1 | General-purpose I/O, UART TX |
| 5 | GPIO2 | General-purpose I/O, UART RX |
| 6 | GPIO3 | General-purpose I/O, I2C SDA |
| 7 | GPIO4 | General-purpose I/O, I2C SCL |
| 8 | GPIO5 | General-purpose I/O, PWM output |
| 9 | GPIO6 | General-purpose I/O, ADC input |
| 10 | GPIO7 | General-purpose I/O, DAC output |
| 11 | EN | Enable pin, used to reset the board |
| 12 | USB_DM | USB data minus |
| 13 | USB_DP | USB data plus |
Usage Instructions
How to Use the Component in a Circuit
- Powering the Board: Connect the board to a 5V power source using the USB-C port. The onboard voltage regulator will step down the voltage to 3.3V for the ESP32-S3 chip.
- Programming the Board: Use the USB-C connection to upload code via the Arduino IDE, ESP-IDF, or other supported development environments.
- Connecting Peripherals: Use the GPIO pins to interface with sensors, actuators, or other devices. Ensure that the voltage levels of connected peripherals are compatible with the 3.3V logic level of the board.
- Audio Applications: Utilize the I2S interface for connecting external microphones or speakers for voice processing tasks.
Important Considerations and Best Practices
- Power Supply: Ensure a stable 5V power supply to avoid unexpected resets or malfunctions.
- GPIO Voltage Levels: Avoid applying voltages higher than 3.3V to the GPIO pins to prevent damage.
- Firmware Updates: Regularly update the firmware to benefit from the latest features and bug fixes.
- Heat Management: While the board is efficient, prolonged high-performance tasks may generate heat. Ensure proper ventilation if used in enclosed spaces.
Example Code for Arduino UNO Integration
Below is an example of how to use the Mini ESP32-S3 AI Voice Development Board to control an LED via voice commands:
#include <WiFi.h>
#include <ESP32_SpeechRecognition.h>

// Replace with your Wi-Fi credentials
const char* ssid = "Your_SSID";
const char* password = "Your_PASSWORD";

// Define the GPIO pin for the LED
#define LED_PIN 5

void setup() {
  // Initialize serial communication
  Serial.begin(115200);

  // Connect to Wi-Fi
  WiFi.begin(ssid, password);
  while (WiFi.status() != WL_CONNECTED) {
    delay(500);
    Serial.print(".");
  }
  Serial.println("\nWi-Fi connected!");

  // Initialize the LED pin as output
  pinMode(LED_PIN, OUTPUT);

  // Initialize the speech recognition module
  if (!SpeechRecognition.begin()) {
    Serial.println("Failed to initialize speech recognition!");
    while (1);
  }
  Serial.println("Speech recognition initialized.");
}

void loop() {
  // Check for voice commands
  String command = SpeechRecognition.listen();
  if (command == "turn on the light") {
    digitalWrite(LED_PIN, HIGH); // Turn on the LED
    Serial.println("LED turned ON");
  } else if (command == "turn off the light") {
    digitalWrite(LED_PIN, LOW); // Turn off the LED
    Serial.println("LED turned OFF");
  }
}
Troubleshooting and FAQs
Common Issues Users Might Face
Board Not Detected by Computer:
- Ensure the USB-C cable is data-capable (not just for charging).
- Verify that the correct drivers for the ESP32-S3 are installed on your computer.
Wi-Fi Connection Fails:
- Double-check the SSID and password in your code.
- Ensure the Wi-Fi network is within range and not overloaded.
GPIO Pins Not Responding:
- Confirm that the pins are correctly configured in your code.
- Check for short circuits or incorrect wiring.
Speech Recognition Not Working:
- Ensure the microphone is properly connected and functional.
- Verify that the speech recognition library is correctly installed and configured.
Solutions and Tips for Troubleshooting
- Debugging: Use the Serial Monitor to print debug messages and identify issues.
- Firmware Reset: If the board behaves unexpectedly, press the EN (Enable) button to reset it.
- Library Updates: Keep all libraries and tools up to date to ensure compatibility with the latest features.
By following this documentation, you can effectively utilize the Mini ESP32-S3 AI Voice Development Board for your AI and IoT projects.