Cirkit Designer
Your all-in-one circuit design IDE
Home /
Component Documentation
How to Use DHT11: Examples, Pinouts, and Specs
Introduction
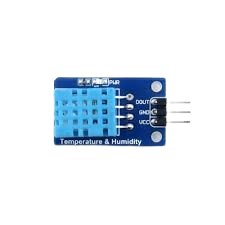
The DHT11 is a basic, low-cost digital temperature and humidity sensor manufactured by Arduino. It uses a capacitive humidity sensor and a thermistor to measure the surrounding air and outputs a digital signal on the data pin. This sensor is widely used in various applications due to its simplicity and affordability.
Explore Projects Built with DHT11
ESP8266 NodeMCU with DHT11 Sensor for Temperature and Humidity Monitoring
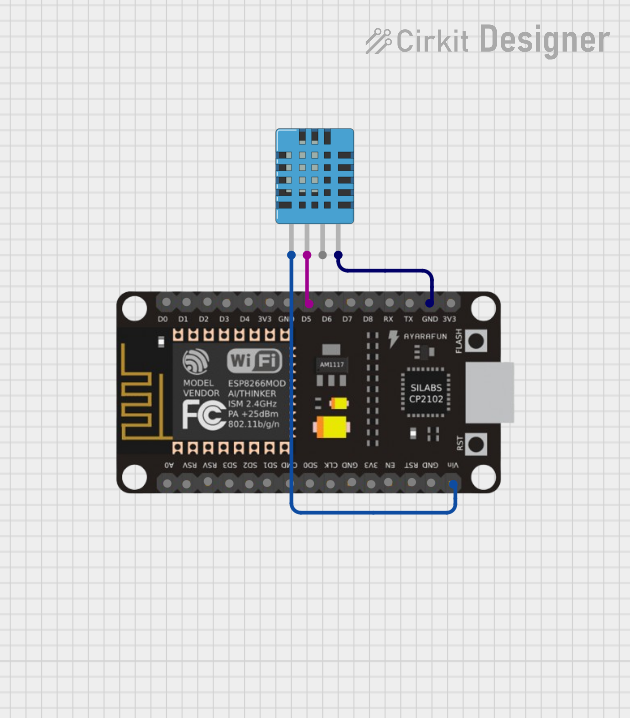
This circuit connects a DHT11 Humidity and Temperature Sensor to an ESP8266 NodeMCU microcontroller. The DHT11 sensor's data pin is interfaced with the D5 pin on the NodeMCU for digital signal communication, while both the sensor and the NodeMCU share a common ground (GND). The sensor is powered by the NodeMCU's VIN pin, which likely supplies the required voltage for the DHT11 to operate.
ESP32 and DHT11 Wi-Fi Enabled Temperature and Humidity Sensor
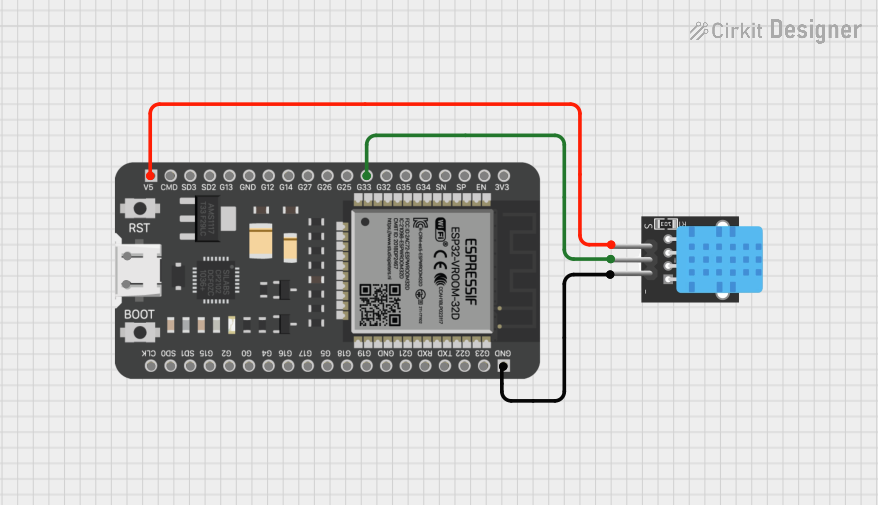
This circuit uses an ESP32 microcontroller to read temperature and humidity data from a DHT11 sensor. The ESP32 provides power to the DHT11 and receives the sensor data through its GPIO pin G33.
Arduino UNO-Based Temperature and Humidity Monitor with DHT11 Sensor
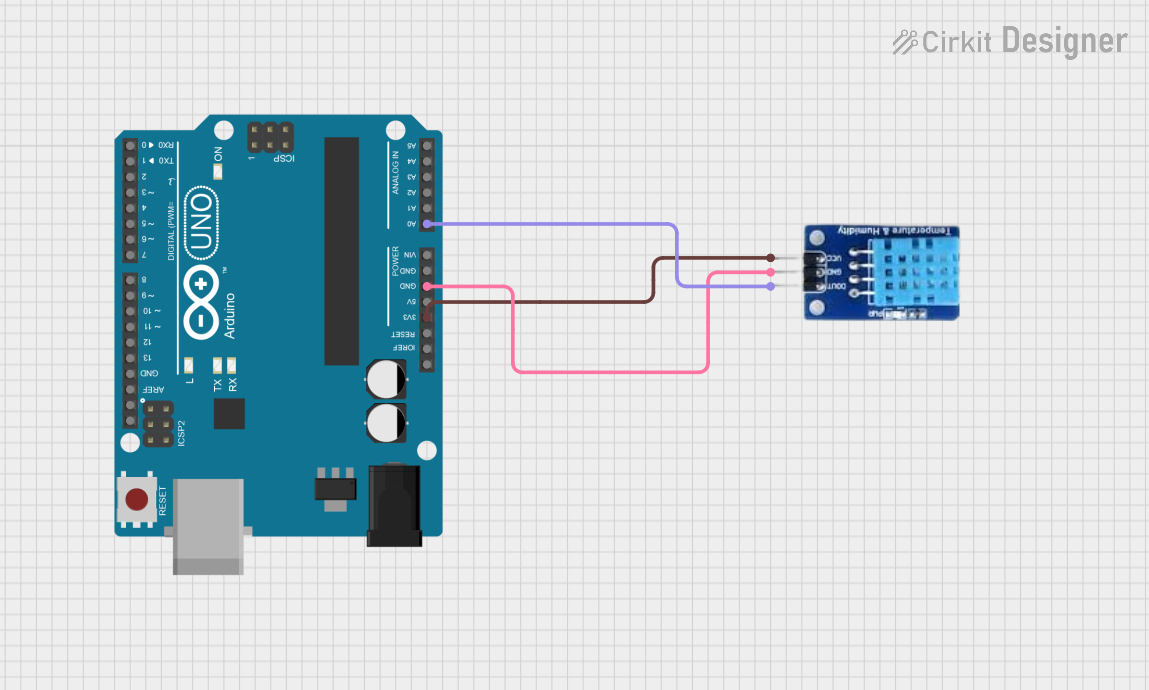
This circuit consists of an Arduino UNO microcontroller connected to a DHT11 temperature and humidity sensor. The DHT11 sensor is powered by the 3.3V and GND pins of the Arduino, and its data output is connected to the A0 analog input pin of the Arduino. The Arduino is programmed to read data from the DHT11 sensor.
Raspberry Pi 3B with DHT11 Temperature and Humidity Sensor
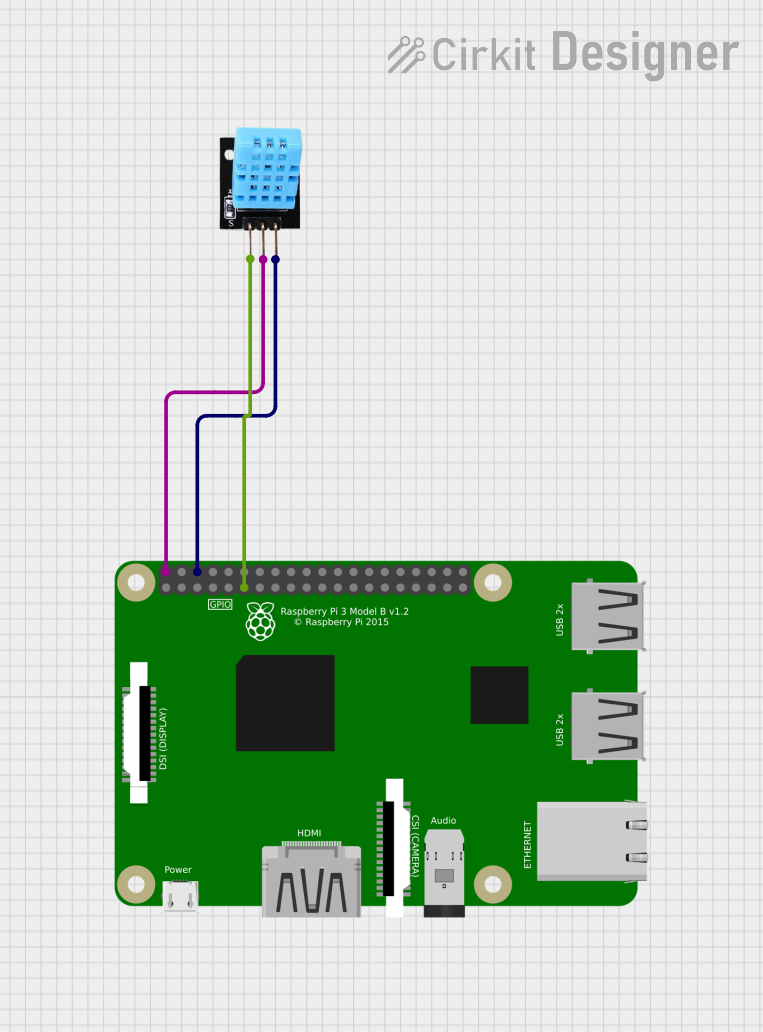
This circuit connects a DHT11 temperature and humidity sensor to a Raspberry Pi 3B. The DHT11's data output pin is connected to GPIO pin 11 on the Raspberry Pi for digital signal communication. The sensor is powered by the Raspberry Pi's 5V and ground pins.
Explore Projects Built with DHT11
ESP8266 NodeMCU with DHT11 Sensor for Temperature and Humidity Monitoring
This circuit connects a DHT11 Humidity and Temperature Sensor to an ESP8266 NodeMCU microcontroller. The DHT11 sensor's data pin is interfaced with the D5 pin on the NodeMCU for digital signal communication, while both the sensor and the NodeMCU share a common ground (GND). The sensor is powered by the NodeMCU's VIN pin, which likely supplies the required voltage for the DHT11 to operate.
ESP32 and DHT11 Wi-Fi Enabled Temperature and Humidity Sensor
This circuit uses an ESP32 microcontroller to read temperature and humidity data from a DHT11 sensor. The ESP32 provides power to the DHT11 and receives the sensor data through its GPIO pin G33.
Arduino UNO-Based Temperature and Humidity Monitor with DHT11 Sensor
This circuit consists of an Arduino UNO microcontroller connected to a DHT11 temperature and humidity sensor. The DHT11 sensor is powered by the 3.3V and GND pins of the Arduino, and its data output is connected to the A0 analog input pin of the Arduino. The Arduino is programmed to read data from the DHT11 sensor.
Raspberry Pi 3B with DHT11 Temperature and Humidity Sensor
This circuit connects a DHT11 temperature and humidity sensor to a Raspberry Pi 3B. The DHT11's data output pin is connected to GPIO pin 11 on the Raspberry Pi for digital signal communication. The sensor is powered by the Raspberry Pi's 5V and ground pins.
Common Applications and Use Cases
- Home automation systems
- Weather stations
- Environmental monitoring
- HVAC systems
- Greenhouse monitoring
Technical Specifications
Key Technical Details
| Parameter | Value |
|---|---|
| Operating Voltage | 3.3V to 5.5V |
| Max Current | 2.5mA |
| Humidity Range | 20-90% RH |
| Temperature Range | 0-50°C |
| Humidity Accuracy | ±5% RH |
| Temperature Accuracy | ±2°C |
| Sampling Rate | 1Hz (one reading per second) |
| Signal Type | Digital |
Pin Configuration and Descriptions
| Pin Number | Pin Name | Description |
|---|---|---|
| 1 | VCC | Power supply (3.3V to 5.5V) |
| 2 | Data | Serial data output |
| 3 | NC | Not connected |
| 4 | GND | Ground |
Usage Instructions
How to Use the DHT11 in a Circuit
- Power Supply: Connect the VCC pin to a 3.3V or 5V power supply.
- Ground: Connect the GND pin to the ground of the circuit.
- Data Pin: Connect the Data pin to a digital input pin on your microcontroller (e.g., Arduino UNO).
Important Considerations and Best Practices
- Pull-up Resistor: Use a 10kΩ pull-up resistor between the Data pin and VCC to ensure reliable communication.
- Sampling Rate: The DHT11 has a sampling rate of 1Hz, meaning it can provide one reading per second. Avoid querying the sensor more frequently to prevent inaccurate readings.
- Wiring Length: Keep the wiring between the sensor and the microcontroller as short as possible to minimize signal degradation.
Example Code for Arduino UNO
#include "DHT.h"

#define DHTPIN 2     // Pin where the DHT11 is connected
#define DHTTYPE DHT11   // DHT 11

DHT dht(DHTPIN, DHTTYPE);

void setup() {
  Serial.begin(9600);
  dht.begin();
}

void loop() {
  delay(2000);  // Wait a few seconds between measurements

  float h = dht.readHumidity();
  float t = dht.readTemperature();

  // Check if any reads failed and exit early (to try again).
  if (isnan(h) || isnan(t)) {
    Serial.println("Failed to read from DHT sensor!");
    return;
  }

  Serial.print("Humidity: ");
  Serial.print(h);
  Serial.print(" %\t");
  Serial.print("Temperature: ");
  Serial.print(t);
  Serial.println(" *C");
}
Troubleshooting and FAQs
Common Issues Users Might Face
- No Data Output: Ensure the Data pin is connected correctly and the pull-up resistor is in place.
- Inaccurate Readings: Check the power supply voltage and ensure it is within the specified range. Also, verify the sampling rate is not too high.
- Sensor Not Responding: Ensure the sensor is not damaged and is connected to the correct pins on the microcontroller.
Solutions and Tips for Troubleshooting
- Check Connections: Verify all connections are secure and correct.
- Use a Pull-up Resistor: Ensure a 10kΩ pull-up resistor is used between the Data pin and VCC.
- Power Supply: Ensure the sensor is powered with a stable voltage within the specified range.
- Code Verification: Double-check the code for any errors and ensure the correct library is included.
By following this documentation, users can effectively integrate the DHT11 sensor into their projects, ensuring accurate temperature and humidity measurements.