How to Use Battery: Examples, Pinouts, and Specs
Introduction
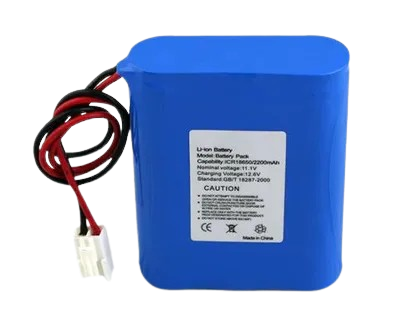
A Battery is a device that stores electrical energy in chemical form and converts it into electrical energy to power electronic circuits. The Li-ion Battery 12V is a rechargeable lithium-ion battery designed to provide a stable 12V output, making it suitable for a wide range of applications. Its lightweight design, high energy density, and long cycle life make it a popular choice for portable electronics, robotics, and renewable energy systems.
Explore Projects Built with Battery


Explore Projects Built with Battery
Common Applications and Use Cases
- Power supply for portable electronic devices
- Backup power for microcontroller-based systems (e.g., Arduino projects)
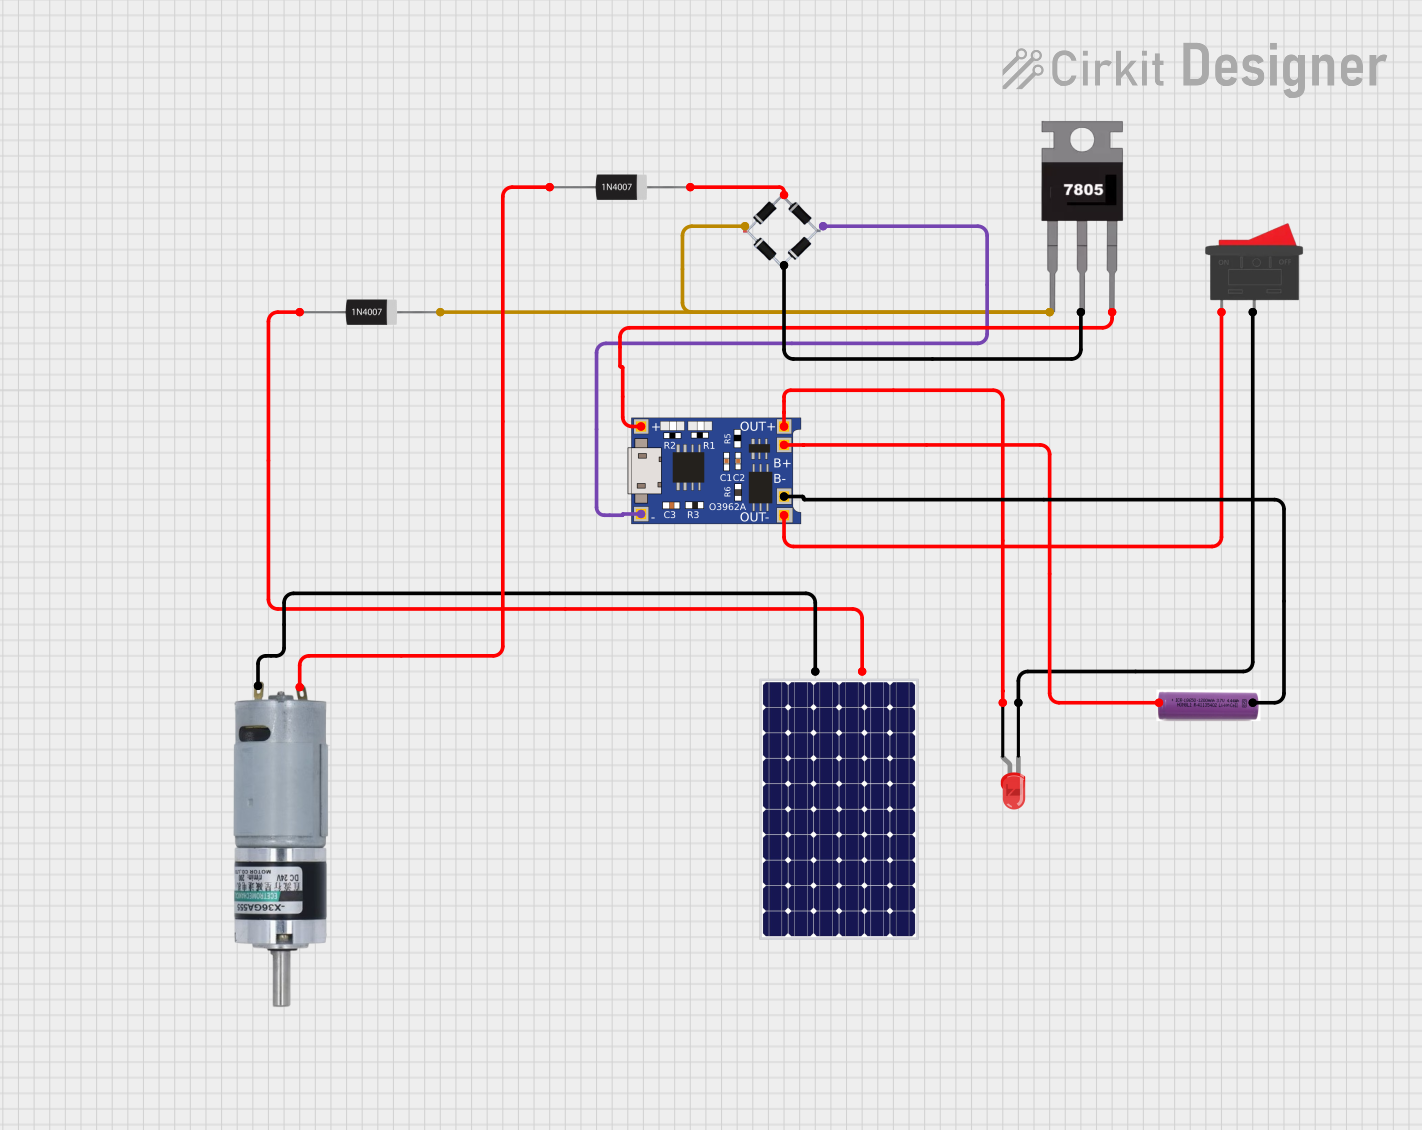
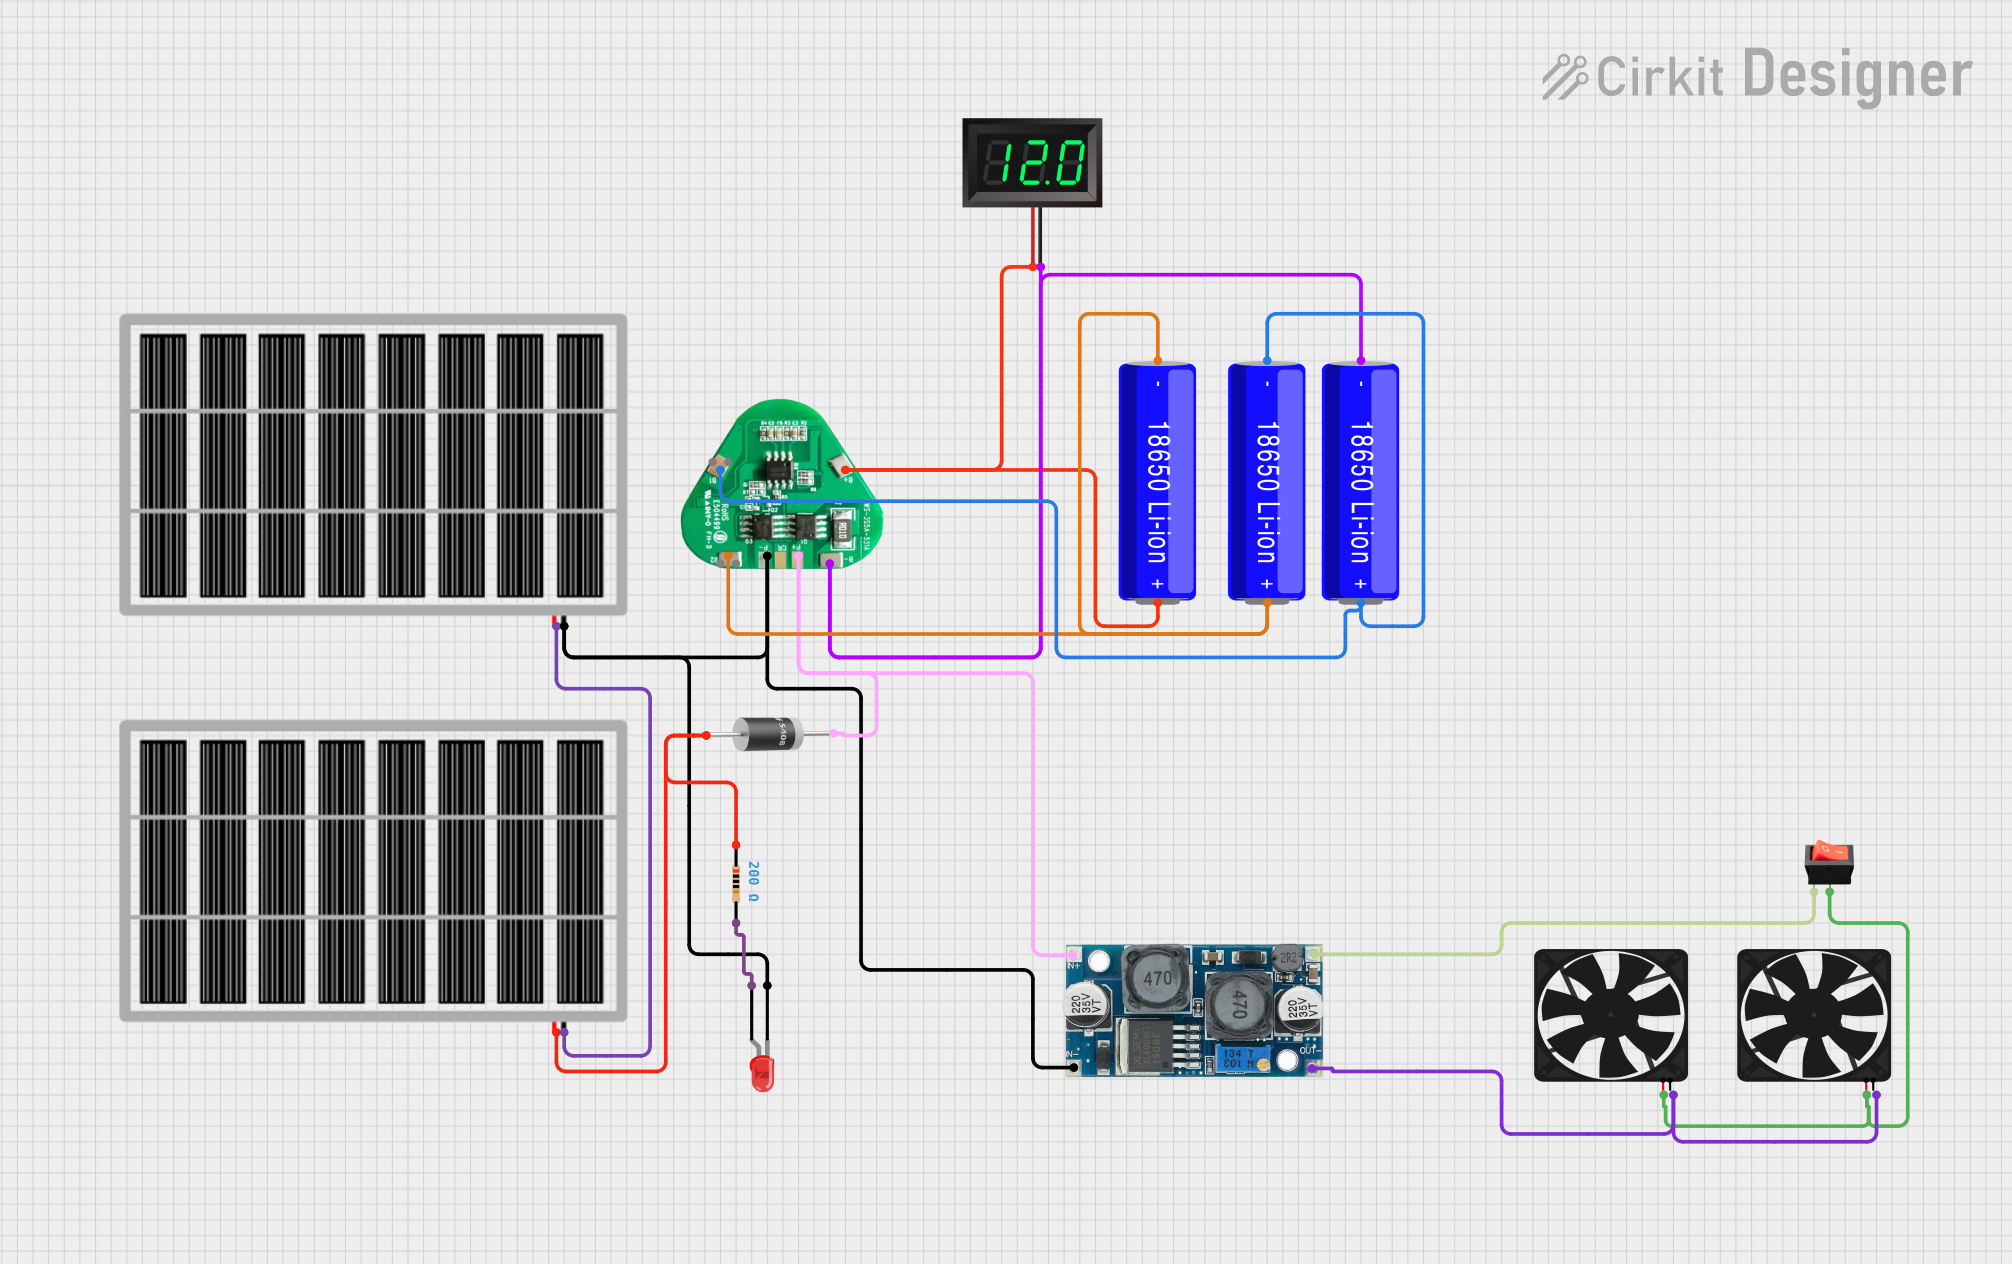
- Energy storage in renewable energy systems (e.g., solar panels)
- Robotics and electric vehicles
- Uninterruptible Power Supplies (UPS)
Technical Specifications
The following table outlines the key technical details of the Li-ion Battery 12V:
| Parameter | Specification |
|---|---|
| Nominal Voltage | 12V |
| Capacity | 2000mAh (varies by model) |
| Chemistry | Lithium-Ion |
| Maximum Discharge Current | 2A |
| Charging Voltage | 12.6V ± 0.1V |
| Charging Current | 1A (recommended) |
| Operating Temperature | -20°C to 60°C |
| Cycle Life | >500 charge/discharge cycles |
| Dimensions | Varies by model (e.g., 70x40x20mm) |
| Weight | ~200g |
Pin Configuration and Descriptions
The Li-ion Battery 12V typically has two terminals for connection:
| Pin Name | Description |
|---|---|
| Positive (+) | The positive terminal of the battery, connected to the load or charging circuit. |
| Negative (-) | The negative terminal of the battery, connected to the ground of the circuit. |
Usage Instructions
How to Use the Battery in a Circuit
Connecting the Battery:
- Connect the positive terminal of the battery to the positive input of your circuit.
- Connect the negative terminal of the battery to the ground of your circuit.
- Ensure proper polarity to avoid damage to the battery or circuit components.
Charging the Battery:
- Use a compatible lithium-ion battery charger with a charging voltage of 12.6V.
- Set the charging current to 1A (or as specified by the battery's datasheet).
- Avoid overcharging or deep discharging the battery to extend its lifespan.
Using with an Arduino UNO:
- The 12V battery can be connected to the Arduino UNO's Vin pin for power.
- Ensure the battery's voltage does not exceed 12.6V to prevent damage to the Arduino's voltage regulator.
Example Code for Arduino UNO
The following code demonstrates how to monitor the battery voltage using an Arduino UNO and a voltage divider circuit:
// Battery voltage monitoring using Arduino UNO
// Ensure the voltage divider reduces 12V to a safe range (0-5V) for the analog pin.

const int batteryPin = A0;  // Analog pin connected to the voltage divider
float voltageDividerRatio = 5.7;  // Adjust based on your resistor values

void setup() {
  Serial.begin(9600);  // Initialize serial communication
}

void loop() {
  int sensorValue = analogRead(batteryPin);  // Read analog value
  float batteryVoltage = (sensorValue * 5.0 / 1023.0) * voltageDividerRatio;

  // Print the battery voltage to the Serial Monitor
  Serial.print("Battery Voltage: ");
  Serial.print(batteryVoltage);
  Serial.println(" V");

  delay(1000);  // Wait for 1 second before the next reading
}
Important Considerations and Best Practices
- Safety: Avoid short-circuiting the battery terminals, as this can cause overheating or damage.
- Storage: Store the battery in a cool, dry place when not in use. Avoid exposing it to extreme temperatures.
- Discharge Limits: Do not discharge the battery below 10.8V to prevent damage to the cells.
- Charging Precautions: Use only chargers designed for lithium-ion batteries to ensure safe and efficient charging.
Troubleshooting and FAQs
Common Issues and Solutions
| Issue | Possible Cause | Solution |
|---|---|---|
| Battery not charging | Faulty charger or incorrect voltage | Verify the charger output and connections. |
| Battery drains quickly | Overloading or aging cells | Reduce load or replace the battery. |
| Battery overheats during use | Excessive current draw | Ensure the load does not exceed 2A. |
| Arduino not powering on | Insufficient voltage or loose connection | Check battery voltage and connections. |
FAQs
Can I use this battery to power a 5V device?
- Yes, but you will need a voltage regulator or DC-DC converter to step down the voltage to 5V.
How do I know when the battery is fully charged?
- The charger will typically indicate full charge when the current drops to a minimal level, or the voltage reaches 12.6V.
Can I connect multiple batteries in series or parallel?
- Yes, but ensure proper balancing and use a Battery Management System (BMS) to prevent overcharging or over-discharging.
What happens if I over-discharge the battery?
- Over-discharging can permanently damage the battery. Use a low-voltage cutoff circuit to prevent this.
By following these guidelines, you can safely and effectively use the Li-ion Battery 12V in your projects.