How to Use Solar Charge Controller: Examples, Pinouts, and Specs
Introduction
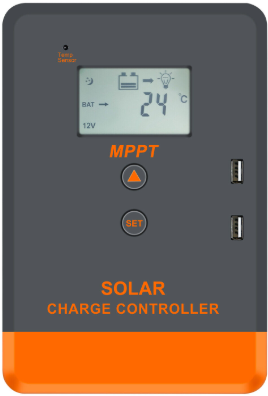
A Solar Charge Controller is a crucial component in solar power systems. It regulates the voltage and current coming from solar panels to the battery, ensuring the batteries are not overcharged and prolonging their lifespan. By managing the power flow, it protects the battery from damage and enhances the overall efficiency of the solar power system.
Explore Projects Built with Solar Charge Controller

Explore Projects Built with Solar Charge Controller
Common Applications and Use Cases
- Residential Solar Power Systems: Used in homes to manage solar energy storage.
- Off-Grid Solar Systems: Essential for remote locations without access to the grid.
- Solar Street Lighting: Ensures efficient charging and discharging of batteries.
- Portable Solar Chargers: Used in portable solar power kits for camping and outdoor activities.
Technical Specifications
Key Technical Details
| Parameter | Value |
|---|---|
| Input Voltage | 12V/24V Auto |
| Max Input Current | 20A |
| Output Voltage | 12V/24V |
| Max Output Current | 20A |
| Efficiency | ≥ 95% |
| Operating Temp | -20°C to +60°C |
| Battery Type | Lead-Acid, Lithium-Ion |
Pin Configuration and Descriptions
| Pin Number | Pin Name | Description |
|---|---|---|
| 1 | Solar Panel + | Positive terminal for solar panel input |
| 2 | Solar Panel - | Negative terminal for solar panel input |
| 3 | Battery + | Positive terminal for battery connection |
| 4 | Battery - | Negative terminal for battery connection |
| 5 | Load + | Positive terminal for load connection |
| 6 | Load - | Negative terminal for load connection |
| 7 | Temp Sensor | Temperature sensor input for battery monitoring |
| 8 | COM | Communication port for monitoring and control |
Usage Instructions
How to Use the Component in a Circuit
Connect the Solar Panel:
- Connect the positive terminal of the solar panel to the
Solar Panel +pin. - Connect the negative terminal of the solar panel to the
Solar Panel -pin.
- Connect the positive terminal of the solar panel to the
Connect the Battery:
- Connect the positive terminal of the battery to the
Battery +pin. - Connect the negative terminal of the battery to the
Battery -pin.
- Connect the positive terminal of the battery to the
Connect the Load:
- Connect the positive terminal of the load to the
Load +pin. - Connect the negative terminal of the load to the
Load -pin.
- Connect the positive terminal of the load to the
Optional Connections:
- Connect the temperature sensor to the
Temp Sensorpin for battery temperature monitoring. - Use the
COMport for communication and monitoring if needed.
- Connect the temperature sensor to the
Important Considerations and Best Practices
- Ensure Proper Polarity: Always check the polarity of connections to avoid damage.
- Use Appropriate Wire Gauge: Use wires that can handle the maximum current rating.
- Install in a Ventilated Area: Ensure proper ventilation to avoid overheating.
- Regular Maintenance: Periodically check connections and clean terminals to ensure efficient operation.
Troubleshooting and FAQs
Common Issues Users Might Face
No Charging:
- Solution: Check the connections and ensure the solar panel is receiving sunlight.
Overcharging:
- Solution: Verify the battery type setting and ensure the charge controller is configured correctly.
Load Not Working:
- Solution: Check the load connections and ensure the load is within the rated capacity.
Temperature Sensor Error:
- Solution: Ensure the temperature sensor is properly connected and functioning.
Solutions and Tips for Troubleshooting
- Check Connections: Loose or incorrect connections are common issues. Ensure all connections are secure and correct.
- Monitor Indicators: Most charge controllers have LED indicators. Refer to the manual to understand the meaning of different LED signals.
- Use a Multimeter: Measure the voltage and current at different points to diagnose issues.
- Refer to the Manual: Always refer to the manufacturer's manual for specific troubleshooting steps.
Arduino UNO Integration Example
If you want to monitor the solar charge controller using an Arduino UNO, you can use the following code to read the voltage and current values:
// Include necessary libraries
#include <Wire.h>
#include <LiquidCrystal_I2C.h>

// Initialize the LCD
LiquidCrystal_I2C lcd(0x27, 16, 2);

// Define analog pins for voltage and current sensors
const int voltagePin = A0;
const int currentPin = A1;

void setup() {
  // Initialize the LCD
  lcd.begin();
  lcd.backlight();

  // Initialize serial communication
  Serial.begin(9600);
}

void loop() {
  // Read voltage and current values
  int voltageValue = analogRead(voltagePin);
  int currentValue = analogRead(currentPin);

  // Convert analog values to actual voltage and current
  float voltage = voltageValue * (5.0 / 1023.0) * 11; // Assuming a voltage divider
  float current = currentValue * (5.0 / 1023.0) * 20; // Assuming a current sensor

  // Display values on the LCD
  lcd.setCursor(0, 0);
  lcd.print("Voltage: ");
  lcd.print(voltage);
  lcd.print("V");

  lcd.setCursor(0, 1);
  lcd.print("Current: ");
  lcd.print(current);
  lcd.print("A");

  // Print values to the serial monitor
  Serial.print("Voltage: ");
  Serial.print(voltage);
  Serial.println(" V");

  Serial.print("Current: ");
  Serial.print(current);
  Serial.println(" A");

  // Wait for a second before the next reading
  delay(1000);
}
This code reads the voltage and current from the solar charge controller and displays the values on an LCD screen and the serial monitor. Adjust the conversion factors based on your specific sensors.
This documentation provides a comprehensive guide to understanding, using, and troubleshooting a Solar Charge Controller. Whether you are a beginner or an experienced user, this guide aims to help you make the most of your solar power system.