How to Use Oxygen Sensor O2: Examples, Pinouts, and Specs
Introduction
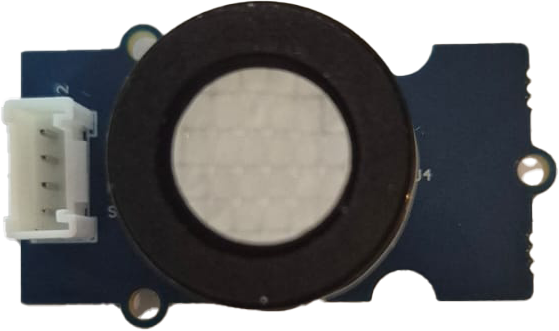
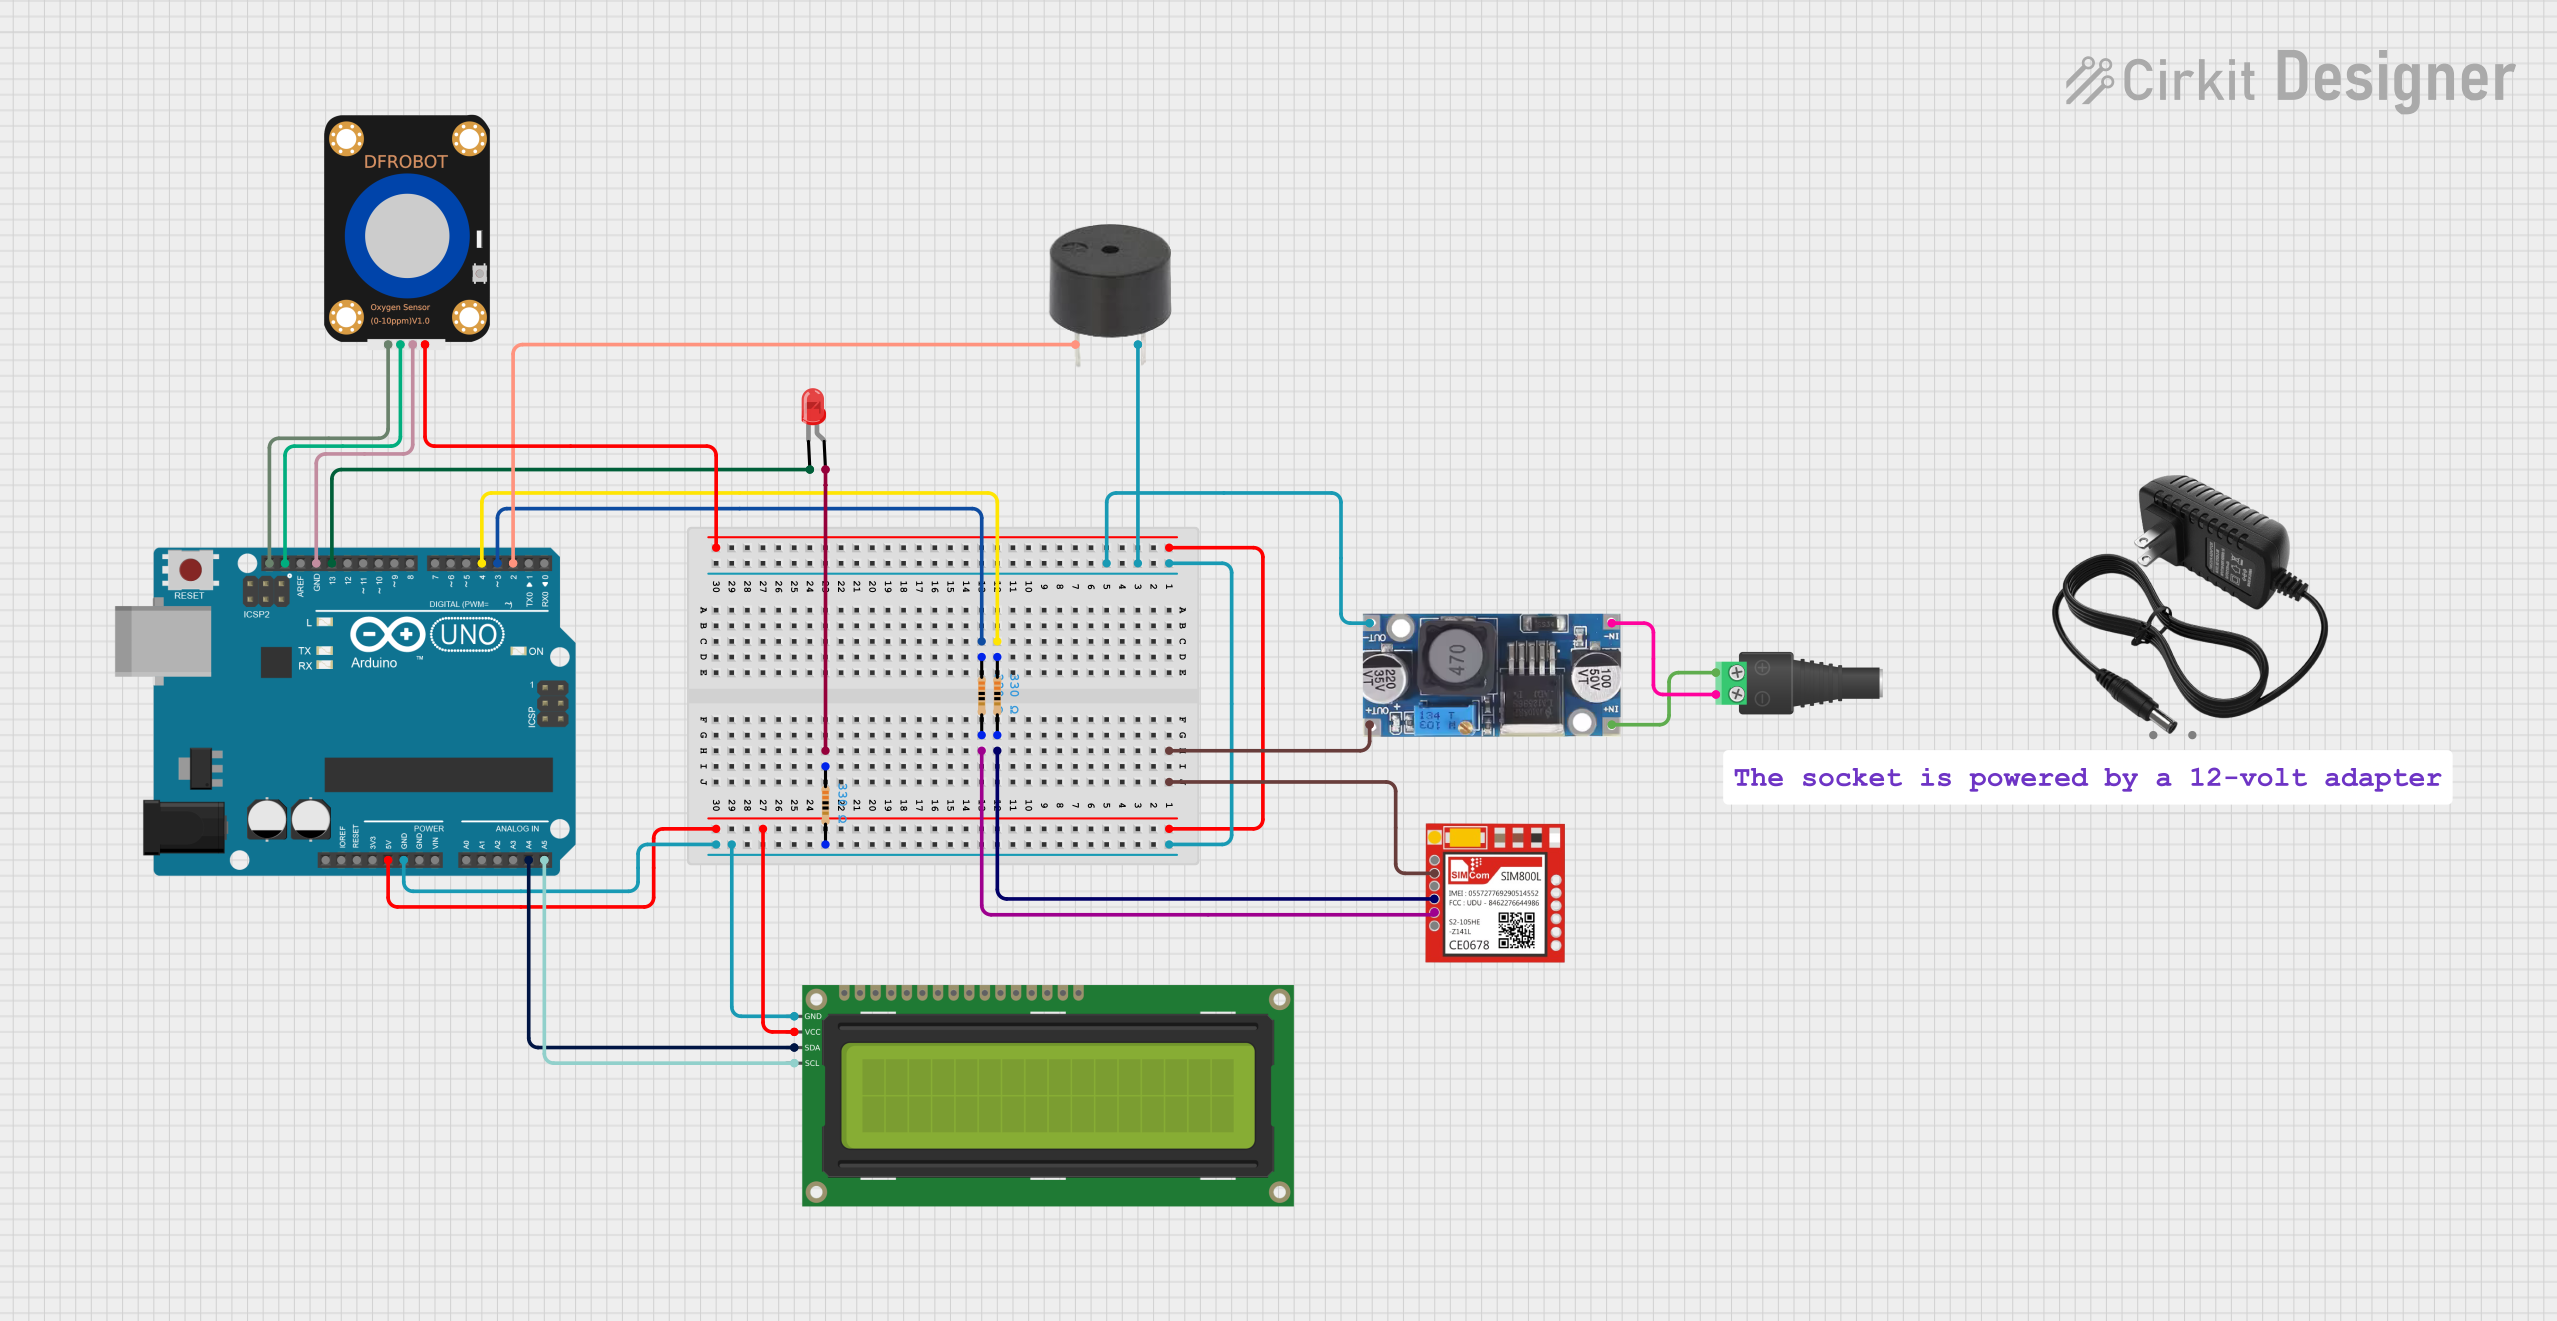
The Oxygen Sensor (O2 sensor) by Seeed Studios (Part ID: O2 sensor) is a critical component designed to measure the concentration of oxygen in exhaust gases. This sensor plays a vital role in optimizing fuel efficiency and reducing harmful emissions by providing real-time feedback to the engine control unit (ECU). It ensures that the air-fuel mixture in an internal combustion engine is maintained at an ideal ratio, improving engine performance and reducing environmental impact.
Explore Projects Built with Oxygen Sensor O2

Explore Projects Built with Oxygen Sensor O2
Common Applications and Use Cases
- Automotive engines for air-fuel ratio monitoring and control
- Industrial combustion systems for emissions monitoring
- Environmental monitoring systems
- Research and development in combustion and fuel efficiency
Technical Specifications
The following table outlines the key technical details of the Seeed Studios Oxygen Sensor:
| Parameter | Value |
|---|---|
| Manufacturer | Seeed Studios |
| Part ID | O2 sensor |
| Operating Voltage | 5V DC |
| Output Signal | Analog voltage (proportional to oxygen level) |
| Measurement Range | 0% to 25% oxygen concentration |
| Response Time | < 100 ms |
| Operating Temperature | -40°C to 85°C |
| Connector Type | 4-pin JST |
| Dimensions | 40mm x 20mm x 10mm |
Pin Configuration and Descriptions
The Oxygen Sensor has a 4-pin JST connector. The pinout is as follows:
| Pin | Name | Description |
|---|---|---|
| 1 | VCC | Power supply input (5V DC) |
| 2 | GND | Ground connection |
| 3 | SIGNAL | Analog output signal (proportional to oxygen level) |
| 4 | NC | Not connected (reserved for future use) |
Usage Instructions
How to Use the Component in a Circuit
- Power Supply: Connect the VCC pin to a stable 5V DC power source and the GND pin to the ground of your circuit.
- Signal Output: Connect the SIGNAL pin to an analog input pin of your microcontroller or data acquisition system.
- Placement: Install the sensor in the exhaust system or the environment where oxygen levels need to be measured. Ensure the sensor is exposed to the gas flow for accurate readings.
- Calibration: For precise measurements, calibrate the sensor using a known oxygen concentration before use.
Important Considerations and Best Practices
- Avoid Contamination: Ensure the sensor is not exposed to contaminants such as oil, water, or dirt, as these can affect its accuracy and lifespan.
- Temperature Range: Operate the sensor within the specified temperature range (-40°C to 85°C) to prevent damage.
- Signal Conditioning: Use a low-pass filter if the output signal is noisy.
- Arduino Compatibility: The sensor can be easily interfaced with an Arduino UNO for data acquisition and processing.
Example Arduino Code
Below is an example of how to interface the Oxygen Sensor with an Arduino UNO:
// Oxygen Sensor (O2 sensor) example code for Arduino UNO
// Reads the analog signal from the sensor and displays the oxygen level

const int sensorPin = A0; // Connect SIGNAL pin to A0 on Arduino
float sensorValue = 0;    // Variable to store the analog reading
float oxygenLevel = 0;    // Variable to store the calculated oxygen level

void setup() {
  Serial.begin(9600); // Initialize serial communication at 9600 baud
  pinMode(sensorPin, INPUT); // Set the sensor pin as input
}

void loop() {
  // Read the analog value from the sensor
  sensorValue = analogRead(sensorPin);

  // Convert the analog value to oxygen concentration (0-25%)
  // Assuming a linear relationship between sensor output and oxygen level
  oxygenLevel = (sensorValue / 1023.0) * 25.0;

  // Print the oxygen level to the Serial Monitor
  Serial.print("Oxygen Level: ");
  Serial.print(oxygenLevel);
  Serial.println(" %");

  delay(1000); // Wait for 1 second before the next reading
}
Notes:
- Ensure the sensor is properly calibrated before using the above code.
- The conversion formula may need adjustment based on the specific characteristics of the sensor.
Troubleshooting and FAQs
Common Issues and Solutions
No Output Signal:
- Cause: Incorrect wiring or power supply.
- Solution: Verify the connections and ensure the sensor is powered with 5V DC.
Inaccurate Readings:
- Cause: Sensor contamination or improper calibration.
- Solution: Clean the sensor if necessary and recalibrate using a known oxygen concentration.
Fluctuating Signal:
- Cause: Electrical noise or unstable power supply.
- Solution: Use a low-pass filter on the SIGNAL pin and ensure a stable power source.
Sensor Not Responding:
- Cause: Operating outside the specified temperature range.
- Solution: Ensure the sensor is used within the -40°C to 85°C range.
FAQs
Q1: Can this sensor be used for underwater applications?
A1: No, the sensor is not waterproof and should not be used in underwater environments.
Q2: How often should the sensor be calibrated?
A2: Calibration frequency depends on the application. For critical applications, calibrate before each use.
Q3: Can the sensor measure oxygen levels above 25%?
A3: No, the sensor is designed to measure oxygen concentrations within the 0% to 25% range.
Q4: Is the sensor compatible with microcontrollers other than Arduino?
A4: Yes, the sensor can be used with any microcontroller that has an analog input pin and supports 5V operation.
By following this documentation, users can effectively integrate and utilize the Seeed Studios Oxygen Sensor in their projects.