How to Use Solar Chager MPPT : Examples, Pinouts, and Specs
Introduction
The Solar Charger with Maximum Power Point Tracking (MPPT) technology is an advanced electronic component designed to optimize the power output from solar panels. By continuously tracking the maximum power point of the solar panel, the MPPT charger ensures efficient energy conversion and maximizes the charging performance for connected batteries. This technology is particularly useful in varying sunlight conditions, where it adjusts dynamically to extract the maximum available power.
Explore Projects Built with Solar Chager MPPT


Explore Projects Built with Solar Chager MPPT
Common Applications and Use Cases
- Charging batteries in solar power systems (e.g., lead-acid, lithium-ion)
- Off-grid solar installations for homes, RVs, and boats
- Solar-powered IoT devices and remote monitoring systems
- Renewable energy projects and experiments
- Portable solar charging stations
Technical Specifications
Below are the key technical details of the Solar Charger MPPT:
| Parameter | Value |
|---|---|
| Input Voltage Range | 12V to 50V DC |
| Output Voltage Range | 12V, 24V, or adjustable (depending on model) |
| Maximum Input Current | 10A to 30A (model-dependent) |
| Efficiency | Up to 98% |
| Battery Compatibility | Lead-acid, AGM, Gel, Lithium-ion |
| Operating Temperature | -20°C to 60°C |
| Protection Features | Overvoltage, overcurrent, short circuit, reverse polarity |
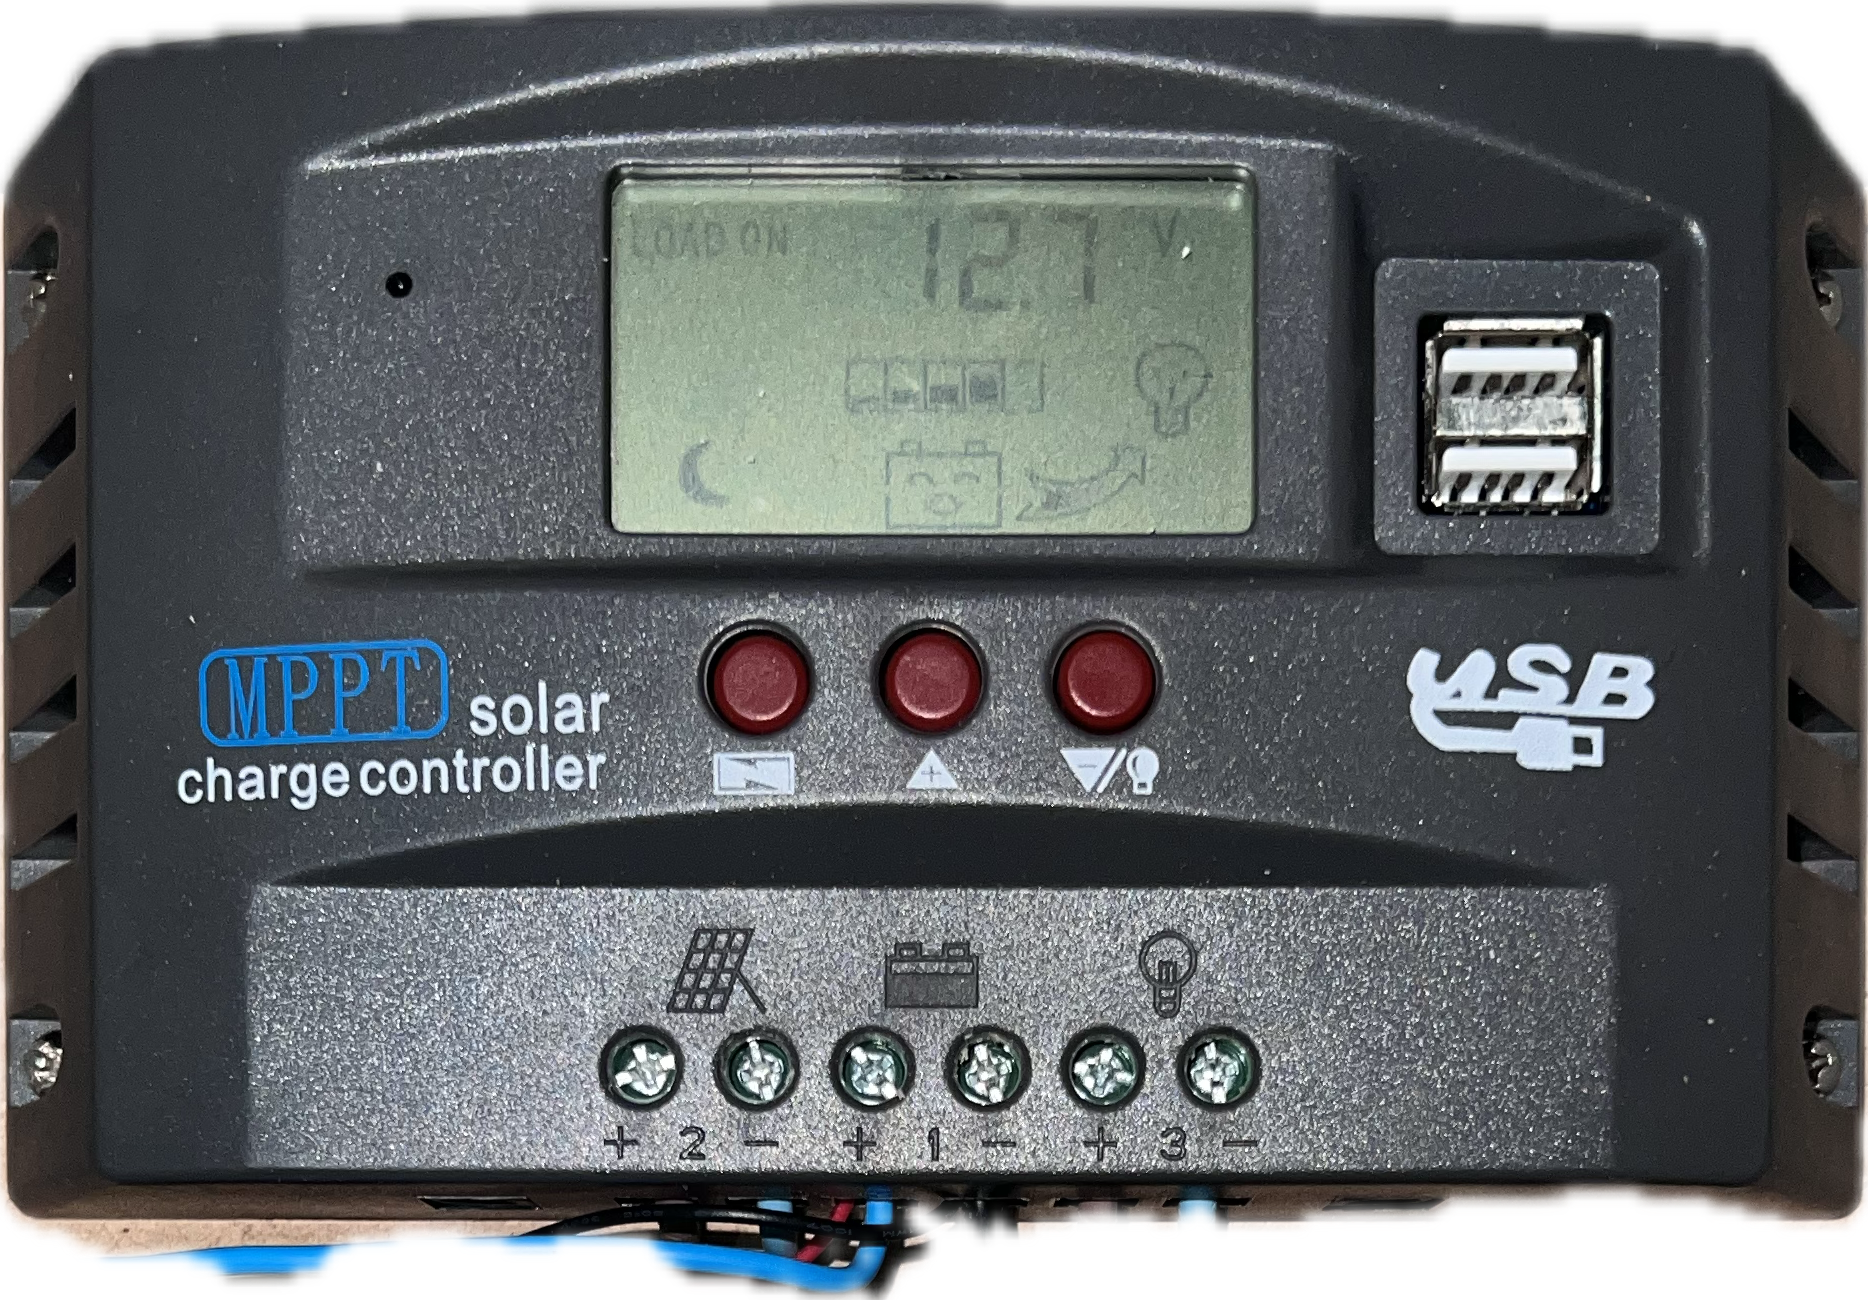
Pin Configuration and Descriptions
The Solar Charger MPPT typically has the following terminals for connections:
| Pin/Terminal | Label | Description |
|---|---|---|
| 1 | Solar Panel (+) | Positive input from the solar panel |
| 2 | Solar Panel (-) | Negative input from the solar panel |
| 3 | Battery (+) | Positive terminal of the battery |
| 4 | Battery (-) | Negative terminal of the battery |
| 5 | Load (+) | Positive terminal for the connected load (optional) |
| 6 | Load (-) | Negative terminal for the connected load (optional) |
Usage Instructions
How to Use the Solar Charger MPPT in a Circuit
Connect the Solar Panel:
- Attach the positive and negative terminals of the solar panel to the
Solar Panel (+)andSolar Panel (-)inputs on the MPPT charger. - Ensure the solar panel's voltage is within the charger's input voltage range.
- Attach the positive and negative terminals of the solar panel to the
Connect the Battery:
- Connect the positive and negative terminals of the battery to the
Battery (+)andBattery (-)outputs. - Verify that the battery type is compatible with the MPPT charger.
- Connect the positive and negative terminals of the battery to the
Optional Load Connection:
- If the MPPT charger supports load output, connect the load to the
Load (+)andLoad (-)terminals. - Ensure the load does not exceed the charger's rated output current.
- If the MPPT charger supports load output, connect the load to the
Power On:
- Place the solar panel in sunlight to power the MPPT charger.
- The charger will automatically detect the battery type and begin charging.
Important Considerations and Best Practices
- Battery Type Selection: Some MPPT chargers require manual selection of the battery type. Refer to the charger's manual for configuration instructions.
- Cable Sizing: Use appropriately sized cables to minimize voltage drops, especially for high-current applications.
- Ventilation: Ensure proper ventilation around the MPPT charger to prevent overheating.
- Sunlight Conditions: For optimal performance, place the solar panel in direct sunlight and avoid shading.
Arduino UNO Integration Example
The Solar Charger MPPT can be monitored using an Arduino UNO by reading the battery voltage and current. Below is an example code snippet:
// Example: Monitoring battery voltage and current from an MPPT charger
// Connect voltage sensor to A0 and current sensor to A1

const int voltagePin = A0; // Pin connected to voltage sensor
const int currentPin = A1; // Pin connected to current sensor

void setup() {
  Serial.begin(9600); // Initialize serial communication
}

void loop() {
  // Read voltage and current sensor values
  int voltageRaw = analogRead(voltagePin);
  int currentRaw = analogRead(currentPin);

  // Convert raw values to actual voltage and current
  float batteryVoltage = (voltageRaw / 1023.0) * 25.0; // Adjust scale as per sensor
  float batteryCurrent = (currentRaw / 1023.0) * 10.0; // Adjust scale as per sensor

  // Print the values to the Serial Monitor
  Serial.print("Battery Voltage: ");
  Serial.print(batteryVoltage);
  Serial.println(" V");

  Serial.print("Battery Current: ");
  Serial.print(batteryCurrent);
  Serial.println(" A");

  delay(1000); // Wait for 1 second before next reading
}
Troubleshooting and FAQs
Common Issues and Solutions
No Output from the MPPT Charger:
- Cause: Insufficient sunlight or incorrect connections.
- Solution: Ensure the solar panel is in direct sunlight and all connections are secure.
Overheating of the MPPT Charger:
- Cause: Poor ventilation or excessive load.
- Solution: Improve airflow around the charger and reduce the load if necessary.
Battery Not Charging:
- Cause: Incorrect battery type or damaged battery.
- Solution: Verify the battery type and check for any faults in the battery.
Low Efficiency:
- Cause: Shading on the solar panel or mismatched panel voltage.
- Solution: Remove shading and ensure the solar panel's voltage matches the charger's input range.
FAQs
Q: Can I use the MPPT charger with multiple solar panels?
A: Yes, you can connect multiple solar panels in series or parallel, provided the combined voltage and current are within the charger's input range.
Q: How do I know if the MPPT charger is working?
A: Most MPPT chargers have indicator LEDs or an LCD display to show charging status and errors.
Q: Can I use the MPPT charger without a battery?
A: No, the MPPT charger requires a battery to function properly. It is not designed to operate as a standalone power supply.
Q: Is the MPPT charger waterproof?
A: Most MPPT chargers are not waterproof. Use them in a dry, protected environment or install them in a weatherproof enclosure.