Cirkit Designer Logo
Cirkit Designer
Your all-in-one circuit design IDE
Home / 
Component Documentation

How to Use DHT22: Examples, Pinouts, and Specs

Image of DHT22
Cirkit Designer LogoDesign with DHT22 in Cirkit Designer

Introduction

The DHT22 is a reliable sensor for measuring temperature and humidity. It's a step up from its sibling, the DHT11, offering greater precision and a wider range of measurement. This sensor is widely used in the fields of HVAC, consumer electronics, weather stations, home automation, and data logging. Its digital output makes it easy to interface with microcontrollers such as the Arduino UNO.

Explore Projects Built with DHT22

Use Cirkit Designer to design, explore, and prototype these projects online. Some projects support real-time simulation. Click "Open Project" to start designing instantly!
Arduino UNO Based DHT22 Temperature and Humidity Sensor
Image of TEMPERATURA HUMEDAD: A project utilizing DHT22 in a practical application
This circuit consists of an Arduino UNO microcontroller connected to a DHT22 temperature and humidity sensor. The DHT22 sensor is powered by the Arduino's 5V output through a 4.7k Ohm resistor, and its data pin is connected to the digital pin D2 of the Arduino. The embedded code on the Arduino reads the temperature and humidity values from the DHT22 sensor and outputs them to the serial monitor at regular intervals.
Cirkit Designer LogoOpen Project in Cirkit Designer
Arduino UNO-Based Temperature and Humidity Sensor with DHT22
Image of firsttry: A project utilizing DHT22 in a practical application
This circuit uses an Arduino UNO to read data from a DHT22 temperature and humidity sensor. The DHT22 is powered by the Arduino's 3.3V and GND pins, with its data output connected to the Arduino's digital pin D2 through a 1.5k Ohm pull-up resistor.
Cirkit Designer LogoOpen Project in Cirkit Designer
Arduino UNO and DHT22 Temperature and Humidity Sensor with Serial Monitoring
Image of dht22 test: A project utilizing DHT22 in a practical application
This circuit uses an Arduino UNO to interface with a DHT22 temperature and humidity sensor. The Arduino reads data from the DHT22 sensor and outputs the temperature and humidity readings to the Serial Monitor. The DHT22 is powered by the Arduino's 5V and GND pins, and its data pin is connected to digital pin 2 on the Arduino.
Cirkit Designer LogoOpen Project in Cirkit Designer
Arduino UNO with DHT22 Temperature and Humidity Sensor
Image of Temperature and humidity: A project utilizing DHT22 in a practical application
This circuit connects a DHT22 temperature and humidity sensor to an Arduino UNO microcontroller. The DHT22's data pin is connected to digital pin 4 (D4) on the Arduino, allowing the microcontroller to read temperature and humidity data. The sensor is powered by the Arduino's 5V output, and both devices share a common ground.
Cirkit Designer LogoOpen Project in Cirkit Designer

Explore Projects Built with DHT22

Use Cirkit Designer to design, explore, and prototype these projects online. Some projects support real-time simulation. Click "Open Project" to start designing instantly!
Image of TEMPERATURA HUMEDAD: A project utilizing DHT22 in a practical application
Arduino UNO Based DHT22 Temperature and Humidity Sensor
This circuit consists of an Arduino UNO microcontroller connected to a DHT22 temperature and humidity sensor. The DHT22 sensor is powered by the Arduino's 5V output through a 4.7k Ohm resistor, and its data pin is connected to the digital pin D2 of the Arduino. The embedded code on the Arduino reads the temperature and humidity values from the DHT22 sensor and outputs them to the serial monitor at regular intervals.
Cirkit Designer LogoOpen Project in Cirkit Designer
Image of firsttry: A project utilizing DHT22 in a practical application
Arduino UNO-Based Temperature and Humidity Sensor with DHT22
This circuit uses an Arduino UNO to read data from a DHT22 temperature and humidity sensor. The DHT22 is powered by the Arduino's 3.3V and GND pins, with its data output connected to the Arduino's digital pin D2 through a 1.5k Ohm pull-up resistor.
Cirkit Designer LogoOpen Project in Cirkit Designer
Image of dht22 test: A project utilizing DHT22 in a practical application
Arduino UNO and DHT22 Temperature and Humidity Sensor with Serial Monitoring
This circuit uses an Arduino UNO to interface with a DHT22 temperature and humidity sensor. The Arduino reads data from the DHT22 sensor and outputs the temperature and humidity readings to the Serial Monitor. The DHT22 is powered by the Arduino's 5V and GND pins, and its data pin is connected to digital pin 2 on the Arduino.
Cirkit Designer LogoOpen Project in Cirkit Designer
Image of Temperature and humidity: A project utilizing DHT22 in a practical application
Arduino UNO with DHT22 Temperature and Humidity Sensor
This circuit connects a DHT22 temperature and humidity sensor to an Arduino UNO microcontroller. The DHT22's data pin is connected to digital pin 4 (D4) on the Arduino, allowing the microcontroller to read temperature and humidity data. The sensor is powered by the Arduino's 5V output, and both devices share a common ground.
Cirkit Designer LogoOpen Project in Cirkit Designer

Technical Specifications

Key Technical Details

  • Humidity Range: 0-100% relative humidity (RH)
  • Humidity Accuracy: ±2% RH
  • Temperature Range: -40 to 80°C (-40 to 176°F)
  • Temperature Accuracy: ±0.5°C
  • Operating Voltage: 3.3 to 6V DC
  • Output Signal: Digital signal via a single data pin
  • Max Current: 2.5mA during data transmission
  • Sampling Rate: No more than once every 2 seconds

Pin Configuration and Descriptions

Pin Number Name Description
1 VDD Power supply (3.3 to 6V DC)
2 DATA Digital data output
3 NC Not connected
4 GND Ground

Usage Instructions

Interfacing with Arduino

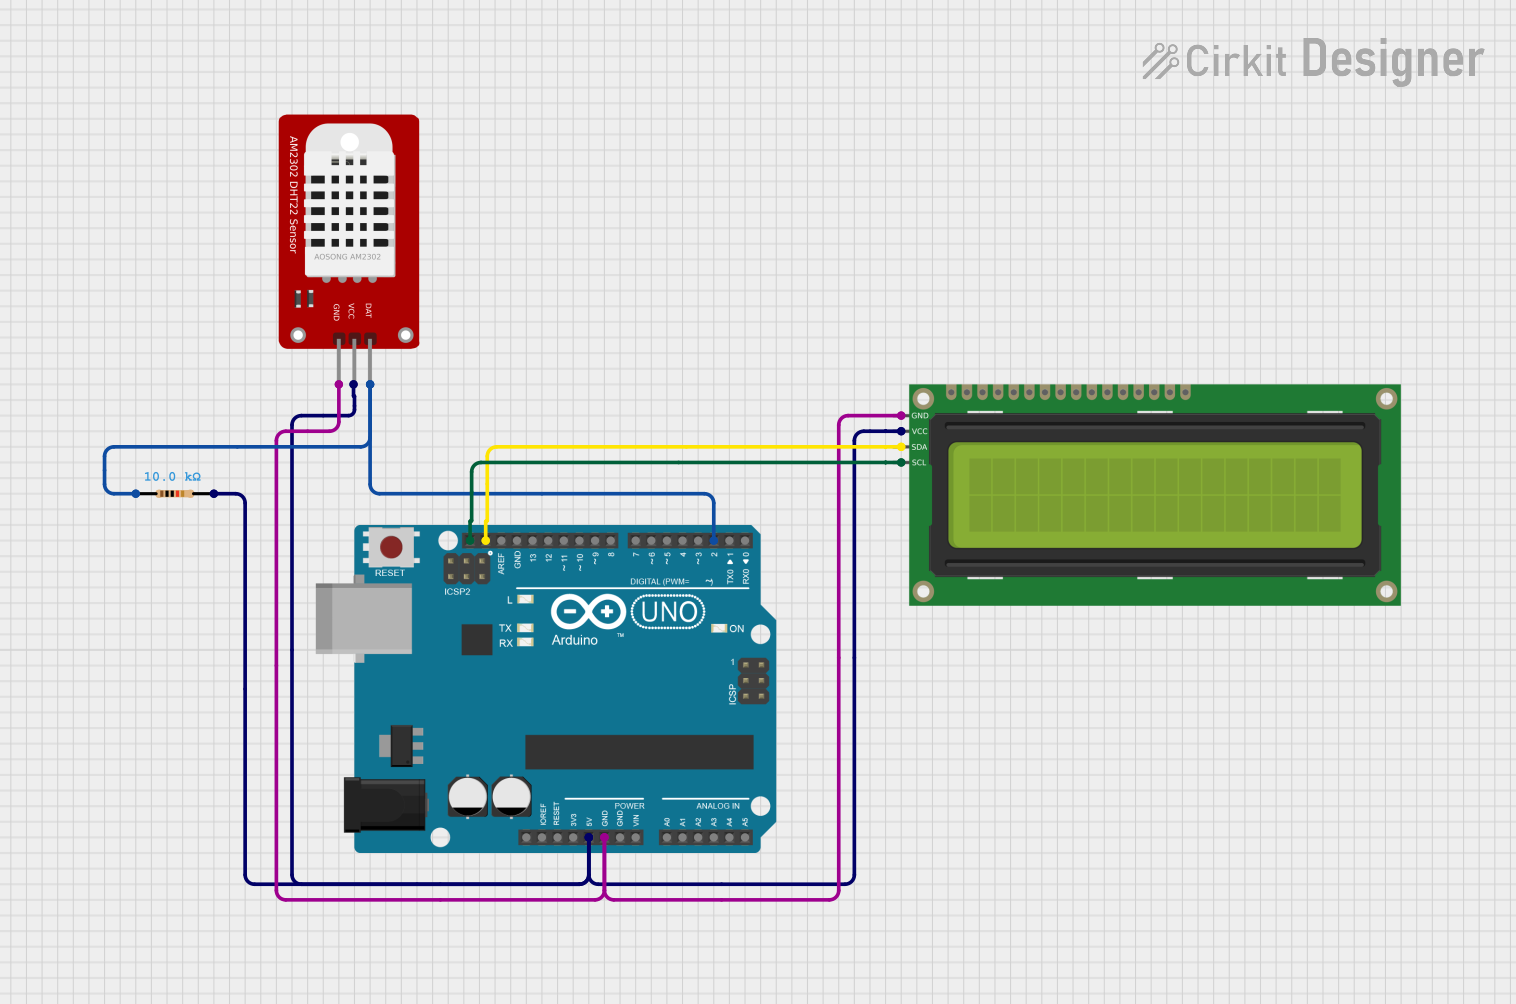
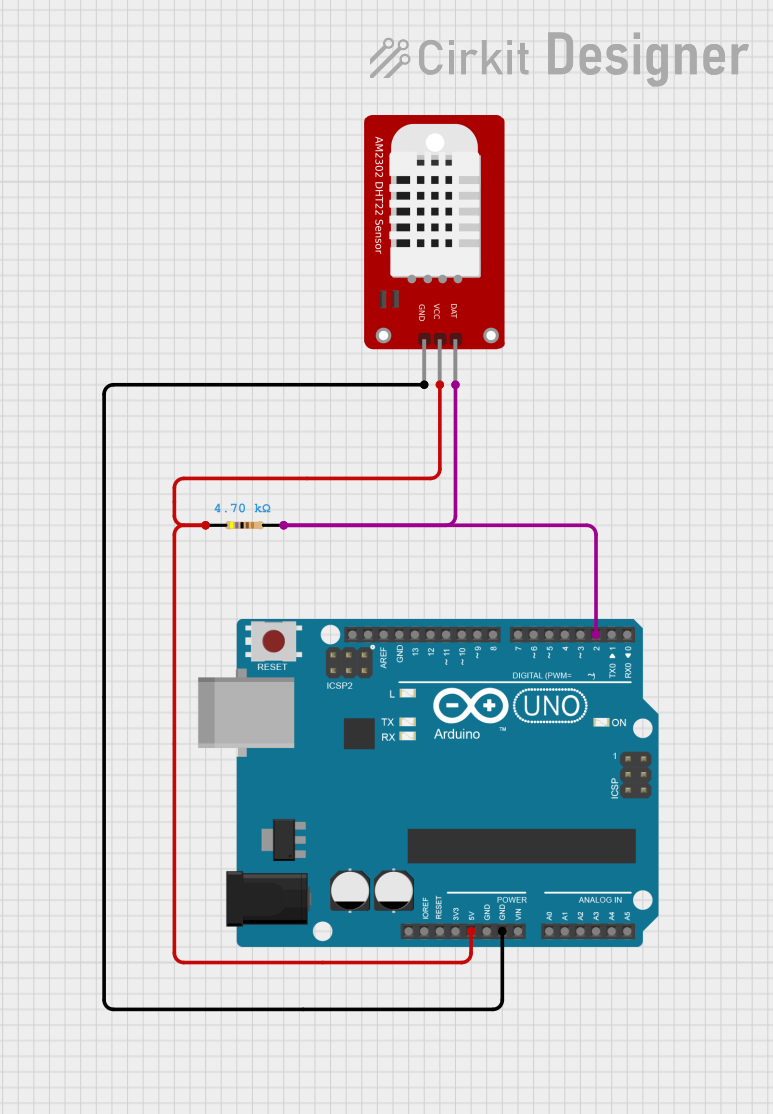
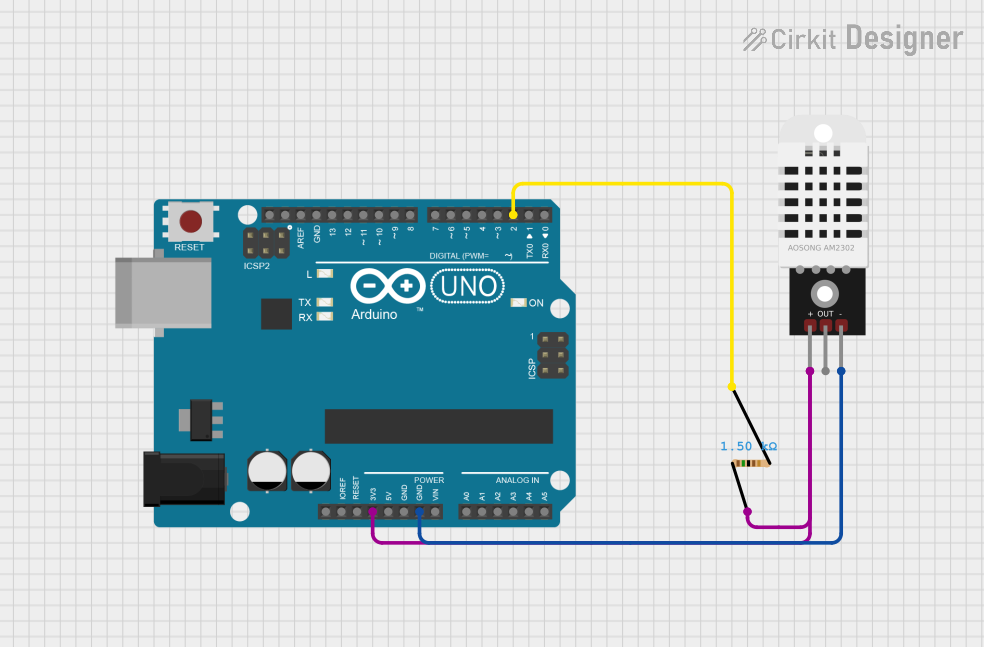
To use the DHT22 with an Arduino, you'll need a 4.7k - 10k ohm resistor to pull up the data line to VDD. Here's how to connect the DHT22 to an Arduino UNO:

  1. Connect the VDD pin to the 5V output on the Arduino.
  2. Connect the DATA pin to a digital I/O pin (e.g., pin 2) on the Arduino.
  3. Place a pull-up resistor between the DATA pin and VDD.
  4. Connect the GND pin to the ground on the Arduino.

Code Example

Here's a simple code snippet to read temperature and humidity from the DHT22 using an Arduino. This example requires the Adafruit DHT sensor library, which you can install through the Arduino IDE's Library Manager.

#include "DHT.h"

#define DHTPIN 2     // Digital pin connected to the DHT sensor
#define DHTTYPE DHT22   // DHT 22 (AM2302)

DHT dht(DHTPIN, DHTTYPE);

void setup() {
  Serial.begin(9600);
  dht.begin();
}

void loop() {
  // Wait a few seconds between measurements.
  delay(2000);

  // Reading temperature or humidity takes about 250 milliseconds!
  float humidity = dht.readHumidity();
  // Read temperature as Celsius (the default)
  float temperature = dht.readTemperature();

  // Check if any reads failed and exit early (to try again).
  if (isnan(humidity) || isnan(temperature)) {
    Serial.println(F("Failed to read from DHT sensor!"));
    return;
  }

  // Compute heat index in Celsius (isFahrenheit = false)
  float heatIndex = dht.computeHeatIndex(temperature, humidity, false);

  Serial.print(F("Humidity: "));
  Serial.print(humidity);
  Serial.print(F("%  Temperature: "));
  Serial.print(temperature);
  Serial.print(F("°C  Heat index: "));
  Serial.print(heatIndex);
  Serial.println(F("°C"));
}

Important Considerations and Best Practices

  • Avoid placing the sensor in direct sunlight or near heat sources to get accurate readings.
  • Ensure the sensor is not exposed to condensation or immersed in water.
  • The DHT22 should not be used for more than 24 hours in conditions beyond its humidity range.
  • Allow the sensor to acclimate to the environment for accurate readings.

Troubleshooting and FAQs

Common Issues

  • Inaccurate Readings: Ensure the sensor is not affected by heat sources or direct sunlight. Check for proper pull-up resistor placement.
  • No Data: Verify all connections, ensure the correct pin is defined in the code, and check that the power supply is within the specified range.
  • Sensor Heating Up: Make sure the sensor is not being read more frequently than once every 2 seconds.

Solutions and Tips

  • Sensor Not Responding: Reset the power to the sensor and ensure the Arduino is functioning correctly.
  • Consistent Use of Units: Be aware that the DHT library can report temperature in Celsius or Fahrenheit. Ensure you're using the correct unit in your code.

FAQs

Q: Can I use the DHT22 sensor with a 3.3V supply? A: Yes, the DHT22 can operate with a supply voltage from 3.3V to 6V.

Q: How long should I wait between readings? A: The DHT22 requires a minimum of 2 seconds between readings to ensure accuracy and sensor longevity.

Q: Is the DHT22 waterproof? A: No, the DHT22 is not waterproof. It should be protected from condensation and water exposure.

Q: Can I use longer wires to connect the DHT22 to an Arduino? A: Yes, but keep in mind that longer wires can introduce resistance and potential signal degradation. Use shielded cables for longer distances and ensure stable power supply.

This documentation provides a comprehensive guide to using the DHT22 sensor with an Arduino. For further assistance, consult the datasheet or reach out to the community forums.