How to Use FLIR Lepton 3.5: Examples, Pinouts, and Specs
Introduction
The FLIR Lepton 3.5 is a compact, high-performance thermal imaging camera module designed for integration into a wide range of applications. With a resolution of 160x120 pixels and a thermal sensitivity of less than 50 mK, it delivers precise thermal imaging in a small form factor. This module is ideal for applications such as drones, robotics, IoT devices, building inspections, and security systems. Its low power consumption and advanced features make it a versatile choice for developers and engineers.
Explore Projects Built with FLIR Lepton 3.5


Explore Projects Built with FLIR Lepton 3.5
Technical Specifications
Below are the key technical details and pin configuration for the FLIR Lepton 3.5:
Key Technical Details
| Parameter | Specification |
|---|---|
| Resolution | 160x120 pixels |
| Thermal Sensitivity | < 50 mK |
| Spectral Range | 8 µm to 14 µm |
| Frame Rate | 8.7 Hz (radiometric) |
| Operating Voltage | 3.0 V to 3.6 V |
| Power Consumption | ~150 mW (typical) |
| Interface | SPI (Serial Peripheral Interface) |
| Dimensions | 10.5 mm x 12.7 mm x 7.14 mm |
| Weight | 0.9 grams |
| Operating Temperature | -10°C to +65°C |
Pin Configuration and Descriptions
The FLIR Lepton 3.5 module has a 14-pin interface. Below is the pinout and description:
| Pin Number | Name | Description |
|---|---|---|
| 1 | GND | Ground |
| 2 | VDD | Power supply (3.0 V to 3.6 V) |
| 3 | MCLK | Master clock input |
| 4 | GND | Ground |
| 5 | SCL | I2C clock line |
| 6 | SDA | I2C data line |
| 7 | GND | Ground |
| 8 | SPI_CS | SPI chip select |
| 9 | SPI_CLK | SPI clock |
| 10 | SPI_MISO | SPI master-in/slave-out |
| 11 | SPI_MOSI | SPI master-out/slave-in |
| 12 | RESET | Active-low reset |
| 13 | PWR_DWN | Power down control |
| 14 | GND | Ground |
Usage Instructions
How to Use the FLIR Lepton 3.5 in a Circuit
- Power Supply: Connect the VDD pin to a 3.3 V power source and ensure all GND pins are connected to the ground.
- Clock Input: Provide a stable 25 MHz clock signal to the MCLK pin.
- Communication Interface: Use the SPI interface for image data transfer and the I2C interface for configuration and control.
- Reset and Power Down: Use the RESET pin to initialize the module and the PWR_DWN pin to manage power-saving modes.
Important Considerations and Best Practices
- Thermal Isolation: Ensure the module is thermally isolated from heat sources to avoid interference with thermal readings.
- Lens Cleaning: Use a soft, lint-free cloth to clean the lens. Avoid using abrasive materials.
- Startup Sequence: Apply power to the module, provide the MCLK signal, and then release the RESET pin to initialize the module.
- SPI Communication: Use a microcontroller or development board (e.g., Arduino or Raspberry Pi) to interface with the module via SPI.
Example: Using FLIR Lepton 3.5 with Arduino UNO
Below is an example of interfacing the FLIR Lepton 3.5 with an Arduino UNO using the SPI interface:
#include <SPI.h>

// Define SPI pins for Arduino UNO
#define CS_PIN 10  // Chip Select pin
#define CLK_PIN 13 // SPI Clock pin
#define MOSI_PIN 11 // Master-Out Slave-In pin
#define MISO_PIN 12 // Master-In Slave-Out pin

void setup() {
  // Initialize Serial Monitor for debugging
  Serial.begin(9600);

  // Initialize SPI communication
  SPI.begin();
  pinMode(CS_PIN, OUTPUT);
  digitalWrite(CS_PIN, HIGH); // Set CS pin high (inactive)

  Serial.println("FLIR Lepton 3.5 Initialization Complete");
}

void loop() {
  // Example: Read data from the FLIR Lepton 3.5
  digitalWrite(CS_PIN, LOW); // Activate the module by pulling CS low
  byte response = SPI.transfer(0x00); // Send dummy data to receive response
  digitalWrite(CS_PIN, HIGH); // Deactivate the module by pulling CS high

  // Print the received data
  Serial.print("Received Data: ");
  Serial.println(response, HEX);

  delay(1000); // Wait for 1 second before the next read
}
Note: This is a basic example. For full functionality, use a dedicated library such as LeptonSDK or LeptonArduino.
Troubleshooting and FAQs
Common Issues and Solutions
No Image Output:
- Ensure the MCLK signal is stable and at 25 MHz.
- Verify that the SPI and I2C connections are correct.
- Check the power supply voltage (3.3 V) and ensure it is within the specified range.
Module Overheating:
- Ensure proper thermal isolation from other heat-generating components.
- Avoid prolonged operation in high-temperature environments.
Communication Errors:
- Double-check the SPI and I2C wiring.
- Ensure the correct SPI mode (Mode 3) is configured in your microcontroller.
Blurry or Distorted Images:
- Clean the lens with a soft, lint-free cloth.
- Verify that the module is not exposed to direct sunlight or reflective surfaces.
FAQs
Q: Can the FLIR Lepton 3.5 detect human body temperature?
A: Yes, the module can detect human body temperature, but it is not a medical-grade device and should not be used for diagnostic purposes.
Q: What is the maximum range of the FLIR Lepton 3.5?
A: The effective range depends on the target size and emissivity. For small objects, the range is typically a few meters.
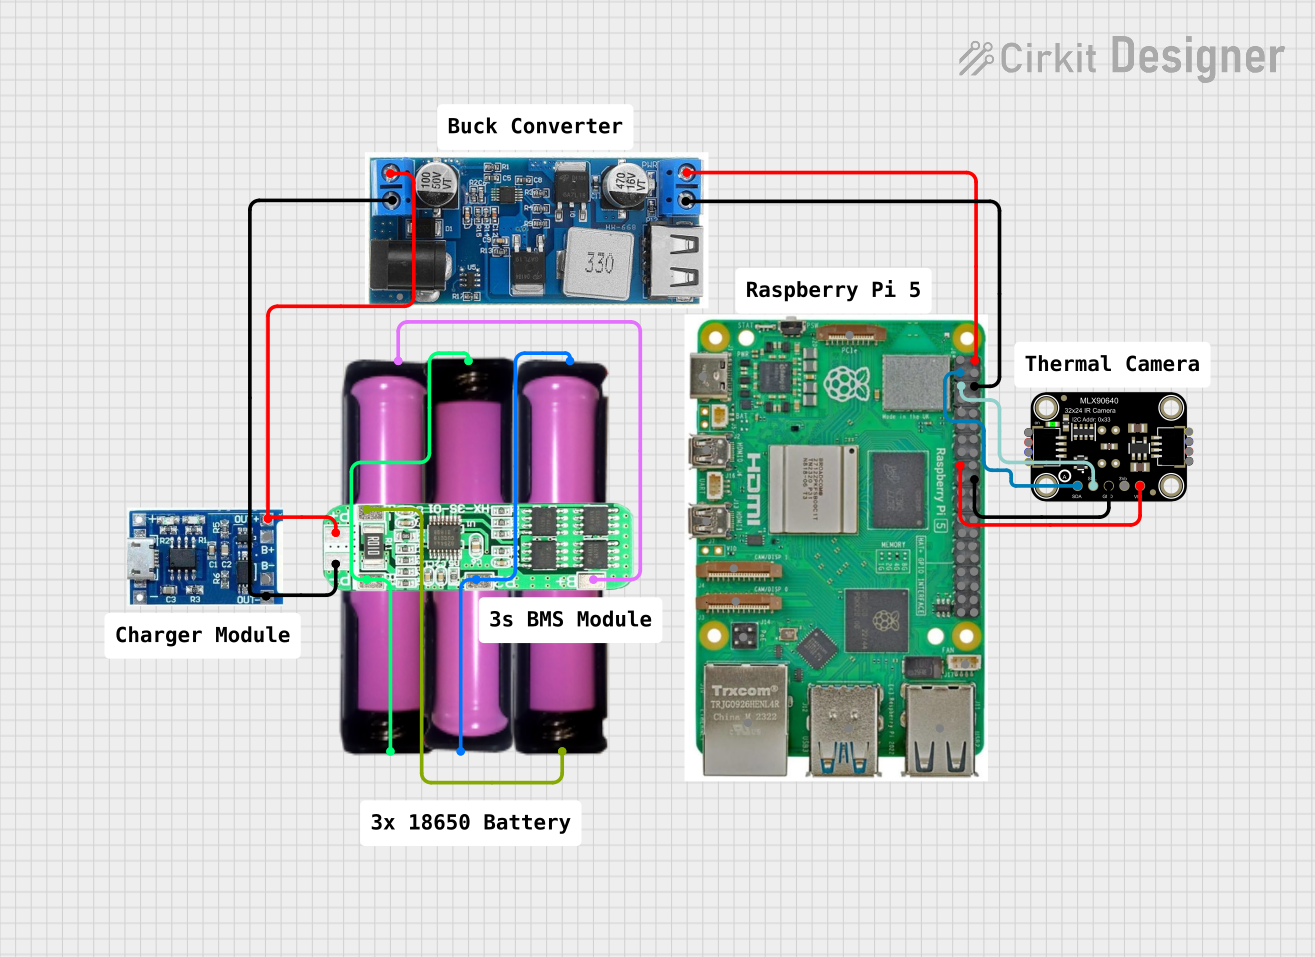
Q: Can I use the FLIR Lepton 3.5 with Raspberry Pi?
A: Yes, the module can be interfaced with Raspberry Pi using the SPI and I2C interfaces. Libraries such as pylepton can simplify integration.
Q: Is the module waterproof?
A: No, the FLIR Lepton 3.5 is not waterproof. Use appropriate enclosures for outdoor or wet environments.