How to Use pyranometer: Examples, Pinouts, and Specs
Introduction
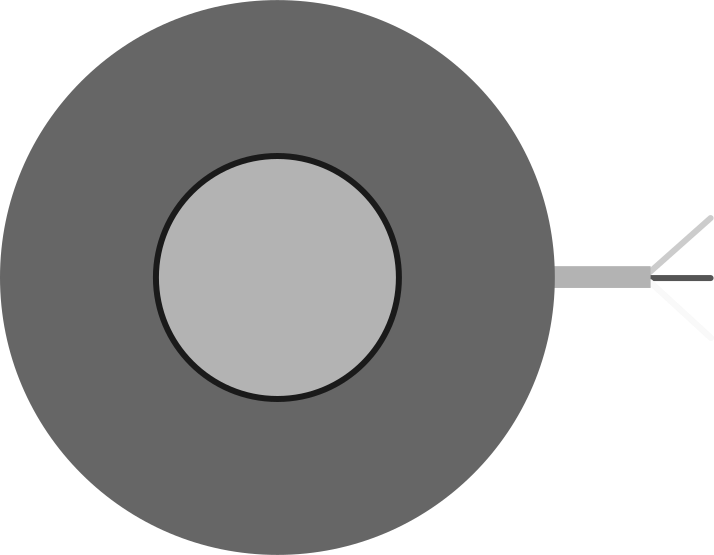
A pyranometer is a precision instrument designed to measure solar radiation received on a surface. It is widely used in meteorology, climatology, and solar energy applications to monitor and analyze sunlight intensity. By converting solar radiation into an electrical signal, pyranometers provide critical data for weather forecasting, solar panel efficiency analysis, and environmental research.
Explore Projects Built with pyranometer
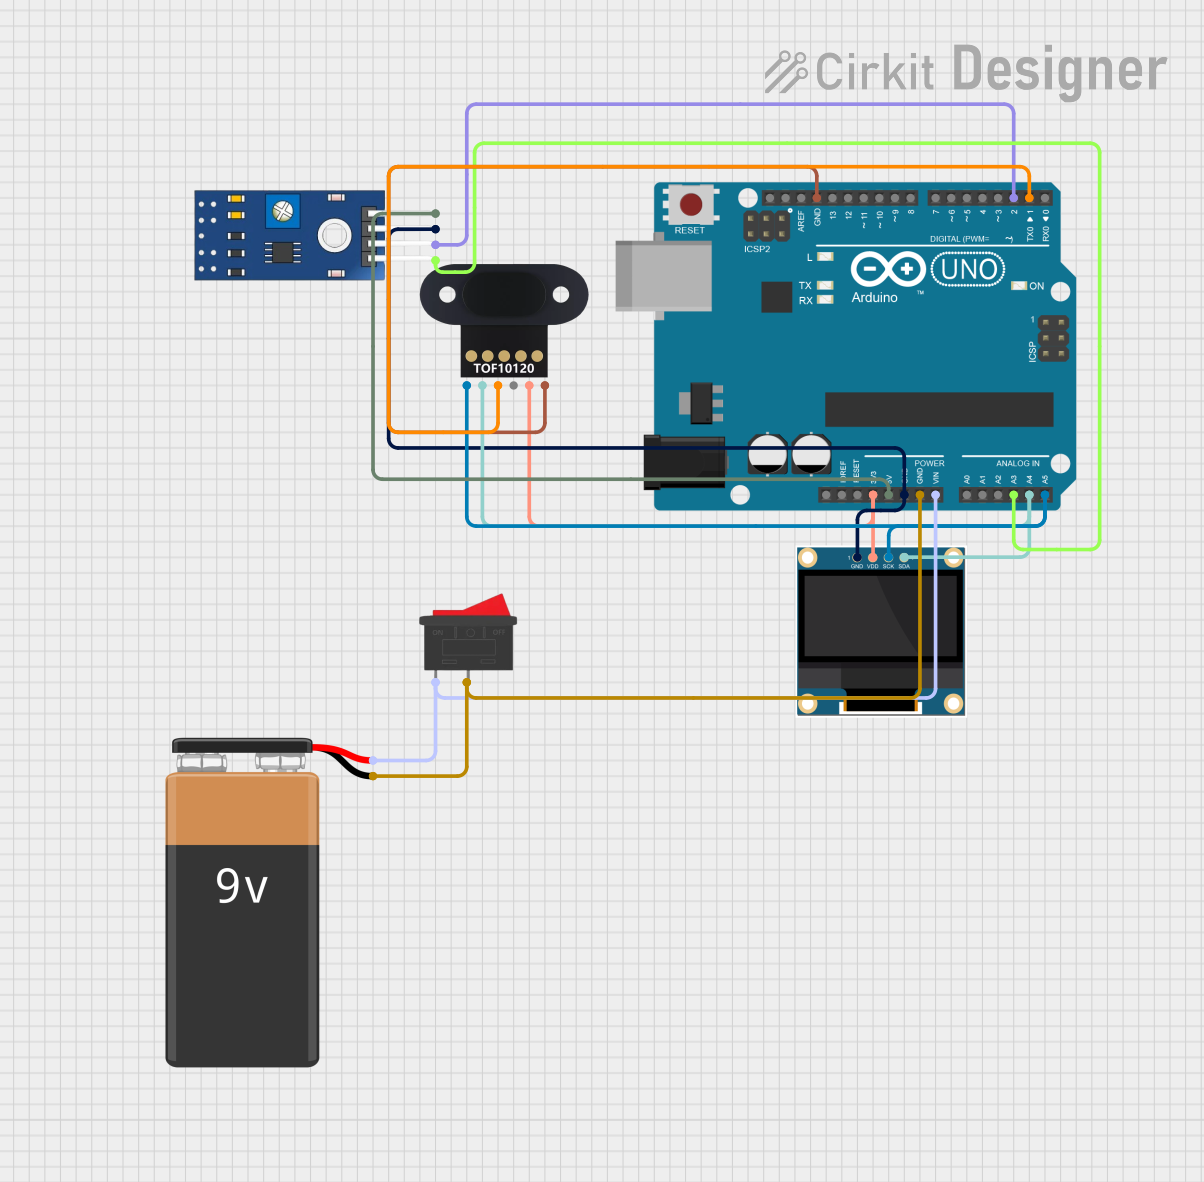
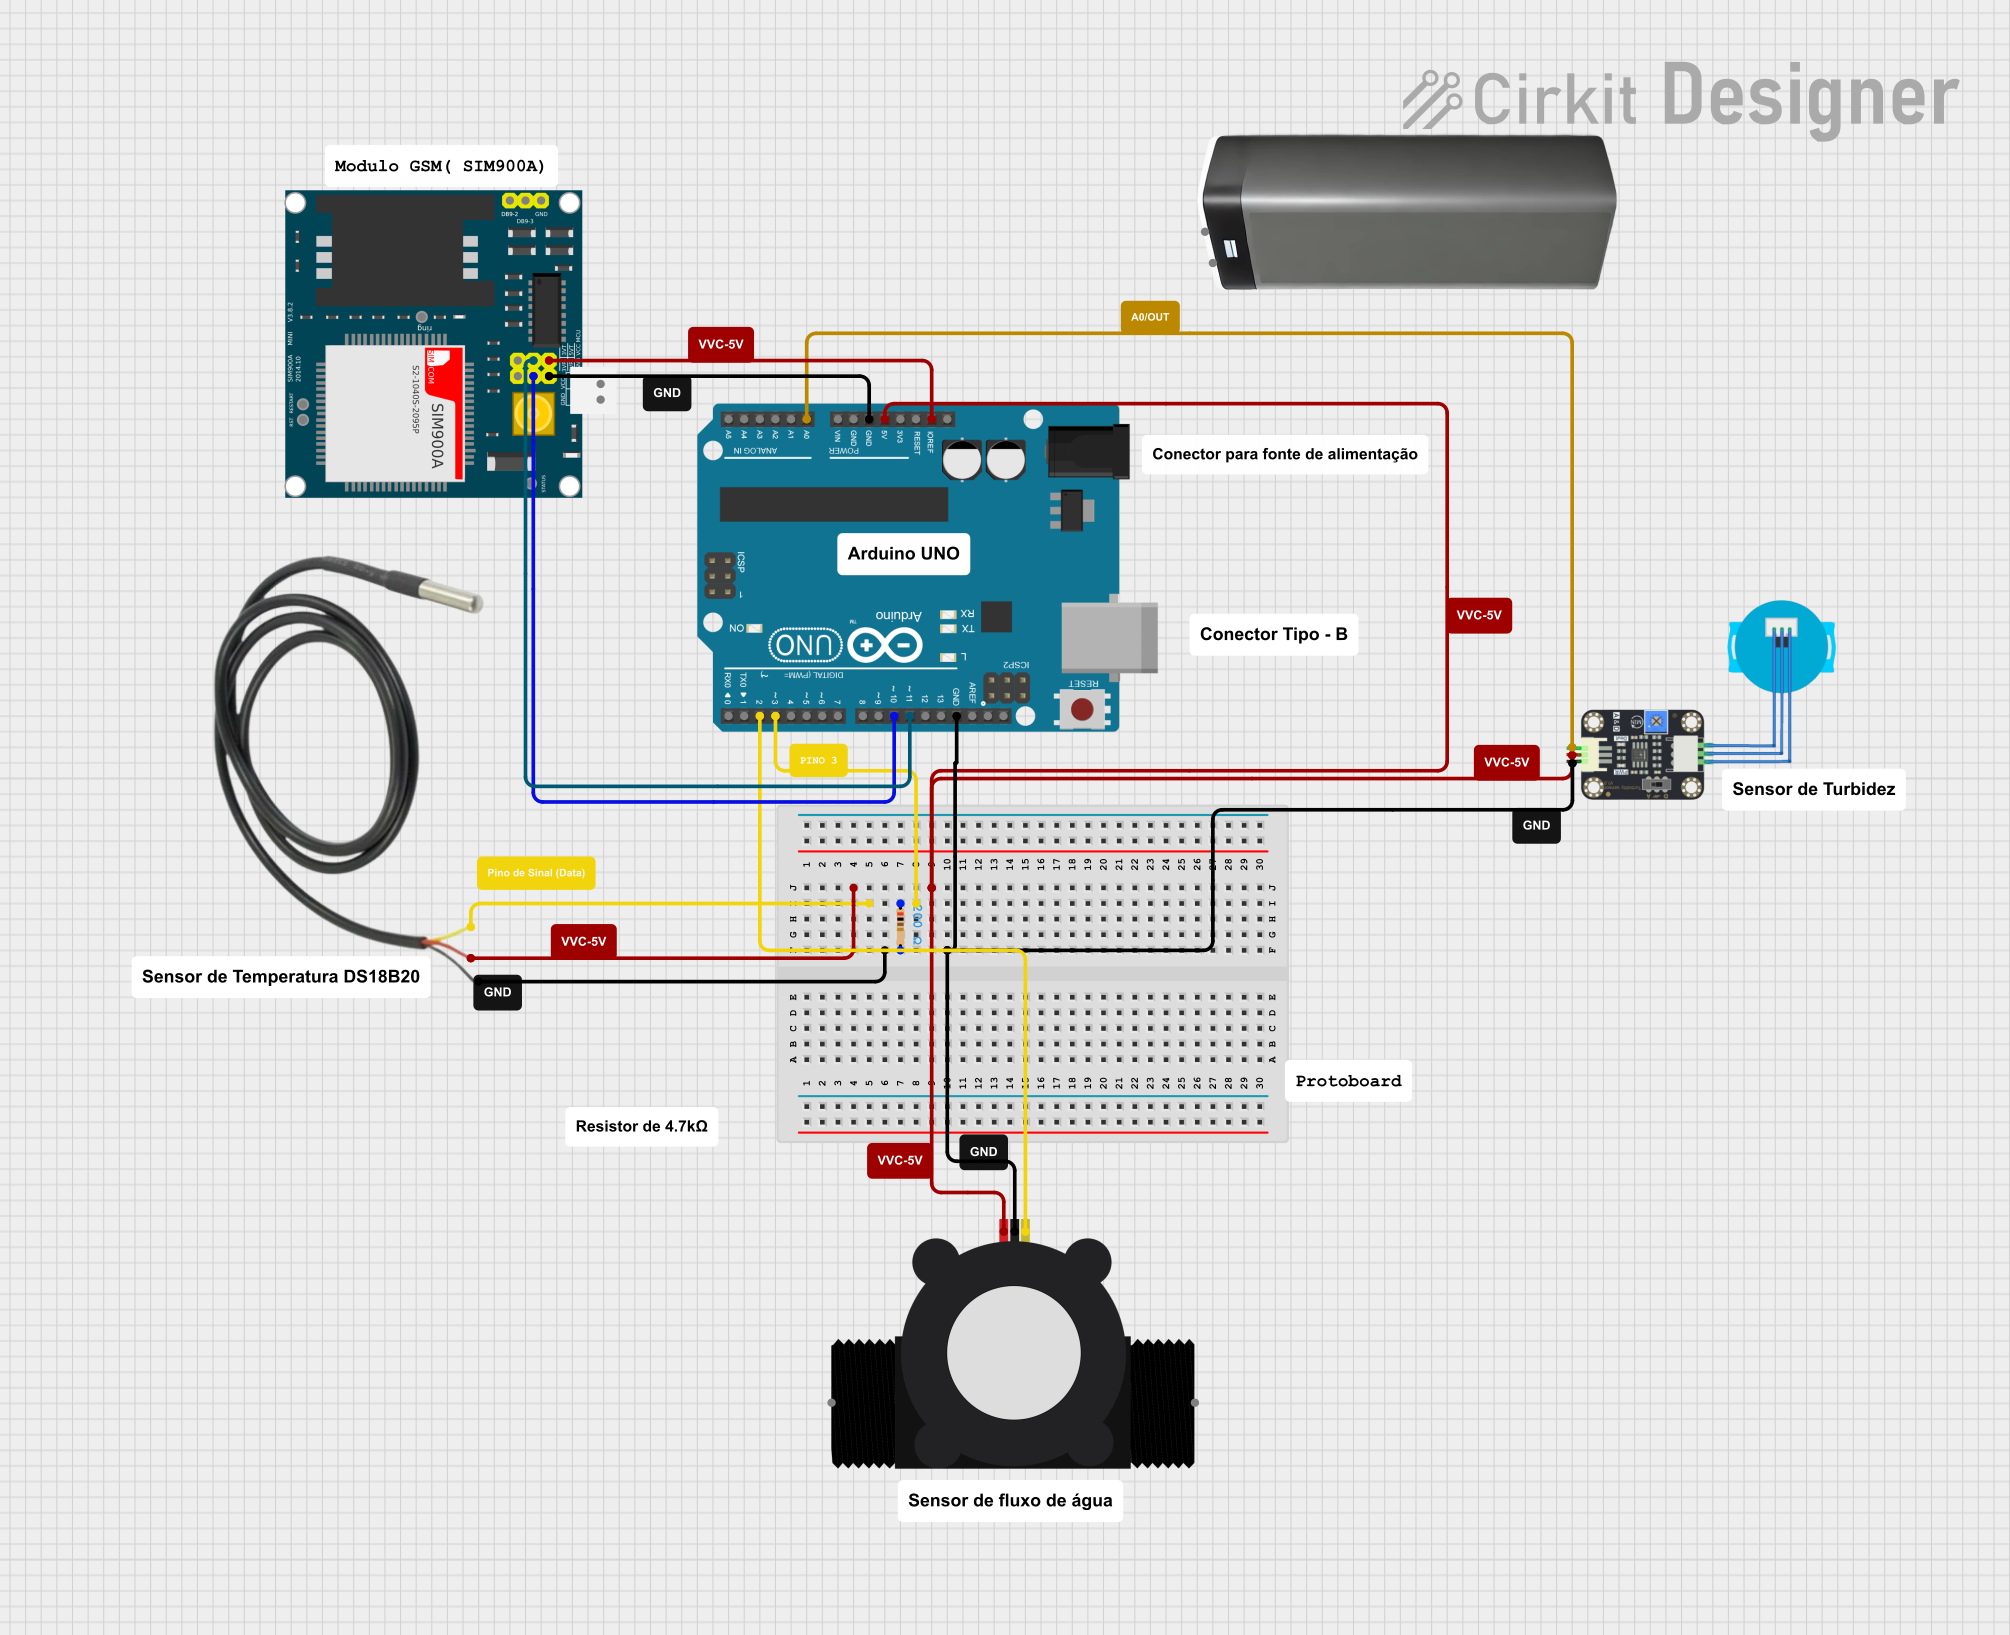
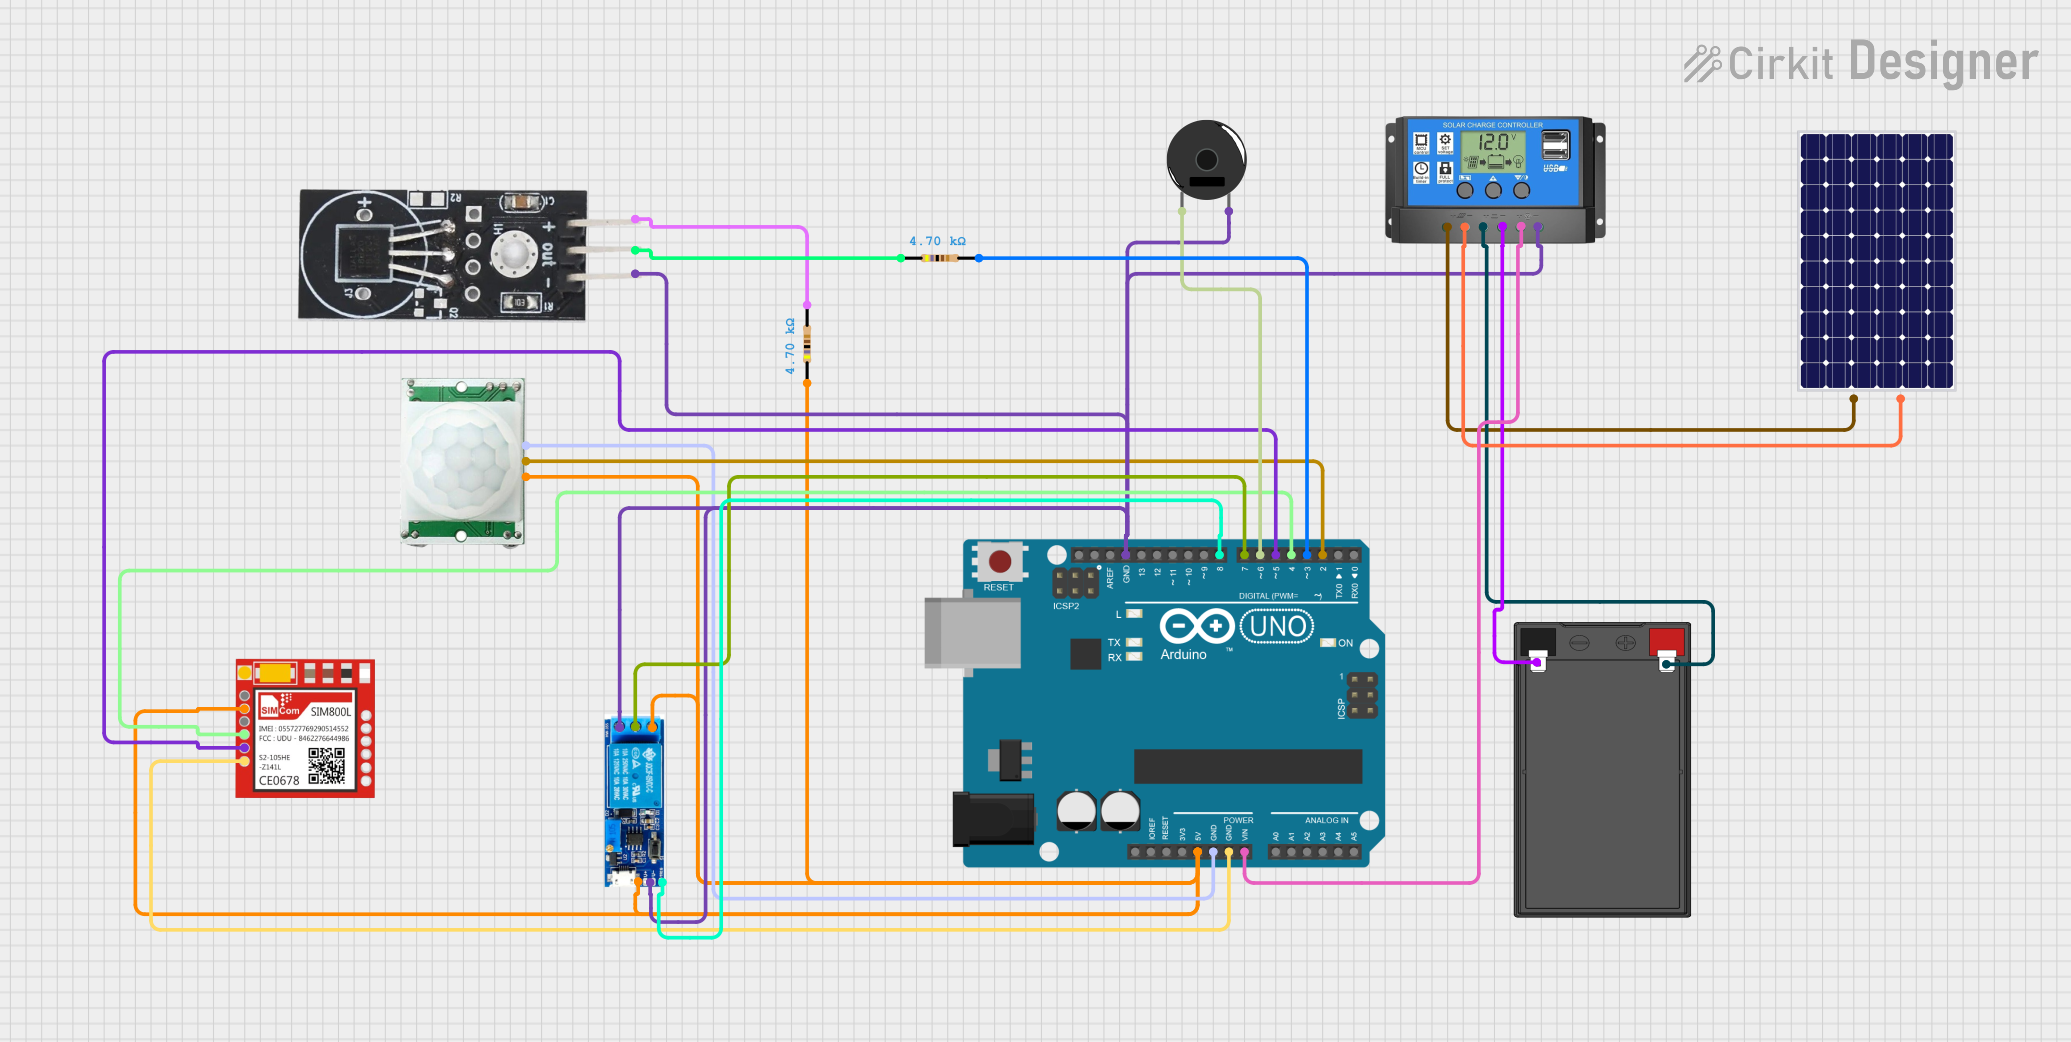
Explore Projects Built with pyranometer
Common Applications and Use Cases
- Monitoring solar radiation for photovoltaic (PV) system performance.
- Weather stations for meteorological data collection.
- Agricultural applications to optimize crop growth based on sunlight exposure.
- Research in climate science and environmental studies.
- Solar thermal energy systems for efficiency analysis.
Technical Specifications
Below are the key technical details of a typical pyranometer:
| Parameter | Specification |
|---|---|
| Spectral Range | 300 nm to 2800 nm |
| Sensitivity | 10 µV/W/m² to 30 µV/W/m² |
| Response Time | < 5 seconds |
| Operating Temperature | -40°C to +80°C |
| Power Supply | Not required (passive sensor) |
| Output Signal | Analog voltage (mV) |
| Calibration Uncertainty | ±3% to ±5% |
| Field of View | 180° (hemispherical) |
Pin Configuration and Descriptions
Pyranometers typically have a simple wiring interface. Below is a table describing the pin configuration for a standard analog-output pyranometer:
| Pin Name | Description |
|---|---|
| Signal (+) | Positive analog voltage output proportional to light |
| Signal (-) | Negative (ground) reference for the signal output |
| Shield | Optional shielding for noise reduction |
Usage Instructions
How to Use the Pyranometer in a Circuit
Connect the Pyranometer:
- Connect the
Signal (+)pin to the analog input of your data acquisition system or microcontroller (e.g., Arduino). - Connect the
Signal (-)pin to the ground (GND) of your system. - If available, connect the
Shieldto the system ground to reduce noise interference.
- Connect the
Power Requirements:
- Pyranometers are passive devices and do not require an external power supply. Ensure your data acquisition system can read low-voltage analog signals.
Calibration:
- Use the calibration factor provided by the manufacturer to convert the output voltage (mV) into solar radiation (W/m²). For example: [ \text{Solar Radiation (W/m²)} = \frac{\text{Output Voltage (mV)}}{\text{Sensitivity (µV/W/m²)}} ]
Data Logging:
- Use a microcontroller or data logger to record the output voltage over time for analysis.
Important Considerations and Best Practices
- Positioning: Ensure the pyranometer is mounted horizontally and unobstructed to measure global solar radiation accurately.
- Cleaning: Regularly clean the glass dome to prevent dirt or debris from affecting measurements.
- Temperature Effects: Some pyranometers may have slight temperature dependencies. Refer to the datasheet for correction factors if needed.
- Calibration: Periodically recalibrate the pyranometer to maintain accuracy, as specified by the manufacturer.
Example: Connecting a Pyranometer to an Arduino UNO
Below is an example of how to connect and read data from a pyranometer using an Arduino UNO:
// Example code to read pyranometer data using Arduino UNO
// Ensure the pyranometer's Signal(+) is connected to A0 and Signal(-) to GND

const int pyranometerPin = A0; // Analog pin connected to pyranometer
float sensitivity = 15.0;     // Sensitivity in µV/W/m² (check your datasheet)

void setup() {
  Serial.begin(9600); // Initialize serial communication
}

void loop() {
  int rawValue = analogRead(pyranometerPin); // Read raw analog value (0-1023)

  // Convert raw value to voltage (assuming 5V reference voltage)
  float voltage = (rawValue / 1023.0) * 5.0;

  // Convert voltage to solar radiation (W/m²)
  float solarRadiation = (voltage * 1000) / sensitivity; // Convert mV to µV

  // Print the solar radiation value to the Serial Monitor
  Serial.print("Solar Radiation: ");
  Serial.print(solarRadiation);
  Serial.println(" W/m²");

  delay(1000); // Wait for 1 second before the next reading
}
Troubleshooting and FAQs
Common Issues and Solutions
No Output Signal:
- Check the wiring connections. Ensure the
Signal (+)andSignal (-)pins are correctly connected. - Verify that the analog input pin on your microcontroller is functioning.
- Check the wiring connections. Ensure the
Inconsistent Readings:
- Ensure the pyranometer is clean and free from obstructions.
- Check for electrical noise or interference. Use the shield wire if available.
Low or Zero Readings in Bright Sunlight:
- Verify the calibration factor and sensitivity value used in calculations.
- Ensure the pyranometer is not shaded or improperly positioned.
Temperature-Related Variations:
- Some pyranometers may exhibit slight temperature dependencies. Refer to the datasheet for correction factors.
FAQs
Q: Can I use a pyranometer indoors?
A: Pyranometers are designed for outdoor use to measure solar radiation. However, they can be used indoors to measure artificial light intensity, though the calibration may not be accurate for non-solar light sources.
Q: How often should I calibrate my pyranometer?
A: Calibration frequency depends on the manufacturer’s recommendations, typically every 1-2 years for high-accuracy applications.
Q: Can I use a pyranometer with a digital output?
A: Yes, some pyranometers come with digital interfaces (e.g., Modbus or SDI-12). This documentation focuses on analog-output pyranometers.
Q: What is the difference between a pyranometer and a photodiode?
A: A pyranometer measures global solar radiation across a wide spectral range, while a photodiode typically measures light intensity in a narrower spectrum and is less accurate for solar radiation measurements.