How to Use SparkFun Mini FET Shield: Examples, Pinouts, and Specs
Introduction
The SparkFun Mini FET Shield is an expansion board designed for Arduino and other compatible microcontrollers. This shield allows users to control high-power devices such as motors, lights, and solenoids through Field-Effect Transistors (FETs). It is an ideal choice for projects requiring the switching of higher currents and voltages that a microcontroller cannot handle directly.
Explore Projects Built with SparkFun Mini FET Shield


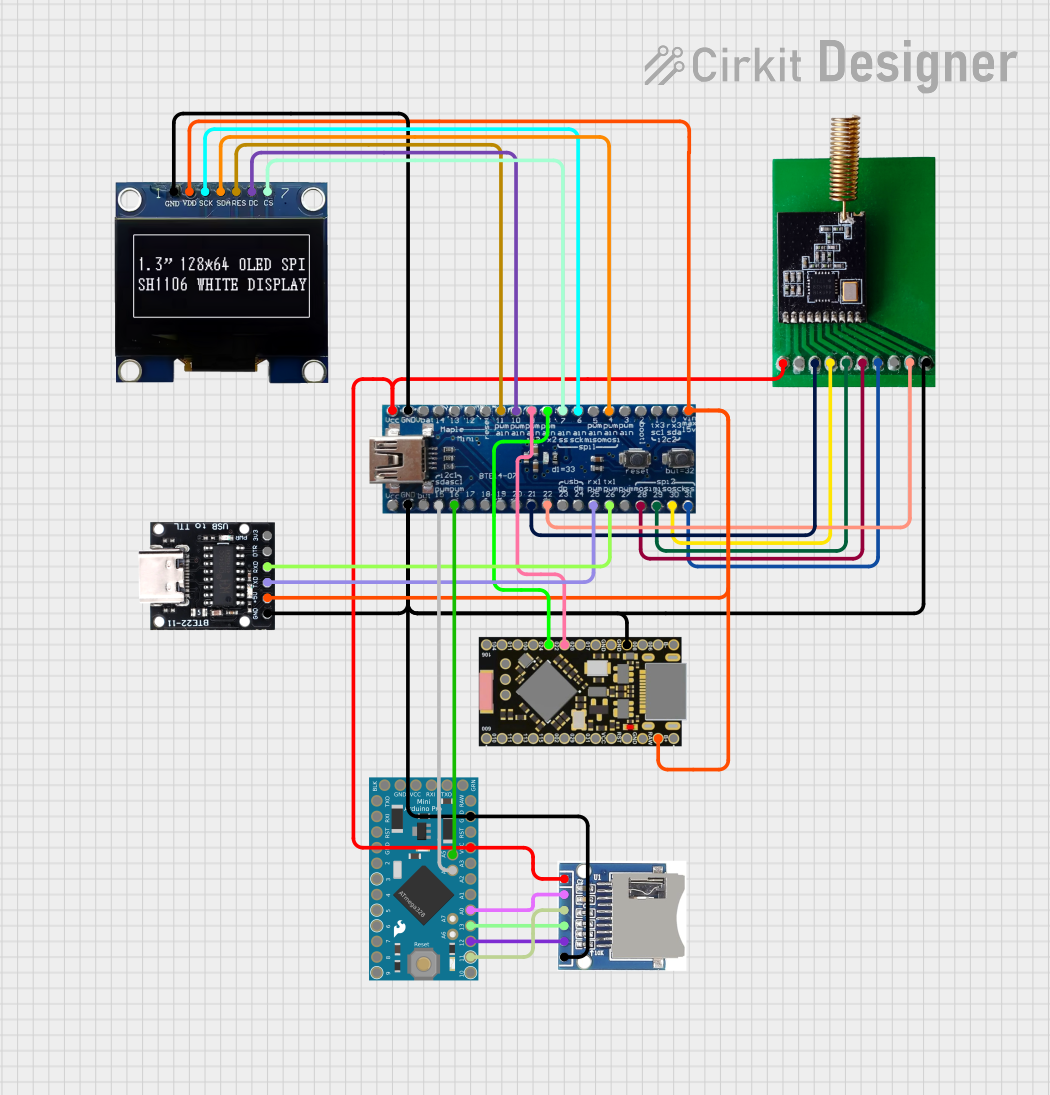
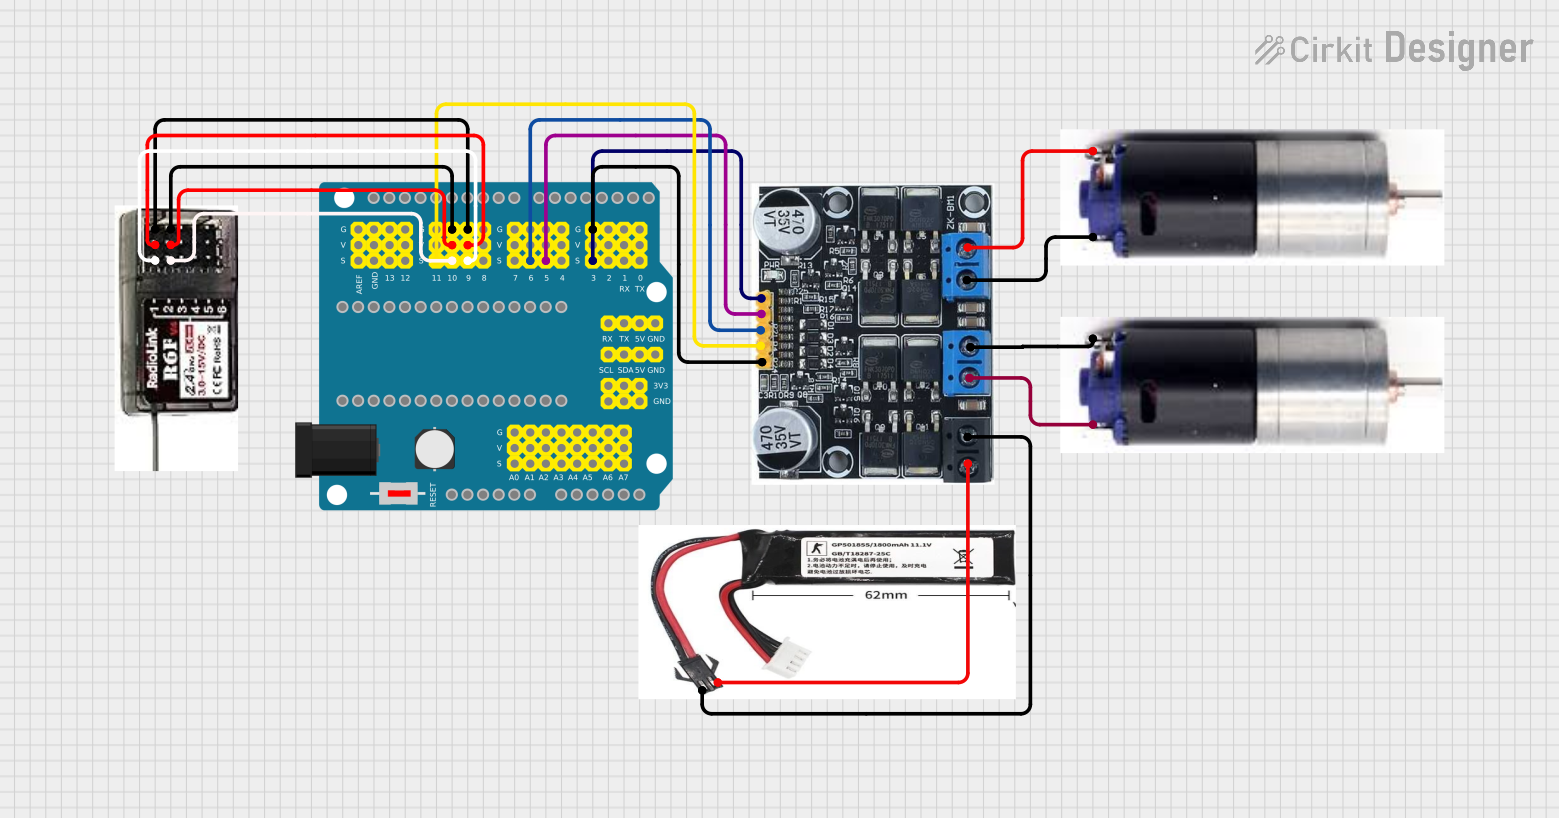
Explore Projects Built with SparkFun Mini FET Shield
Common Applications and Use Cases
- Driving high-power LEDs
- Controlling DC motors
- Operating solenoids for pneumatic or hydraulic systems
- Switching power to other electronic circuits
Technical Specifications
The SparkFun Mini FET Shield is built to handle substantial power requirements with the following key specifications:
| Specification | Value |
|---|---|
| Operating Voltage | 3.3V - 5V (Vcc) |
| Maximum Output Load | 30V @ 6A per channel |
| Number of Channels | 2 |
| Logic Level | Compatible with 3.3V and 5V logic levels |
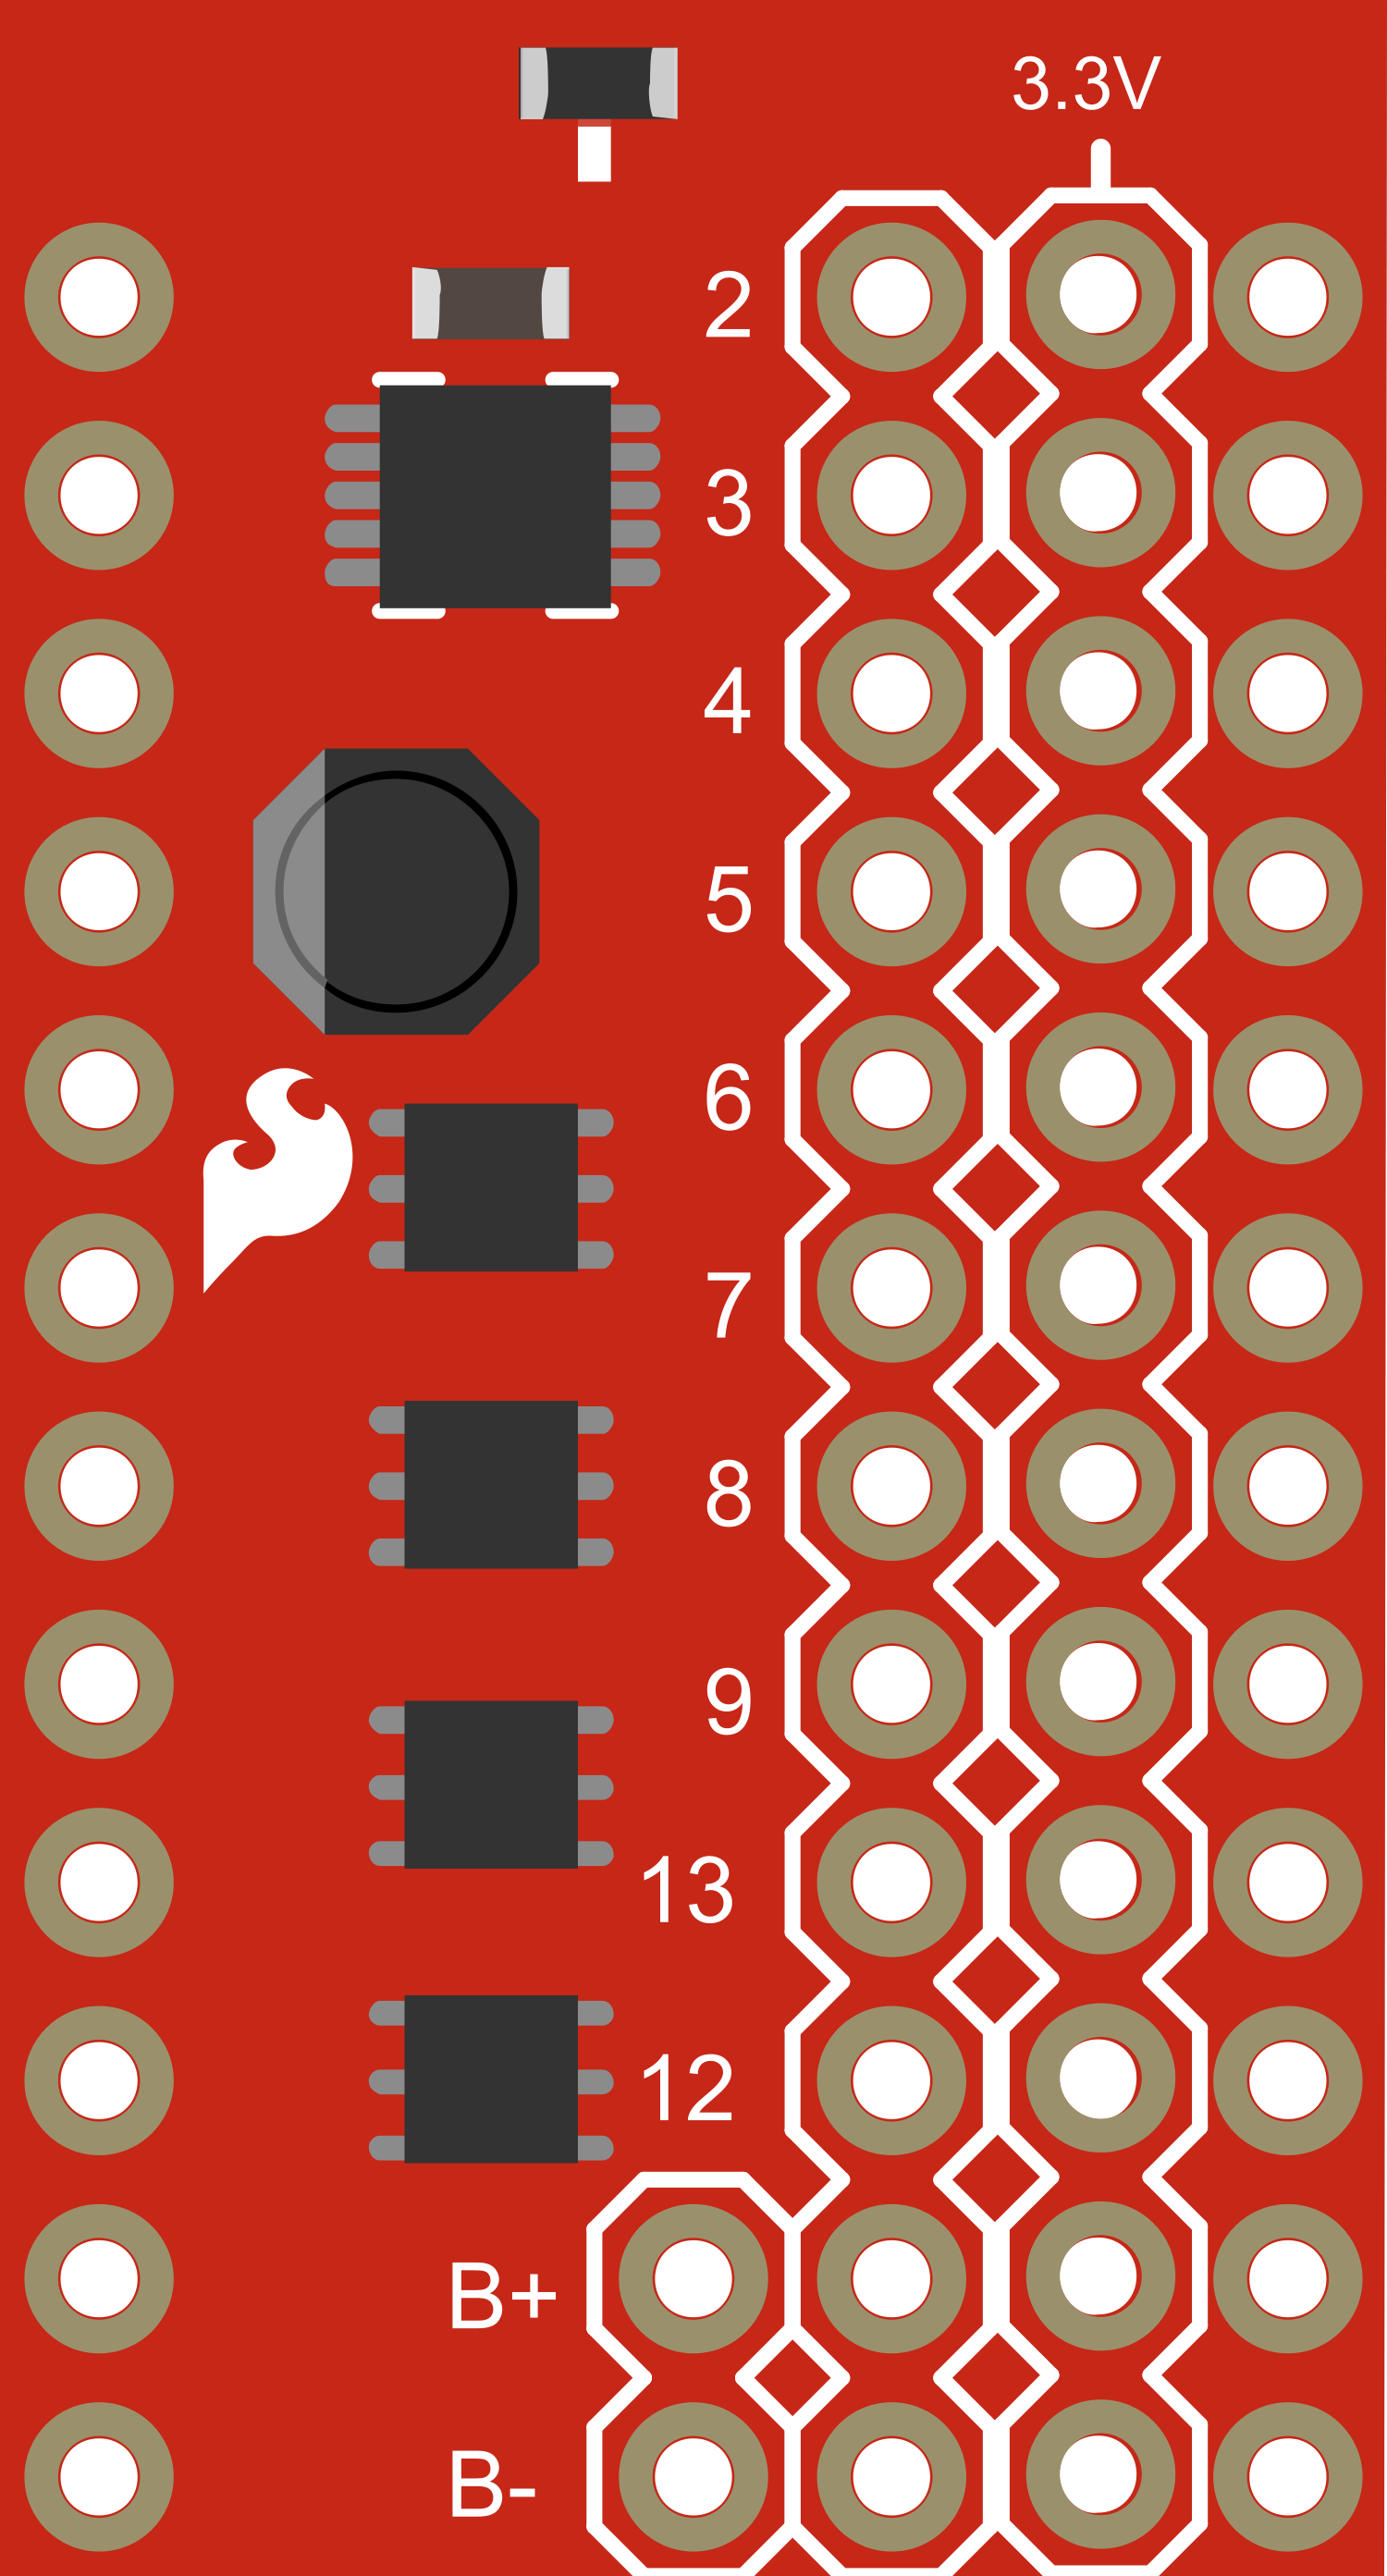
Pin Configuration and Descriptions
| Pin | Description |
|---|---|
| GND | Ground pin, common reference for all signals |
| Vcc | Power supply for the FETs (3.3V - 5V) |
| IN1 | Input signal for Channel 1 |
| IN2 | Input signal for Channel 2 |
| OUT1 | Output for Channel 1 |
| OUT2 | Output for Channel 2 |
Usage Instructions
How to Use the Component in a Circuit
- Powering the Shield: Connect the Vcc pin to a 3.3V or 5V power supply from your microcontroller board.
- Ground Connection: Connect the GND pin to the ground of your microcontroller and power supply.
- Signal Inputs: Connect IN1 and IN2 to the digital output pins on your microcontroller.
- Load Connections: Connect your high-power device to the OUT1 and OUT2 pins, ensuring the device's power requirements do not exceed the shield's maximum ratings.
Important Considerations and Best Practices
- Always verify that the power supply voltage and current do not exceed the shield's maximum ratings.
- Use proper heat dissipation techniques if driving loads near the maximum ratings to prevent overheating.
- Ensure that the load is connected correctly with the right polarity.
- When controlling inductive loads like motors or solenoids, use flyback diodes to prevent voltage spikes.
Example Code for Arduino UNO
// Example code to control a motor using the SparkFun Mini FET Shield

const int fetChannel1 = 3; // Connect IN1 to Digital Pin 3 on Arduino

void setup() {
  pinMode(fetChannel1, OUTPUT); // Set the FET channel as an output
}

void loop() {
  digitalWrite(fetChannel1, HIGH); // Turn on the motor
  delay(1000);                     // Wait for 1 second
  digitalWrite(fetChannel1, LOW);  // Turn off the motor
  delay(1000);                     // Wait for 1 second
}
Troubleshooting and FAQs
Common Issues
- Motor does not turn on: Check connections and ensure the power supply is adequate.
- FET overheating: Ensure the load does not exceed the shield's specifications and improve heat dissipation.
- Intermittent operation: Verify that all connections are secure and there are no loose wires.
Solutions and Tips for Troubleshooting
- Double-check wiring against the pin configuration table.
- Use a multimeter to verify the presence of voltage at the FET inputs and outputs.
- Ensure that the microcontroller's digital outputs are functioning by testing them with an LED.
FAQs
Q: Can I control the speed of a motor with this shield? A: Yes, by using PWM (Pulse Width Modulation) on the input pins, you can control the speed of a DC motor.
Q: Is it possible to stack multiple Mini FET Shields? A: Stacking is not natively supported, but with careful wiring and ensuring unique control pins for each shield, you can control multiple shields from one microcontroller.
Q: Can I use this shield with a 3.3V microcontroller? A: Yes, the shield is compatible with both 3.3V and 5V logic levels.
For further assistance, please refer to the SparkFun community forums or contact technical support.