Cirkit Designer Logo
Cirkit Designer
Your all-in-one circuit design IDE
Home / 
Component Documentation

How to Use Ambient Light Sensor (TEMT6000 Breakout Board): Examples, Pinouts, and Specs
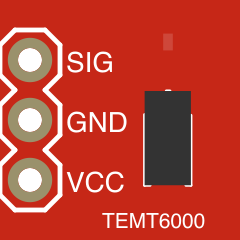

Image of Ambient Light Sensor (TEMT6000 Breakout Board)
Cirkit Designer LogoDesign with Ambient Light Sensor (TEMT6000 Breakout Board) in Cirkit Designer

Introduction

The TEMT6000 Breakout Board is an ambient light sensor designed to detect light levels and convert them into a proportional voltage output. This sensor mimics the human eye's response to light, making it ideal for applications requiring automatic brightness adjustment, such as in displays, lighting systems, and energy-saving devices. Its compact design and ease of use make it a popular choice for both hobbyists and professionals.

Explore Projects Built with Ambient Light Sensor (TEMT6000 Breakout Board)
Use Cirkit Designer to design, explore, and prototype these projects online. Some projects support real-time simulation. Click "Open Project" to start designing instantly!
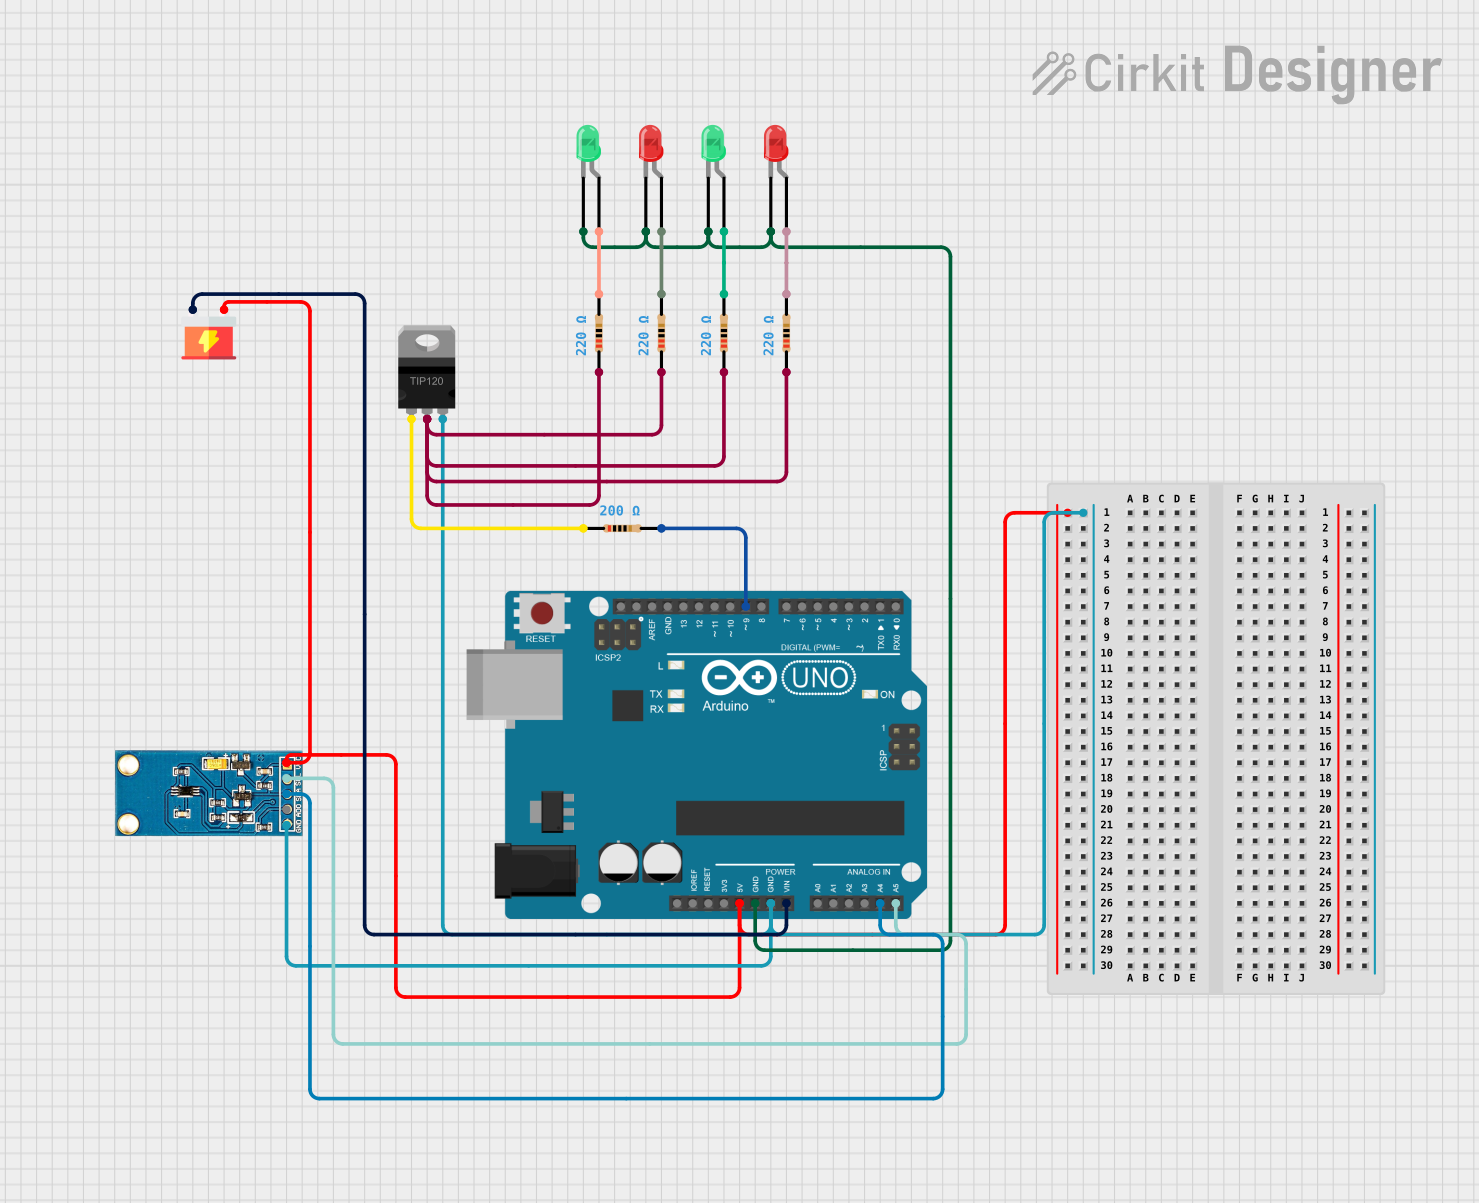
Arduino UNO Controlled Light-Responsive LED Array
Image of Envi Bot Rahhhhhhhhhhhhh: A project utilizing Ambient Light Sensor (TEMT6000 Breakout Board) in a practical application
This circuit features an Arduino UNO microcontroller interfaced with a light sensor and multiple LEDs (red and green) through TIP120 Darlington transistors. The Arduino reads the ambient light level via the light sensor and adjusts the brightness of the LEDs inversely proportional to the light intensity, likely creating a dimming effect as the ambient light increases. The circuit is designed to provide visual feedback based on the surrounding light conditions, potentially for applications like automatic night lights or backlight adjustment.
Cirkit Designer LogoOpen Project in Cirkit Designer
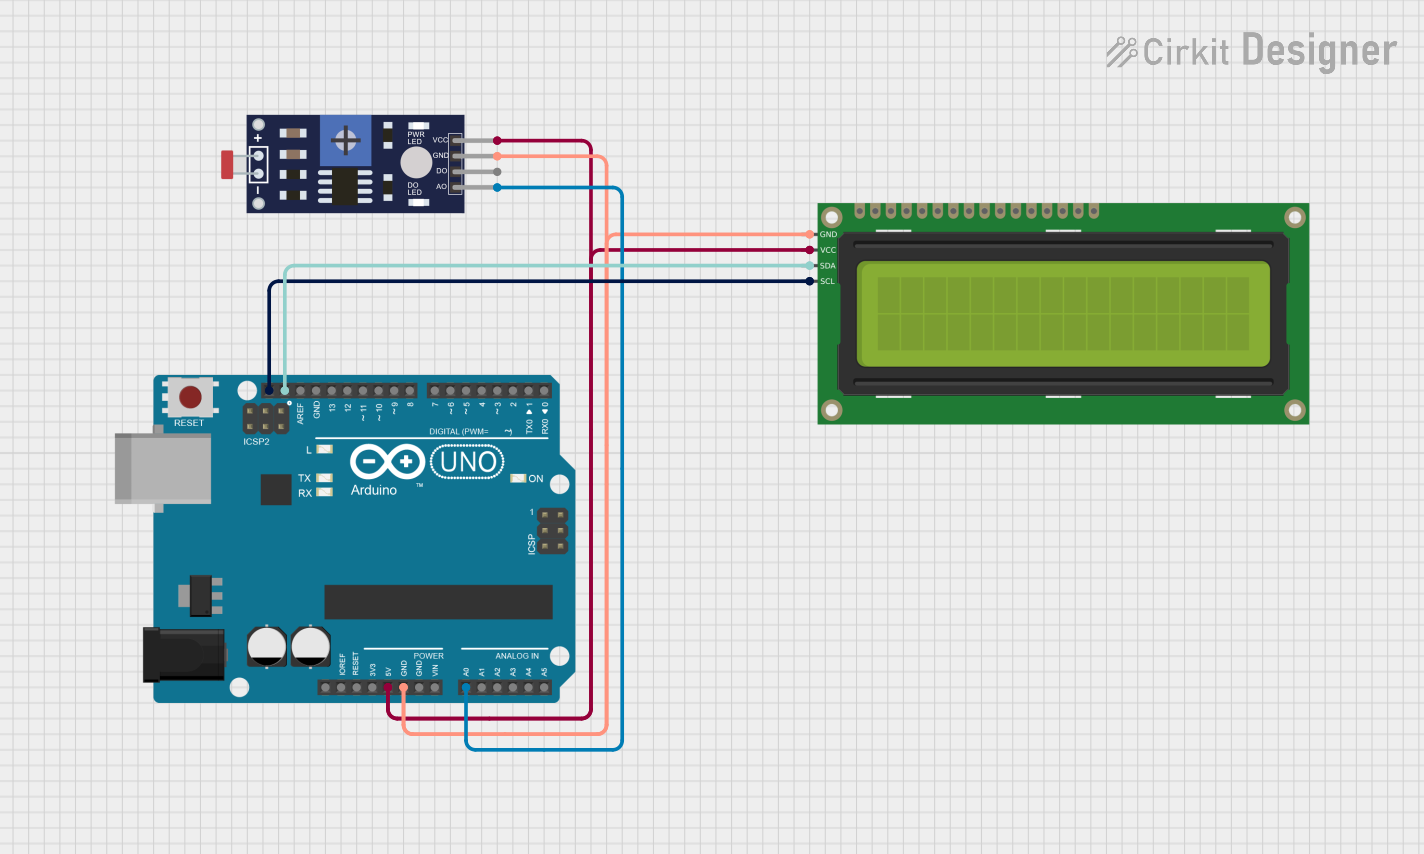
Arduino-Based Light Level Monitor with I2C LCD Display
Image of Measure Light Intensity With Photoresistor (LDR): A project utilizing Ambient Light Sensor (TEMT6000 Breakout Board) in a practical application
This circuit utilizes a Photoresistor (LDR) sensor to measure ambient light levels and display the results on a 16x2 I2C LCD. The Arduino UNO processes the sensor data and updates the LCD to indicate whether the environment is 'Light' or 'Dark' based on the calculated lux value.
Cirkit Designer LogoOpen Project in Cirkit Designer
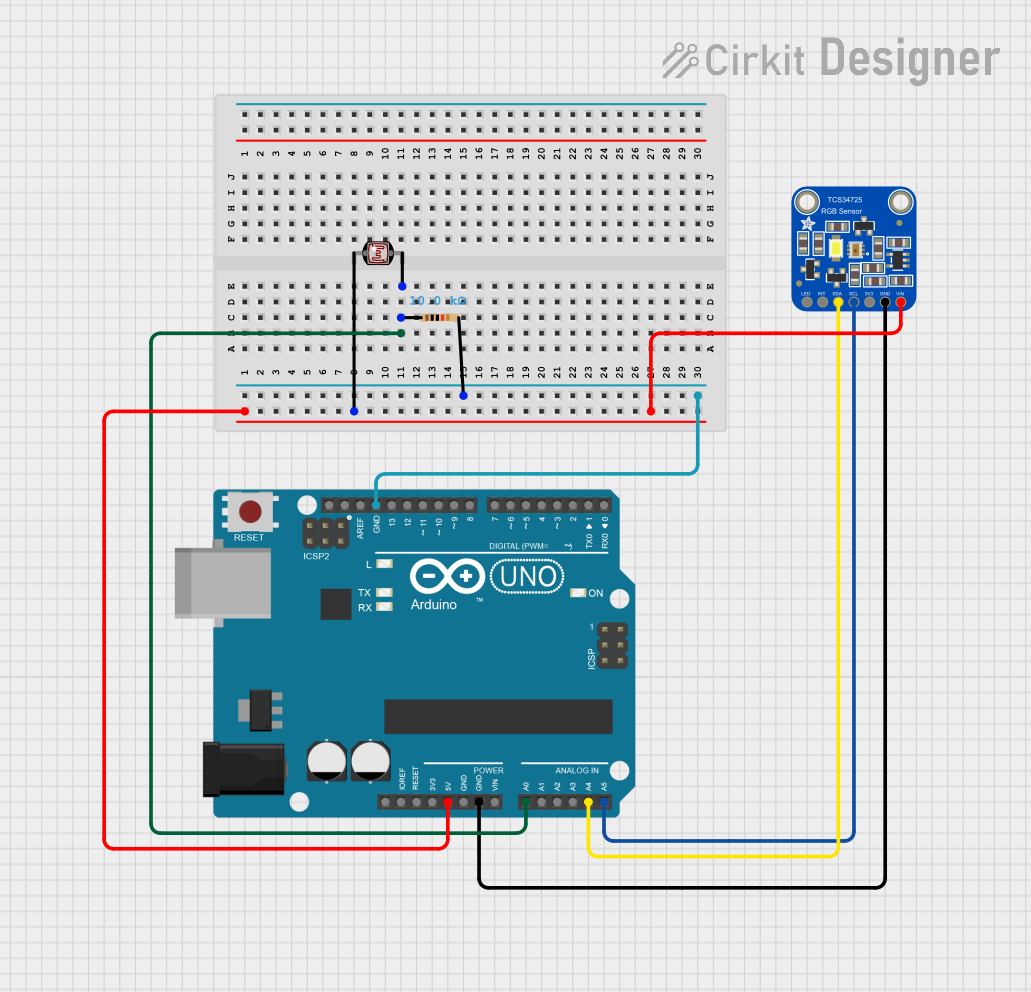
Arduino UNO with TCS34725 Color Sensor and LDR Light Detection
Image of SSC: A project utilizing Ambient Light Sensor (TEMT6000 Breakout Board) in a practical application
This circuit features an Arduino UNO microcontroller connected to an Adafruit TCS34725 RGB Color Sensor and a photocell (LDR) with a 10k Ohm resistor forming a voltage divider connected to the Arduino's analog input A0. The RGB sensor is interfaced with the Arduino via I2C communication, using SDA and SCL lines. The purpose of this circuit is likely to measure ambient light intensity with the photocell and detect colors with the RGB sensor, both interfaced with the Arduino for processing and potential output of the sensor data.
Cirkit Designer LogoOpen Project in Cirkit Designer
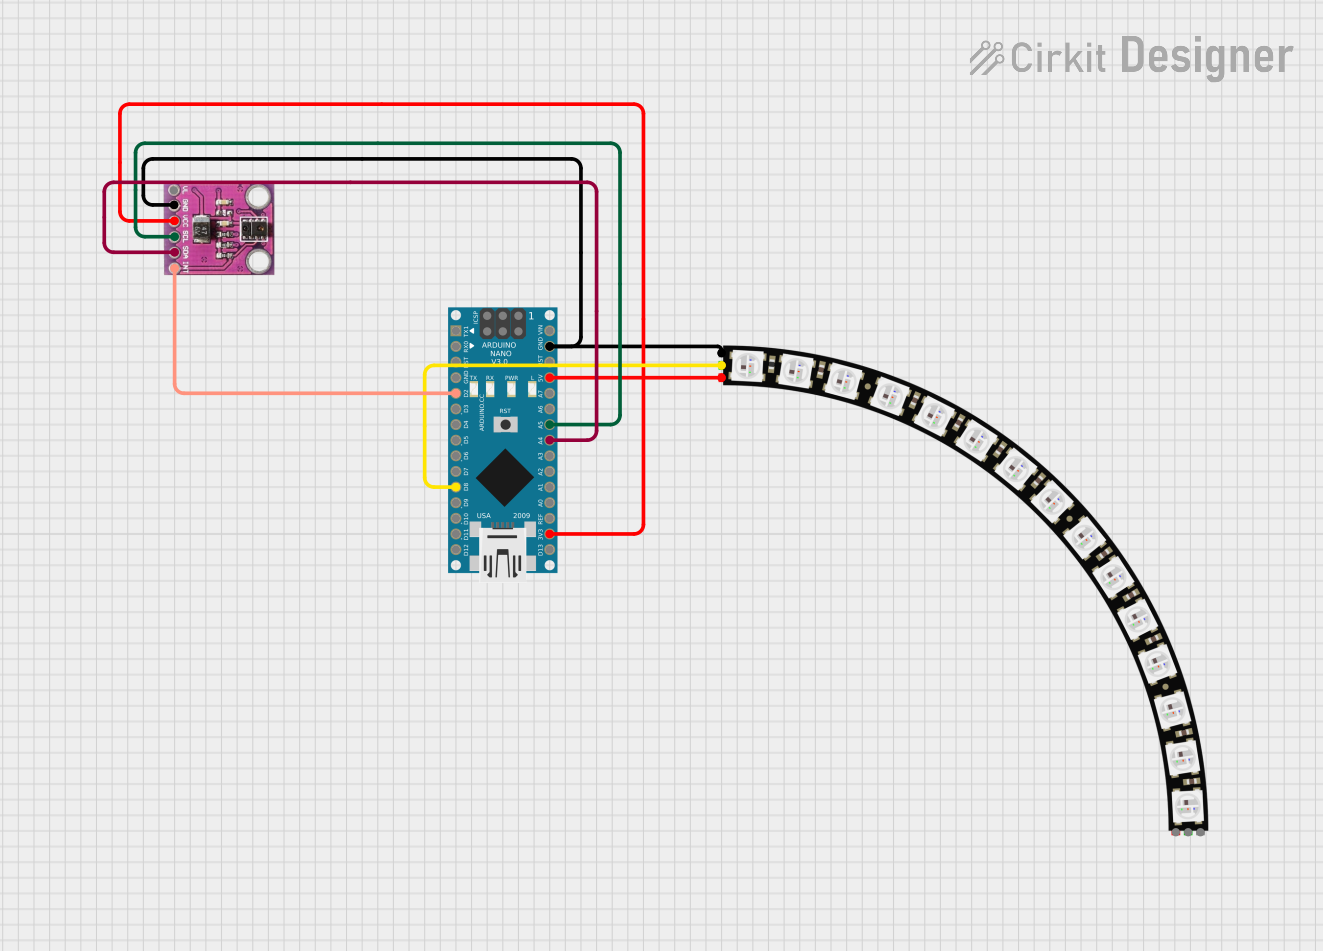
Arduino Nano Controlled Ambient Light Sensing and NeoPixel Display
Image of GuesturLED: A project utilizing Ambient Light Sensor (TEMT6000 Breakout Board) in a practical application
This circuit features an Arduino Nano microcontroller interfaced with an APDS-9930 Proximity and Ambient Light Sensor for sensing environmental light and proximity. The Arduino Nano also controls an Adafruit Quarter 60 NeoPixel Ring, likely for visual feedback or display purposes. The sensor communicates with the Arduino via I2C (SDA and SCL connections), and the NeoPixel Ring is driven by a digital output (D8) from the Arduino.
Cirkit Designer LogoOpen Project in Cirkit Designer

Explore Projects Built with Ambient Light Sensor (TEMT6000 Breakout Board)

Use Cirkit Designer to design, explore, and prototype these projects online. Some projects support real-time simulation. Click "Open Project" to start designing instantly!
Image of Envi Bot Rahhhhhhhhhhhhh: A project utilizing Ambient Light Sensor (TEMT6000 Breakout Board) in a practical application
Arduino UNO Controlled Light-Responsive LED Array
This circuit features an Arduino UNO microcontroller interfaced with a light sensor and multiple LEDs (red and green) through TIP120 Darlington transistors. The Arduino reads the ambient light level via the light sensor and adjusts the brightness of the LEDs inversely proportional to the light intensity, likely creating a dimming effect as the ambient light increases. The circuit is designed to provide visual feedback based on the surrounding light conditions, potentially for applications like automatic night lights or backlight adjustment.
Cirkit Designer LogoOpen Project in Cirkit Designer
Image of Measure Light Intensity With Photoresistor (LDR): A project utilizing Ambient Light Sensor (TEMT6000 Breakout Board) in a practical application
Arduino-Based Light Level Monitor with I2C LCD Display
This circuit utilizes a Photoresistor (LDR) sensor to measure ambient light levels and display the results on a 16x2 I2C LCD. The Arduino UNO processes the sensor data and updates the LCD to indicate whether the environment is 'Light' or 'Dark' based on the calculated lux value.
Cirkit Designer LogoOpen Project in Cirkit Designer
Image of SSC: A project utilizing Ambient Light Sensor (TEMT6000 Breakout Board) in a practical application
Arduino UNO with TCS34725 Color Sensor and LDR Light Detection
This circuit features an Arduino UNO microcontroller connected to an Adafruit TCS34725 RGB Color Sensor and a photocell (LDR) with a 10k Ohm resistor forming a voltage divider connected to the Arduino's analog input A0. The RGB sensor is interfaced with the Arduino via I2C communication, using SDA and SCL lines. The purpose of this circuit is likely to measure ambient light intensity with the photocell and detect colors with the RGB sensor, both interfaced with the Arduino for processing and potential output of the sensor data.
Cirkit Designer LogoOpen Project in Cirkit Designer
Image of GuesturLED: A project utilizing Ambient Light Sensor (TEMT6000 Breakout Board) in a practical application
Arduino Nano Controlled Ambient Light Sensing and NeoPixel Display
This circuit features an Arduino Nano microcontroller interfaced with an APDS-9930 Proximity and Ambient Light Sensor for sensing environmental light and proximity. The Arduino Nano also controls an Adafruit Quarter 60 NeoPixel Ring, likely for visual feedback or display purposes. The sensor communicates with the Arduino via I2C (SDA and SCL connections), and the NeoPixel Ring is driven by a digital output (D8) from the Arduino.
Cirkit Designer LogoOpen Project in Cirkit Designer

Common Applications

  • Automatic brightness control in LCD and OLED displays
  • Energy-efficient lighting systems
  • Light intensity measurement in smart home devices
  • Robotics and environmental monitoring

Technical Specifications

The TEMT6000 Breakout Board is built around the TEMT6000 phototransistor, which is sensitive to visible light. Below are the key technical details:

Parameter Value
Operating Voltage 3.3V to 5V
Output Voltage Range 0V to Vcc (proportional to light)
Spectral Sensitivity 570 nm (peak sensitivity)
Current Consumption ~0.5 mA
Operating Temperature -40°C to +85°C
Dimensions 10 mm x 10 mm

Pin Configuration

The TEMT6000 Breakout Board has three pins, as described in the table below:

Pin Name Description
1 VCC Power supply pin (3.3V to 5V)
2 GND Ground connection
3 OUT Analog output voltage proportional to light intensity

Usage Instructions

Connecting the TEMT6000 to a Circuit

  1. Power the Sensor: Connect the VCC pin to a 3.3V or 5V power source and the GND pin to the ground of your circuit.
  2. Read the Output: Connect the OUT pin to an analog input pin of your microcontroller or ADC (Analog-to-Digital Converter). The output voltage will vary based on the ambient light intensity.

Important Considerations

  • Voltage Levels: Ensure the operating voltage matches the sensor's specifications (3.3V to 5V).
  • Placement: Place the sensor in an area where it can directly sense ambient light without obstructions.
  • Calibration: Depending on your application, you may need to calibrate the sensor to map its output voltage to specific light intensity levels (e.g., lux).

Example: Using the TEMT6000 with Arduino UNO

Below is an example of how to connect and read data from the TEMT6000 using an Arduino UNO:

Circuit Diagram

  • Connect VCC to the Arduino's 5V pin.
  • Connect GND to the Arduino's GND pin.
  • Connect OUT to the Arduino's analog input pin A0.

Arduino Code

// TEMT6000 Ambient Light Sensor Example
// Reads the analog output from the sensor and prints the value to the Serial Monitor.

const int sensorPin = A0; // Pin connected to the OUT pin of TEMT6000

void setup() {
  Serial.begin(9600); // Initialize serial communication at 9600 baud
}

void loop() {
  int sensorValue = analogRead(sensorPin); // Read the analog value from the sensor
  float voltage = sensorValue * (5.0 / 1023.0); // Convert to voltage (5V reference)
  
  // Print the raw sensor value and voltage to the Serial Monitor
  Serial.print("Sensor Value: ");
  Serial.print(sensorValue);
  Serial.print(" | Voltage: ");
  Serial.print(voltage);
  Serial.println(" V");
  
  delay(500); // Wait for 500ms before the next reading
}

Best Practices

  • Use a decoupling capacitor (e.g., 0.1 µF) between VCC and GND to reduce noise.
  • Avoid exposing the sensor to direct sunlight for extended periods, as it may affect its lifespan.
  • If using the sensor outdoors, consider adding a protective cover to shield it from dust and moisture.

Troubleshooting and FAQs

Common Issues

  1. No Output Voltage:

    • Check the power connections to ensure the sensor is receiving the correct voltage.
    • Verify that the OUT pin is properly connected to the microcontroller or ADC.
  2. Inconsistent Readings:

    • Ensure the sensor is not exposed to flickering light sources (e.g., fluorescent lights).
    • Add a capacitor to stabilize the power supply.
  3. Output Voltage Always High or Low:

    • Confirm that the sensor is not obstructed or placed in complete darkness.
    • Check for damage to the sensor or incorrect wiring.

FAQs

Q: Can the TEMT6000 detect infrared or UV light?
A: No, the TEMT6000 is designed to detect visible light and has peak sensitivity at 570 nm. It is not sensitive to infrared or ultraviolet light.

Q: How do I convert the sensor's output voltage to lux?
A: The TEMT6000 does not provide a direct lux reading. You can calibrate the sensor by measuring its output voltage under known light conditions and creating a conversion formula.

Q: Can I use the TEMT6000 with a 3.3V microcontroller?
A: Yes, the TEMT6000 operates at 3.3V to 5V, making it compatible with 3.3V microcontrollers like the ESP32 or Raspberry Pi Pico.

By following this documentation, you can effectively integrate the TEMT6000 Breakout Board into your projects and achieve reliable ambient light sensing.