How to Use GSR SENSOR: Examples, Pinouts, and Specs
Introduction
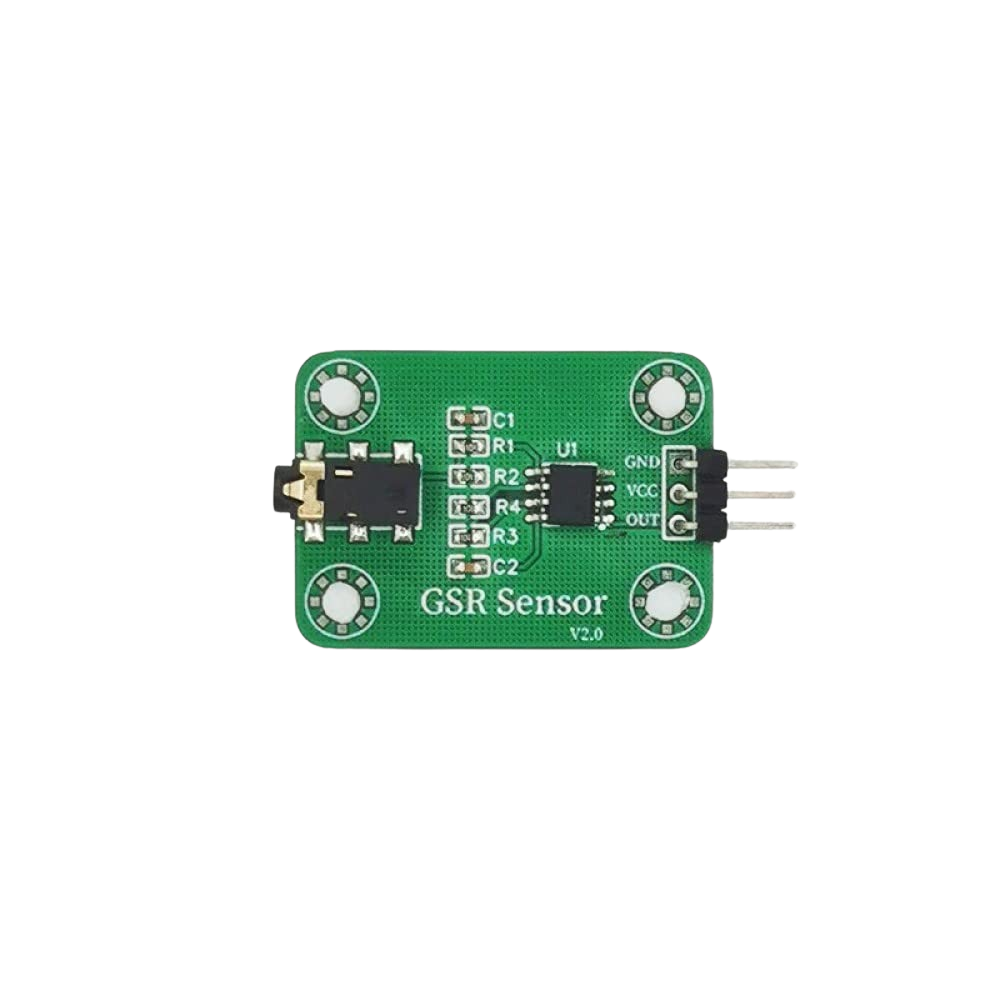
The GSR (Galvanic Skin Response) sensor is an electronic component that measures the electrical conductance of the skin, which varies with its moisture level. This variation is often a result of psychological or physiological arousal, making the GSR sensor a valuable tool in psychological studies, lie detection, and even for biofeedback purposes in mindfulness and stress management applications.
Explore Projects Built with GSR SENSOR
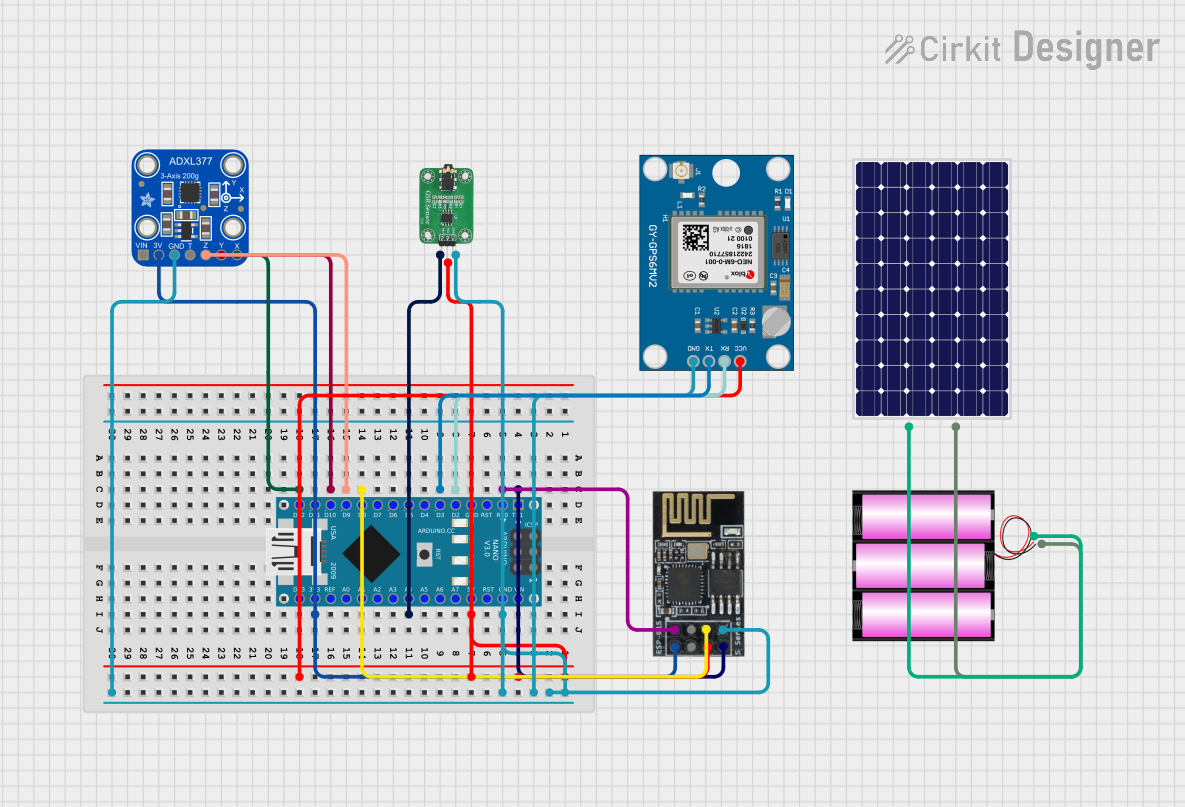


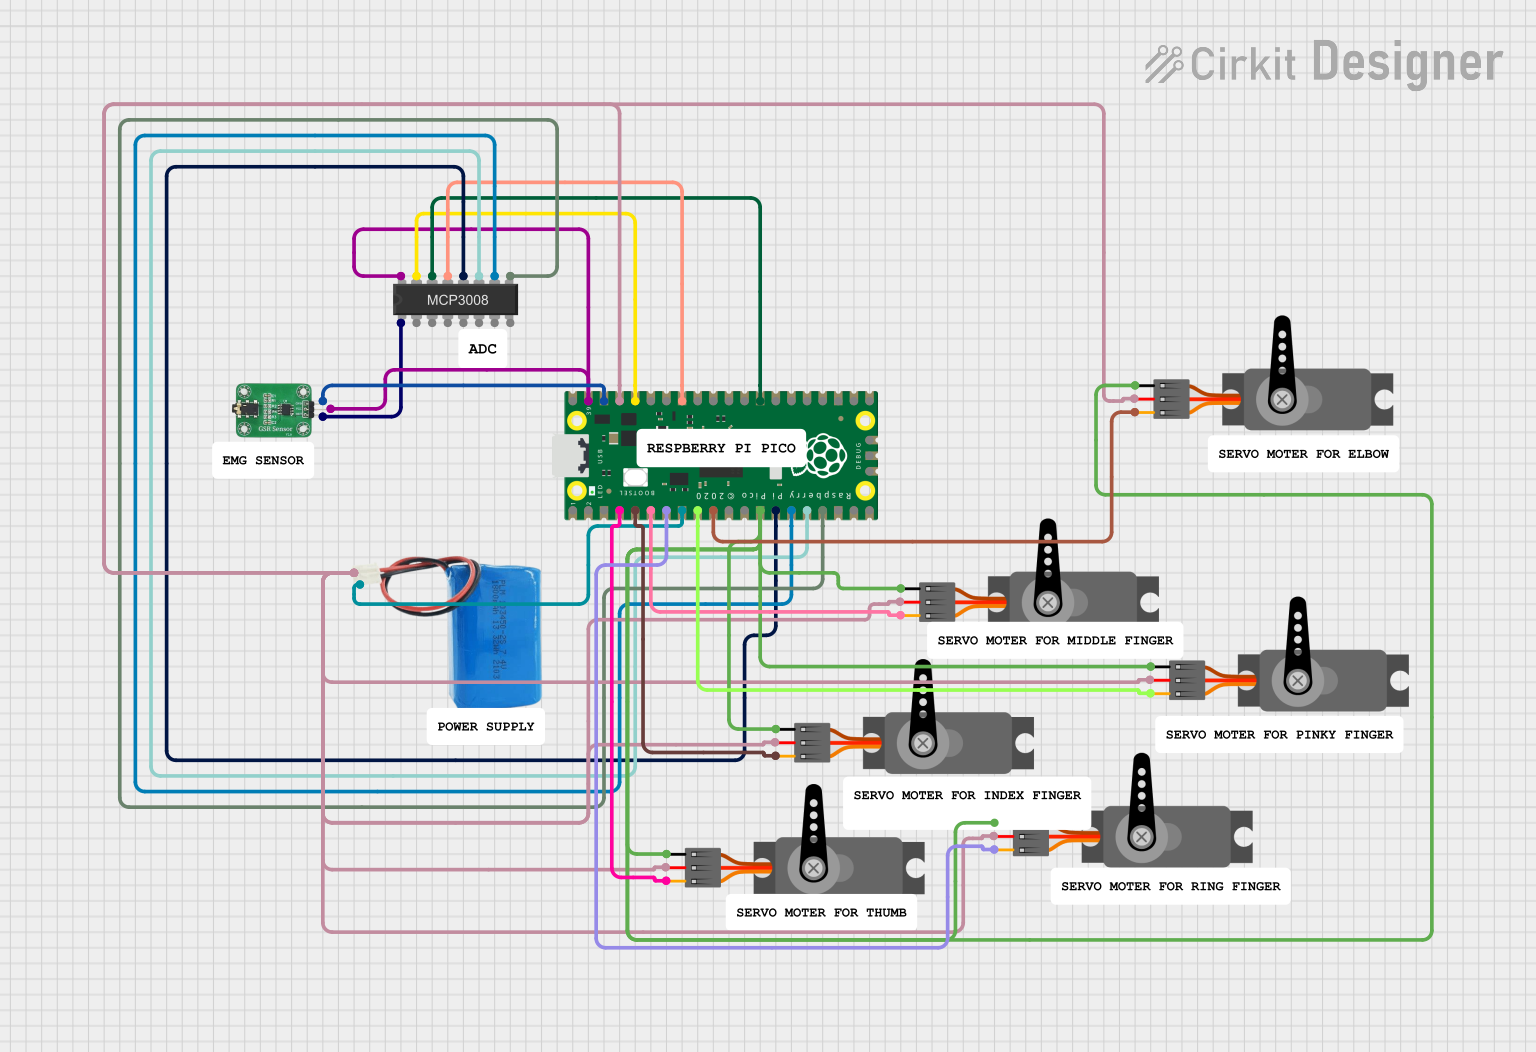
Explore Projects Built with GSR SENSOR
Technical Specifications
Key Technical Details
- Operating Voltage: Typically 3.3V to 5V
- Output Signal: Analog voltage corresponding to skin conductance
- Measurement Range: Varies with the design; some can detect minute changes
- Response Time: Depends on the sensor model and skin conditions
Pin Configuration and Descriptions
| Pin Number | Name | Description |
|---|---|---|
| 1 | VCC | Power supply (3.3V - 5V) |
| 2 | GND | Ground connection |
| 3 | SIG | Analog signal output |
Usage Instructions
Integration with a Circuit
- Connect the VCC pin to the power supply (3.3V or 5V, depending on your system).
- Connect the GND pin to the ground of your power supply.
- Connect the SIG pin to an analog input on your microcontroller, such as an Arduino.
Best Practices
- Ensure that the sensor is in firm contact with the skin for accurate readings.
- Avoid placing the sensor near areas that might induce artifacts, such as areas with excessive hair or near joints that might move frequently.
- Use a stable power supply to avoid noise in the signal.
- Allow the sensor to acclimatize to the skin's temperature for consistent readings.
Example Code for Arduino UNO
// Define the analog pin connected to the GSR sensor
const int GsrPin = A0;

void setup() {
  // Initialize serial communication at 9600 bits per second
  Serial.begin(9600);
}

void loop() {
  // Read the value from the GSR sensor
  int sensorValue = analogRead(GsrPin);

  // Convert the analog reading (which goes from 0 - 1023) to a voltage (0 - 5V)
  float voltage = sensorValue * (5.0 / 1023.0);

  // Print out the value in volts
  Serial.println(voltage);

  // Delay for a stable reading
  delay(500);
}
Troubleshooting and FAQs
Common Issues
- Inconsistent Readings: Ensure that the sensor maintains good contact with the skin and that the skin is clean.
- Noisy Signal: Check for loose connections and ensure a stable power supply. Additionally, consider using a low-pass filter to smooth out the signal.
Solutions and Tips
- Improving Contact: Use conductive gel or water to improve the sensor's contact with the skin.
- Signal Processing: Implement software filtering techniques to reduce noise and improve the quality of the signal.
FAQs
Q: Can the GSR sensor be used with a battery-powered system? A: Yes, as long as the battery provides a stable voltage within the sensor's operating range.
Q: How sensitive is the GSR sensor? A: Sensitivity varies by model. Some sensors can detect very small changes in skin conductance, while others may require larger changes.
Q: Is the GSR sensor safe to use? A: Yes, GSR sensors are designed for safe contact with the skin and operate at low voltages.
Q: How do I calibrate the GSR sensor? A: Calibration procedures vary. Some sensors require calibration against known resistances, while others are used in a relative measurement mode without specific calibration.
Q: Can I use the GSR sensor with other microcontrollers besides Arduino? A: Yes, any microcontroller with an analog input can be used with the GSR sensor, but you will need to adapt the code accordingly.