How to Use waveshare: Examples, Pinouts, and Specs
Introduction
Waveshare is a renowned manufacturer of electronic components and development boards, widely recognized for its high-quality displays, sensors, and modules. The Waveshare Display is a versatile component designed for use in DIY electronics, prototyping, and embedded systems. It supports a variety of interfaces and resolutions, making it suitable for applications such as graphical user interfaces (GUIs), data visualization, and educational projects.
Explore Projects Built with waveshare
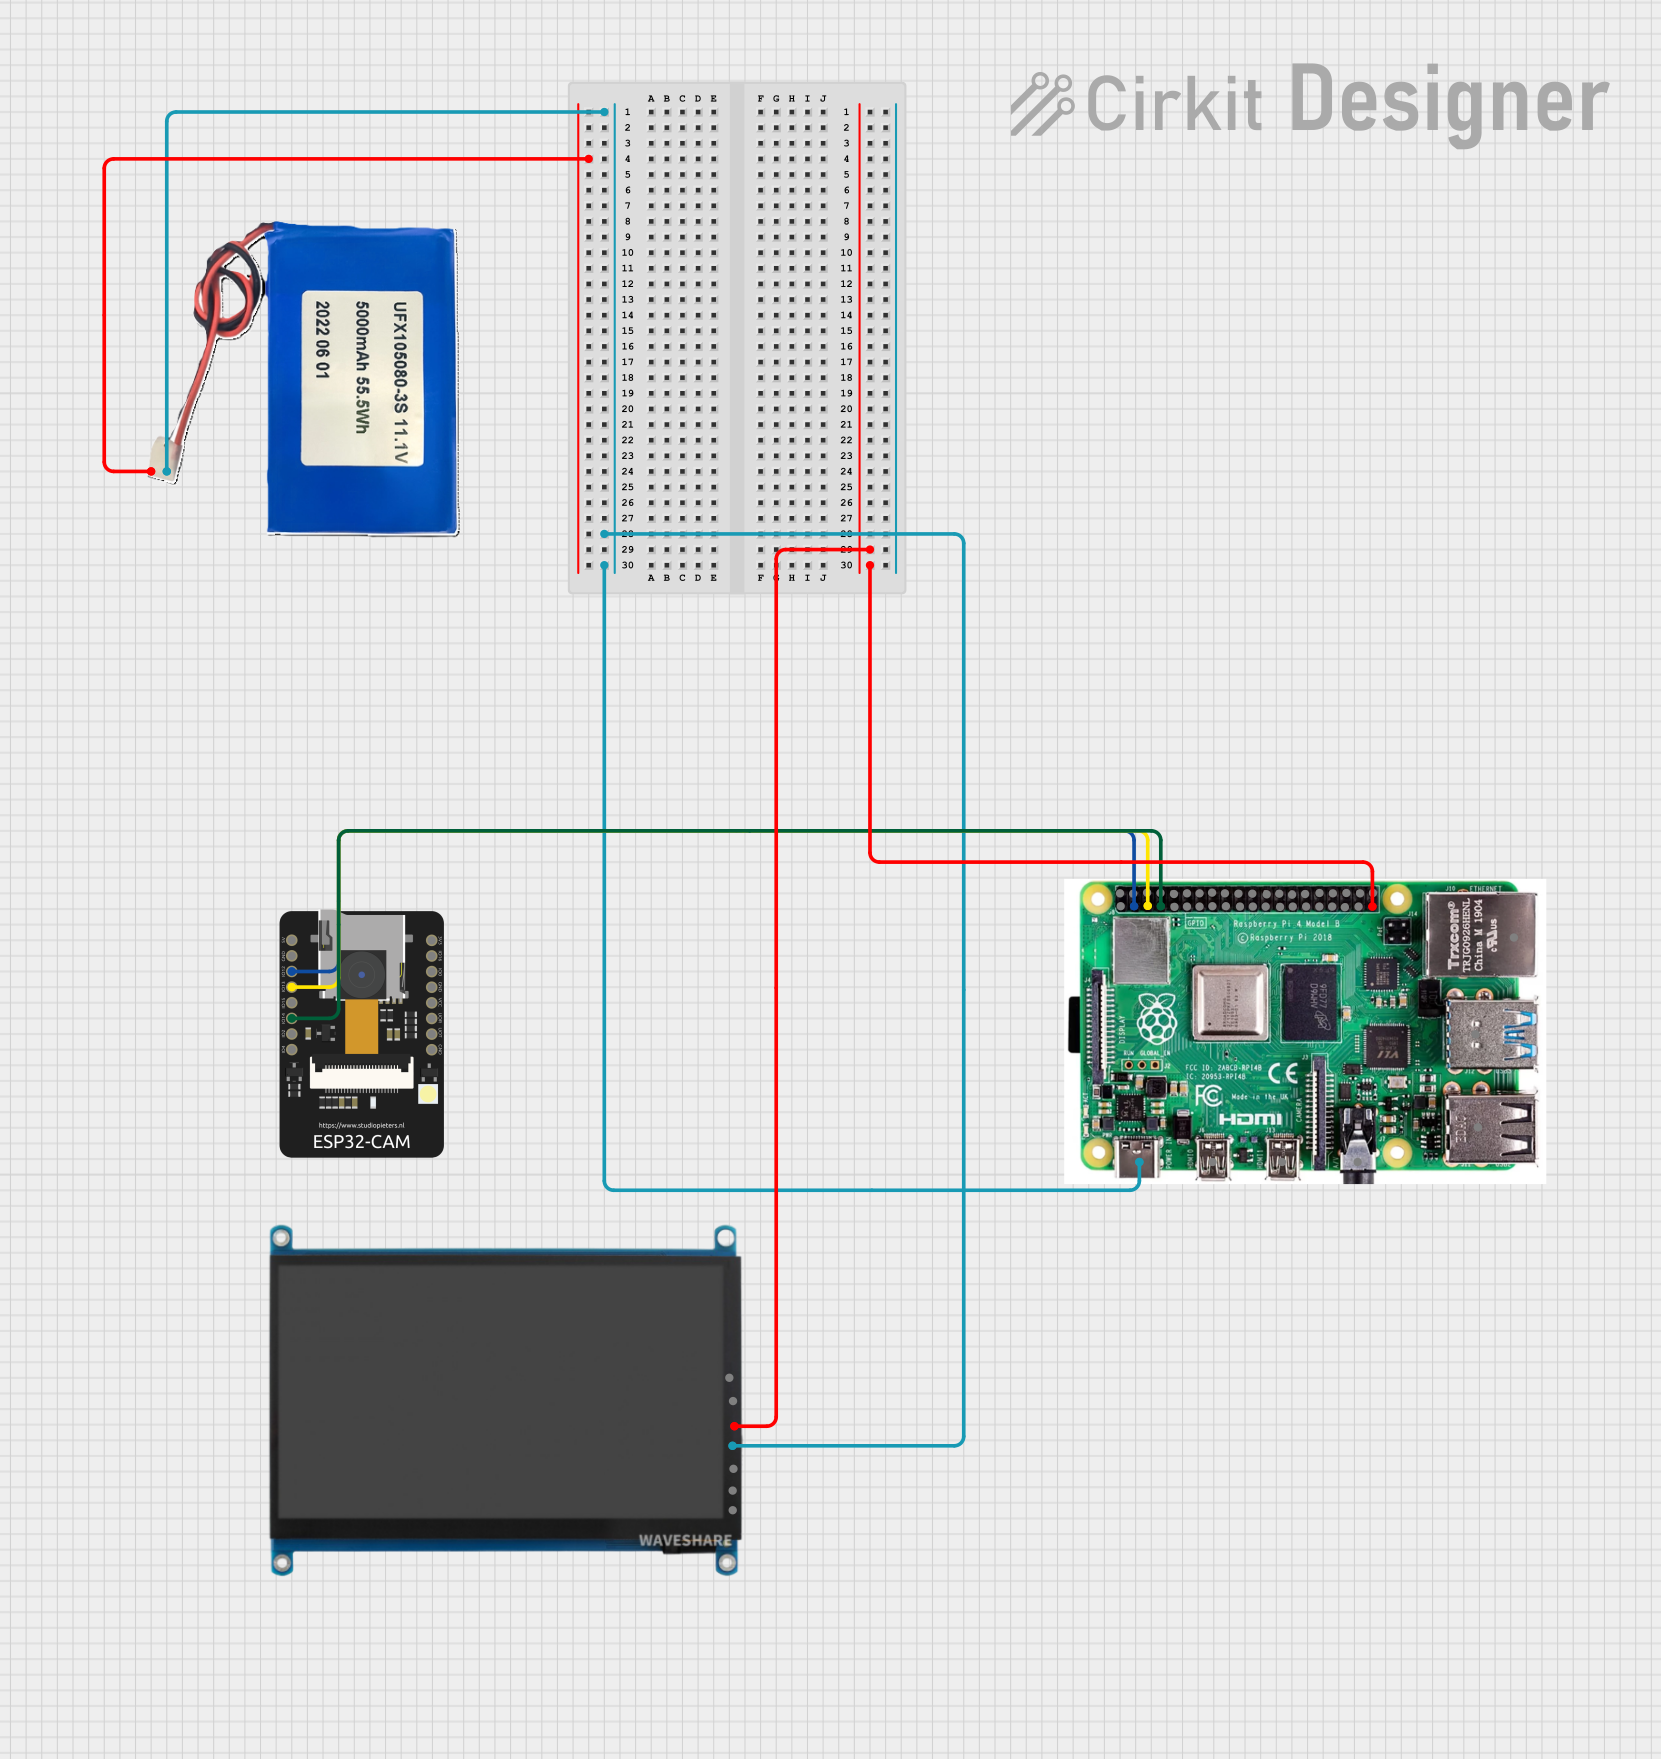
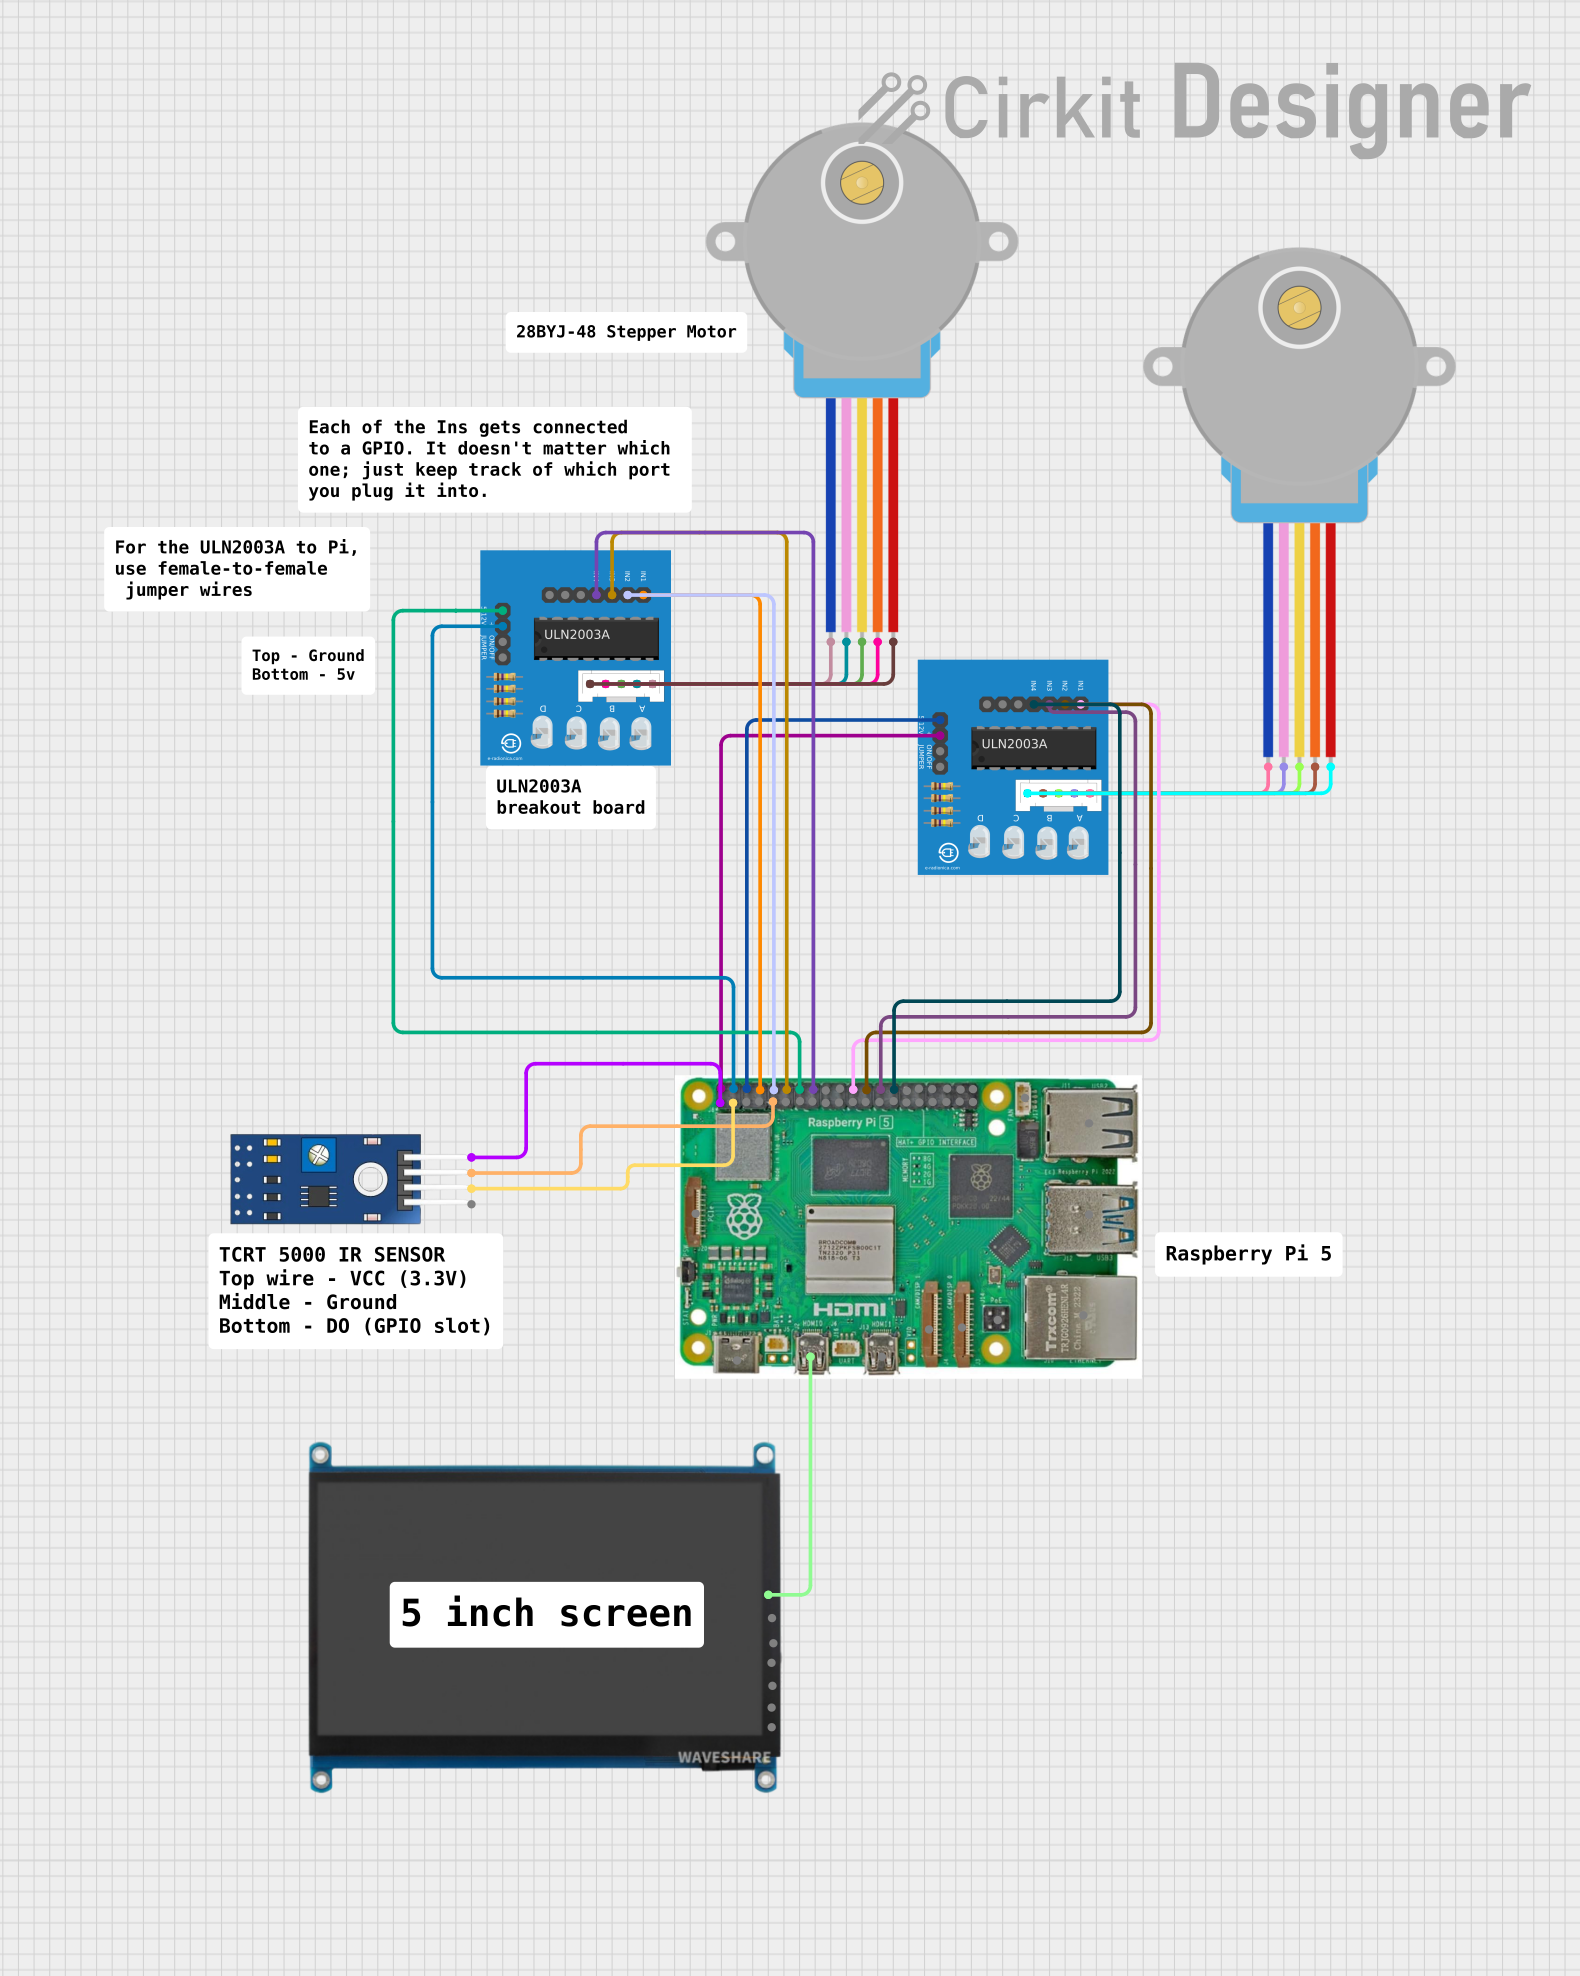

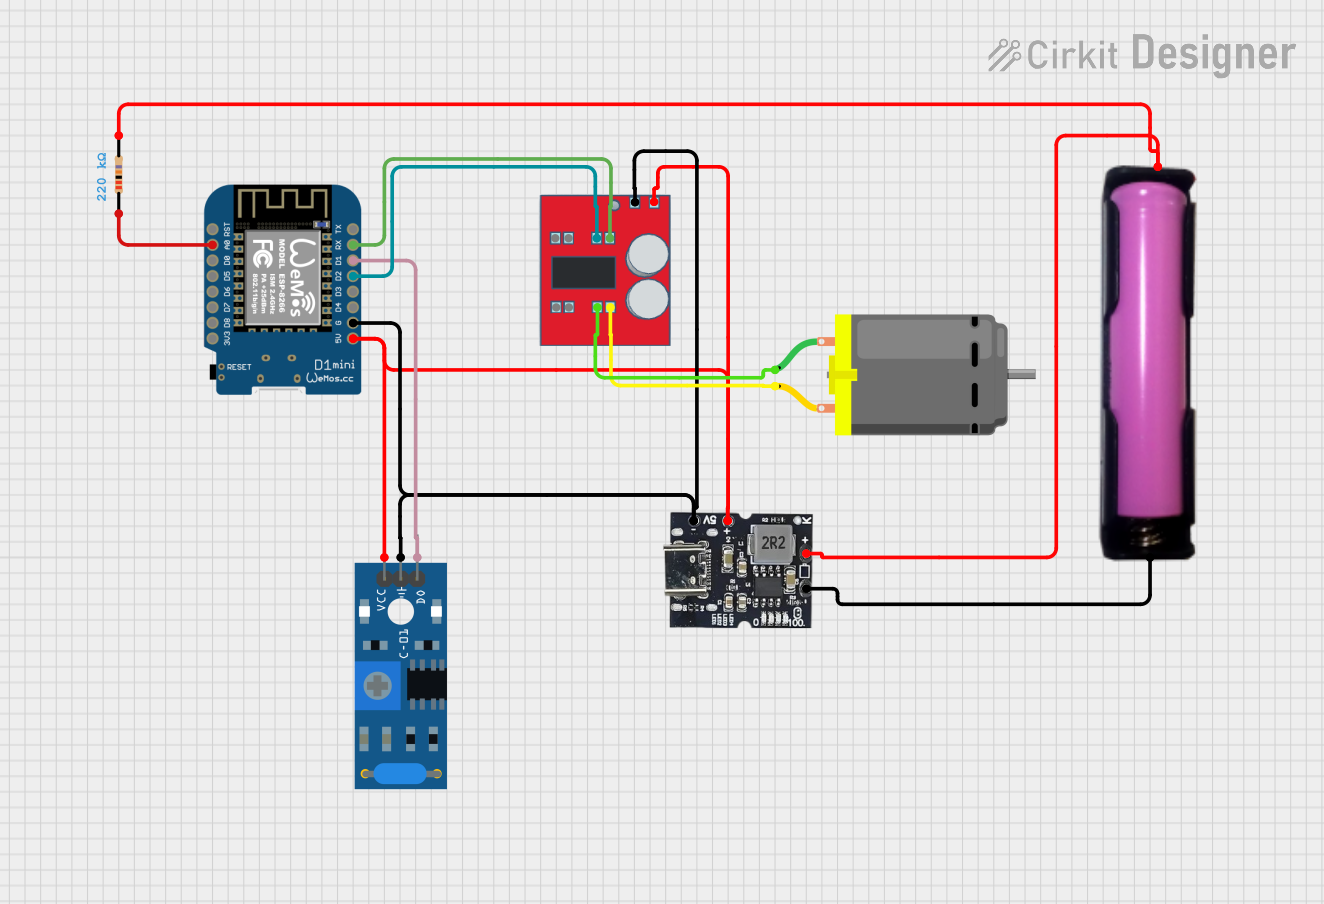
Explore Projects Built with waveshare
Common Applications and Use Cases
- Embedded systems and IoT projects
- Prototyping graphical interfaces
- Educational tools for learning electronics and programming
- Data visualization in industrial or personal projects
- Integration with microcontrollers like Arduino, Raspberry Pi, and STM32
Technical Specifications
Below are the key technical details for the Waveshare Display:
General Specifications
- Manufacturer: Waveshare
- Part ID: Display
- Display Type: LCD, e-Paper, or OLED (varies by model)
- Resolution: Up to 800x480 pixels (depending on the model)
- Interface: SPI, I2C, or Parallel (model-dependent)
- Operating Voltage: 3.3V or 5V (check specific model)
- Power Consumption: Typically < 1W (varies by model)
- Dimensions: Varies by model (e.g., 2.13", 4.3", 7")
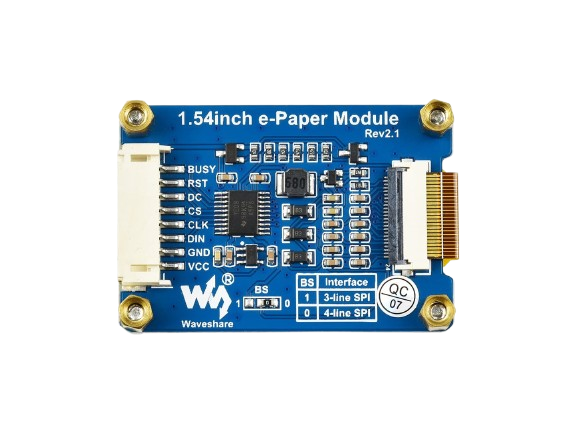
Pin Configuration and Descriptions
The pin configuration may vary depending on the specific Waveshare Display model. Below is an example pinout for a typical SPI-based Waveshare Display:
| Pin | Name | Description |
|---|---|---|
| 1 | VCC | Power supply input (3.3V or 5V, depending on the model). |
| 2 | GND | Ground connection. |
| 3 | DIN/MOSI | Data input for SPI communication. |
| 4 | CLK/SCK | Clock input for SPI communication. |
| 5 | CS | Chip Select pin to enable communication with the display. |
| 6 | DC | Data/Command control pin (high for data, low for command). |
| 7 | RST | Reset pin to initialize the display. |
| 8 | BUSY | Busy signal output (used in e-Paper displays to indicate processing). |
For I2C-based displays, the pinout typically includes SDA (data line) and SCL (clock line) instead of SPI pins.
Usage Instructions
How to Use the Component in a Circuit
- Power Supply: Connect the VCC pin to a 3.3V or 5V power source (as specified for your model) and GND to the ground.
- Communication Interface: Depending on the display model, connect the appropriate pins for SPI, I2C, or Parallel communication to your microcontroller.
- Initialization: Use the appropriate library or driver for your microcontroller to initialize and control the display.
- Data Transmission: Send commands and data to the display using the communication protocol supported by your model.
Important Considerations and Best Practices
- Voltage Compatibility: Ensure the display's operating voltage matches your microcontroller's logic level (e.g., 3.3V or 5V).
- Library Support: Use the official Waveshare libraries or compatible open-source libraries for your microcontroller platform.
- Connection Stability: Use short, secure connections to avoid signal degradation, especially for high-speed SPI communication.
- Avoid Static Damage: Handle the display carefully to prevent damage from electrostatic discharge (ESD).
Example: Connecting to an Arduino UNO
Below is an example of how to connect and use a Waveshare SPI-based display with an Arduino UNO:
Wiring
| Waveshare Display Pin | Arduino UNO Pin |
|---|---|
| VCC | 5V |
| GND | GND |
| DIN/MOSI | D11 |
| CLK/SCK | D13 |
| CS | D10 |
| DC | D9 |
| RST | D8 |
Arduino Code
#include <SPI.h>
#include <Adafruit_GFX.h>  // Graphics library
#include <Waveshare_Display.h>  // Replace with the specific library for your display

#define CS_PIN 10  // Chip Select pin
#define DC_PIN 9   // Data/Command pin
#define RST_PIN 8  // Reset pin

// Initialize the display object
Waveshare_Display display(CS_PIN, DC_PIN, RST_PIN);

void setup() {
  // Initialize serial communication for debugging
  Serial.begin(9600);
  Serial.println("Initializing display...");

  // Initialize the display
  if (!display.begin()) {
    Serial.println("Display initialization failed!");
    while (1);  // Halt execution if initialization fails
  }

  Serial.println("Display initialized successfully!");

  // Clear the display and set text properties
  display.clearDisplay();
  display.setTextSize(2);  // Set text size
  display.setTextColor(WHITE);  // Set text color
  display.setCursor(0, 0);  // Set cursor position

  // Display a message
  display.print("Hello, Waveshare!");
  display.display();  // Update the display
}

void loop() {
  // Add your main code here
}
Troubleshooting and FAQs
Common Issues and Solutions
Display Not Turning On:
- Verify the power supply voltage and connections.
- Check for loose or incorrect wiring.
No Output on the Display:
- Ensure the correct communication protocol (SPI/I2C) is selected in the code.
- Verify that the library is compatible with your display model.
Flickering or Unstable Display:
- Use shorter wires to reduce noise in the communication lines.
- Add decoupling capacitors near the power pins to stabilize the voltage.
Library Errors:
- Ensure the library is installed correctly and matches your display model.
- Update the library to the latest version.
FAQs
Q: Can I use the Waveshare Display with a Raspberry Pi?
A: Yes, Waveshare provides libraries and tutorials for using their displays with Raspberry Pi.
Q: How do I know if my display is SPI or I2C?
A: Check the product documentation or look for labels on the PCB near the pins.
Q: Can I power the display directly from a 5V source?
A: Most Waveshare displays support 5V input, but confirm the specifications for your specific model.
Q: Is the display compatible with 3.3V logic microcontrollers?
A: Yes, many Waveshare displays are compatible with 3.3V logic. Check the datasheet for details.