How to Use LAMP: Examples, Pinouts, and Specs

Introduction
A lamp is an electronic component that produces light when an electrical current passes through it. Lamps are widely used in various applications ranging from simple indicator lights to complex lighting systems. They can be found in residential, commercial, and industrial settings, serving purposes such as illumination, signaling, and decoration.
Explore Projects Built with LAMP
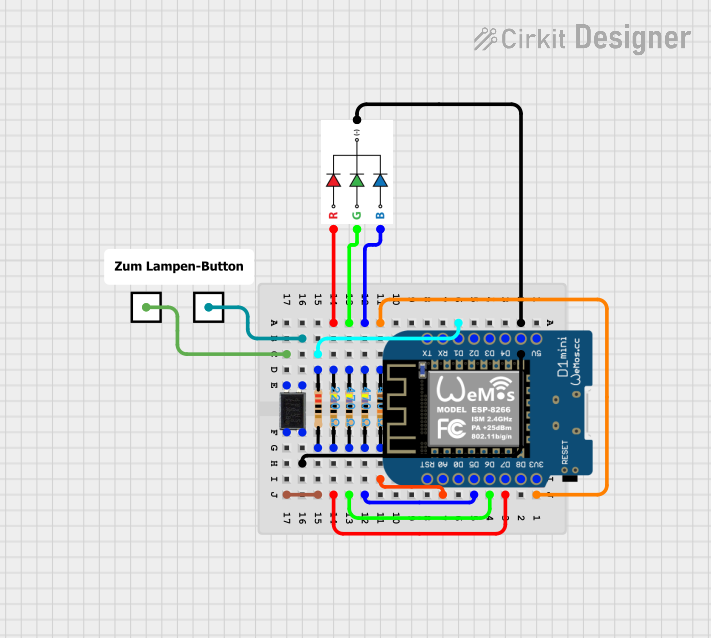

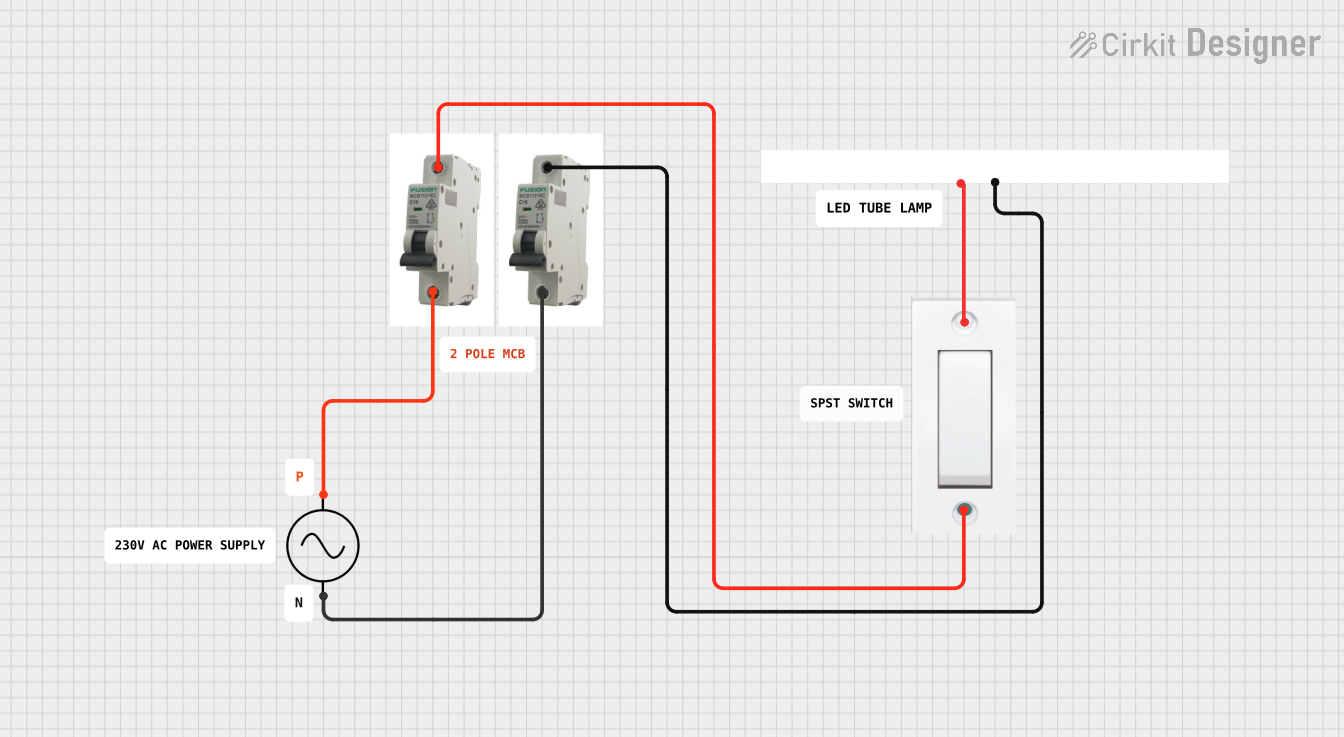
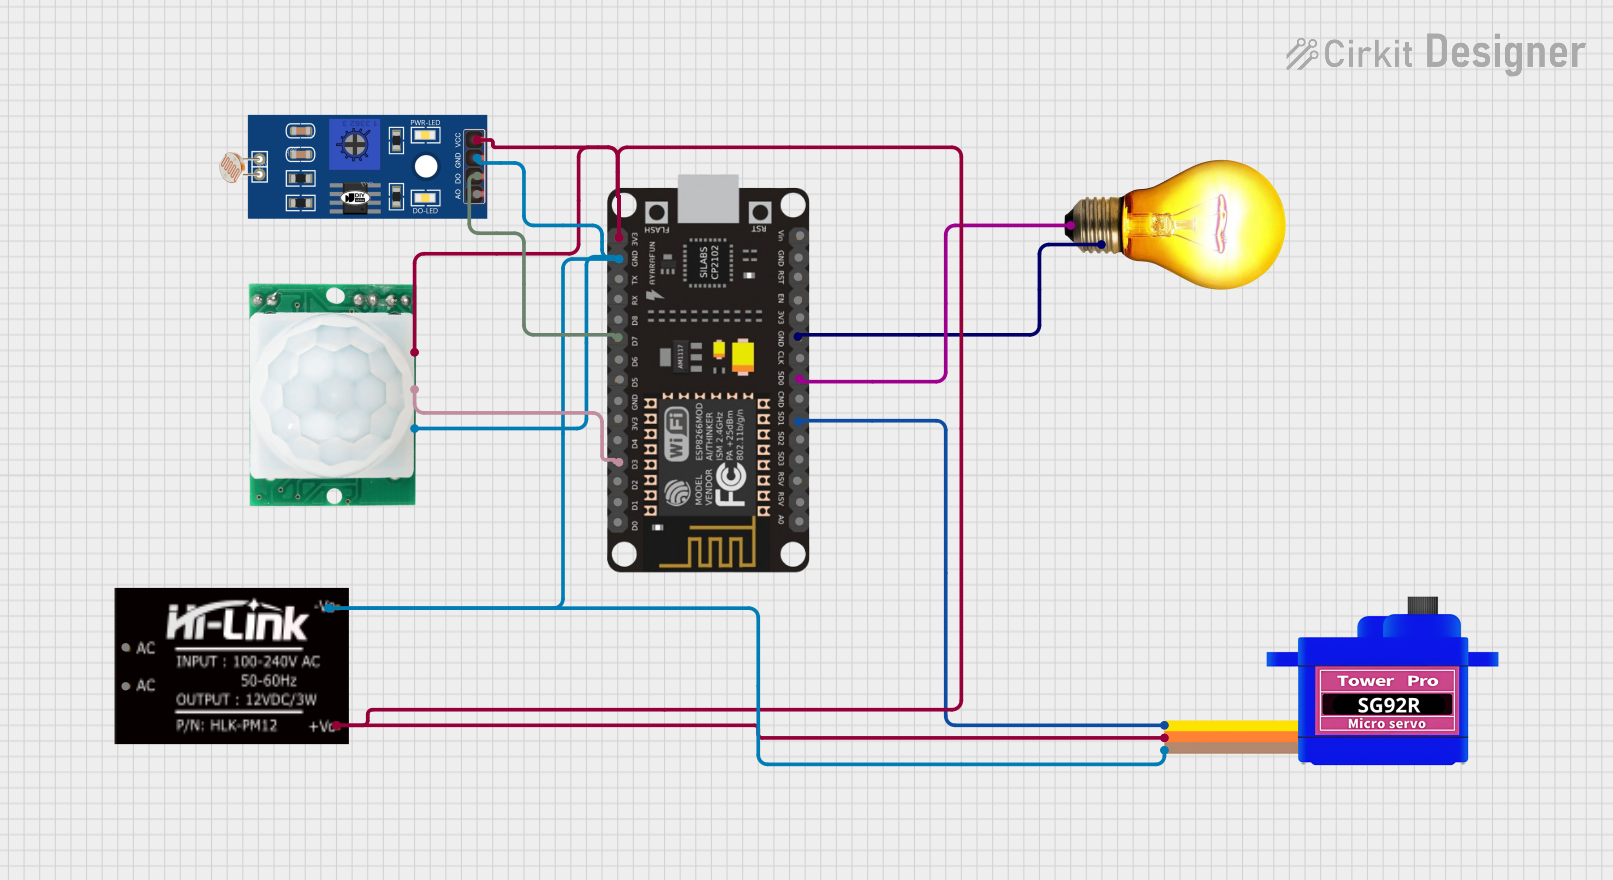
Explore Projects Built with LAMP
Technical Specifications
Key Technical Details
- Voltage Rating: The voltage rating of a lamp determines the electrical potential difference required for optimal operation. Common voltage ratings include 3V, 5V, 12V, and 120/240V for household lamps.
- Current Rating: This specifies the amount of current the lamp will draw at its rated voltage. Typical current ratings can range from a few milliamperes (mA) for small LEDs to several amperes (A) for high-power lamps.
- Power Rating: Defined in watts (W), this is the product of the voltage and current ratings, indicating the power consumption of the lamp.
- Luminous Flux: Measured in lumens (lm), this indicates the amount of light emitted by the lamp.
- Color Temperature: Expressed in Kelvin (K), this specifies the color appearance of the light, ranging from warm (yellowish) to cool (bluish) tones.
- Lifespan: The expected operational life of the lamp, typically given in hours.
Pin Configuration and Descriptions
| Pin Number | Description |
|---|---|
| 1 | Anode (+) |
| 2 | Cathode (-) |
Note: The pin configuration may vary for different types of lamps, such as LED, incandescent, or fluorescent. The above table is a general representation for a simple two-pin LED lamp.
Usage Instructions
How to Use the Lamp in a Circuit
- Identify the Voltage Requirements: Ensure the lamp's voltage rating matches the supply voltage.
- Connect to Power Source: Connect the anode (positive) pin to the positive terminal of the power source, and the cathode (negative) pin to the negative terminal.
- Current Limiting: For LED lamps, always use a current-limiting resistor in series to prevent excessive current flow that could damage the lamp.
- Switching: Incorporate a switch to control the on/off state of the lamp.
Important Considerations and Best Practices
- Heat Management: Some high-power lamps generate significant heat. Provide adequate ventilation or heat sinks to dissipate heat.
- Dimming: If dimming is required, use compatible dimmer circuits or pulse-width modulation (PWM) for LEDs.
- Safety: For high-voltage lamps, follow electrical safety standards to prevent shock hazards.
Example Circuit with Arduino UNO
// Example code to control a 5V LED lamp with an Arduino UNO

const int lampPin = 13; // Connect the LED lamp to pin 13

void setup() {
  pinMode(lampPin, OUTPUT); // Set the lamp pin as an output
}

void loop() {
  digitalWrite(lampPin, HIGH); // Turn on the lamp
  delay(1000);                 // Wait for 1 second
  digitalWrite(lampPin, LOW);  // Turn off the lamp
  delay(1000);                 // Wait for 1 second
}
Note: Ensure to use a current-limiting resistor (e.g., 220 ohms) in series with the LED lamp when connecting to the Arduino.
Troubleshooting and FAQs
Common Issues
- Lamp Does Not Light Up: Check the power supply and connections. Ensure the polarity is correct for LEDs.
- Flickering Lamp: This may indicate a loose connection or an incompatible dimmer switch.
- Dim Light Output: The voltage may be too low, or the lamp may be nearing the end of its lifespan.
Solutions and Tips for Troubleshooting
- Verify Connections: Double-check all connections for proper contact and polarity.
- Test with Another Lamp: Replace the lamp with another to determine if the issue is with the lamp or the circuit.
- Measure Voltage and Current: Use a multimeter to ensure the voltage and current are within the lamp's specifications.
FAQs
Q: Can I use a higher voltage rating lamp than my power supply? A: No, using a lamp with a higher voltage rating than the power supply can result in dim light or no light at all.
Q: How do I choose the right current-limiting resistor for an LED lamp? A: Calculate the resistor value using Ohm's law: R = (V_supply - V_LED) / I_LED, where V_supply is the supply voltage, V_LED is the forward voltage of the LED, and I_LED is the forward current.
Q: Is it safe to touch a lamp while it's on? A: For low-voltage, low-power lamps like LEDs, it is generally safe. However, for high-voltage or high-power lamps, it is not recommended due to the risk of burns or electric shock. Always turn off the power before handling.
This documentation provides a comprehensive guide to using a lamp in electronic circuits. Always follow safety guidelines and manufacturer specifications to ensure proper operation and longevity of the lamp.