Cirkit Designer Logo
Cirkit Designer
Your all-in-one circuit design IDE
Home / 
Component Documentation

How to Use 4 x AAA Battery Mount: Examples, Pinouts, and Specs

Image of 4 x AAA Battery Mount
Cirkit Designer LogoDesign with 4 x AAA Battery Mount in Cirkit Designer

Introduction

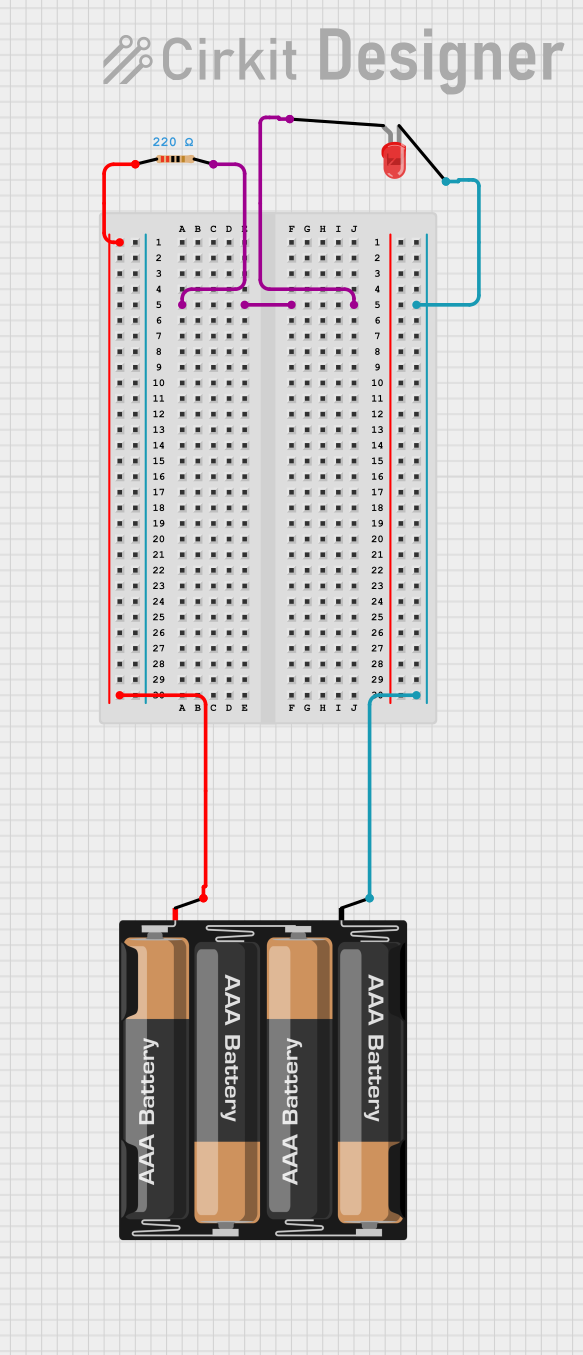
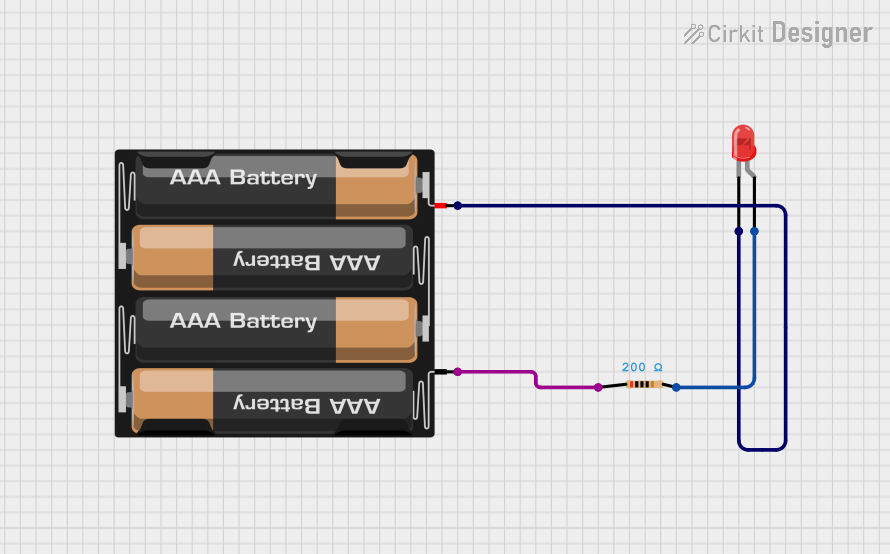
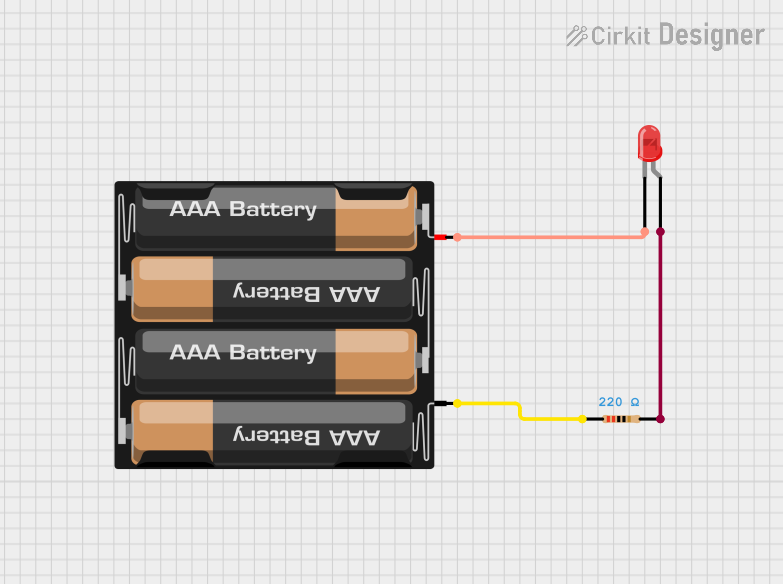
The 4 x AAA Battery Mount is a practical and reliable power source component designed to hold four AAA batteries in series. This battery holder is commonly used in portable electronic projects and devices that require a nominal voltage of 6V. It is an essential component for hobbyists, educators, and professionals who need a compact and easy-to-use power solution for their projects.

Explore Projects Built with 4 x AAA Battery Mount

Use Cirkit Designer to design, explore, and prototype these projects online. Some projects support real-time simulation. Click "Open Project" to start designing instantly!
Battery-Powered LED Circuit with Resistor
Image of Project 1: Glowing LED: A project utilizing 4 x AAA Battery Mount in a practical application
This circuit consists of a 4 x AAA battery mount powering a red LED through a 220-ohm resistor. The resistor limits the current flowing through the LED, which is connected in series with the battery pack to ensure safe operation and prevent damage to the LED.
Cirkit Designer LogoOpen Project in Cirkit Designer
Simple Battery-Powered LED Circuit
Image of Coding Assignment 2: A project utilizing 4 x AAA Battery Mount in a practical application
This is a basic LED circuit with a series resistor for current limiting. It is powered by a 4 x AAA battery mount, with the resistor ensuring that the LED operates within safe current levels to prevent damage.
Cirkit Designer LogoOpen Project in Cirkit Designer
Simple Battery-Powered LED Circuit
Image of Coding and Robotics activity 2: A project utilizing 4 x AAA Battery Mount in a practical application
This circuit is a simple LED lighting circuit powered by a 4 x AAA battery mount. The LED's anode is connected to the positive terminal of the battery through a 220 Ohm resistor, which limits the current to protect the LED. The cathode of the LED is connected directly to the negative terminal of the battery, completing the circuit and allowing the LED to light up when the battery is connected.
Cirkit Designer LogoOpen Project in Cirkit Designer
Simple Battery-Powered Red LED Circuit
Image of cirkit designer project2 : A project utilizing 4 x AAA Battery Mount in a practical application
This circuit is a simple LED driver consisting of a red LED, a resistor, and a 4 x AAA battery mount. The resistor is in series with the LED, limiting the current to prevent damage to the LED. The battery provides the power source, with the negative terminal connected to one end of the resistor and the positive terminal connected to the anode of the LED.
Cirkit Designer LogoOpen Project in Cirkit Designer

Explore Projects Built with 4 x AAA Battery Mount

Use Cirkit Designer to design, explore, and prototype these projects online. Some projects support real-time simulation. Click "Open Project" to start designing instantly!
Image of Project 1: Glowing LED: A project utilizing 4 x AAA Battery Mount in a practical application
Battery-Powered LED Circuit with Resistor
This circuit consists of a 4 x AAA battery mount powering a red LED through a 220-ohm resistor. The resistor limits the current flowing through the LED, which is connected in series with the battery pack to ensure safe operation and prevent damage to the LED.
Cirkit Designer LogoOpen Project in Cirkit Designer
Image of Coding Assignment 2: A project utilizing 4 x AAA Battery Mount in a practical application
Simple Battery-Powered LED Circuit
This is a basic LED circuit with a series resistor for current limiting. It is powered by a 4 x AAA battery mount, with the resistor ensuring that the LED operates within safe current levels to prevent damage.
Cirkit Designer LogoOpen Project in Cirkit Designer
Image of Coding and Robotics activity 2: A project utilizing 4 x AAA Battery Mount in a practical application
Simple Battery-Powered LED Circuit
This circuit is a simple LED lighting circuit powered by a 4 x AAA battery mount. The LED's anode is connected to the positive terminal of the battery through a 220 Ohm resistor, which limits the current to protect the LED. The cathode of the LED is connected directly to the negative terminal of the battery, completing the circuit and allowing the LED to light up when the battery is connected.
Cirkit Designer LogoOpen Project in Cirkit Designer
Image of cirkit designer project2 : A project utilizing 4 x AAA Battery Mount in a practical application
Simple Battery-Powered Red LED Circuit
This circuit is a simple LED driver consisting of a red LED, a resistor, and a 4 x AAA battery mount. The resistor is in series with the LED, limiting the current to prevent damage to the LED. The battery provides the power source, with the negative terminal connected to one end of the resistor and the positive terminal connected to the anode of the LED.
Cirkit Designer LogoOpen Project in Cirkit Designer

Common Applications and Use Cases

  • Portable electronic devices
  • DIY projects and educational kits
  • Small robotics
  • Remote controls
  • Handheld games
  • LED lighting systems

Technical Specifications

Key Technical Details

  • Nominal Voltage: 6V (1.5V per AAA battery)
  • Maximum Recommended Current: Varies based on the battery specifications
  • Material: Typically plastic casing with metal contacts
  • Battery Compatibility: Standard AAA size batteries (alkaline, NiMH, NiCd, etc.)

Pin Configuration and Descriptions

Pin Name Description
V+ Positive voltage output terminal
V- Negative voltage output terminal

Usage Instructions

How to Use the Component in a Circuit

  1. Inserting Batteries:

    • Ensure the AAA batteries are inserted with the correct polarity. The positive end of the battery should align with the positive (+) marking on the holder, and the negative end with the negative (-) marking.
  2. Connecting to a Circuit:

    • Use the leads from the battery mount to connect to your circuit. The red wire is typically the positive (V+) and the black wire is the negative (V-).
    • Secure the connections using a breadboard, terminal blocks, or soldering, depending on your project's requirements.
  3. Powering an Arduino UNO:

    • Although an Arduino UNO typically operates at 5V, it can be powered with 6V through the Vin pin.
    • Connect the V+ from the battery mount to the Vin pin on the Arduino UNO.
    • Connect the V- from the battery mount to one of the GND pins on the Arduino UNO.

Important Considerations and Best Practices

  • Do not exceed the recommended current draw for the batteries used.
  • Check the polarity of the batteries before inserting them to prevent damage to the battery mount and your circuit.
  • Remove batteries from the holder when not in use to prevent leakage and corrosion.
  • Ensure that the battery holder is securely mounted in your project to prevent disconnections or short circuits.

Troubleshooting and FAQs

Common Issues Users Might Face

  • Device not powering on: Check the battery orientation and ensure that the connections are secure.
  • Low power output: Ensure that the batteries are fresh and check for any signs of corrosion on the contacts.
  • Intermittent power: Inspect the wires and solder joints for any loose connections or breaks.

Solutions and Tips for Troubleshooting

  • Always test the battery voltage before use to ensure they are providing sufficient power.
  • Clean the battery contacts with a dry cloth if corrosion is present.
  • If using rechargeable batteries, make sure they are fully charged before use.

FAQs

Q: Can I use rechargeable AAA batteries with this mount? A: Yes, rechargeable AAA batteries such as NiMH or NiCd can be used.

Q: What is the maximum current the battery mount can handle? A: The maximum current is dependent on the batteries used. Refer to the specifications of the batteries for current ratings.

Q: Can I use this battery mount to power a 5V device? A: Yes, but it is recommended to use a voltage regulator to ensure the device receives a stable 5V supply.

Q: How do I know when to replace the batteries? A: When the device powered by the batteries starts to perform poorly or stops working, it's time to check and possibly replace the batteries.

Q: Is it safe to leave batteries in the mount for extended periods? A: It is not recommended to leave batteries in the mount for extended periods when not in use, as this can lead to leakage and damage to the mount.