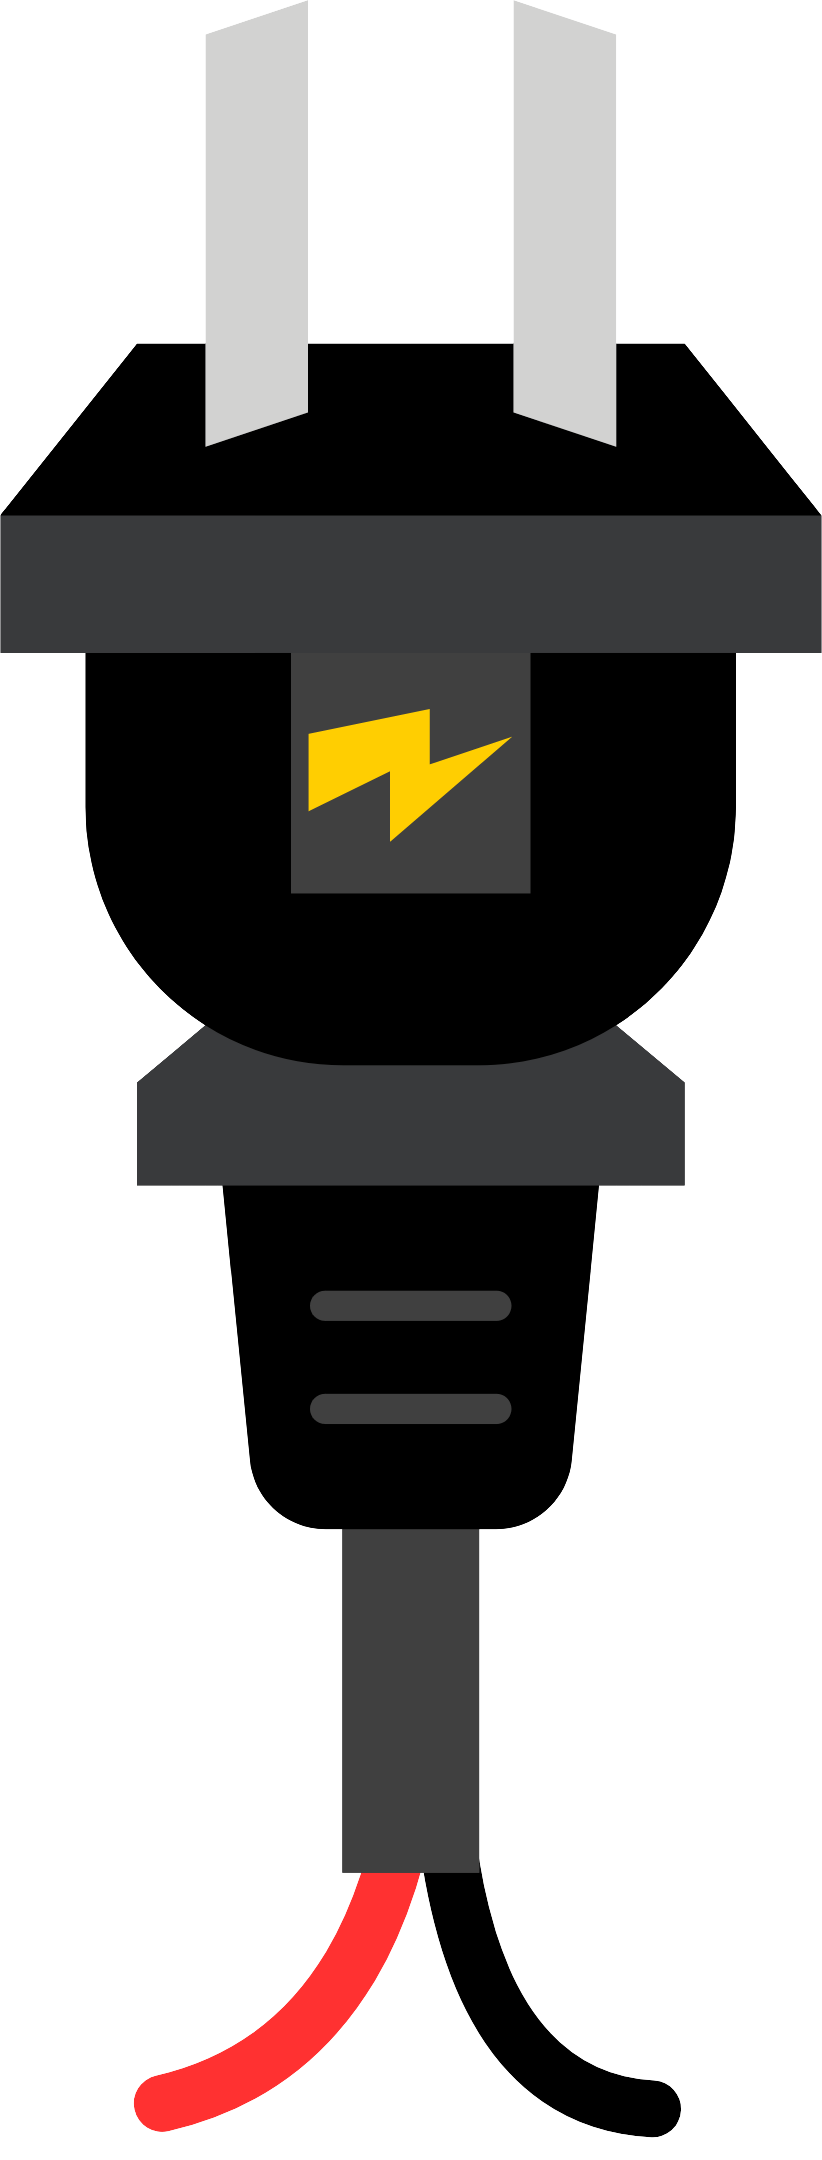
How to Use AC Source (left): Examples, Pinouts, and Specs
Introduction
An alternating current (AC) source provides a voltage that varies sinusoidally with time. It is a fundamental component in electrical and electronic systems, commonly used to power AC circuits. The "AC Source (Left)" refers to a specific representation of an AC power supply in circuit diagrams, where the sinusoidal waveform is depicted on the left side of the symbol. This component is essential for simulating or delivering AC power in various applications.
Explore Projects Built with AC Source (left)
Explore Projects Built with AC Source (left)
Common Applications and Use Cases
- Powering household appliances and industrial equipment
- Testing and simulating AC circuits in laboratories
- Driving transformers and motors
- Providing input for rectifiers and AC-DC converters
Technical Specifications
Below are the key technical details for a standard AC source:
| Parameter | Value |
|---|---|
| Voltage Range | 110V to 240V RMS (typical) |
| Frequency Range | 50 Hz or 60 Hz (region-dependent) |
| Waveform Type | Sinusoidal |
| Power Output | Varies based on application |
| Phase Configuration | Single-phase or three-phase |
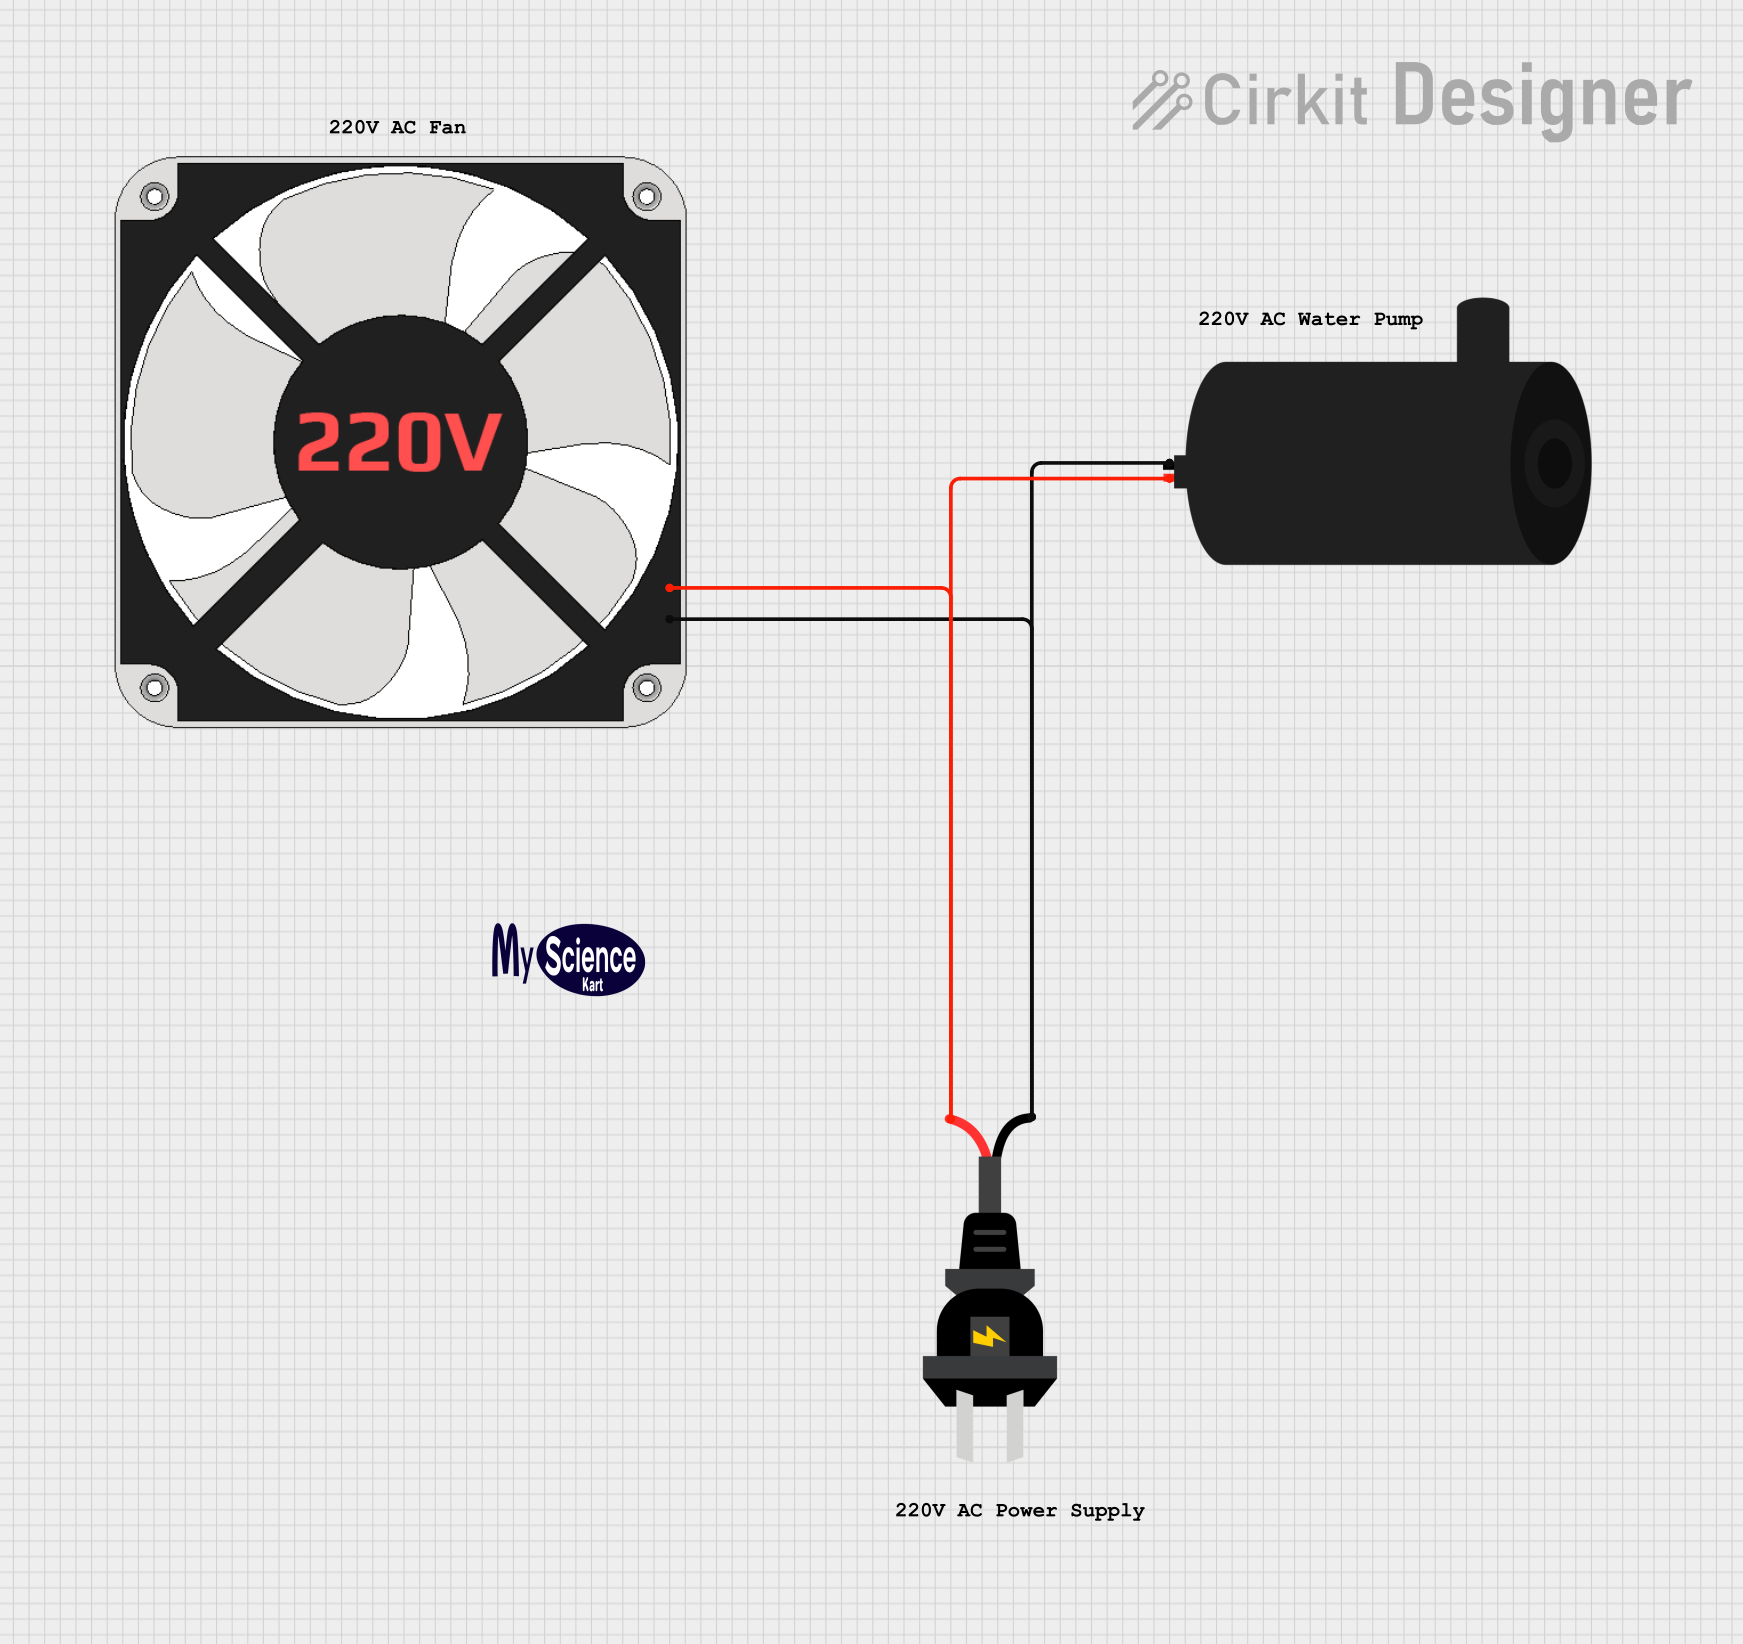
Pin Configuration and Descriptions
The AC source typically has two or three terminals, depending on the configuration:
| Pin | Name | Description |
|---|---|---|
| 1 | Live (L) | Provides the alternating voltage; connects to the live wire in AC systems. |
| 2 | Neutral (N) | Completes the circuit; connects to the neutral wire in AC systems. |
| 3 | Ground (G) | (Optional) Safety ground connection to prevent electric shock and equipment damage. |
Usage Instructions
How to Use the AC Source in a Circuit
Connect the Terminals:
- Connect the "Live" terminal to the input of the circuit or device you wish to power.
- Connect the "Neutral" terminal to the return path of the circuit.
- If available, connect the "Ground" terminal to the earth ground for safety.
Verify Voltage and Frequency:
- Ensure the voltage and frequency of the AC source match the requirements of your circuit or device.
Use Proper Safety Measures:
- Always handle AC sources with care, as they can be hazardous.
- Use insulated tools and avoid direct contact with live terminals.
Power On the Source:
- Once all connections are secure, turn on the AC source to supply power to the circuit.
Important Considerations and Best Practices
- Isolation: Use an isolation transformer when working with high-voltage AC sources to protect yourself and sensitive equipment.
- Load Compatibility: Ensure the connected load does not exceed the power rating of the AC source.
- Fuse Protection: Include a fuse or circuit breaker in the circuit to prevent damage from overcurrent conditions.
- Polarity: While AC does not have fixed polarity, ensure proper wiring to avoid potential issues with connected devices.
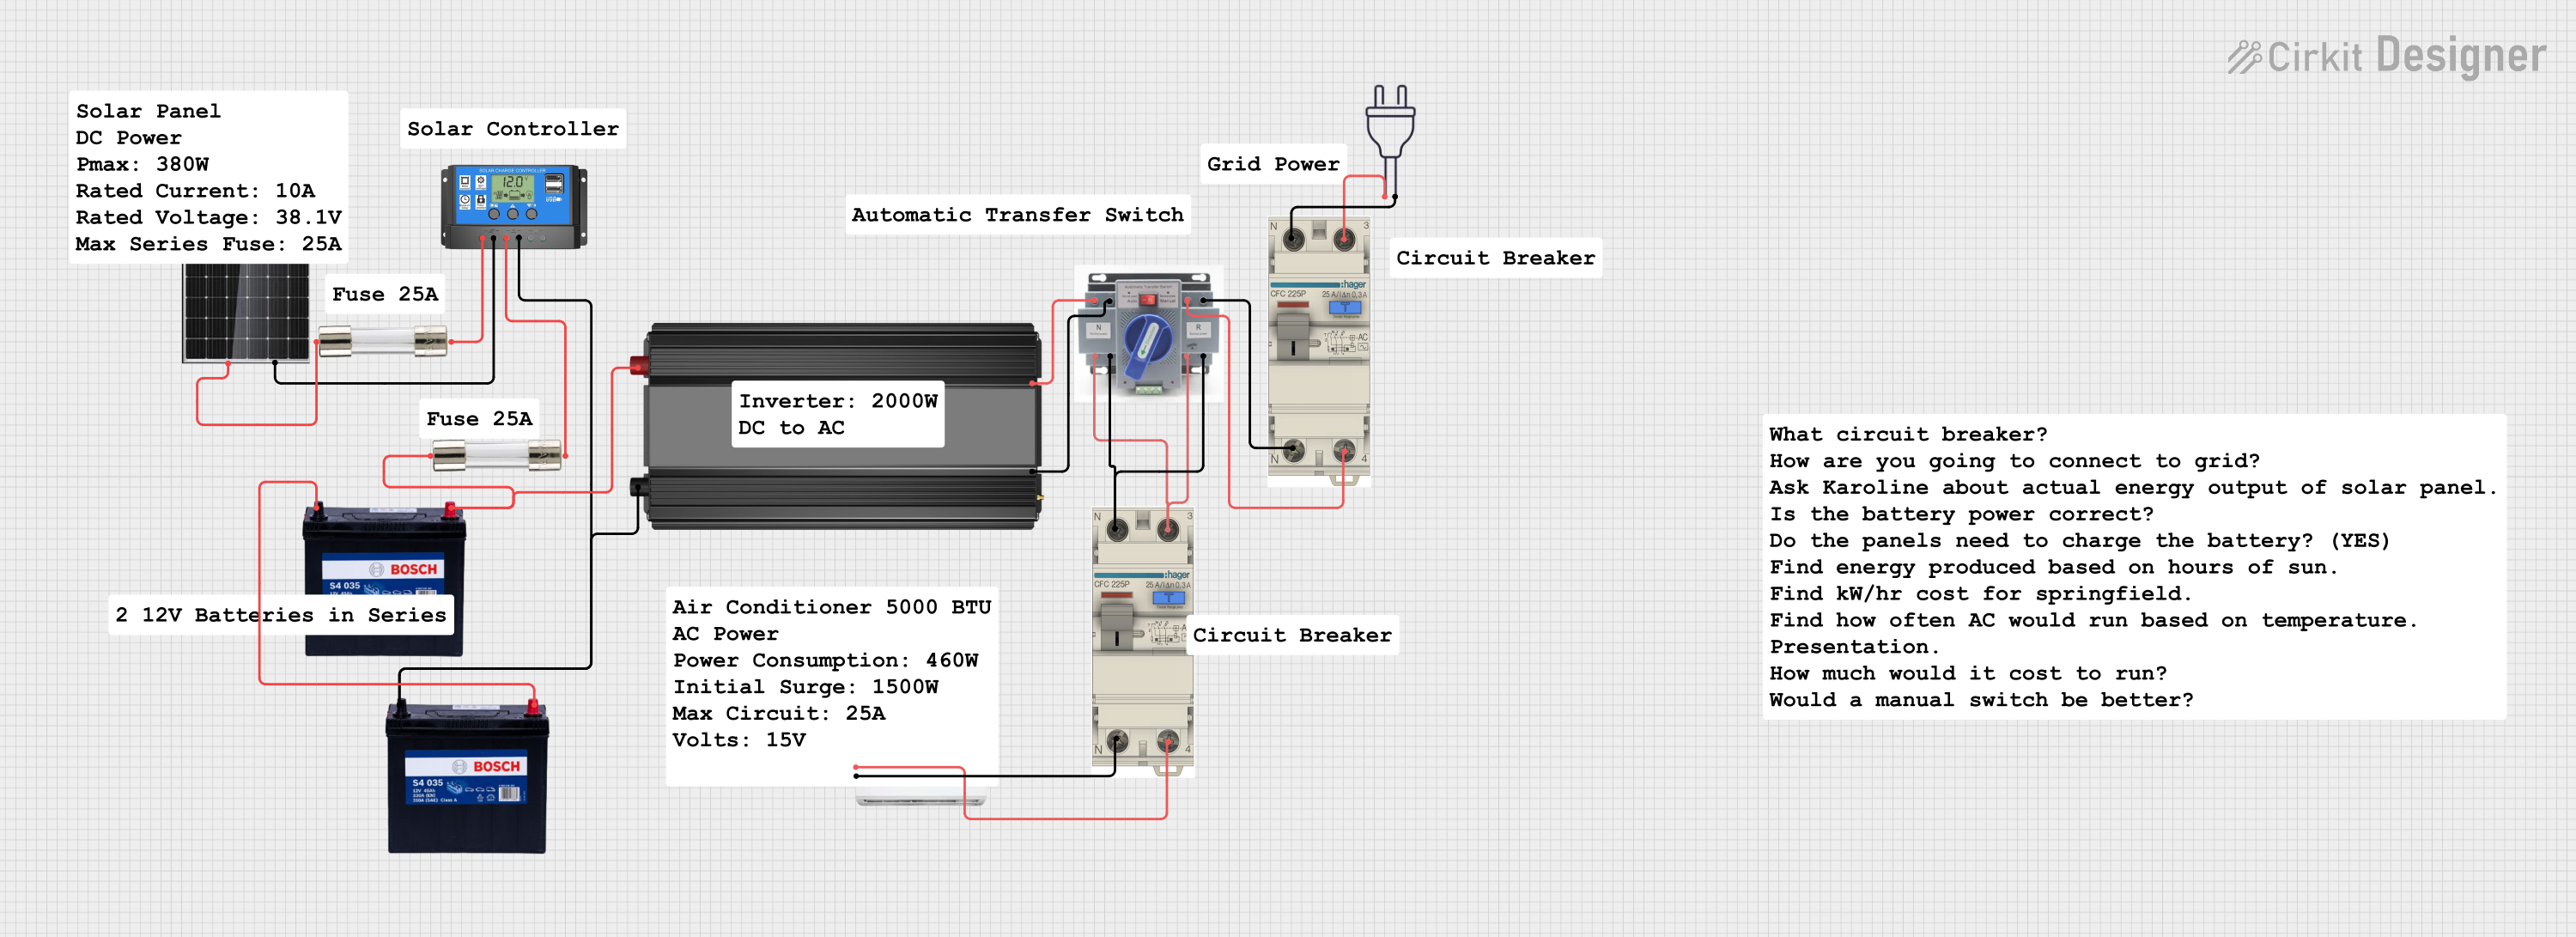
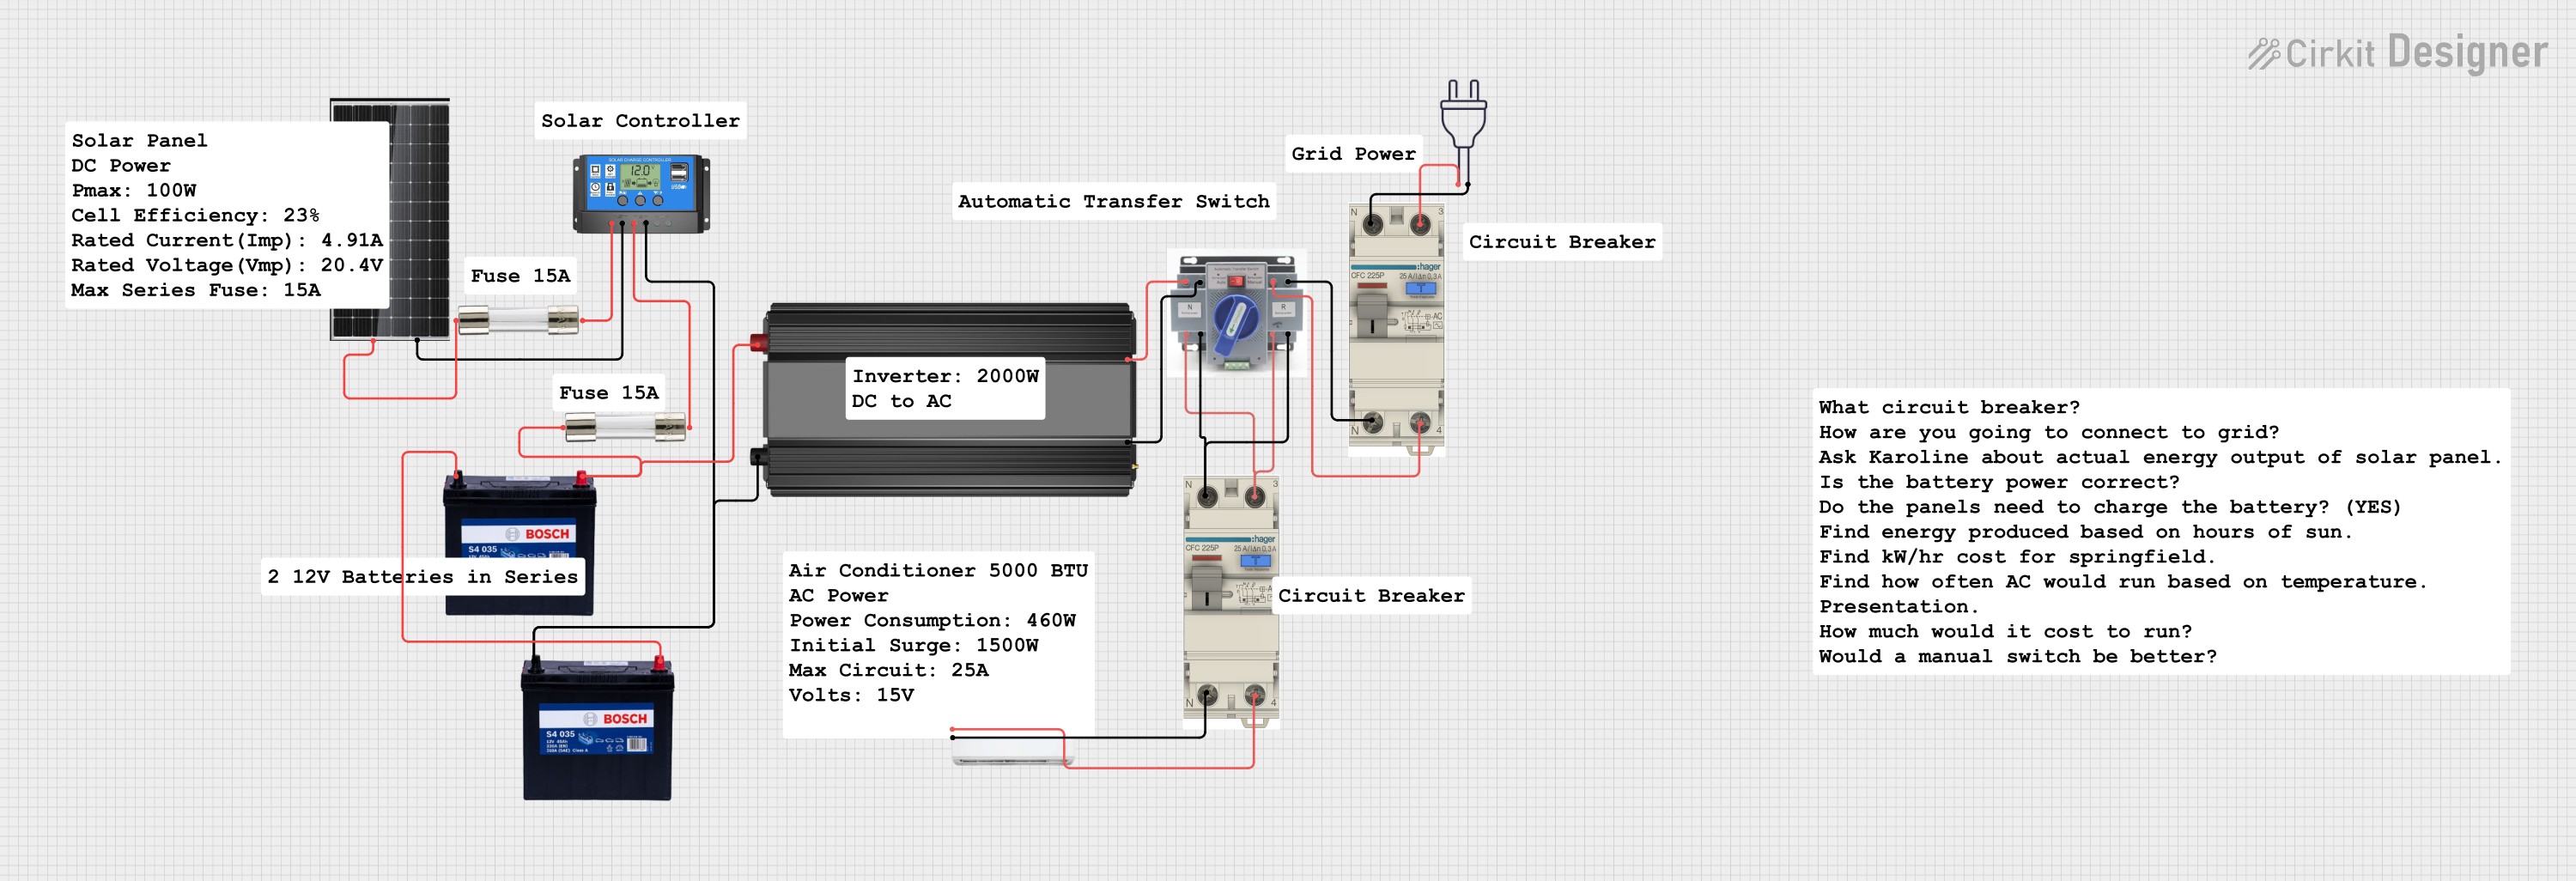
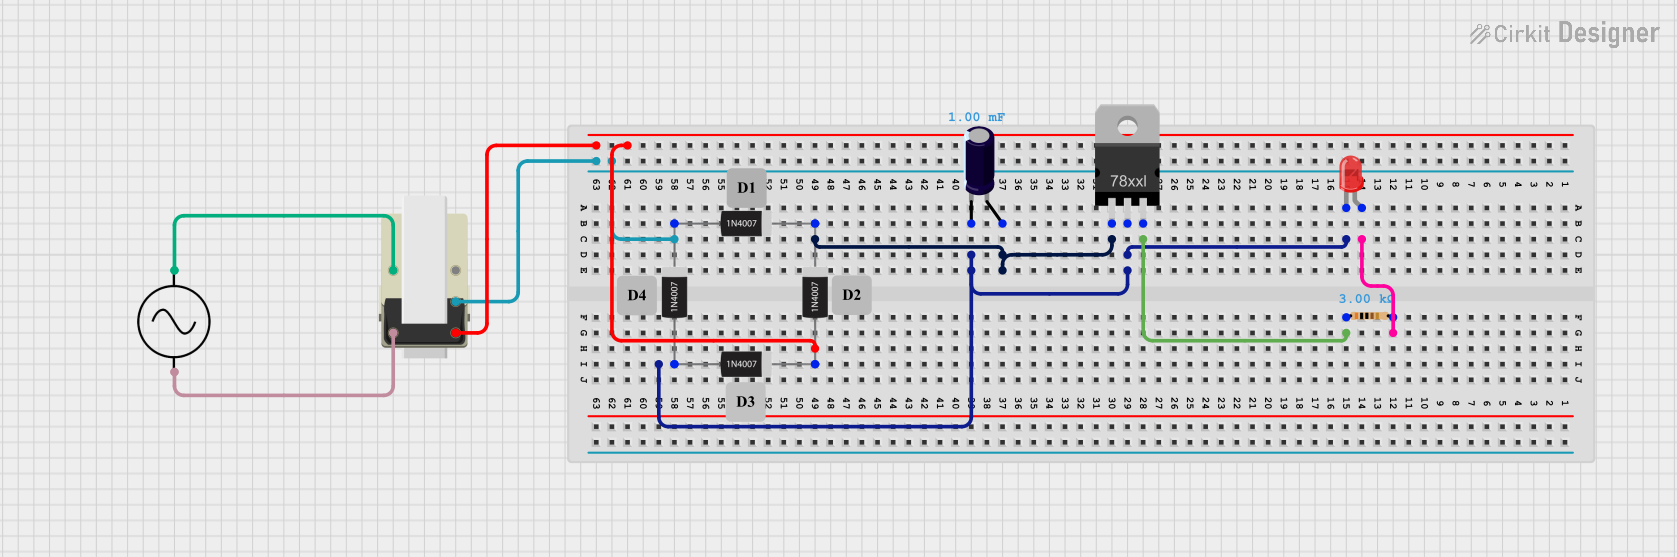
Example: Using an AC Source with an Arduino UNO
While the Arduino UNO operates on DC power, an AC source can be used in conjunction with a rectifier and voltage regulator to provide the required DC voltage. Below is an example of how to use an AC source to power an Arduino UNO indirectly:
Circuit Setup
- Connect the AC source to a bridge rectifier to convert AC to DC.
- Use a capacitor to smooth the rectified DC voltage.
- Add a voltage regulator (e.g., 7805) to provide a stable 5V output for the Arduino UNO.
Arduino Code Example
// Example code for Arduino UNO powered indirectly by an AC source
// This code blinks an LED connected to pin 13

void setup() {
  pinMode(13, OUTPUT); // Set pin 13 as an output pin
}

void loop() {
  digitalWrite(13, HIGH); // Turn the LED on
  delay(1000);            // Wait for 1 second
  digitalWrite(13, LOW);  // Turn the LED off
  delay(1000);            // Wait for 1 second
}
Note: Ensure the rectified and regulated DC voltage is within the Arduino UNO's input voltage range (7-12V recommended for the barrel jack).
Troubleshooting and FAQs
Common Issues Users Might Face
No Output Voltage:
- Cause: Loose or incorrect connections.
- Solution: Verify all connections and ensure the AC source is powered on.
Circuit Overheating:
- Cause: Load exceeds the power rating of the AC source.
- Solution: Reduce the load or use an AC source with a higher power rating.
Device Not Functioning Properly:
- Cause: Incorrect voltage or frequency.
- Solution: Check the voltage and frequency of the AC source and match it to the device's requirements.
Electric Shock Hazard:
- Cause: Improper grounding or exposed live wires.
- Solution: Ensure proper grounding and use insulated wires.
FAQs
Q: Can I use an AC source to directly power a DC device?
- A: No, you must first convert the AC voltage to DC using a rectifier and voltage regulator.
Q: What safety precautions should I take when using an AC source?
- A: Always use insulated tools, avoid direct contact with live terminals, and ensure proper grounding.
Q: How do I determine the correct voltage and frequency for my application?
- A: Refer to the specifications of your device or circuit to ensure compatibility with the AC source.
Q: Can I use an AC source with an Arduino UNO?
- A: Indirectly, yes. Use a rectifier and voltage regulator to convert the AC voltage to a suitable DC voltage for the Arduino UNO.
By following this documentation, users can safely and effectively utilize an AC source in their projects and applications.