How to Use SparkFun Load Cell Amplifier - HX711: Examples, Pinouts, and Specs
Introduction
The SparkFun Load Cell Amplifier - HX711 is a small breakout board designed to interface directly with load cells. Load cells are transducers that convert force into an electrical signal, and the HX711 is a precision 24-bit analog-to-digital converter (ADC) designed for weigh scales and industrial control applications to interface directly with a bridge sensor. This module is ideal for applications such as measuring weight, creating scales, and industrial process control where accurate weight measurements are required.
Explore Projects Built with SparkFun Load Cell Amplifier - HX711
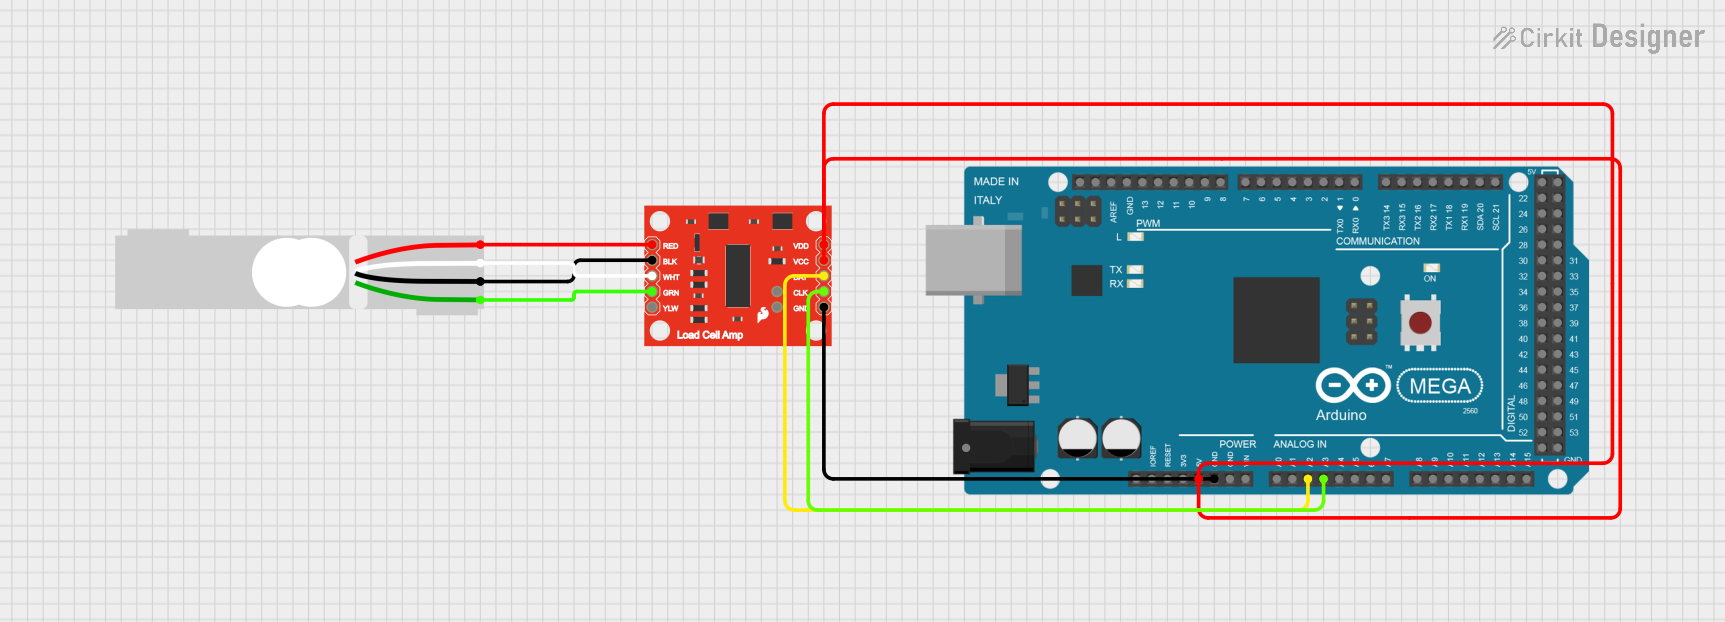
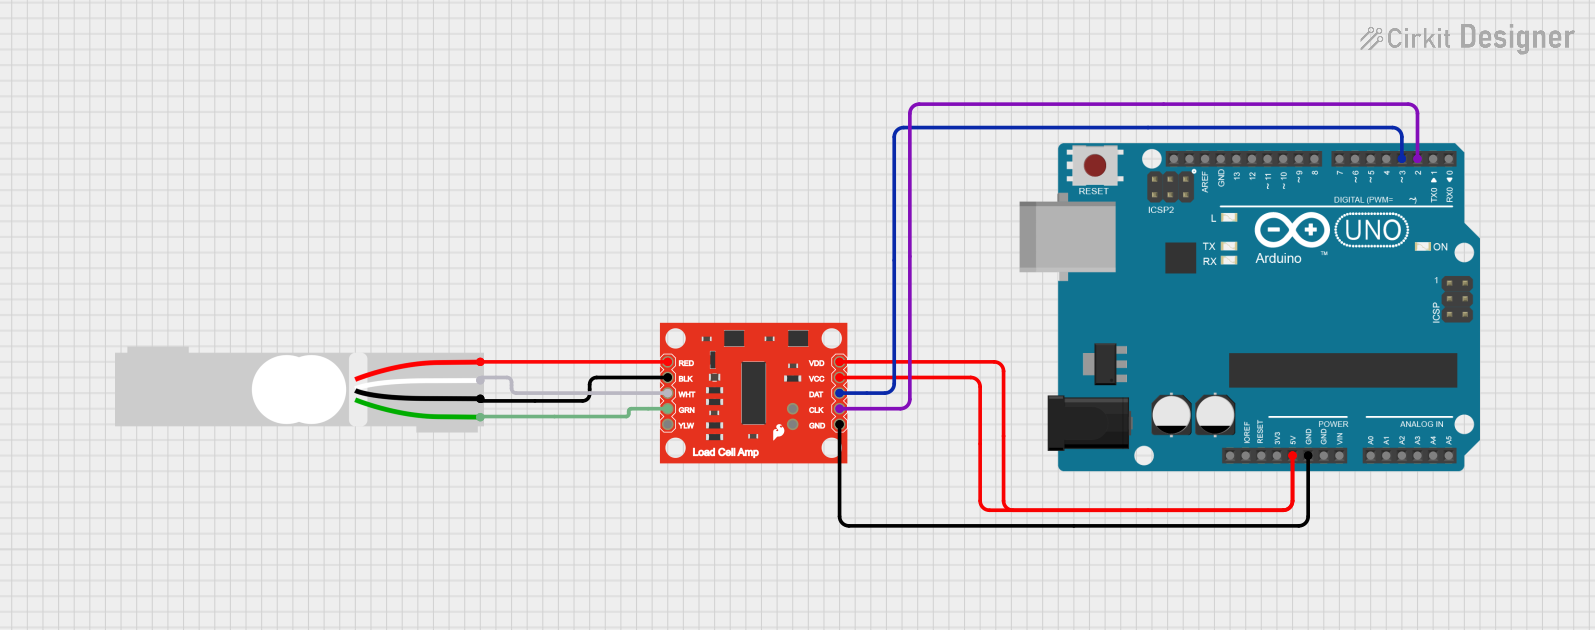
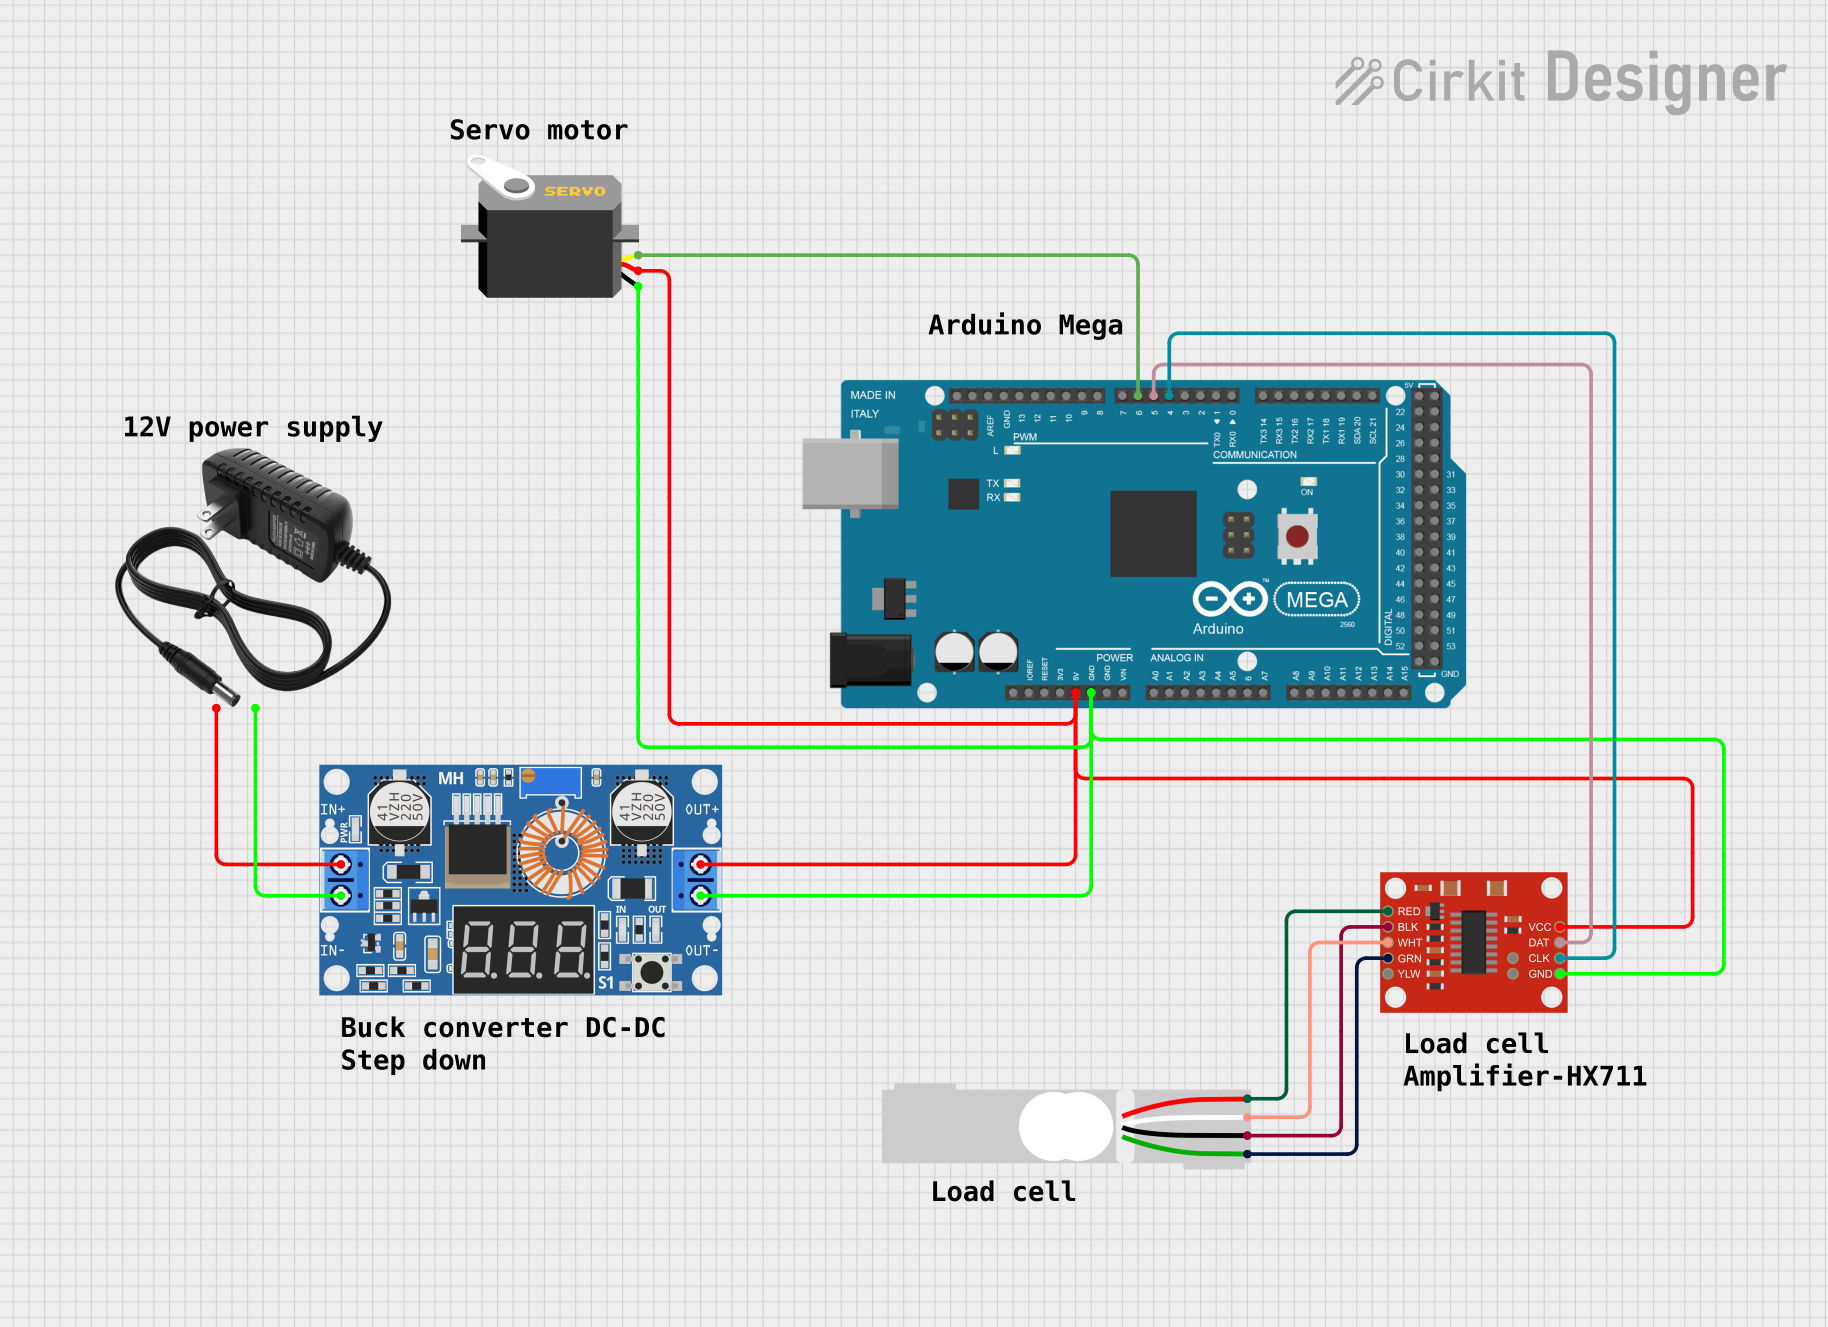
Explore Projects Built with SparkFun Load Cell Amplifier - HX711
Common Applications and Use Cases
- Digital weighing machines
- Kitchen and luggage scales
- Industrial mixing and batching systems
- Force sensing in robotics and embedded systems
Technical Specifications
Key Technical Details
- Voltage: 2.6V to 5.5V DC
- Current: < 1.5mA
- Selectable 10SPS or 80SPS output data rate
- Selectable gain of 32, 64 and 128
- On-chip power supply regulator for load-cell and ADC analog power supply
- On-chip oscillator requiring no external component with optional external crystal
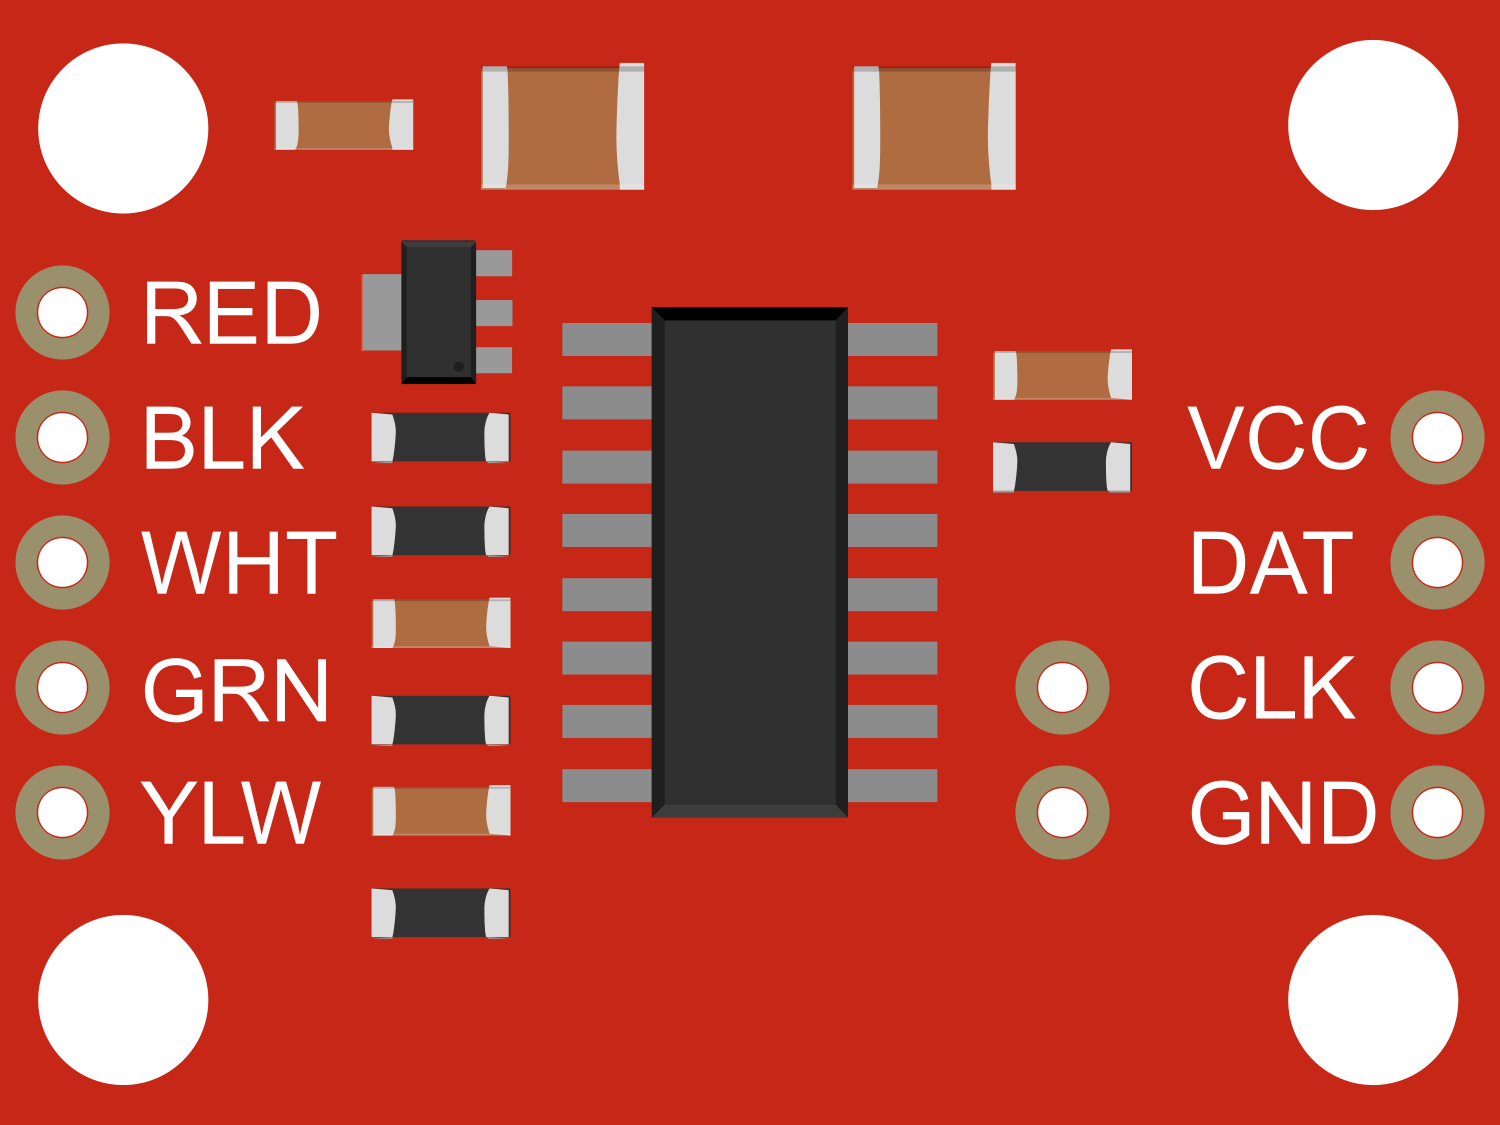
Pin Configuration and Descriptions
| Pin Name | Description |
|---|---|
| VCC | Power supply (2.6V to 5.5V) |
| GND | Ground |
| DT | Data output from HX711 to microcontroller |
| SCK | Serial clock input |
| E+ | Excitation+ for load cell |
| E- | Excitation- for load cell |
| A+ | Channel A positive input |
| A- | Channel A negative input |
| B+ | Channel B positive input (optional use) |
| B- | Channel B negative input (optional use) |
Usage Instructions
How to Use the Component in a Circuit
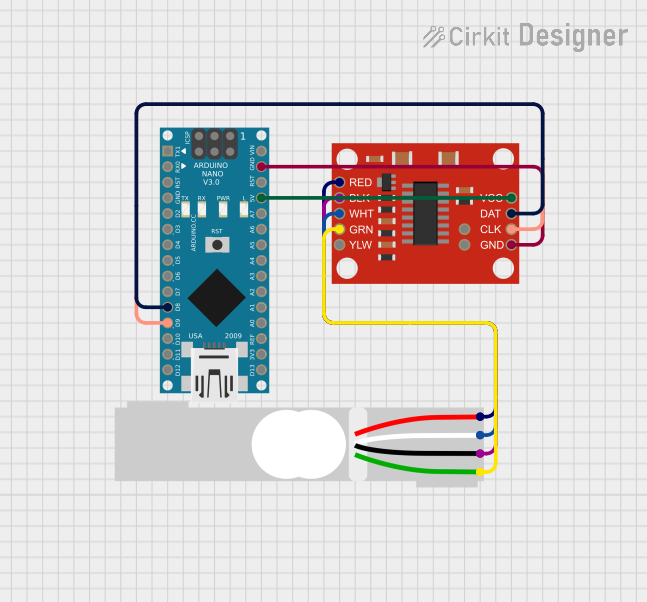
Connecting the Load Cell:
- Connect the load cell wires to the HX711 module according to the load cell's datasheet. Typically, the red wire goes to E+, black to E-, and the white and green wires to A+ and A-, respectively.
Powering the Module:
- Supply the HX711 with a clean and stable voltage between 2.6V and 5.5V.
Interfacing with a Microcontroller:
- Connect the DT and SCK pins of the HX711 to digital pins on your microcontroller, such as an Arduino UNO.
Important Considerations and Best Practices
- Use a stable power supply to avoid fluctuations in readings.
- Keep the wires between the load cell and HX711 as short as possible to minimize noise.
- Calibrate the load cell with known weights to ensure accurate measurements.
- Avoid physical shocks and vibrations that can affect the readings.
Example Arduino Code
#include "HX711.h"

// HX711 circuit wiring
const int LOADCELL_DOUT_PIN = 3;
const int LOADCELL_SCK_PIN = 2;

HX711 scale;

void setup() {
  Serial.begin(9600);
  scale.begin(LOADCELL_DOUT_PIN, LOADCELL_SCK_PIN);
}

void loop() {
  if (scale.is_ready()) {
    long reading = scale.read();
    Serial.print("Reading: ");
    Serial.println(reading);
  } else {
    Serial.println("HX711 not found.");
  }
  delay(1000);
}
Troubleshooting and FAQs
Common Issues Users Might Face
- Inaccurate Readings: Ensure the load cell is properly calibrated and that the module is powered with a stable voltage.
- No Readings: Check all connections, including the load cell wires and the connections to the microcontroller.
- Fluctuating Readings: This can be due to electrical noise or vibrations. Ensure the setup is stable and away from sources of interference.
Solutions and Tips for Troubleshooting
- Calibration: Use known weights to calibrate the load cell. Adjust the calibration factor in the code accordingly.
- Stable Setup: Mount the load cell and HX711 on a firm surface to minimize vibrations.
- Shielding: Use shielded cables for connections and keep them short to reduce noise.
FAQs
Q: Can I use multiple load cells with one HX711? A: Yes, but all load cells must be identical and wired in parallel, effectively creating a single load cell.
Q: How do I calibrate my load cell? A: Apply known weights and adjust the calibration factor in your code until the readings match the applied weights.
Q: What is the maximum rate at which I can get readings? A: The HX711 can be set to 10 or 80 samples per second (SPS).
Q: Can I use the HX711 for applications other than weight measurement? A: Yes, the HX711 can be used for any application that requires precise measurement of a resistive bridge sensor, such as pressure sensors or strain gauges.