How to Use Sensor de nivel de líquido DC24V 4-20mA: Examples, Pinouts, and Specs
Introduction
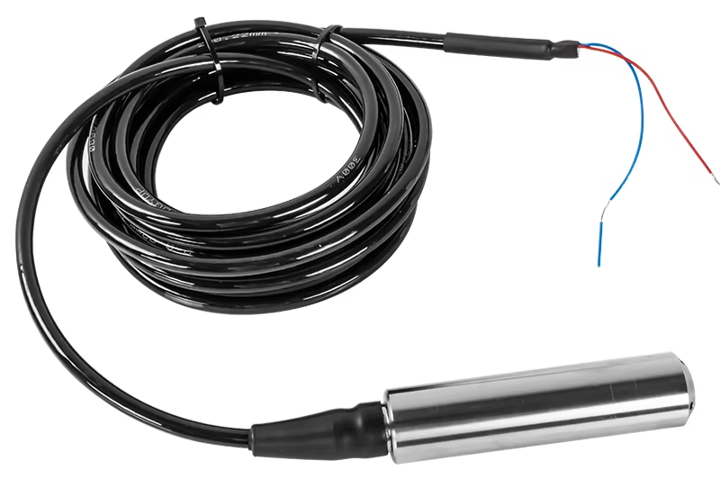
The Yosoo Health Gear Liquid Level Sensor (Part ID: B08F3G3TD9) is a reliable and efficient sensor designed to measure the liquid level in a container. Operating at 24V DC, it provides a current output signal ranging from 4-20mA, which is a standard in industrial applications for transmitting sensor data over long distances with high accuracy and noise immunity.
Explore Projects Built with Sensor de nivel de líquido DC24V 4-20mA

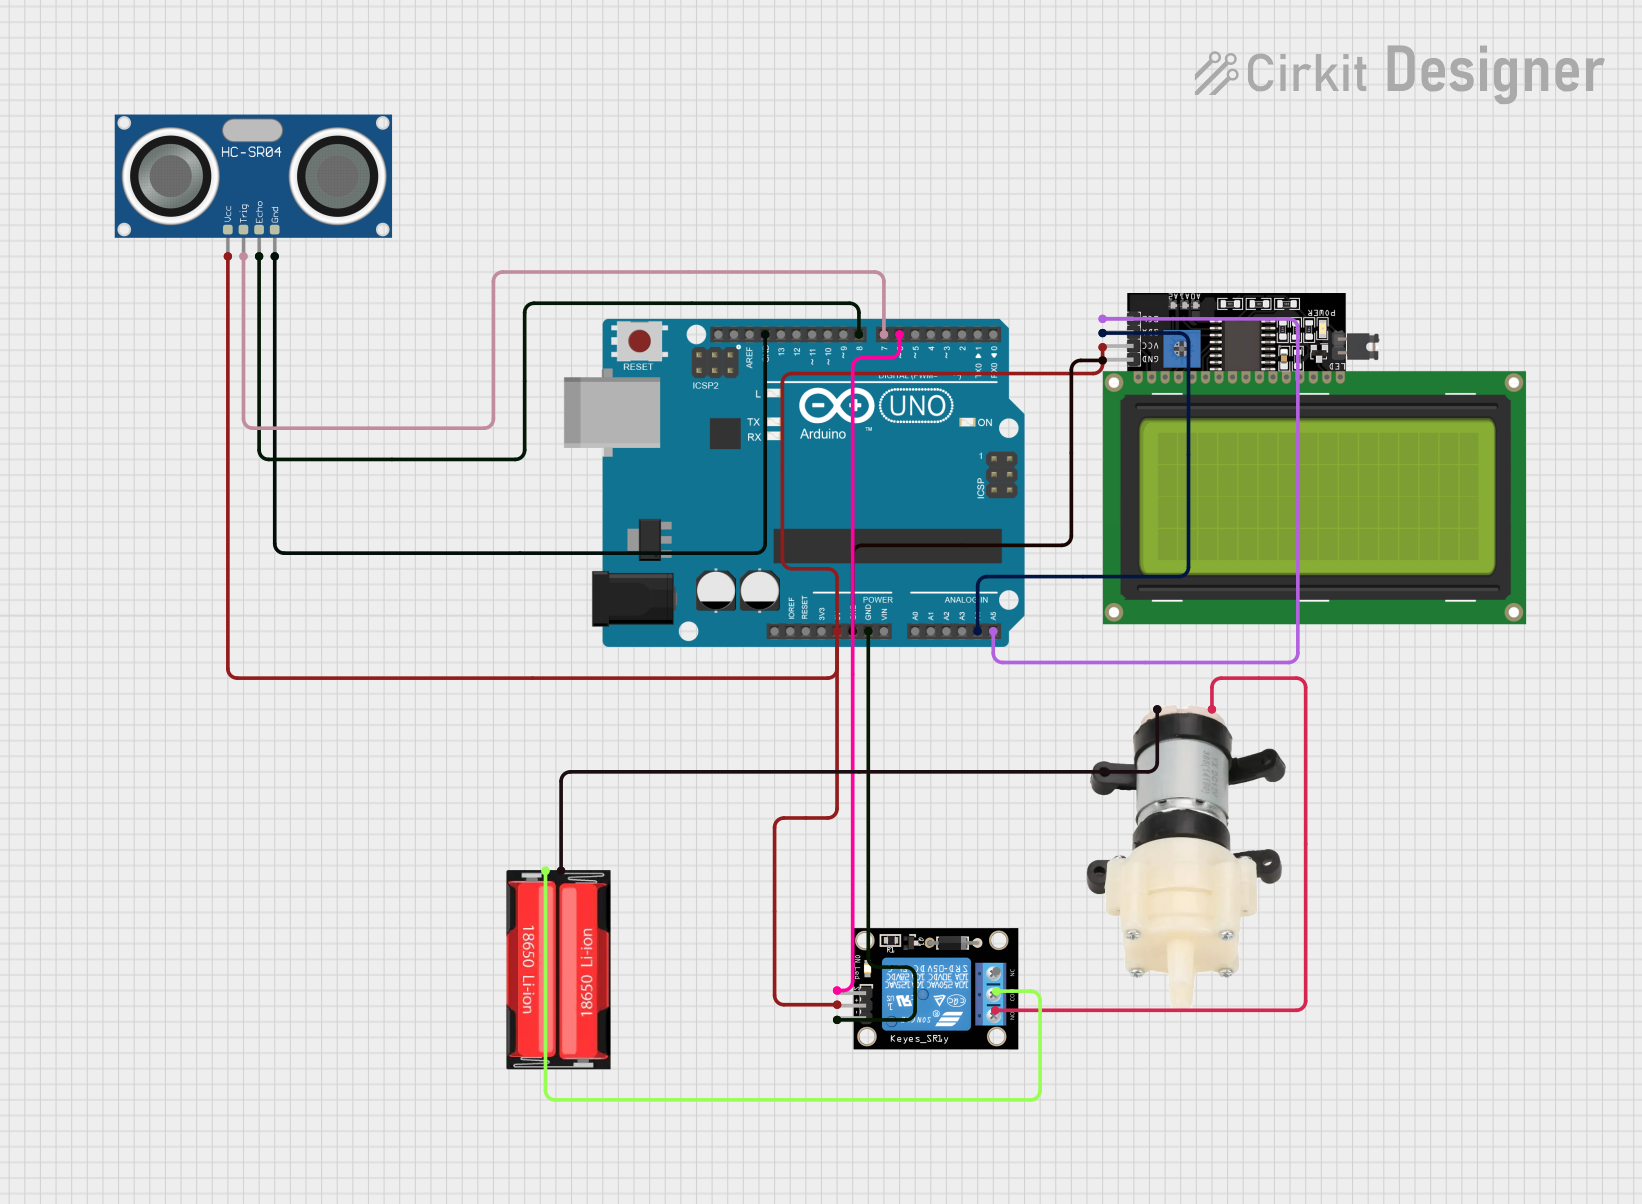

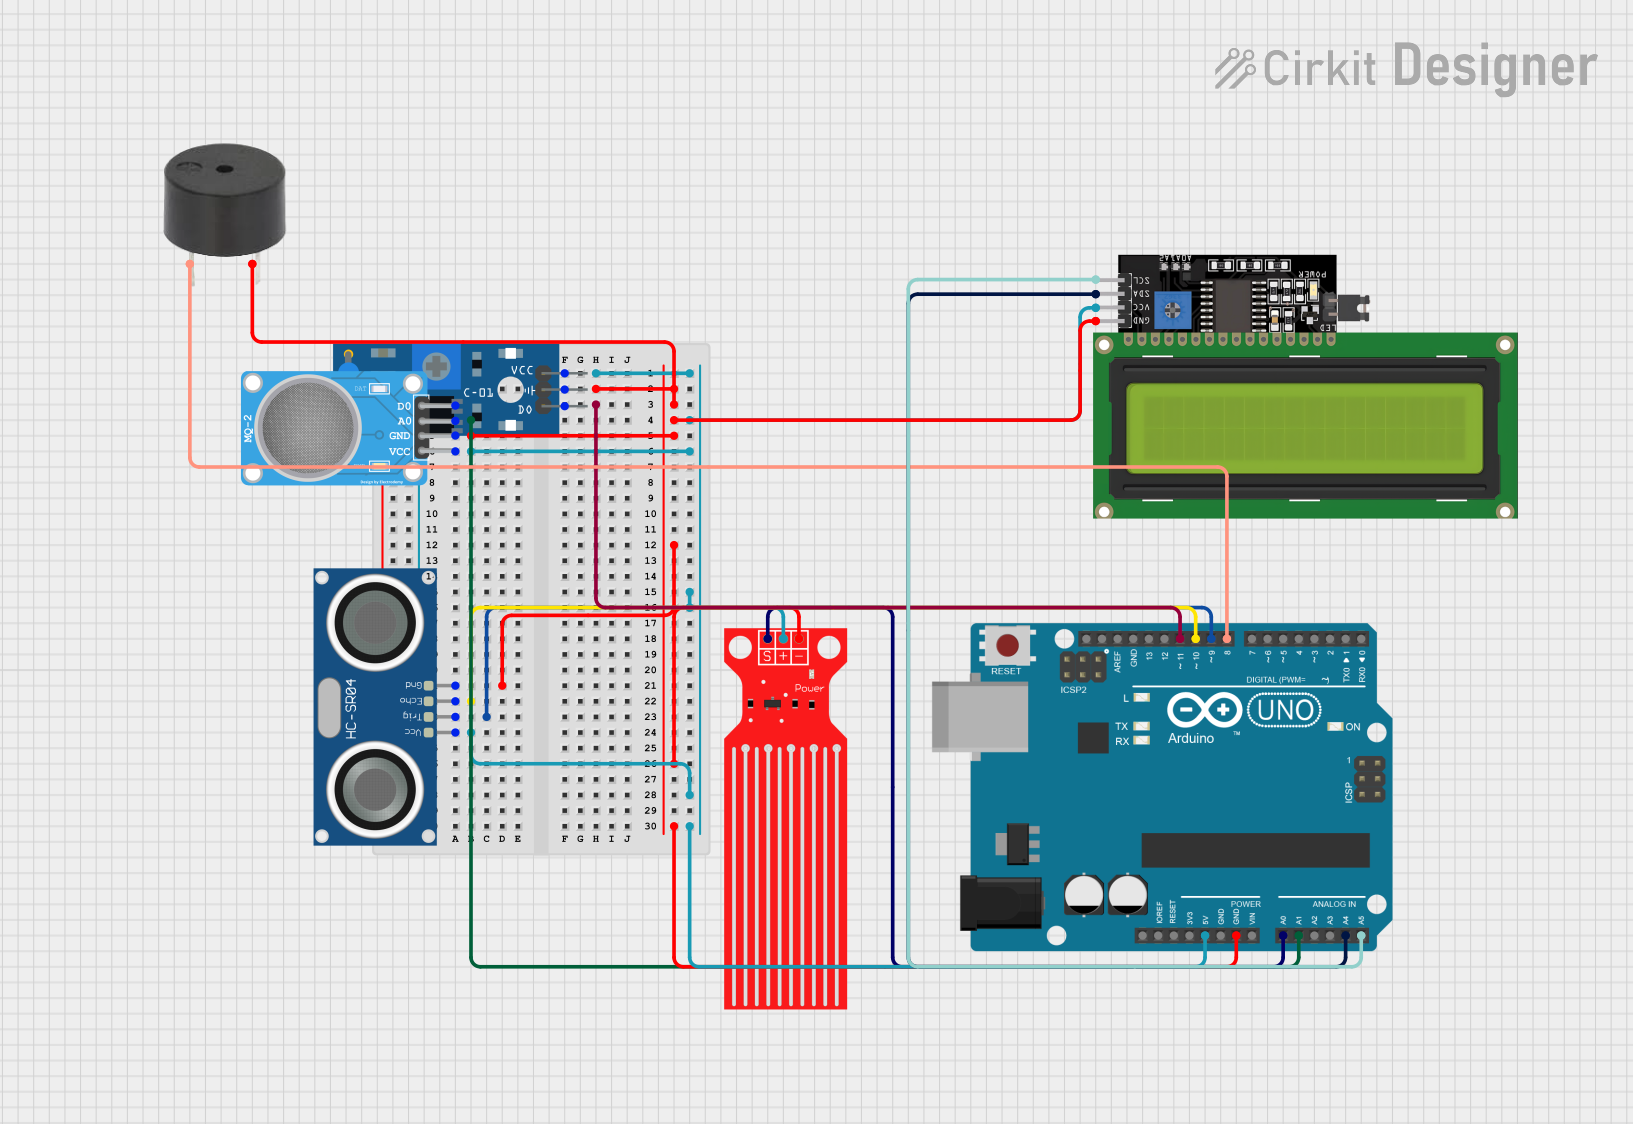
Explore Projects Built with Sensor de nivel de líquido DC24V 4-20mA
Common Applications and Use Cases
- Water Treatment Plants: Monitoring water levels in tanks and reservoirs.
- Chemical Processing: Measuring levels of various chemicals in storage tanks.
- Food and Beverage Industry: Ensuring proper levels of liquids in production processes.
- Oil and Gas: Monitoring fuel and oil levels in storage tanks.
- HVAC Systems: Managing water levels in cooling and heating systems.
Technical Specifications
Key Technical Details
| Parameter | Value |
|---|---|
| Operating Voltage | 24V DC |
| Output Signal | 4-20mA |
| Measurement Range | 0-5 meters (varies by model) |
| Accuracy | ±0.5% FS |
| Operating Temperature | -10°C to 60°C |
| Material | Stainless Steel |
| Cable Length | 5 meters |
Pin Configuration and Descriptions
| Pin Number | Description | Color Code |
|---|---|---|
| 1 | Power Supply (+24V) | Red |
| 2 | Ground (GND) | Black |
| 3 | Signal Output (4-20mA) | White |
Usage Instructions
How to Use the Component in a Circuit
Power Supply Connection:
- Connect the red wire to the +24V DC power supply.
- Connect the black wire to the ground (GND) of the power supply.
Signal Output Connection:
- Connect the white wire to the analog input of your data acquisition system or microcontroller (e.g., Arduino).
Circuit Example:
- Below is an example of connecting the sensor to an Arduino UNO:
// Example code for reading the 4-20mA signal from the Yosoo Health Gear
// Liquid Level Sensor using an Arduino UNO

const int sensorPin = A0; // Analog input pin for the sensor
float sensorValue = 0;    // Variable to store the sensor value
float current = 0;        // Variable to store the calculated current

void setup() {
  Serial.begin(9600); // Initialize serial communication
}

void loop() {
  sensorValue = analogRead(sensorPin); // Read the analog input
  current = (sensorValue / 1023.0) * 20.0; // Convert to current (4-20mA)
  Serial.print("Current: ");
  Serial.print(current);
  Serial.println(" mA");
  delay(1000); // Wait for 1 second before the next reading
}
Important Considerations and Best Practices
- Calibration: Ensure the sensor is calibrated according to the manufacturer's instructions for accurate measurements.
- Power Supply: Use a stable 24V DC power supply to avoid fluctuations in the sensor's output.
- Wiring: Use proper shielding and grounding techniques to minimize electrical noise.
- Environment: Ensure the sensor is used within the specified temperature range and is protected from harsh environmental conditions.
Troubleshooting and FAQs
Common Issues Users Might Face
No Signal Output:
- Solution: Check the power supply connections and ensure the sensor is receiving 24V DC. Verify the wiring and connections to the analog input.
Inaccurate Readings:
- Solution: Calibrate the sensor as per the manufacturer's guidelines. Ensure there are no obstructions or debris affecting the sensor's measurement.
Fluctuating Signal:
- Solution: Use proper shielding and grounding to minimize electrical noise. Ensure the power supply is stable and free from fluctuations.
FAQs
Q1: Can this sensor be used with liquids other than water?
- A1: Yes, the sensor can be used with various liquids, but ensure the liquid is compatible with the sensor's material (stainless steel).
Q2: What is the maximum cable length for this sensor?
- A2: The sensor comes with a 5-meter cable. For longer distances, ensure proper signal conditioning to maintain accuracy.
Q3: How do I convert the 4-20mA signal to a readable value?
- A3: Use a resistor to convert the current signal to a voltage, then read the voltage using an analog input on your microcontroller or data acquisition system.
By following this documentation, users can effectively integrate and utilize the Yosoo Health Gear Liquid Level Sensor in their applications, ensuring accurate and reliable liquid level measurements.