How to Use Three Pin Dupont connector: Examples, Pinouts, and Specs
Introduction
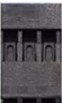
The Three Pin Dupont Connector, manufactured by Dupont, is a versatile and widely used electrical connector designed for prototyping and breadboarding applications. It features three individual pins housed in a durable plastic casing, enabling quick and reliable connections between wires and electronic components. This connector is particularly popular in DIY electronics, robotics, and Arduino-based projects due to its ease of use and compatibility with standard 2.54mm (0.1 inch) pin headers.
Explore Projects Built with Three Pin Dupont connector


Explore Projects Built with Three Pin Dupont connector
Common Applications and Use Cases
- Connecting sensors, modules, and components to microcontrollers (e.g., Arduino, Raspberry Pi)
- Prototyping circuits on breadboards
- Extending or bridging connections in electronic projects
- Robotics and automation systems
- Signal and power transmission in low-current applications
Technical Specifications
The following table outlines the key technical details of the Three Pin Dupont Connector:
| Parameter | Specification |
|---|---|
| Manufacturer | Dupont |
| Number of Pins | 3 |
| Pin Pitch | 2.54mm (0.1 inch) |
| Connector Type | Female (commonly used with male headers) |
| Current Rating | Up to 3A (depending on wire gauge) |
| Voltage Rating | Up to 250V |
| Housing Material | Thermoplastic (heat-resistant) |
| Contact Material | Tin-plated copper |
| Operating Temperature | -25°C to +85°C |
Pin Configuration and Descriptions
The Three Pin Dupont Connector does not have a fixed pinout, as it is typically used for general-purpose connections. However, the pins are often labeled or used as follows in common applications:
| Pin Number | Typical Use | Description |
|---|---|---|
| Pin 1 | Signal (e.g., Data) | Used for transmitting data or signals |
| Pin 2 | Power (e.g., VCC) | Supplies power to the connected device |
| Pin 3 | Ground (GND) | Provides a common ground connection |
Note: The actual pin configuration may vary depending on the specific application or circuit design.
Usage Instructions
How to Use the Component in a Circuit
- Prepare the Wires: Strip the insulation from the ends of the wires you want to connect, ensuring the exposed length matches the connector's crimp terminals.
- Crimp the Terminals: Use a crimping tool to attach the crimp terminals to the stripped wire ends. Ensure a secure connection for both the conductor and insulation.
- Insert into the Housing: Push the crimped terminals into the plastic housing of the Dupont connector until they click into place.
- Connect to Headers: Align the connector with the male pin header on your circuit or device and gently push it in to establish a connection.
Important Considerations and Best Practices
- Wire Gauge: Use wires with a gauge between 22 AWG and 28 AWG for optimal compatibility.
- Secure Connections: Ensure the crimp terminals are properly secured to avoid loose connections or intermittent signals.
- Polarity: Double-check the pin configuration to avoid reversing power and ground connections, which could damage your components.
- Avoid Overcurrent: Do not exceed the current rating of the connector to prevent overheating or damage.
Example: Connecting to an Arduino UNO
The Three Pin Dupont Connector is commonly used to connect sensors or modules to an Arduino UNO. Below is an example of connecting a temperature sensor with a Dupont connector:
Circuit Setup
- Pin 1 (Signal) → Arduino Digital Pin 2
- Pin 2 (VCC) → Arduino 5V
- Pin 3 (GND) → Arduino GND
Arduino Code Example
// Example code for reading a digital signal from a sensor connected via a
// Three Pin Dupont Connector to an Arduino UNO.

const int sensorPin = 2; // Pin 1 (Signal) of the Dupont connector is connected to D2
int sensorValue = 0;     // Variable to store the sensor reading

void setup() {
  pinMode(sensorPin, INPUT); // Set the sensor pin as an input
  Serial.begin(9600);        // Initialize serial communication at 9600 baud
}

void loop() {
  sensorValue = digitalRead(sensorPin); // Read the digital signal from the sensor
  Serial.print("Sensor Value: ");
  Serial.println(sensorValue);         // Print the sensor value to the Serial Monitor
  delay(500);                          // Wait for 500ms before the next reading
}
Troubleshooting and FAQs
Common Issues Users Might Face
Loose Connections:
- Problem: The connector does not fit securely onto the pin header.
- Solution: Ensure the crimp terminals are properly inserted into the housing and check for bent or damaged pins.
Intermittent Signals:
- Problem: The circuit behaves erratically or the signal is unstable.
- Solution: Verify that the crimp terminals are tightly secured to the wires and that the connector is fully seated on the pin header.
Reversed Polarity:
- Problem: The device does not function or gets damaged.
- Solution: Double-check the pin configuration and ensure the power and ground connections are correct.
Overheating:
- Problem: The connector or wires become hot during operation.
- Solution: Ensure the current does not exceed the connector's rating and use appropriate wire gauges.
FAQs
Q1: Can I use the Three Pin Dupont Connector for high-current applications?
A1: No, the connector is designed for low-current applications (up to 3A). For high-current circuits, consider using connectors with higher current ratings.
Q2: Are Dupont connectors reusable?
A2: Yes, the plastic housing can be reused, but the crimp terminals may need to be replaced if they are damaged or deformed during removal.
Q3: Can I connect multiple Dupont connectors side by side?
A3: Yes, the 2.54mm pitch allows multiple connectors to be placed adjacent to each other on standard pin headers.
Q4: How do I remove a crimp terminal from the housing?
A4: Use a small flathead screwdriver or a pin to gently press the locking tab inside the housing and pull the terminal out.
By following this documentation, you can effectively use the Three Pin Dupont Connector in your electronic projects with confidence!