How to Use Haier Verwarmingselement: Examples, Pinouts, and Specs
Introduction
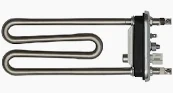
The Haier Verwarmingselement is a high-quality heating element designed for use in various Haier appliances. This component is essential for generating heat in devices such as water heaters, ovens, and dryers. Its robust construction ensures reliable performance and longevity, making it a critical part of many household and industrial appliances.
Explore Projects Built with Haier Verwarmingselement

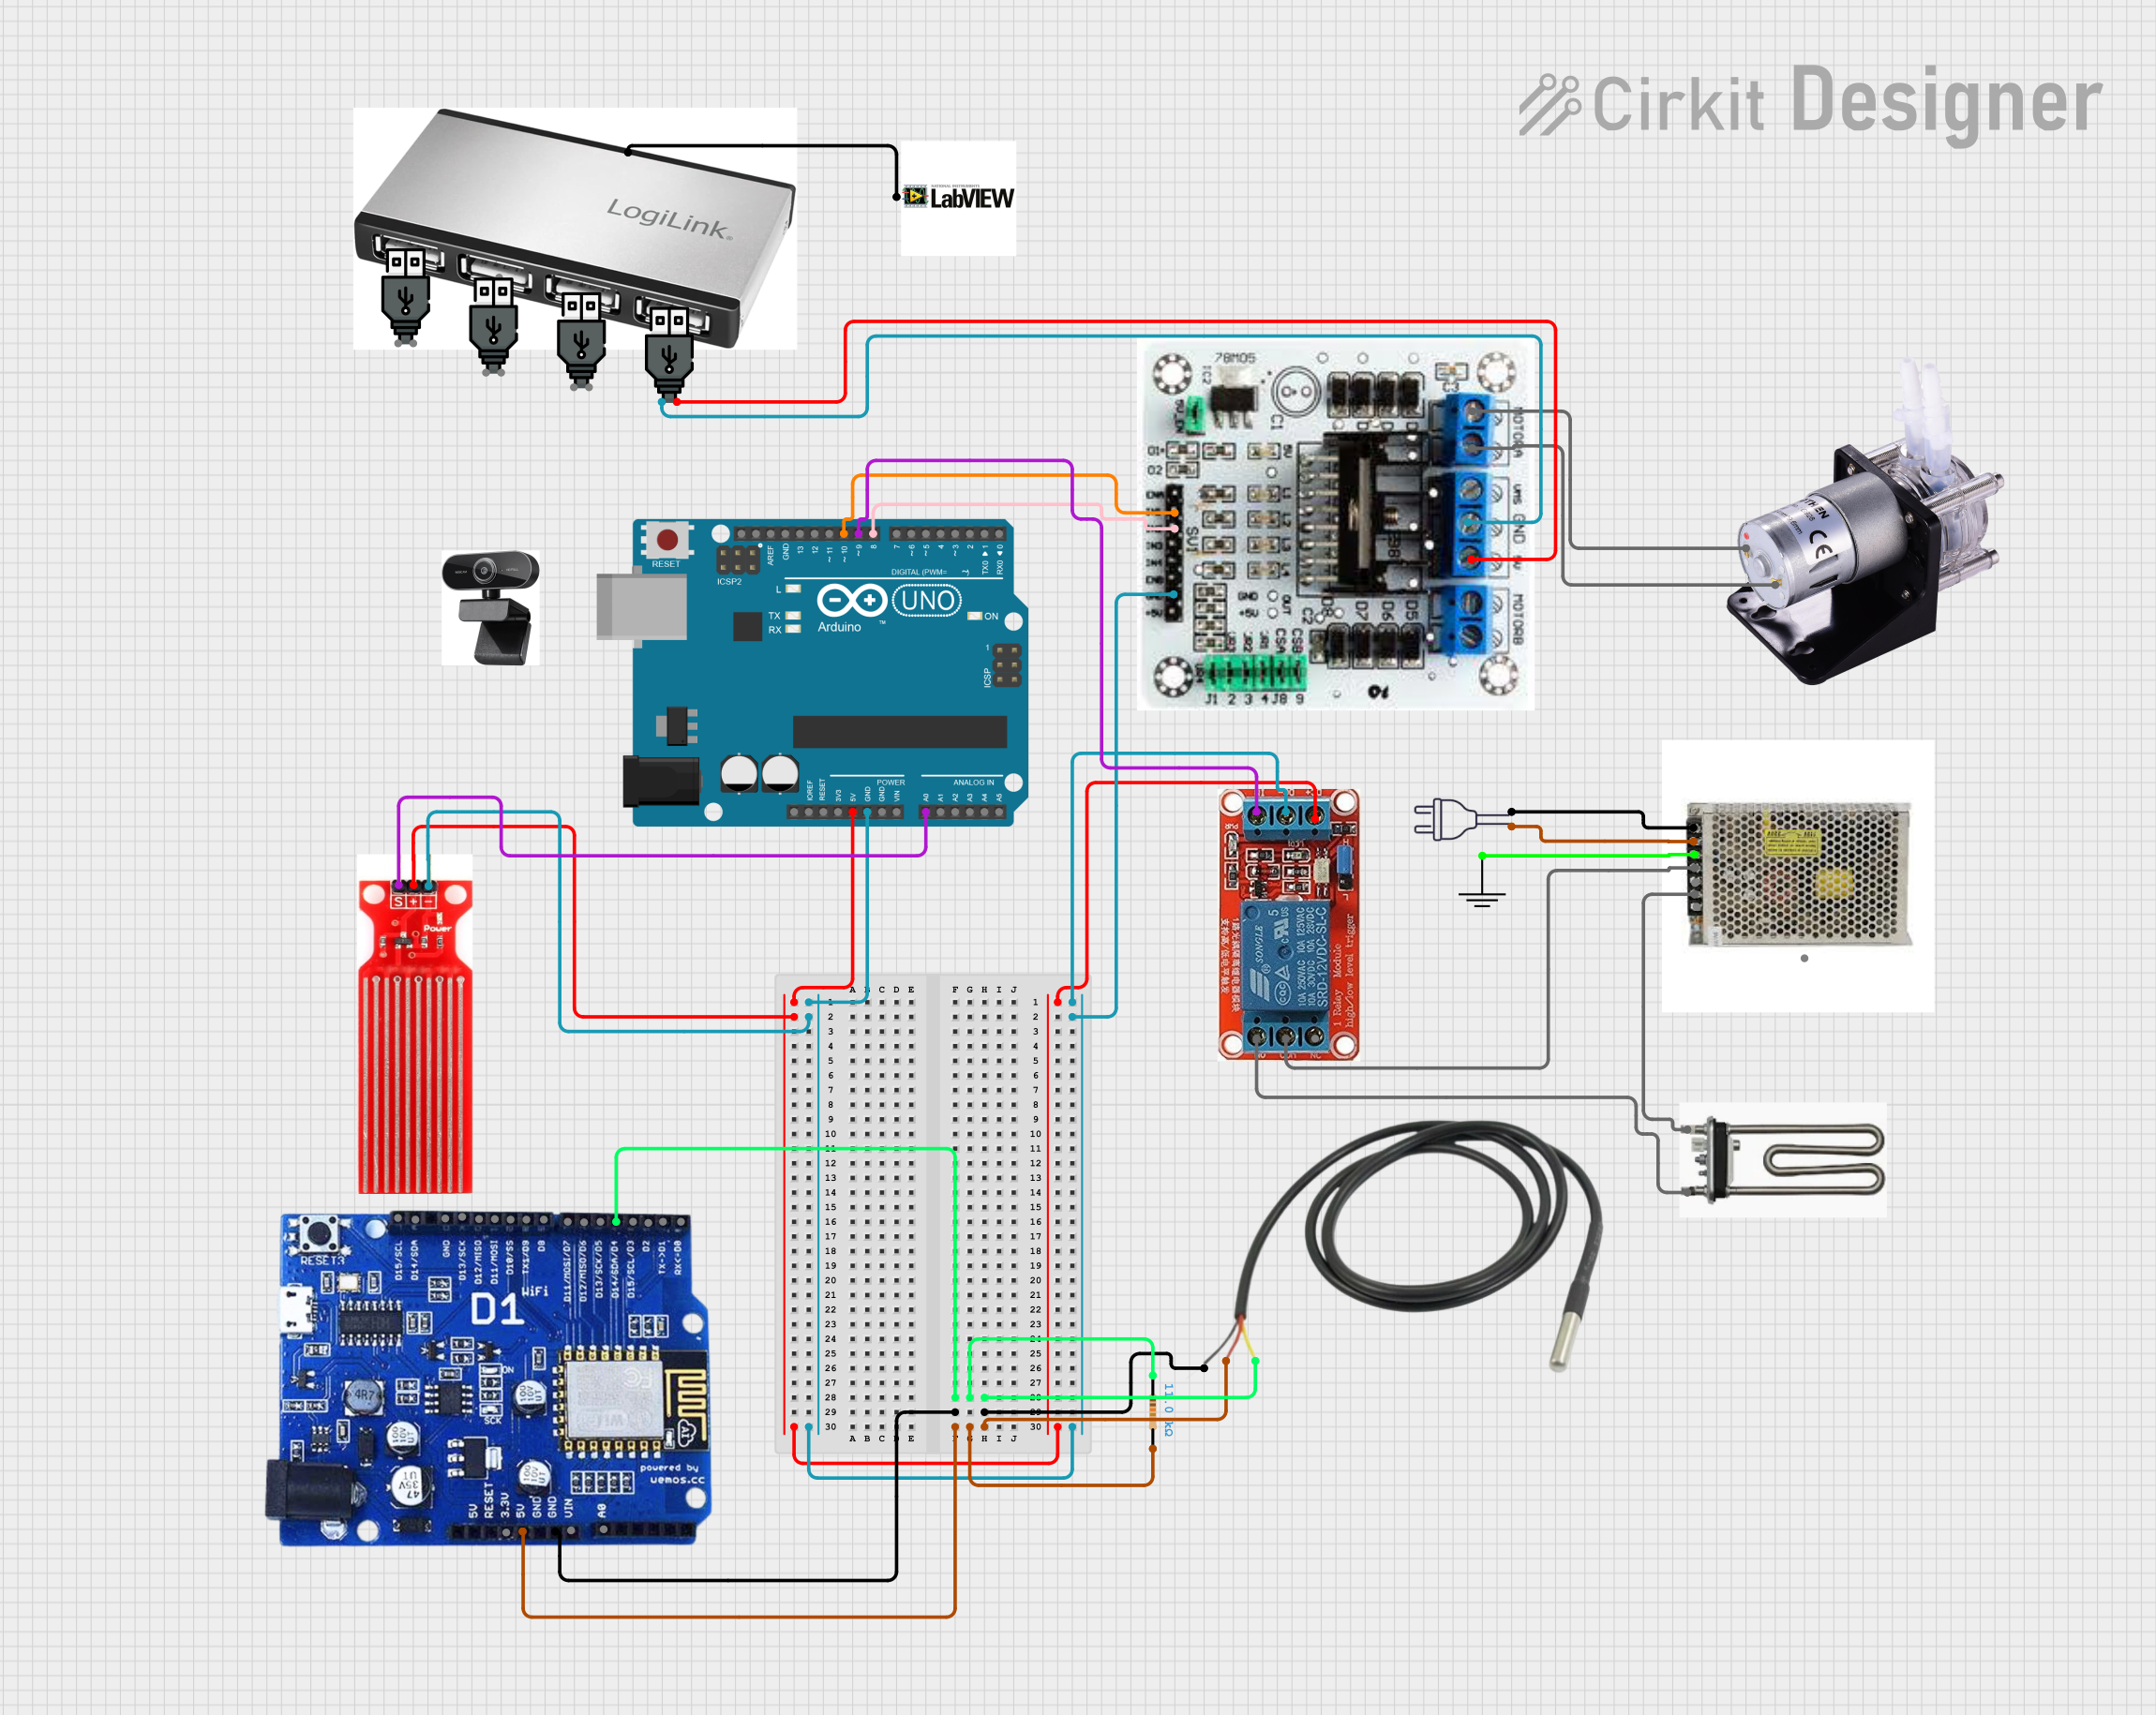
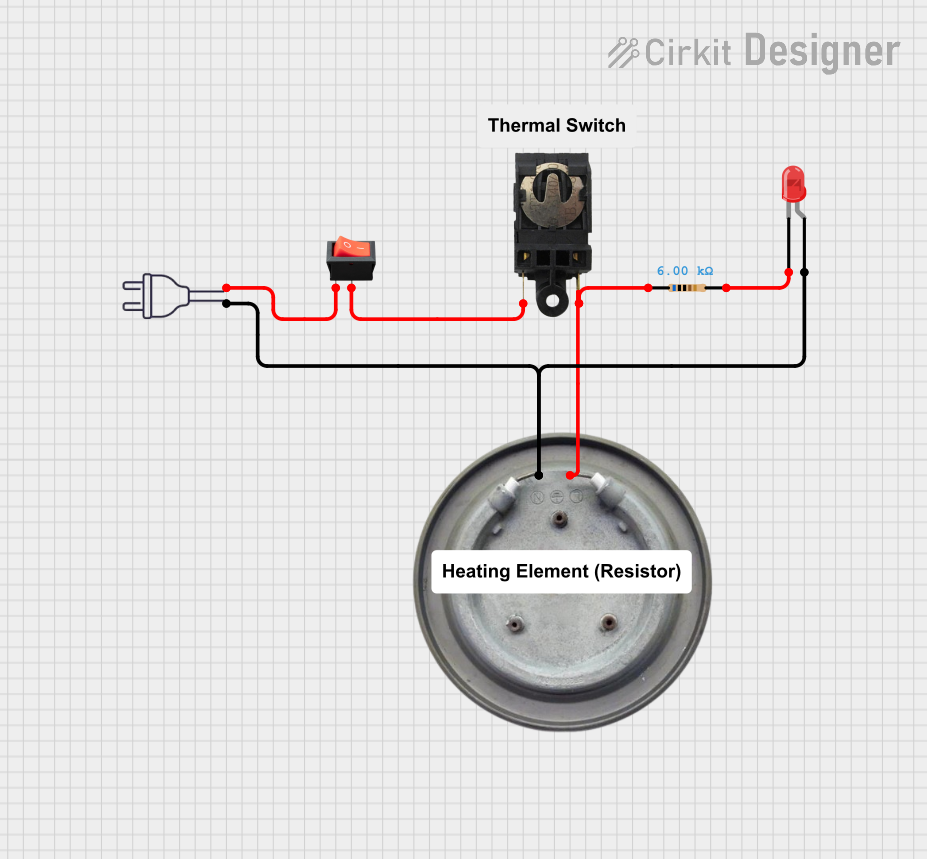

Explore Projects Built with Haier Verwarmingselement
Common Applications and Use Cases
- Water Heaters: Provides the necessary heat to warm water efficiently.
- Ovens: Ensures consistent and even heating for cooking and baking.
- Dryers: Generates heat to dry clothes effectively.
- Industrial Equipment: Used in various heating applications in industrial settings.
Technical Specifications
Key Technical Details
| Parameter | Value |
|---|---|
| Voltage Rating | 220V AC |
| Power Rating | 2000W |
| Current Rating | 9.1A |
| Resistance | 24.2 Ohms |
| Material | Stainless Steel |
| Operating Temperature Range | 0°C to 300°C |
| Dimensions | 300mm x 50mm x 50mm |
| Weight | 500g |
Pin Configuration and Descriptions
| Pin Number | Description |
|---|---|
| 1 | Live (L) - Connects to the live wire of the power supply |
| 2 | Neutral (N) - Connects to the neutral wire of the power supply |
| 3 | Ground (G) - Connects to the ground for safety |
Usage Instructions
How to Use the Component in a Circuit
- Safety First: Ensure the power supply is turned off before making any connections.
- Wiring:
- Connect Pin 1 (Live) to the live wire of the 220V AC power supply.
- Connect Pin 2 (Neutral) to the neutral wire of the power supply.
- Connect Pin 3 (Ground) to the ground for safety.
- Mounting: Secure the heating element in the desired location within the appliance, ensuring it is properly insulated and away from any flammable materials.
- Testing: After making the connections, turn on the power supply and verify that the heating element is functioning correctly.
Important Considerations and Best Practices
- Insulation: Ensure that all connections are properly insulated to prevent electrical shocks.
- Ventilation: Provide adequate ventilation to prevent overheating.
- Regular Maintenance: Periodically check the heating element for any signs of wear or damage and replace it if necessary.
- Safety: Always follow the manufacturer's safety guidelines and local electrical codes.
Troubleshooting and FAQs
Common Issues Users Might Face
Heating Element Not Heating:
- Possible Cause: Faulty wiring or loose connections.
- Solution: Check all connections and ensure they are secure. Verify that the power supply is functioning correctly.
Overheating:
- Possible Cause: Insufficient ventilation or incorrect power supply.
- Solution: Ensure proper ventilation and verify that the power supply matches the specified voltage and current ratings.
Uneven Heating:
- Possible Cause: Damaged heating element or improper mounting.
- Solution: Inspect the heating element for any damage and ensure it is mounted correctly.
Solutions and Tips for Troubleshooting
- Multimeter Testing: Use a multimeter to check the resistance of the heating element. It should match the specified resistance (24.2 Ohms). If not, the element may be faulty.
- Visual Inspection: Regularly inspect the heating element for any visible signs of damage, such as cracks or burn marks.
- Professional Help: If you are unsure about any aspect of the installation or troubleshooting, seek professional assistance.
Example Code for Arduino UNO
While the Haier Verwarmingselement is typically used in high-power applications, it can be controlled using an Arduino UNO with the help of a relay module. Below is an example code to control the heating element using an Arduino UNO and a relay module.
// Define the pin for the relay module
const int relayPin = 7;

void setup() {
  // Initialize the relay pin as an output
  pinMode(relayPin, OUTPUT);
  // Start with the relay off
  digitalWrite(relayPin, LOW);
}

void loop() {
  // Turn the relay on (heating element on)
  digitalWrite(relayPin, HIGH);
  // Keep the heating element on for 10 seconds
  delay(10000);

  // Turn the relay off (heating element off)
  digitalWrite(relayPin, LOW);
  // Keep the heating element off for 10 seconds
  delay(10000);
}
Note: Ensure that the relay module is rated for the voltage and current requirements of the heating element. Always follow safety guidelines when working with high-voltage components.
This documentation provides a comprehensive overview of the Haier Verwarmingselement, including its technical specifications, usage instructions, and troubleshooting tips. Whether you are a beginner or an experienced user, this guide will help you effectively utilize this heating element in your applications.