Cirkit Designer Logo
Cirkit Designer
Your all-in-one circuit design IDE
Home / 
Component Documentation

How to Use 48V to 12v: Examples, Pinouts, and Specs

Image of 48V to 12v
Cirkit Designer LogoDesign with 48V to 12v in Cirkit Designer

Introduction

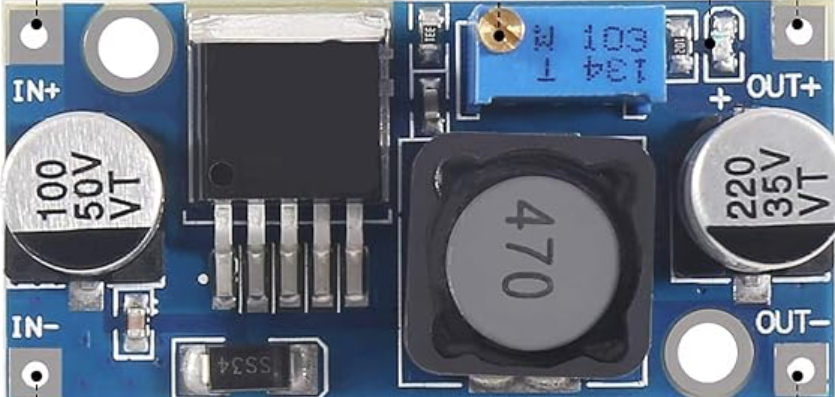
A 48V to 12V DC-DC converter is an electronic device that steps down voltage from 48 volts to 12 volts. These converters are essential in applications where the power supply voltage is higher than what the electronics require. They are commonly used in automotive systems, industrial machinery, and renewable energy setups where battery banks or power systems operate at 48V, but the equipment requires a 12V supply.

Explore Projects Built with 48V to 12v

Use Cirkit Designer to design, explore, and prototype these projects online. Some projects support real-time simulation. Click "Open Project" to start designing instantly!
Battery-Powered DC-DC Converter System for Multi-Voltage Power Distribution
Image of test 1 ih: A project utilizing 48V to 12v in a practical application
This circuit converts a 38.5V battery output to multiple lower voltage levels using a series of DC-DC converters and a power module. It includes an emergency stop switch for safety and distributes power to various components such as a relay module, USB ports, and a bus servo adaptor.
Cirkit Designer LogoOpen Project in Cirkit Designer
240V to 12V Power Conversion Circuit with Stopkontak
Image of daya PLN: A project utilizing 48V to 12v in a practical application
This circuit converts a 240V AC power source to a 12V DC output using a 12V adapter. The 240V AC power source is connected to a stopkontak, which then supplies the 12V adapter with the necessary AC voltage to produce a 12V DC output.
Cirkit Designer LogoOpen Project in Cirkit Designer
Modular Power Distribution System with Multiple SMPS Units and 120V Outlet
Image of Cellion-Tesla: A project utilizing 48V to 12v in a practical application
This circuit is designed to convert 240V AC power to both 12V and 24V DC outputs using multiple SMPS units. Terminal blocks are used to organize and distribute the power, while a 120V outlet provides additional AC power access. The circuit is likely used for powering various electronic devices that require different voltage levels.
Cirkit Designer LogoOpen Project in Cirkit Designer
12V to 5V Power Supply with LED Indicator and Push Switch
Image of Power Supply LVCO: A project utilizing 48V to 12v in a practical application
This circuit is a 12V to 5V regulated power supply with an LED indicator. It uses a 5408 diode for reverse polarity protection, an LM340T5 7805 voltage regulator to step down the voltage to 5V, and a push switch to control the LED indicator. The circuit also includes capacitors for filtering and a resistor to limit the current through the LED.
Cirkit Designer LogoOpen Project in Cirkit Designer

Explore Projects Built with 48V to 12v

Use Cirkit Designer to design, explore, and prototype these projects online. Some projects support real-time simulation. Click "Open Project" to start designing instantly!
Image of test 1 ih: A project utilizing 48V to 12v in a practical application
Battery-Powered DC-DC Converter System for Multi-Voltage Power Distribution
This circuit converts a 38.5V battery output to multiple lower voltage levels using a series of DC-DC converters and a power module. It includes an emergency stop switch for safety and distributes power to various components such as a relay module, USB ports, and a bus servo adaptor.
Cirkit Designer LogoOpen Project in Cirkit Designer
Image of daya PLN: A project utilizing 48V to 12v in a practical application
240V to 12V Power Conversion Circuit with Stopkontak
This circuit converts a 240V AC power source to a 12V DC output using a 12V adapter. The 240V AC power source is connected to a stopkontak, which then supplies the 12V adapter with the necessary AC voltage to produce a 12V DC output.
Cirkit Designer LogoOpen Project in Cirkit Designer
Image of Cellion-Tesla: A project utilizing 48V to 12v in a practical application
Modular Power Distribution System with Multiple SMPS Units and 120V Outlet
This circuit is designed to convert 240V AC power to both 12V and 24V DC outputs using multiple SMPS units. Terminal blocks are used to organize and distribute the power, while a 120V outlet provides additional AC power access. The circuit is likely used for powering various electronic devices that require different voltage levels.
Cirkit Designer LogoOpen Project in Cirkit Designer
Image of Power Supply LVCO: A project utilizing 48V to 12v in a practical application
12V to 5V Power Supply with LED Indicator and Push Switch
This circuit is a 12V to 5V regulated power supply with an LED indicator. It uses a 5408 diode for reverse polarity protection, an LM340T5 7805 voltage regulator to step down the voltage to 5V, and a push switch to control the LED indicator. The circuit also includes capacitors for filtering and a resistor to limit the current through the LED.
Cirkit Designer LogoOpen Project in Cirkit Designer

Common Applications and Use Cases

  • Automotive electronics
  • Solar power systems
  • Telecommunications equipment
  • Industrial control systems
  • LED lighting systems

Technical Specifications

Key Technical Details

  • Input Voltage Range: 48V (Typical)
  • Output Voltage: 12V
  • Maximum Output Current: Specified by the model (e.g., 5A, 10A)
  • Efficiency: Typically >90%
  • Operating Temperature Range: Specified by the model (e.g., -40°C to +85°C)

Pin Configuration and Descriptions

Pin Number Description Notes
1 Input Voltage (48V) Connect to the 48V supply
2 Ground Connect to system ground
3 Output Voltage (12V) Connect to the load or circuit
4 Ground Connect to load or circuit ground

Usage Instructions

How to Use the Component in a Circuit

  1. Connect the Input: Attach the 48V supply to the input pin (Pin 1) and connect the ground from the power source to the ground pin (Pin 2).
  2. Connect the Output: Connect the output voltage pin (Pin 3) to the device or circuit that requires 12V. Ensure that the ground pin (Pin 4) is connected to the ground of the load.
  3. Power On: Once all connections are secure, power on the 48V supply. The converter will step down the voltage to 12V for use by the connected device.

Important Considerations and Best Practices

  • Load Rating: Do not exceed the maximum output current rating of the converter.
  • Heat Dissipation: Ensure adequate ventilation or heat sinking to manage heat generated by the converter.
  • Input Voltage: Verify that the input voltage does not exceed the specified maximum for the converter.
  • Polarity: Always check the polarity of connections to prevent damage to the converter and the connected devices.
  • Short Circuit Protection: Use appropriate fuses or circuit breakers to protect against short circuits.

Troubleshooting and FAQs

Common Issues Users Might Face

  • Insufficient Output Voltage: Check for overloading or short circuits in the connected load.
  • Overheating: Ensure proper heat dissipation and verify that the load does not exceed the converter's rating.
  • No Output: Verify input connections, polarity, and the integrity of the power source.

Solutions and Tips for Troubleshooting

  • Check Connections: Loose or incorrect connections are common issues. Double-check all connections.
  • Measure Input Voltage: Use a multimeter to ensure the input voltage is within the specified range.
  • Inspect for Damage: Look for any visible signs of damage or overheating on the converter.

FAQs

  • Q: Can I use this converter in an automotive application?

    • A: Yes, as long as the input voltage is within the specified range and the current does not exceed the converter's rating.
  • Q: Is the converter isolated?

    • A: This depends on the specific model. Check the datasheet for isolation information.
  • Q: What is the efficiency of the converter?

    • A: Efficiency is typically greater than 90%, but refer to the datasheet for exact figures.

Example Connection with Arduino UNO

While an Arduino UNO typically operates at 5V, you might use a 12V supply for peripherals that require higher voltage. Below is an example code snippet for turning on an LED strip that requires 12V, using a 48V to 12V converter to step down the voltage.

// Define the LED strip power control pin
#define LED_STRIP_PWR_PIN 7

void setup() {
  // Set the power control pin as an output
  pinMode(LED_STRIP_PWR_PIN, OUTPUT);
}

void loop() {
  // Turn on the LED strip
  digitalWrite(LED_STRIP_PWR_PIN, HIGH);
  delay(1000); // Keep the LED strip on for 1 second
  
  // Turn off the LED strip
  digitalWrite(LED_STRIP_PWR_PIN, LOW);
  delay(1000); // Keep the LED strip off for 1 second
}

Note: The above code assumes that the Arduino UNO controls a relay or a transistor that switches the 12V line from the converter to the LED strip. The converter itself is not directly interfaced with the Arduino's pins, as the Arduino operates at 5V logic levels.