How to Use SparkFun ESP32 Thing Plus: Examples, Pinouts, and Specs
Introduction
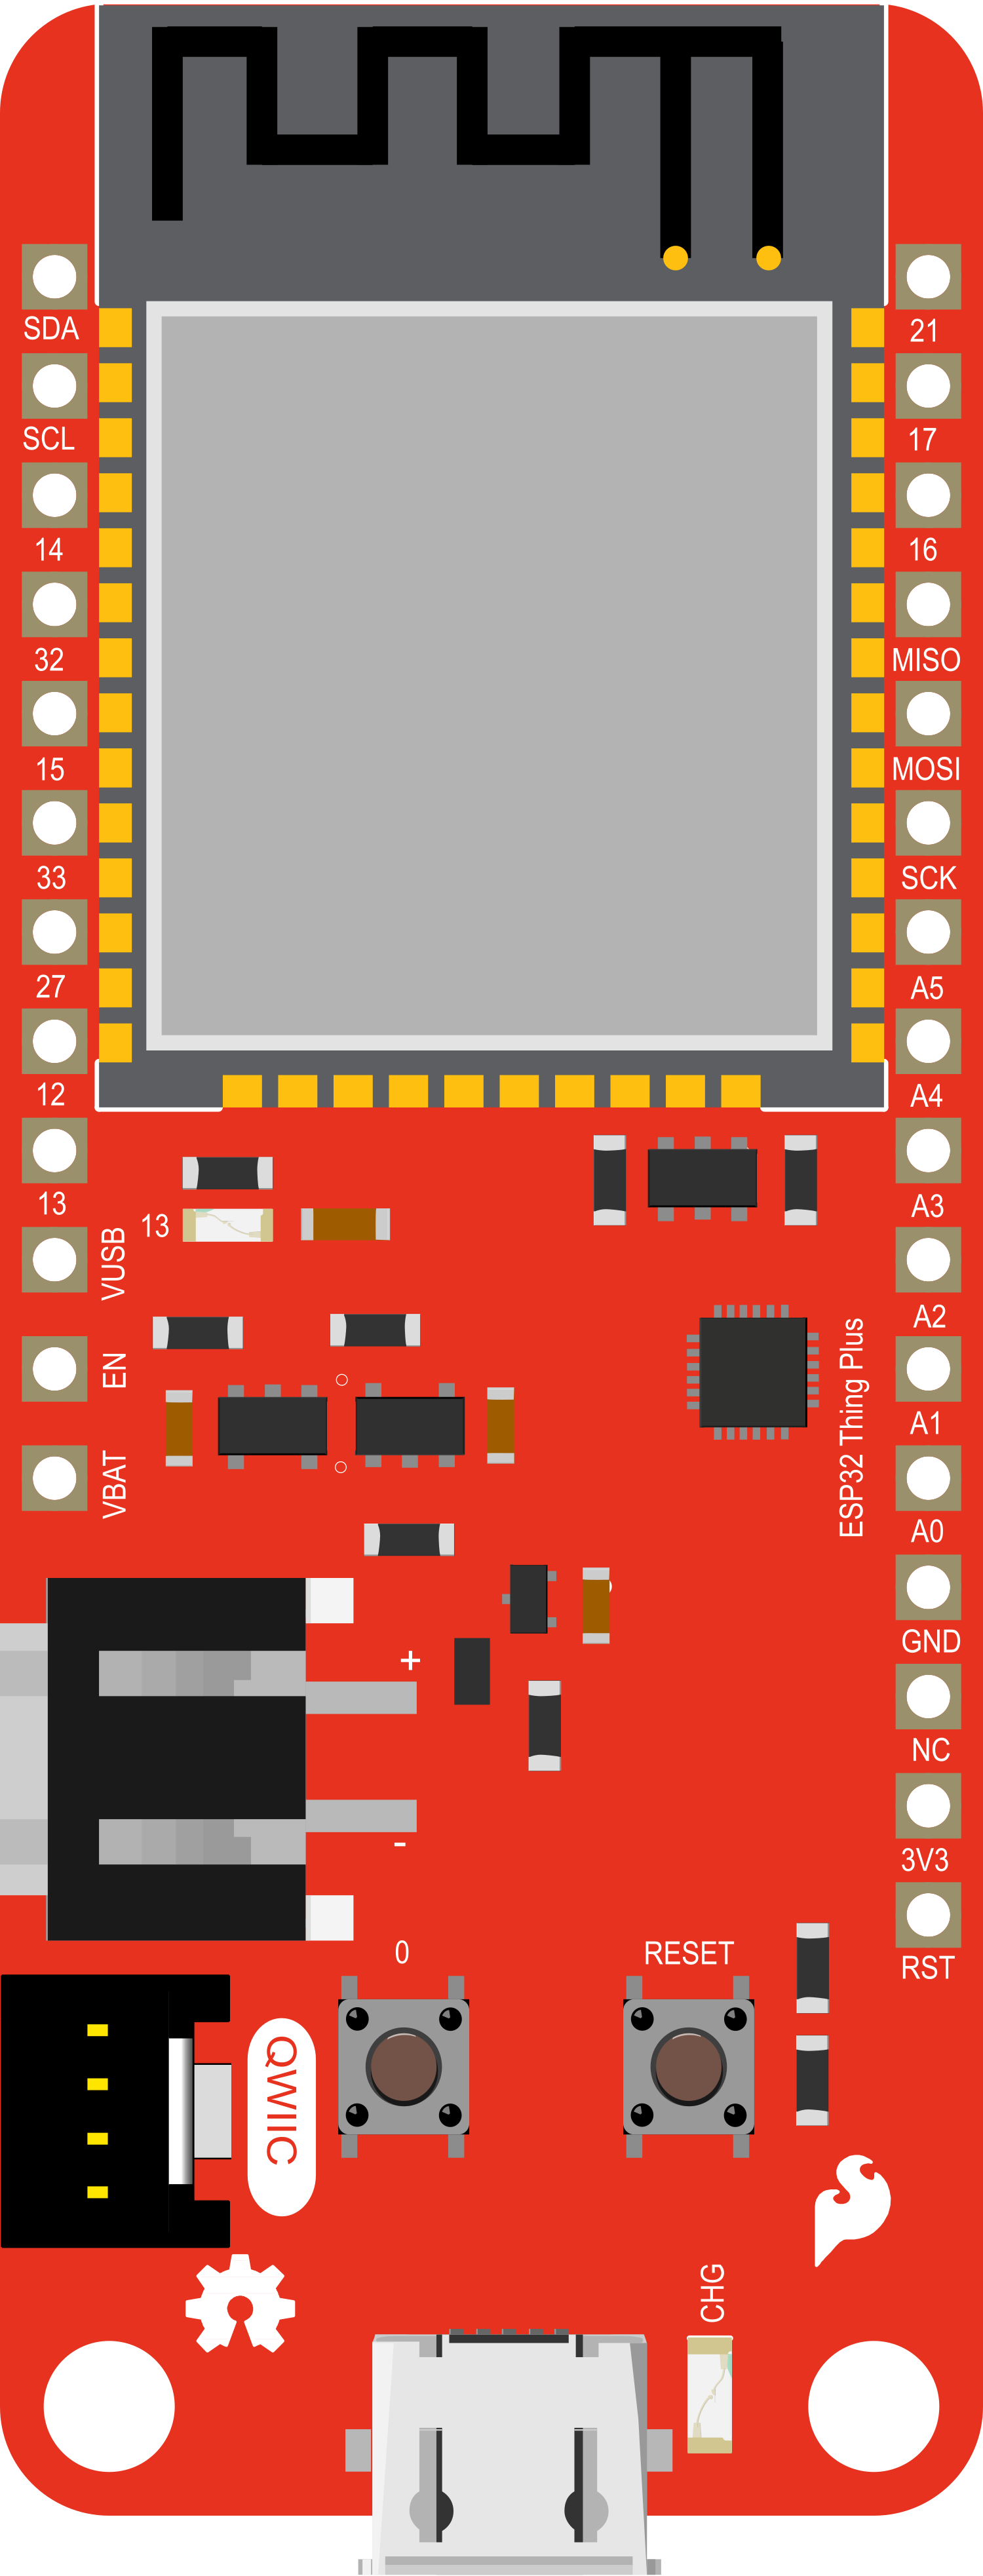
The SparkFun ESP32 Thing Plus is a comprehensive development board that harnesses the power of the ESP32 microcontroller. This versatile board is equipped with Wi-Fi and Bluetooth capabilities, making it an ideal choice for a wide range of Internet of Things (IoT) applications. It can be used for home automation, wearable electronics, and various wireless sensor networks. With its rich set of I/O pins, the ESP32 Thing Plus can interface with numerous sensors and actuators, providing a robust platform for prototyping and product development.
Explore Projects Built with SparkFun ESP32 Thing Plus

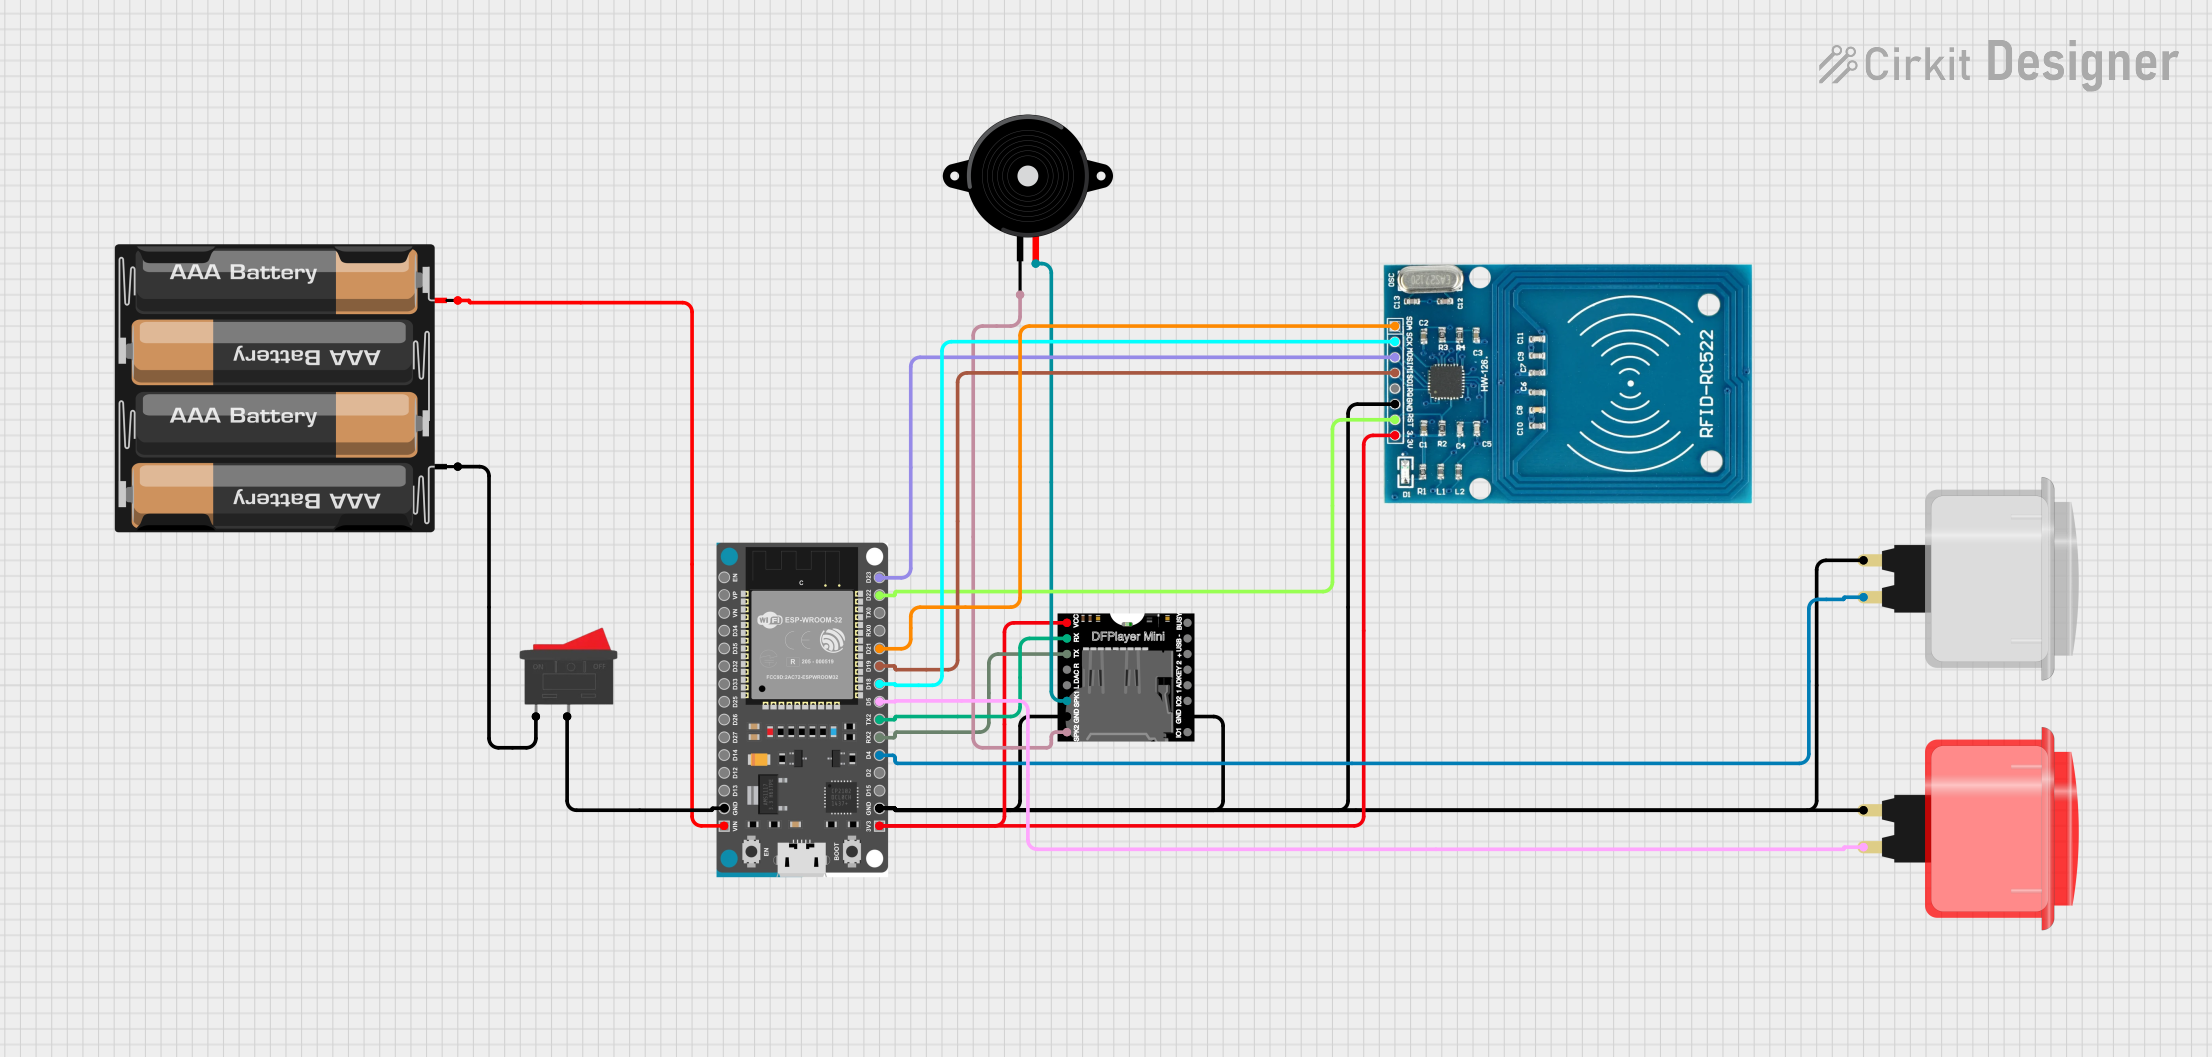
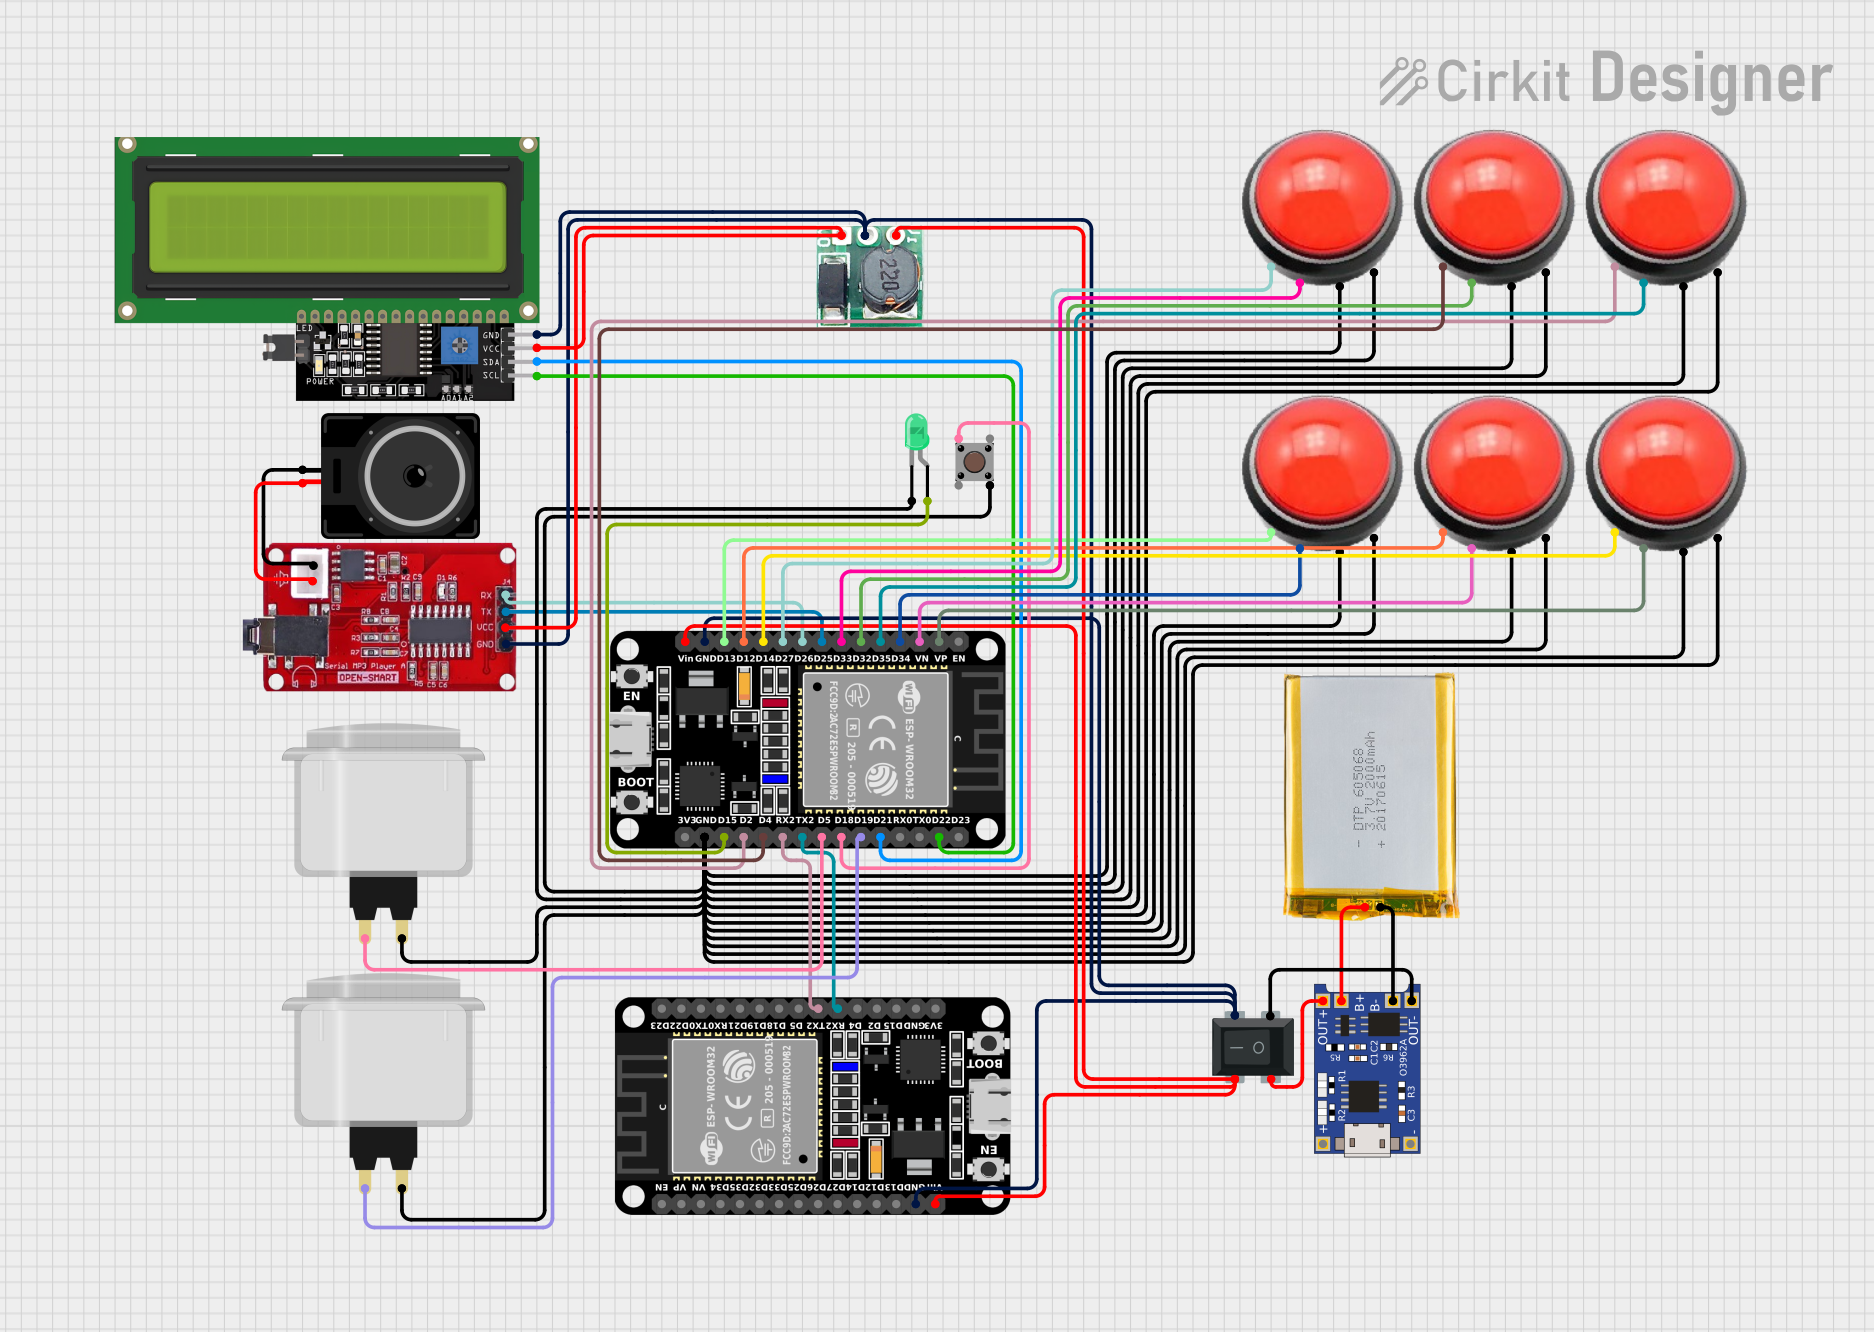
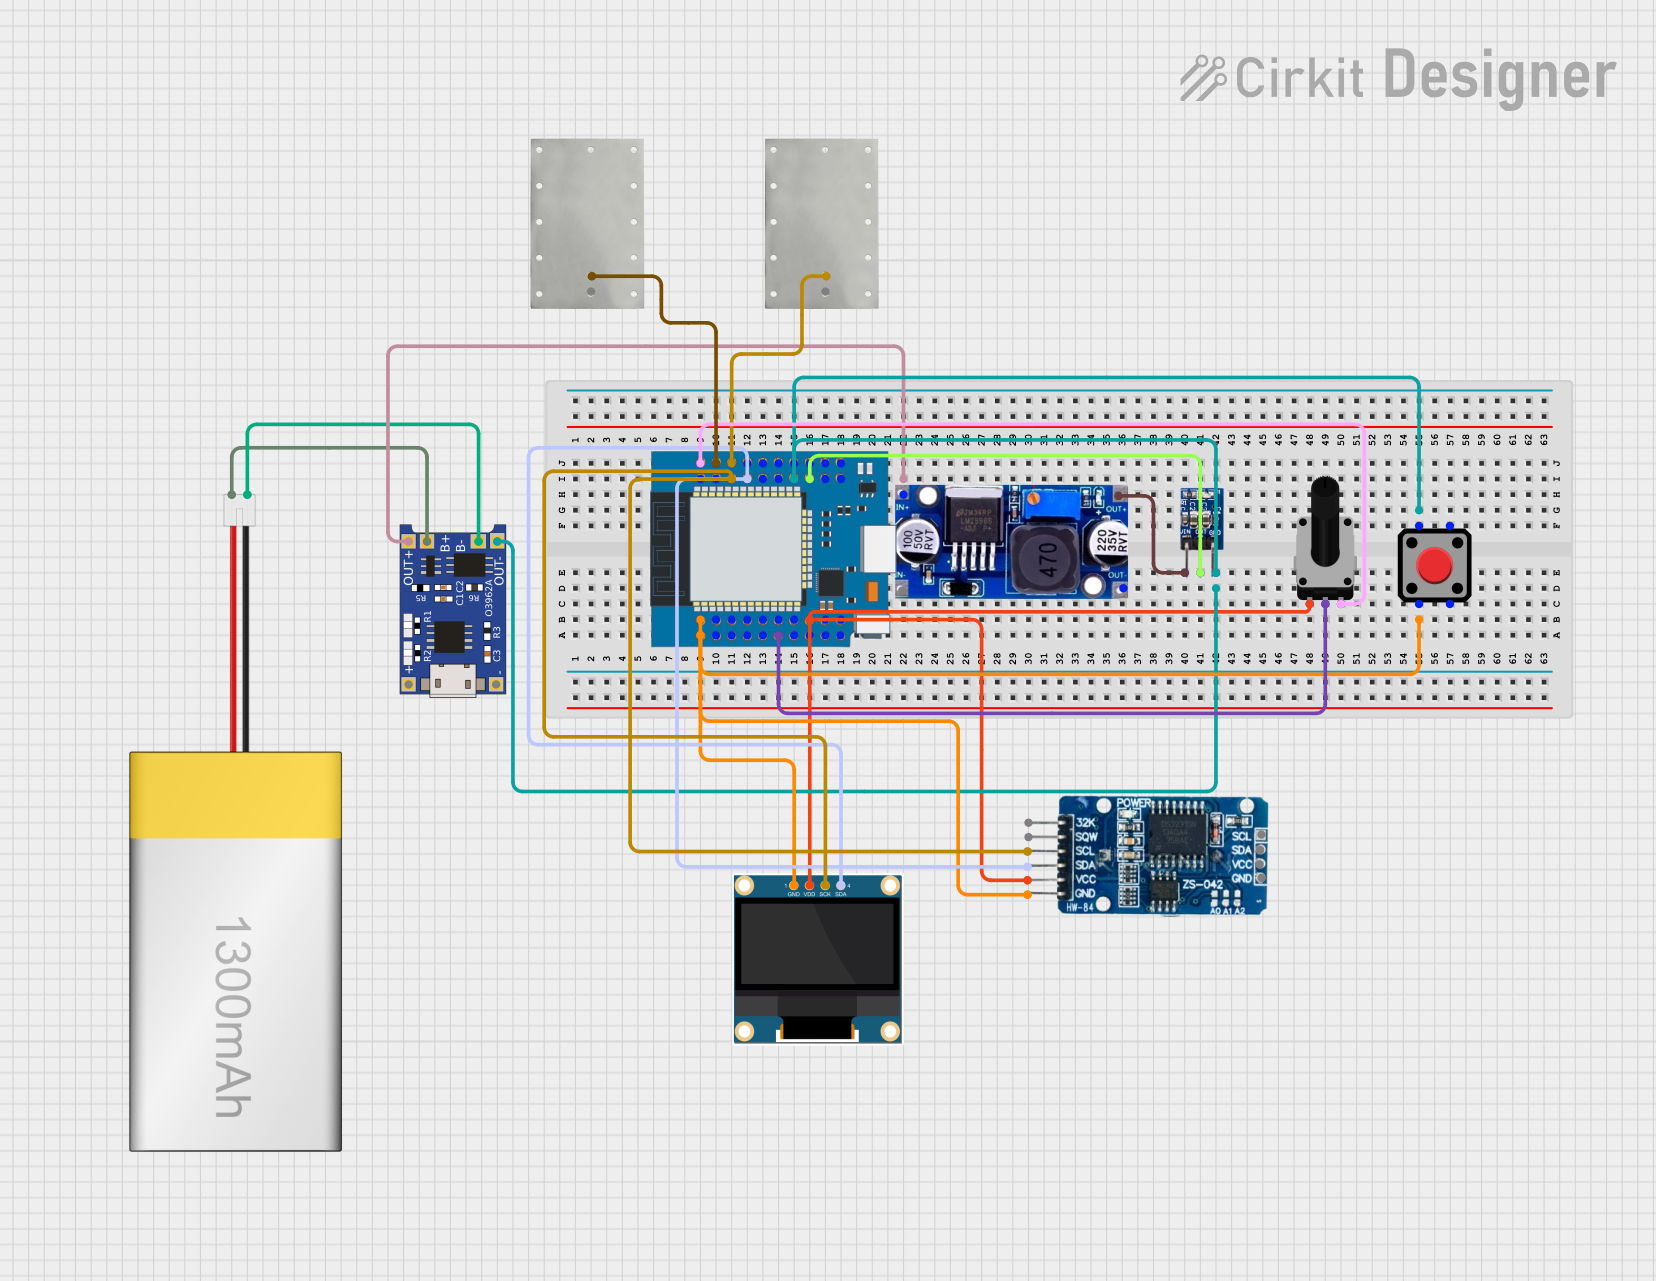
Explore Projects Built with SparkFun ESP32 Thing Plus
Technical Specifications
Key Features
- Microcontroller: ESP32-WROOM-32U
- Operating Voltage: 3.3V
- Input Voltage: 5V via USB or LiPo battery (JST connector)
- Digital I/O Pins: 21
- Analog Input Pins: 6 (ADC 12-bit)
- Analog Outputs: 2 (DAC 8-bit)
- Flash Memory: 4MB
- SRAM: 520KB
- Clock Speed: 240MHz
- Wi-Fi: 802.11 b/g/n (2.4 GHz)
- Bluetooth: v4.2 BR/EDR and BLE
- Integrated LiPo Battery Charger
Pin Configuration
| Pin Number | Function | Description |
|---|---|---|
| 1 | 3V3 | 3.3V power supply |
| 2 | GND | Ground |
| 3-7 | GPIO 13-17 | General Purpose Input/Output Pins |
| 8 | TX0 | UART0 Transmit |
| 9 | RX0 | UART0 Receive |
| 10-15 | GPIO 32-33, 25-27 | General Purpose Input/Output Pins |
| 16 | 5V | USB 5V supply or LiPo battery input |
| 17 | GND | Ground |
| 18-23 | GPIO 12, 14, 16, 17, 22, 23 | General Purpose Input/Output Pins |
| 24 | VIN | Voltage Input for Battery |
Note: This is a simplified pin configuration. For a complete pinout, refer to the SparkFun ESP32 Thing Plus schematic.
Usage Instructions
Getting Started
Powering the Board:
- Connect the board to your computer via a micro USB cable.
- Alternatively, you can power the board with a LiPo battery connected to the JST connector.
Installing the ESP32 Arduino Core:
- In your Arduino IDE, go to
File > Preferencesand add the following URL to the "Additional Board Manager URLs" field:https://dl.espressif.com/dl/package_esp32_index.json - Open the Board Manager from
Tools > Board > Boards Manager...and install the "ESP32 by Espressif Systems" package.
- In your Arduino IDE, go to
Selecting the Board:
- Go to
Tools > Boardand select "SparkFun ESP32 Thing Plus".
- Go to
Selecting the Port:
- Connect the board to your computer and select the appropriate COM port under
Tools > Port.
- Connect the board to your computer and select the appropriate COM port under
Example Blink Code
// This example code blinks the onboard LED on the ESP32 Thing Plus.

void setup() {
  pinMode(5, OUTPUT); // Set the LED pin as an output
}

void loop() {
  digitalWrite(5, HIGH);   // Turn the LED on
  delay(1000);             // Wait for a second
  digitalWrite(5, LOW);    // Turn the LED off
  delay(1000);             // Wait for a second
}
Note: Before uploading the code, ensure that the correct board and port are selected in the Arduino IDE.
Best Practices
- Always disconnect the board from power sources before making or altering connections.
- Use a current limiting resistor when connecting LEDs to GPIO pins.
- Avoid powering high-current devices directly from the board's pins.
Troubleshooting and FAQs
Common Issues
Board not recognized by the computer:
- Ensure the micro USB cable is properly connected and is not just a power cable.
- Check that the USB drivers are installed correctly.
Failed to connect to ESP32: Timed out waiting for packet header:
- Press the BOOT button on the board when starting the upload process.
- Try a different USB port or cable.
Unexpected behavior in Wi-Fi or Bluetooth functions:
- Ensure that the antenna is properly connected if using an external antenna.
- Check for sources of interference and keep the board away from them.
FAQs
Can I use the ESP32 Thing Plus with a battery?
- Yes, the board has an integrated LiPo battery charger and a JST connector for battery power.
What is the maximum input voltage for the VIN pin?
- The maximum input voltage for the VIN pin is 5.5V.
How do I reset the board?
- You can reset the board by pressing the RST button.
For further assistance, consult the SparkFun ESP32 Thing Plus forums or the extensive ESP32 online community for additional resources and support.