How to Use 128x64 OLED Display (I2C IIC SPI Serial): Examples, Pinouts, and Specs
Introduction
The DollaTek 128x64 OLED Display (SSH1106) is a compact, high-resolution display module that utilizes organic light-emitting diodes (OLED) to produce bright and vivid images. With a resolution of 128x64 pixels, this display is ideal for applications requiring clear and detailed visual output. It supports both I2C and SPI communication protocols, making it compatible with a wide range of microcontrollers, including Arduino, Raspberry Pi, and ESP32.
Explore Projects Built with 128x64 OLED Display (I2C IIC SPI Serial)


Explore Projects Built with 128x64 OLED Display (I2C IIC SPI Serial)
Common Applications and Use Cases
- Wearable devices and smart gadgets
- IoT dashboards and data visualization
- Portable instruments and measurement tools
- Embedded systems requiring graphical interfaces
- Educational and prototyping projects
Technical Specifications
Below are the key technical details of the DollaTek 128x64 OLED Display:
| Parameter | Specification |
|---|---|
| Manufacturer | DollaTek |
| Part ID | SSH1106 |
| Display Type | OLED (Organic Light-Emitting Diode) |
| Resolution | 128x64 pixels |
| Communication Protocol | I2C, SPI |
| Operating Voltage | 3.3V to 5V |
| Current Consumption | ~20mA (typical) |
| Driver IC | SSH1106 |
| Display Color | Monochrome (White) |
| Dimensions | 27mm x 27mm x 4mm |
Pin Configuration and Descriptions
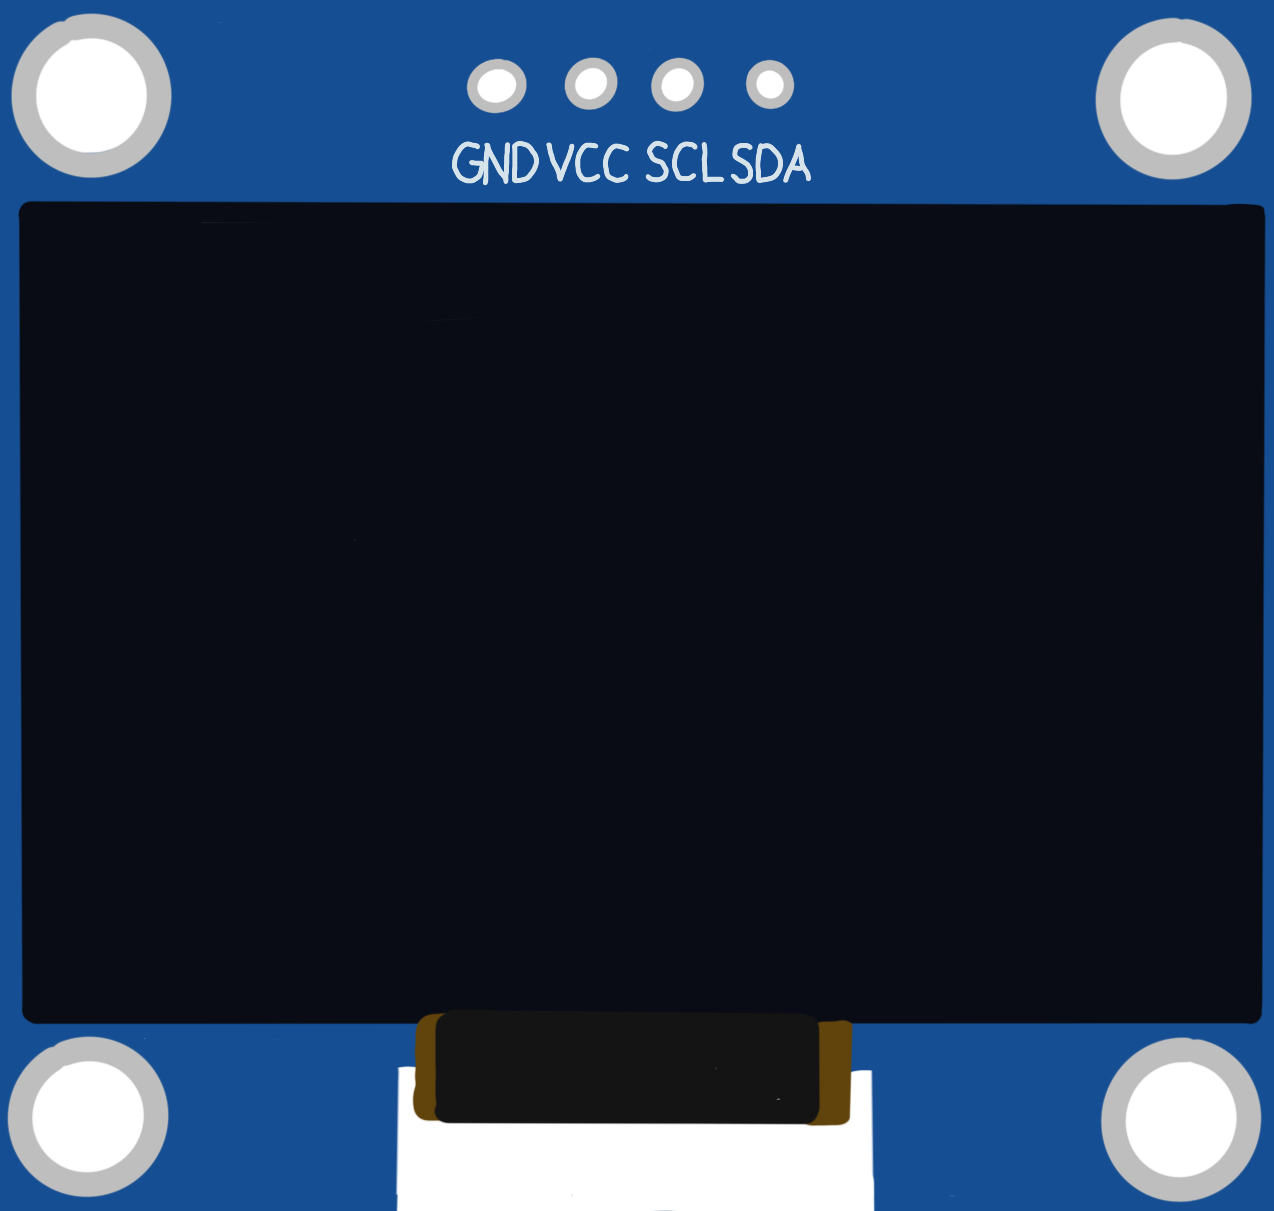
The display module has a total of 4 pins for I2C communication and 7 pins for SPI communication. Below is the pinout for both modes:
I2C Pin Configuration
| Pin | Name | Description |
|---|---|---|
| 1 | GND | Ground (0V reference) |
| 2 | VCC | Power supply (3.3V to 5V) |
| 3 | SCL | Serial Clock Line for I2C communication |
| 4 | SDA | Serial Data Line for I2C communication |
SPI Pin Configuration
| Pin | Name | Description |
|---|---|---|
| 1 | GND | Ground (0V reference) |
| 2 | VCC | Power supply (3.3V to 5V) |
| 3 | SCL | Serial Clock Line for SPI communication |
| 4 | SDA | Serial Data Line for SPI communication |
| 5 | RES | Reset pin |
| 6 | DC | Data/Command control pin |
| 7 | CS | Chip Select for SPI communication |
Usage Instructions
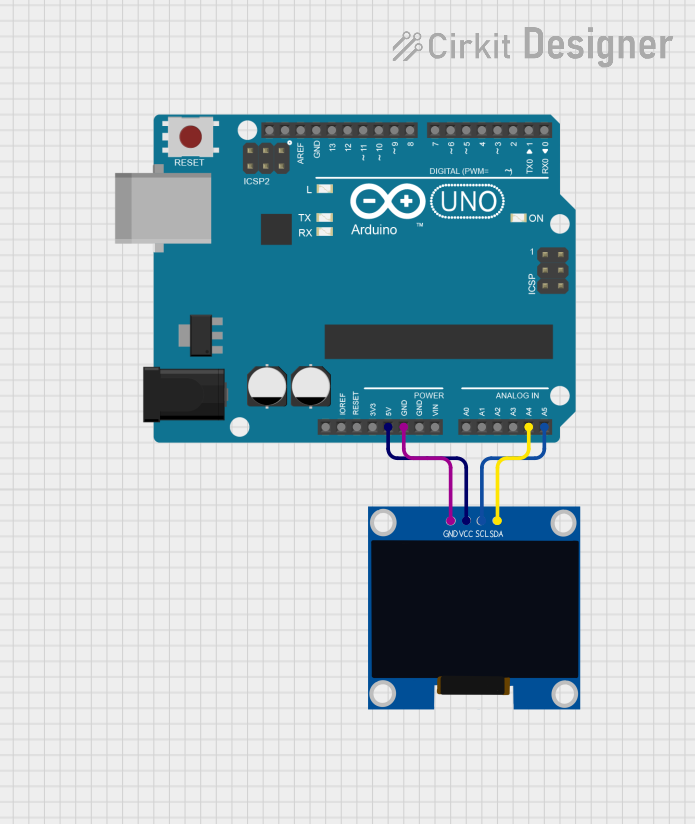
How to Use the Component in a Circuit
- Power the Display: Connect the
VCCpin to a 3.3V or 5V power source and theGNDpin to ground. - Select Communication Protocol:
- For I2C: Connect the
SCLandSDApins to the corresponding I2C pins on your microcontroller. - For SPI: Connect the
SCL,SDA,RES,DC, andCSpins to the appropriate SPI pins on your microcontroller.
- For I2C: Connect the
- Install Required Libraries: For Arduino, install the
Adafruit_GFXandAdafruit_SSD1306libraries via the Arduino Library Manager. - Write Code: Use the example code below to initialize and display content on the OLED.
Important Considerations and Best Practices
- Ensure the power supply voltage matches the display's operating range (3.3V to 5V).
- Use pull-up resistors (typically 4.7kΩ) on the I2C lines (
SCLandSDA) if not already present. - Avoid excessive current draw from the microcontroller by powering the display from an external power source if needed.
- Handle the display module carefully to avoid damaging the OLED screen.
Example Code for Arduino (I2C Mode)
#include <Wire.h>
#include <Adafruit_GFX.h>
#include <Adafruit_SSD1306.h>

// Define the OLED display width and height
#define SCREEN_WIDTH 128
#define SCREEN_HEIGHT 64

// Create an instance of the display object
Adafruit_SSD1306 display(SCREEN_WIDTH, SCREEN_HEIGHT, &Wire, -1);

void setup() {
  // Initialize serial communication for debugging
  Serial.begin(9600);

  // Initialize the OLED display
  if (!display.begin(SSD1306_I2C_ADDRESS, 0x3C)) {
    Serial.println(F("SSD1306 allocation failed"));
    for (;;); // Halt execution if initialization fails
  }

  // Clear the display buffer
  display.clearDisplay();

  // Display a welcome message
  display.setTextSize(1);      // Set text size to 1 (smallest)
  display.setTextColor(SSD1306_WHITE); // Set text color to white
  display.setCursor(0, 0);     // Set cursor to top-left corner
  display.println(F("Hello, OLED!")); // Print message
  display.display();           // Update the display with the buffer
}

void loop() {
  // Add your code here to update the display dynamically
}
Troubleshooting and FAQs
Common Issues and Solutions
Display Not Turning On:
- Verify the power connections (
VCCandGND). - Ensure the correct voltage (3.3V or 5V) is supplied to the display.
- Verify the power connections (
No Output on the Display:
- Check the I2C or SPI connections and ensure they are correctly wired.
- Confirm the I2C address (default is
0x3C) matches the one in your code. - Ensure the required libraries (
Adafruit_GFXandAdafruit_SSD1306) are installed.
Flickering or Unstable Display:
- Use shorter wires to reduce noise in the communication lines.
- Add decoupling capacitors (e.g., 0.1µF) near the power pins.
Library Initialization Fails:
- Double-check the wiring and ensure the correct pins are used.
- Verify that the display driver IC is
SSH1106and notSSD1306. If using a different driver, modify the library accordingly.
FAQs
Q: Can this display work with 3.3V microcontrollers like ESP32?
A: Yes, the display is compatible with both 3.3V and 5V systems.
Q: How do I switch between I2C and SPI modes?
A: The display module typically has solder jumpers on the back to select the communication mode. Refer to the module's datasheet for details.
Q: Can I use this display for animations?
A: Yes, the display supports fast refresh rates, making it suitable for simple animations and dynamic content.
Q: Is the display sunlight-readable?
A: The OLED display is bright but not optimized for direct sunlight readability. Use it in shaded or indoor environments for best results.