How to Use tomada 12V carro: Examples, Pinouts, and Specs
Introduction
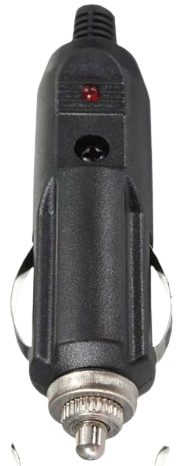
The Tomada 12V Carro is a 12-volt car socket manufactured by Carro with the part ID CAR. This component is a standard automotive power outlet, commonly used to charge and power electronic devices such as smartphones, GPS units, dash cameras, and portable air compressors. It provides a reliable and convenient way to access power from a vehicle's electrical system.
Explore Projects Built with tomada 12V carro


Explore Projects Built with tomada 12V carro
Common Applications and Use Cases
- Charging mobile devices (e.g., phones, tablets, power banks)
- Powering automotive accessories (e.g., dash cams, GPS devices)
- Operating portable appliances (e.g., mini fridges, tire inflators)
- Providing a power source for USB adapters and inverters
Technical Specifications
The Tomada 12V Carro is designed to operate within the standard automotive electrical system. Below are its key technical details:
General Specifications
| Parameter | Value |
|---|---|
| Operating Voltage | 12V DC |
| Maximum Current Rating | 10A |
| Power Output | Up to 120W |
| Material | High-temperature resistant plastic and metal contacts |
| Mounting Style | Panel mount or surface mount |
| Dimensions | 30mm diameter (approx.) |
| Manufacturer Part ID | CAR |
Pin Configuration and Descriptions
The Tomada 12V Carro typically has two connection terminals:
| Pin Name | Description |
|---|---|
| Positive (+) | Connects to the vehicle's 12V power supply (battery positive terminal) |
| Negative (-) | Connects to the vehicle's ground (chassis or battery negative terminal) |
Usage Instructions
How to Use the Component in a Circuit
Mounting the Socket:
- Install the socket in a suitable location on the vehicle's dashboard or panel. Ensure the mounting hole matches the socket's diameter (approximately 30mm).
- Secure the socket using the provided locking nut or screws.
Wiring the Socket:
- Connect the Positive (+) terminal of the socket to the vehicle's 12V power supply using a suitable gauge wire. It is recommended to include a fuse (10A) in series to protect the circuit.
- Connect the Negative (-) terminal to the vehicle's ground (chassis or battery negative terminal).
Testing the Socket:
- After wiring, test the socket by plugging in a compatible 12V device or adapter. Ensure the device powers on correctly.
Using with USB Adapters or Inverters:
- Insert a USB adapter or power inverter into the socket to charge or power devices that require USB or AC power.
Important Considerations and Best Practices
- Fuse Protection: Always use an inline fuse (10A) to prevent damage to the socket or connected devices in case of a short circuit.
- Wire Gauge: Use wires of appropriate gauge (e.g., 16 AWG or thicker) to handle the current without overheating.
- Avoid Overloading: Do not exceed the maximum power rating of 120W to prevent overheating or damage.
- Secure Connections: Ensure all connections are tight and insulated to avoid loose contacts or short circuits.
- Weatherproofing: If the socket is installed in an exposed area, use a weatherproof cover to protect it from moisture and debris.
Example: Using with an Arduino UNO
The Tomada 12V Carro can be used to power an Arduino UNO via a 12V-to-5V USB adapter. Below is an example of how to connect and use it:
- Connect the Positive (+) terminal of the socket to the vehicle's 12V power supply.
- Connect the Negative (-) terminal to the vehicle's ground.
- Insert a 12V-to-5V USB adapter into the socket.
- Use a USB cable to connect the adapter to the Arduino UNO.
// Example Arduino Code: Blink an LED
// This code assumes the Arduino UNO is powered via the 12V car socket
// using a 12V-to-5V USB adapter.

const int ledPin = 13; // Built-in LED pin on Arduino UNO

void setup() {
  pinMode(ledPin, OUTPUT); // Set the LED pin as an output
}

void loop() {
  digitalWrite(ledPin, HIGH); // Turn the LED on
  delay(1000);               // Wait for 1 second
  digitalWrite(ledPin, LOW);  // Turn the LED off
  delay(1000);               // Wait for 1 second
}
Troubleshooting and FAQs
Common Issues and Solutions
| Issue | Possible Cause | Solution |
|---|---|---|
| Socket not powering devices | Loose or incorrect wiring | Check and secure all connections |
| Fuse blows frequently | Overloading or short circuit | Ensure load is within 10A; check for shorts |
| Device not charging properly | Incompatible adapter or device | Use a compatible adapter or device |
| Socket overheats | Exceeding power rating or poor ventilation | Reduce load; ensure proper airflow |
FAQs
Can I use this socket with a 24V system?
No, the Tomada 12V Carro is designed for 12V systems only. Using it with a 24V system may damage the socket or connected devices.What type of fuse should I use?
Use a 10A automotive blade fuse for optimal protection.Can I install this socket in a boat or RV?
Yes, as long as the electrical system operates at 12V DC.Is the socket waterproof?
The socket itself is not waterproof. Use a weatherproof cover if installing in an exposed area.
By following this documentation, you can safely and effectively use the Tomada 12V Carro in your vehicle or other 12V applications.